Re: SD Press - Mark II (Modifications Breakdown)
Hopefully my initial plan with the metal backed Teflon lined bushings will work. If not I will have to make the entire piece from scratch and design it so linear bearings can be used.
You are not logged in. Please login or register.
SoliForum - 3D Printing Community → Solidoodle Press → SD Press - Mark II (Modifications Breakdown)
Hopefully my initial plan with the metal backed Teflon lined bushings will work. If not I will have to make the entire piece from scratch and design it so linear bearings can be used.
I was going to do it with a short piece of 2020. But I think a sheet of aluminum milled out and shaped with a press break would be best (and easier).
This is what I got so far.


Damn, you're good. Not exactly what I had in mind, your idea is much simpler. I was hoping to not need to do that though, lol. If anything I would prefer to take the time and effort of adding linear bearings to the x and y carriage eventually.
Which brings me to another question. What are these rails made from? Is it a hardened steel?
Ha, Thanks.
X & Y is going to be kinda hard. I have it partially modeled out, But I am going to have to tear the machine down further to I can get better measurements.
The stock ones? I am going to assume yes? Not sure. I don't plan on changing them out. Obviously I am going to check to see if they are true. But now that you got me thinking about it- I should prolly get set before finalized the mockup and get started.
Heh. My bucket of stock press parts is going to get bigger... Heh.
only reason i ask is because from what ive read linear bearings arent too kind to non hardened shafts. and i guess it wouldnt surprise me if these were some sort of less expensive material seeing as the price point the printer was aimed for.
Hardened rods are incredibly cheap in quantity.. It would surprise me if they are not hardened steel - the rods on prior Solidoodle models were, but poorer tolerance than most. Since the press apparently doesn't use metal bushings or bearings, it wouldn't surprise me if the stock rods are of extremely poor tolerance and are unusable with bearings. There's no real way Solidoodle knows, because the gliding plastic is going to be more forgiving. Time will tell.
I ordered a set of rods. I took the final measurements and corrected/updated the model I have. I'll mill out the bracket. I'll check the stock rods to see if they are worth a damn. If not, I'll switch to the new ones. Monday/Tuesday and hopefully have it installed.
Yeah mine was pretty flat out of the box. But after a couple heat cycles it has a slight warp. But not as much as you shown in the image above.
im not sure how much, but hoping that the PEI i am going to adhere to the top of it will help straighten it out some. if that doesnt work, what are my other options? my buddy suggested mounting the bed first to a flat layer of aluminum below it that i know is dead flat and going from there. only issue we see there is that since aluminum is a heat sink thats a bit counter productive here.
You could adhere the Mk2b to the stock aluminum plate then place the PEI on top in place of the glass. The Mk2b heats edge to edge. And the recovery times when it heating is very fast. The only thing is you'll have to get creative on attaching the thermistor to the PEI somewhere. In the default location (in the middle of the mk2b) it would measure the aluminum and not the PEI.
say i were to cut a sheet of aluminum 7ga (.144) and then put a 1" or so diameter hole in the center of it for the thermistor to attach to the heated bed and be able to touch the PEI above?
so i got the PTFE lined metal backed bushings into the plastic of the Z carriage and put that on the machine, also gave the rods a nice polish on the bench mounted buffing wheel while they were out. Out of the machine the rods slid like butter through the plastic carriage, once they were in there though things seemed a bit stiffer. i went ahead anyway and attached the Z axis ball screw mount to the carriage and jogged the Z axis and it seems to slide quite well, and there is no more bounce in the bed! once i get the mk2 pcb warp issue squared away i can really see if my mod is worth a damn or not. hopefully next week.
Just for organizational sake, From this point forward I am going to place all my mods in this thread.
So this past week I've been stranded at my mother-in-law's house because of a bad fuel pump and O2 sensor. Which meant I had a lot of time on my hands. And very, very slow internet. But I did have my laptop. And It had fusion installed.
So I've been trying how to build the gantry for a couple days now. And this is what I've come up with.


The above is a WIP. The idea was to reuse what's already there. And keep the required parts list low. But make it rigid. Hense why I went with sheet metal. It's not pretty. But it should get the job done. I have not tackled the other axis yet as it a PITA to get into those areas without completely disassembling the printer (NO DISASSEMBLE).
As for the Z replacement I have it milled, But I need to change the relief cuts so my press brake can bend it. I should have pictures of it at least mocked up pretty soon.
As a sidenote, I'll also have a post on how to get RH and Slic3r correctly configured for the Press. With profiles, pictures and couple calibration parts. I've been also debating if I should release my supercharged version of the FW. Which is a good segway to the next project for my Press (which has already been started) So my quest to add an additional stepper driver and FETs for the Press was successful... If you don't care about getting correct readings from the temp sensor. The weird thing is If I assign any one of the pins (as in just configure it in the FW with nothing connected to the pins) The extruder temps go all over the place. Been dicking around with it for weeks. No dice. So I've decided to replace the controller completely with a RAMBo v1.3. Took the base Marlin FW and Press-a-fy it and flashed it to the RAMBo. So far it works. I've even got a arduino nano controlling the ring LEDs on the top (which will be soon replaced with a ring of WS2811's). The main advantages to changing out the controller was 1) no need to use a AVR flasher to upgrade/change the firmware. 2) Digipots. You can adjust the trimpots via software. 3. (The main reason why I did it) gcode controlled fan headers (multiple) software controlled extruder cooler (in which when it gets to a specified temp it turns it on and when it below a specified point it turns off.) And it already has driver for an extra extruder stepper. Hence why I've made a mount for the Cyclops. Ever since that hotend came out I've been wanting to use it. I think the press would be a good platform for it. (Enclosed, Z-Offset and it was cheap)
Now this is no means a 'OMG PONIES YOU HAVE TO DO00OOO TH1S M0D!!2121!" This is the path I choose to follow. Just want to share what I've been doing. As usually, I'll document (to the best of my abilities) what I've done and share the part files on my github page.
Updated with correct measurements and z-probe mount. Seems like the config. below raises the hotend about 2.25mm from the stock location.


Are you using the stock press thermistor with the Mk2b? Did you have to make any firmware changes for the Mk2b?
My Mk2b came with a thermistor. And not I didn't have to change anything in the FW for it.
Hey, great designs. But i dislike the bent parts. Its usually really difficult to get the angle a 100% correct if you bend by hand. Milled parts should be more accurate. - sry for my bad english.
Nice! Are your bearings subtly offset so one rides against the top of the back rail and one against the bottom?
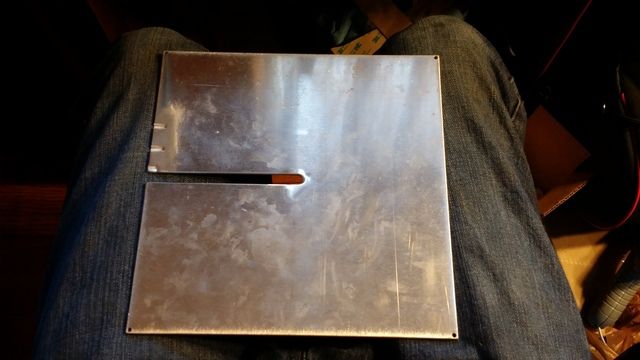
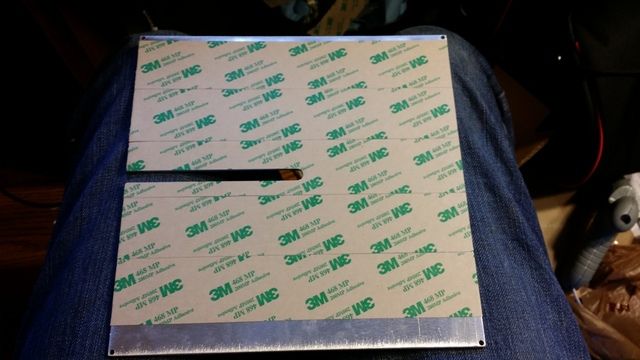
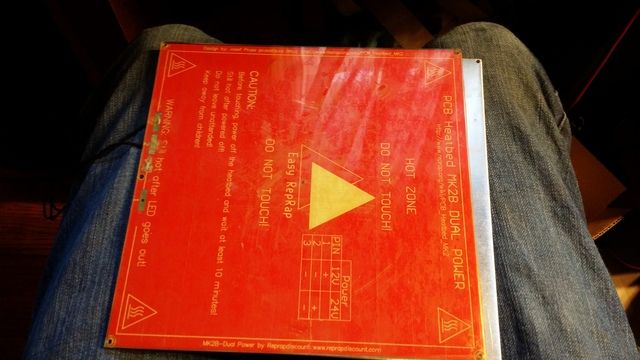
so, to flatten the mk2 pcb out i cut a piece of 7 gauge aluminum and used the 3m 468mp to attach them together. 

then cut holes in the PEI i had and used the same tape to attach them together. 
initial thoughts since the printer isnt fully reassembled yet. the overall weight of the bed is a bit more, but it seems able to handle it thus far. the bed take a little to heat up, less then stock but still not as fast as ive seen on here. but i think that has to do with the fact that the aluminum underneath everything is sucking the heat out of the pcb...so im going to need to insulate that somehow i think.
You'll most likely have to run autotune and adjust the PID for the bed.
For the Hotend > M303 E0 S200 C8
For the Heatbed > M303 E-1 S60 C8
Take the PID values from the autotune and apply it to the EEPROM
Hotend > M301 PXXX IXXX DXXX
Heatbed > M304 PXXX IXXX DXXX
Then M500 to save the changes.
Obviously replace the X's with the correct values and do this with both at ambient room temps.
to be honest, you lost me at autotune.
PID i got though because we use a solenoid with that input to control boost on cars, lol.
Read this > http://reprap.org/wiki/PID_Tuning
SoliForum - 3D Printing Community → Solidoodle Press → SD Press - Mark II (Modifications Breakdown)
Powered by PunBB, supported by Informer Technologies, Inc.