UPDATE!
UPDATE!
IMPORTANT If you have done the E3D v6 modification, you will need to use the drill guide in the thread. and the Extruder Bracket Holes Filled.stl This will become clearer as you read the following instructions If you have never done any mods, Read This Thread VERY Carefully.
However if you have never installed the E3D v6 I would follow this mod step by step.
I have removed other posts for clarity
After following the the guide previously linked on Youtube
https://www.youtube.com/playlist?list=P … jjrRY8MCG)
You will also need to print the cutting template, Stepper Motor Bracket (depending if you already drilled two new holes in the carriage or not. Both attached to this thread), Daughterboard Mount. I have attached the .stl files this post, If you need them in another format let me know.
So having followed the first few parts on youtube, you should have installed a 12v feed and removed the original carriage.
it's now gets fairly interesting, you are going to need three arms and five hands. Its a little fiddly but can be done with some patience
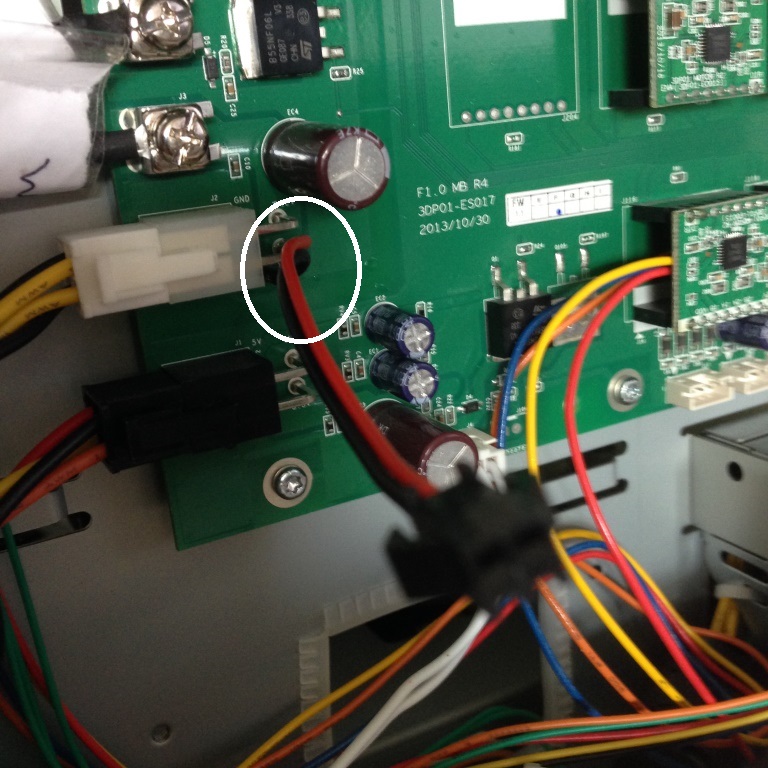
1, I removed the motherboard for ease of soldering the 12v cable connector (make sure of correct polarization). Once soldered I replaced the MB, Photograph the connectors, to aid reinstall.
2, Dismantled the printer carriage and remove from the Printer, all covered on YouTube
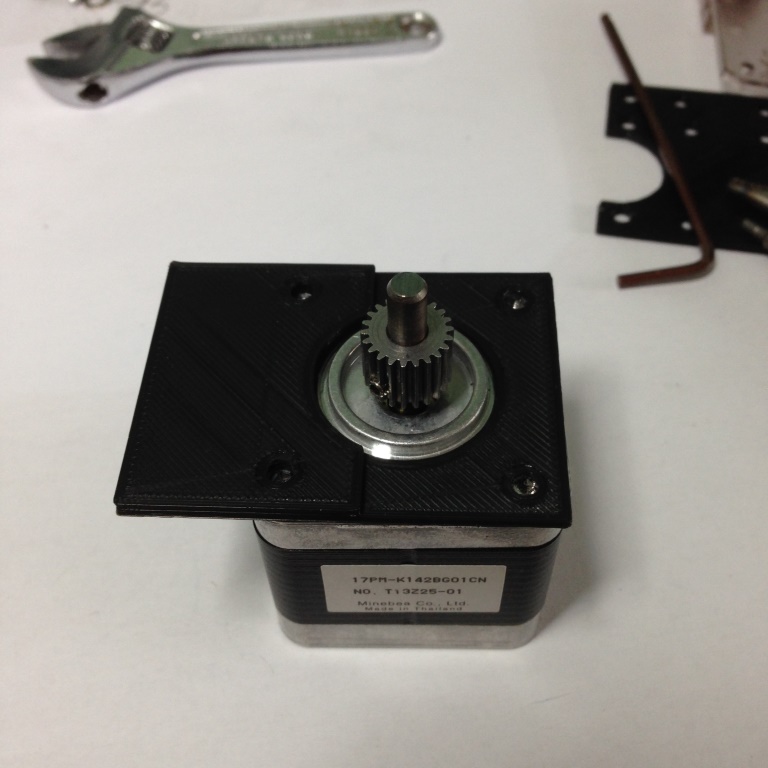
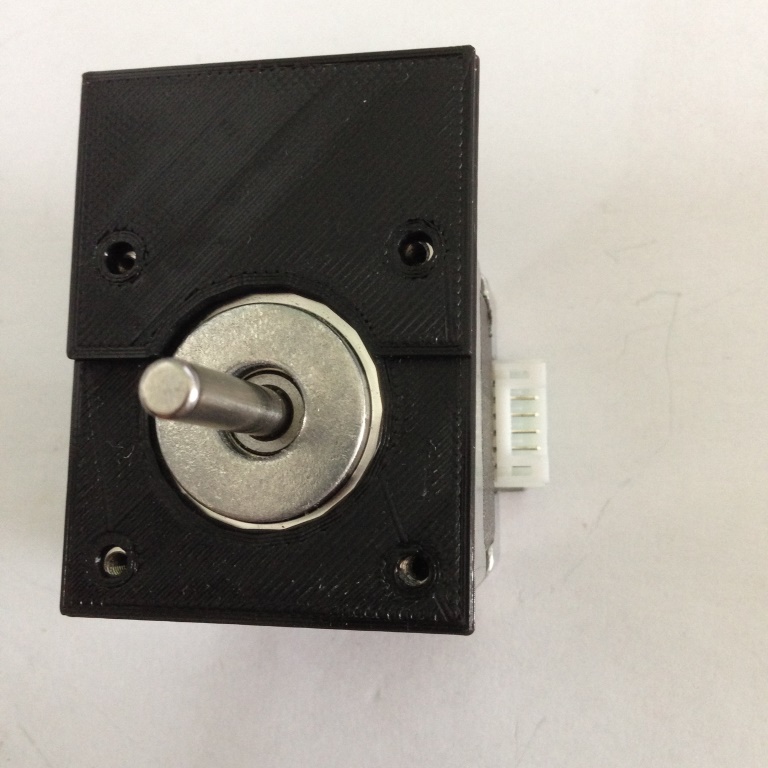
3, If starting from the beginning with no mods already done. Remove the gear from the stepper motor shaft. ( I used a butane torch to remove the original toothed wheel, hold the gear with pliers so it doesnt fall closer to the motor)
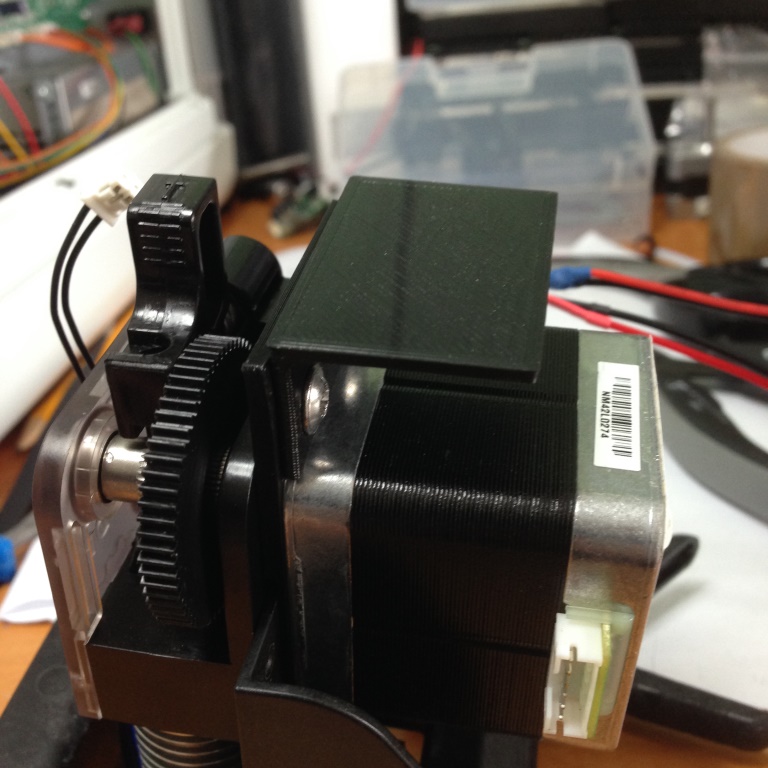
4, Take the steeper motor bracket (Choose the correct one), and this sits on top of the stepper motor. You will see it is longer than the motor body, this is to accomandate the daughterboard mount
Make sure the motor cable connector is to the right when viewed from above
5, Next having modified the original carriage using the cutting/drill guide, mount the guide to the Carriage, (red circles) Trim the carriage to the yellow line and drill 2x 3.5mm holes (marked by the blue circles)
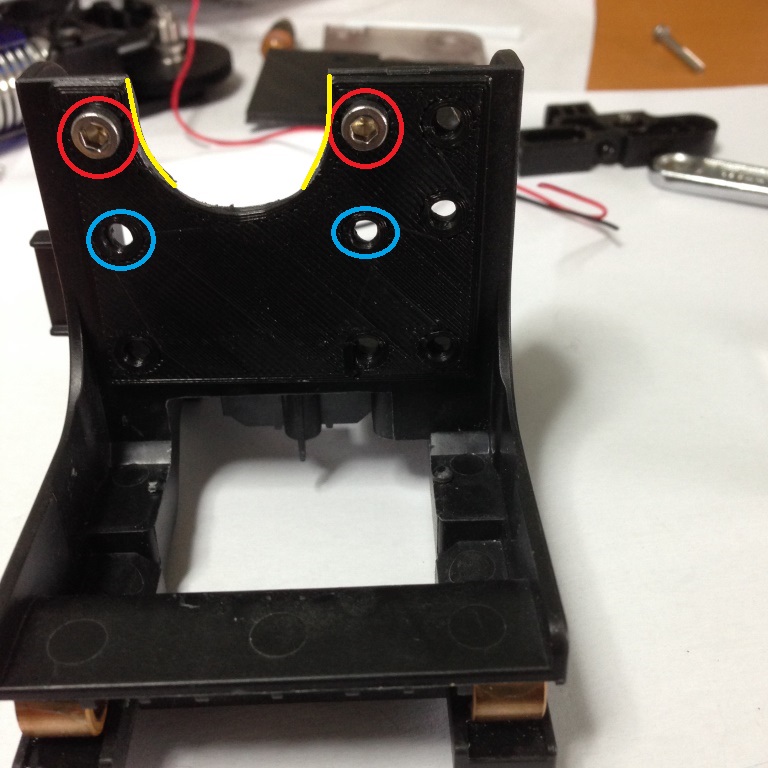
and then remove the guide.
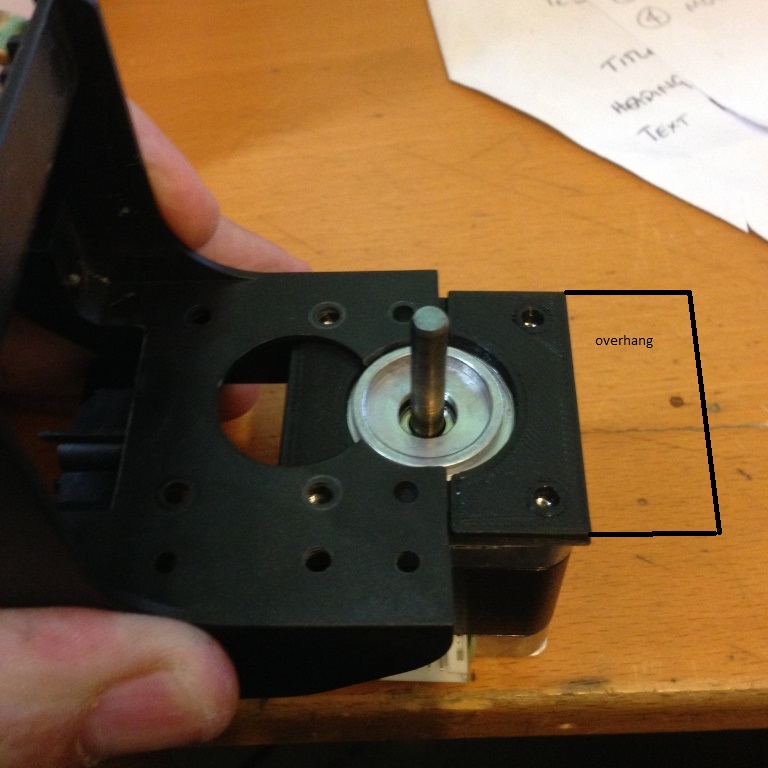
6, When trimmed to match, Lay ontop of the bracket, with the new bracket you will notice a overhang not in this picture. in this picture no previous modification as been done to the carriage
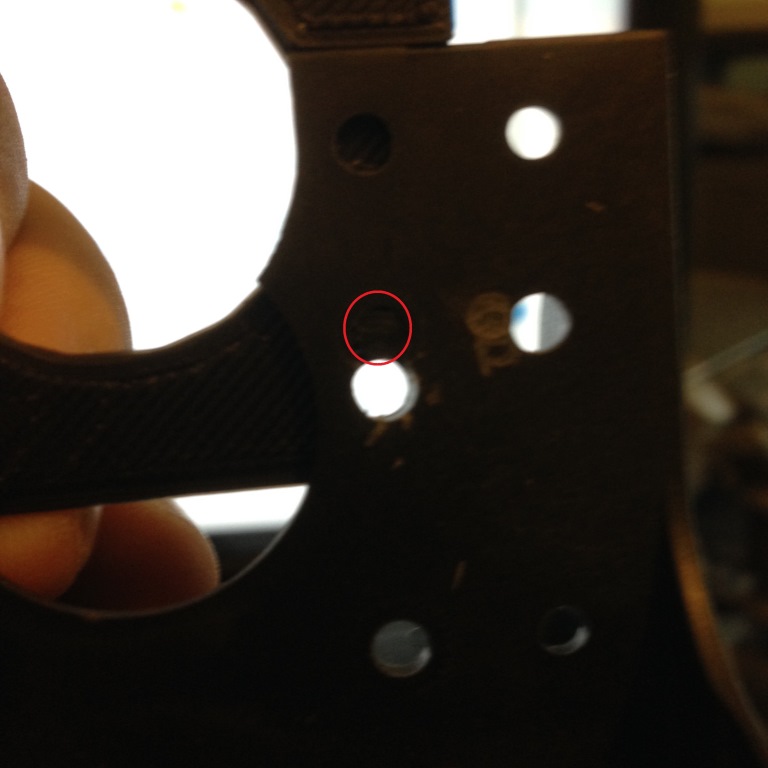
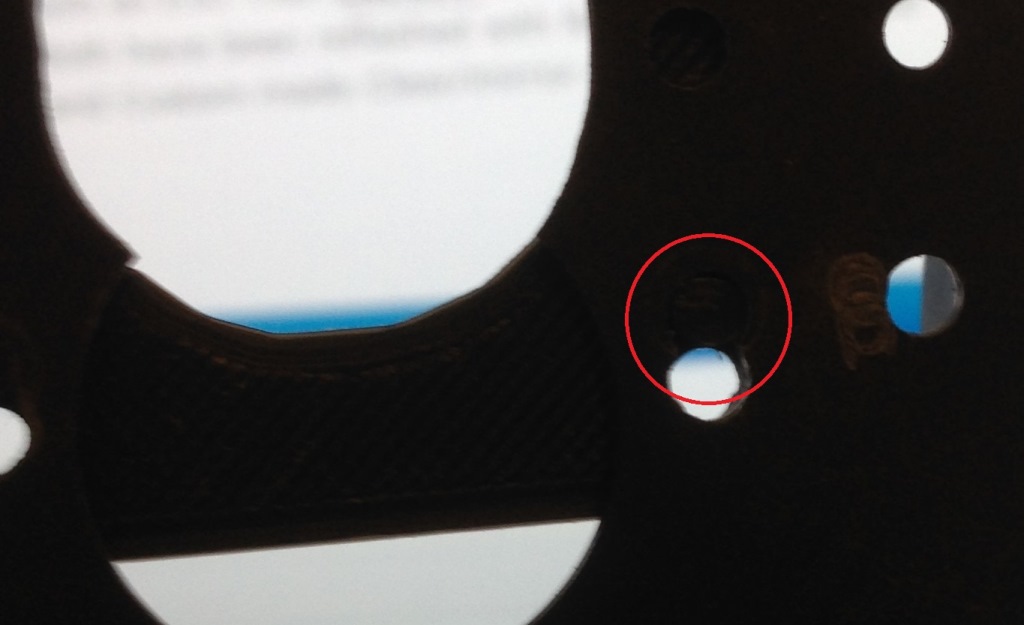
If you have modified the carriage previously, you will need too use the Extruder Bracket Holes filled.stl and after thenew holes have been drilled it will look like this
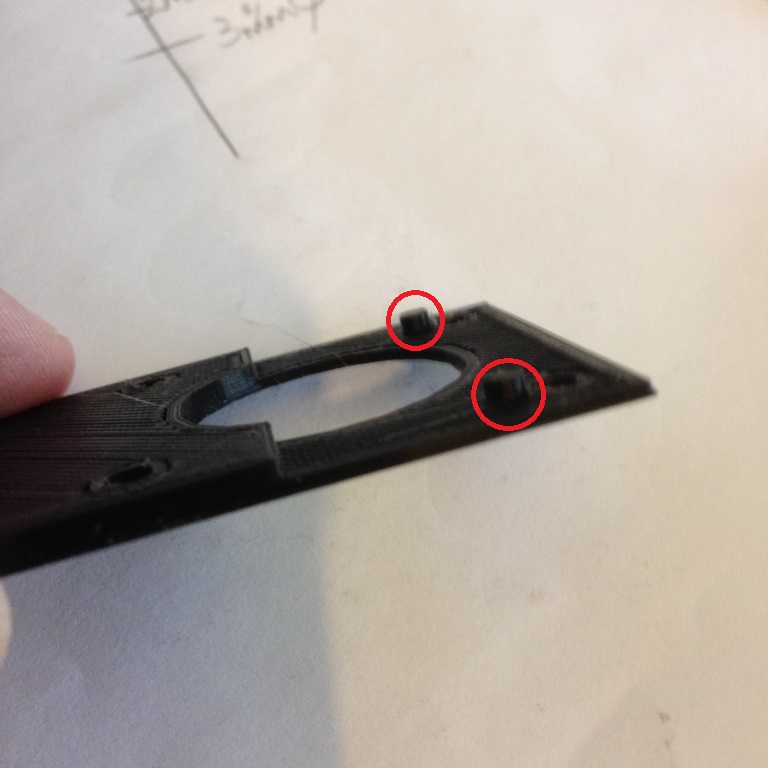
You will notice two pegs ringed in red. These will fill the previously drill holes and allow for a solid install. Run a 3.5mm drill through the holes in your chosen bracket, which will restore the diameters too the correct size
before progressing. your install should look like this if previous holes have been drilled which will now be plugged
and Close up
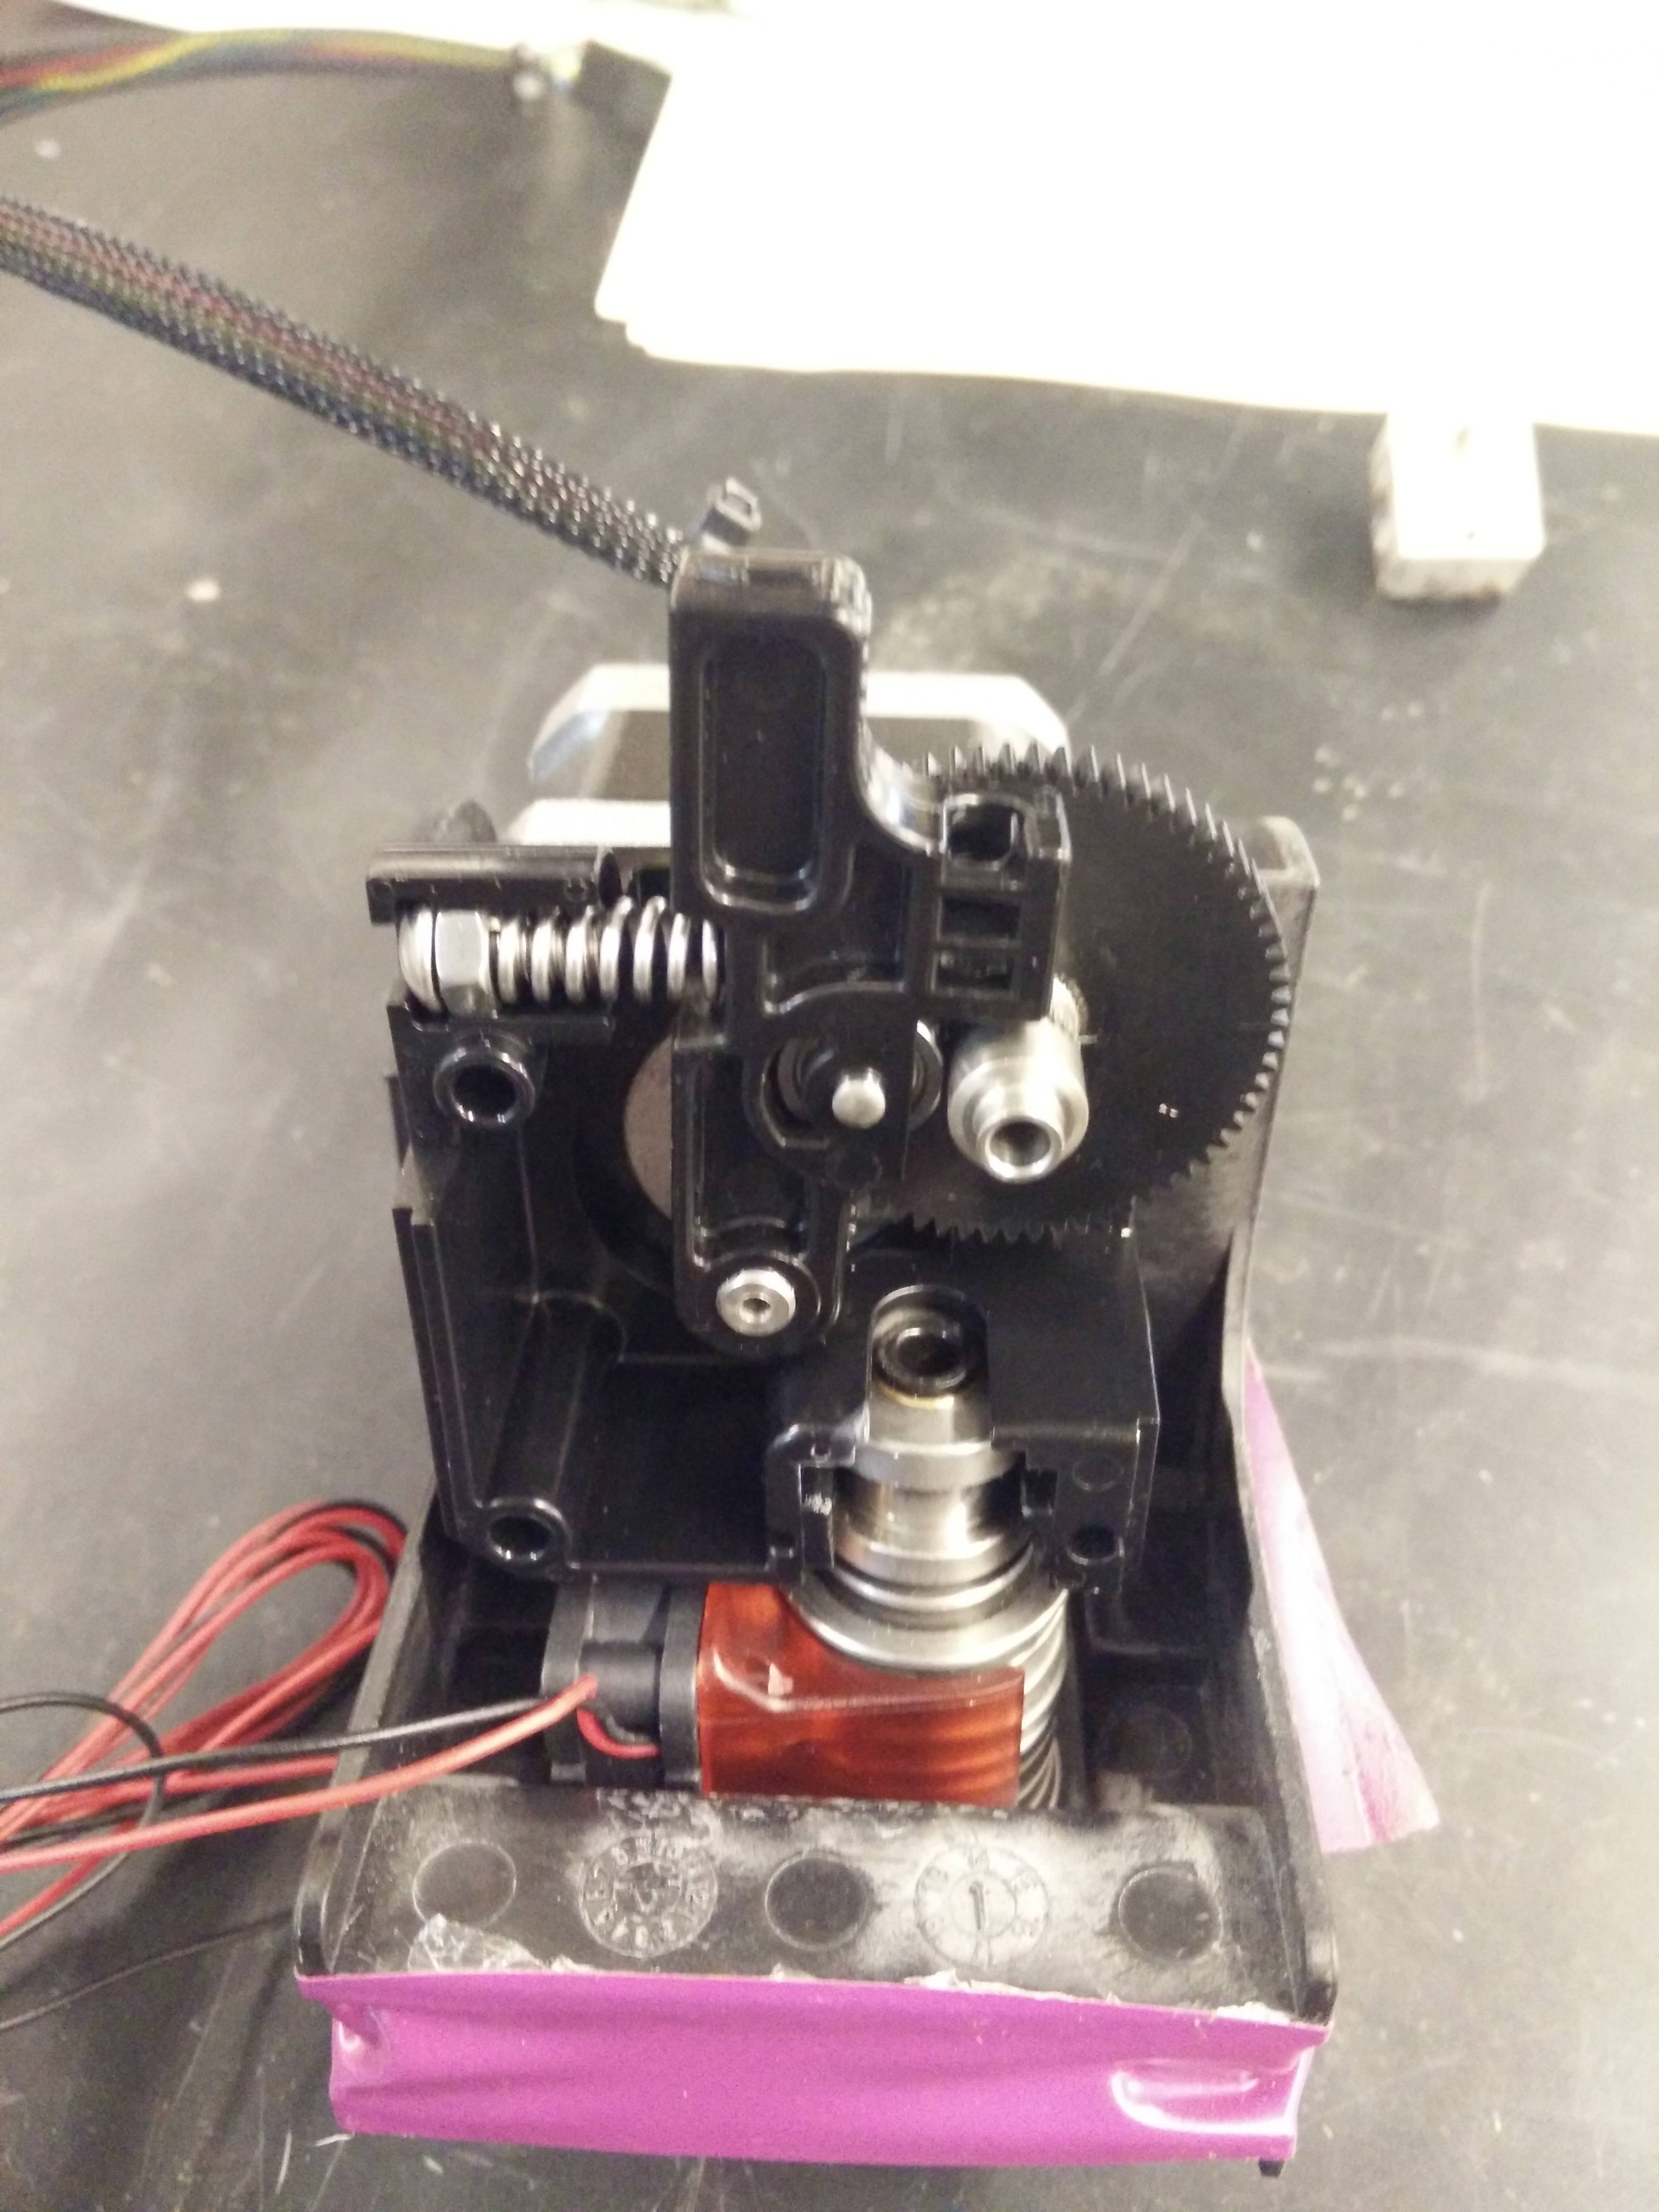
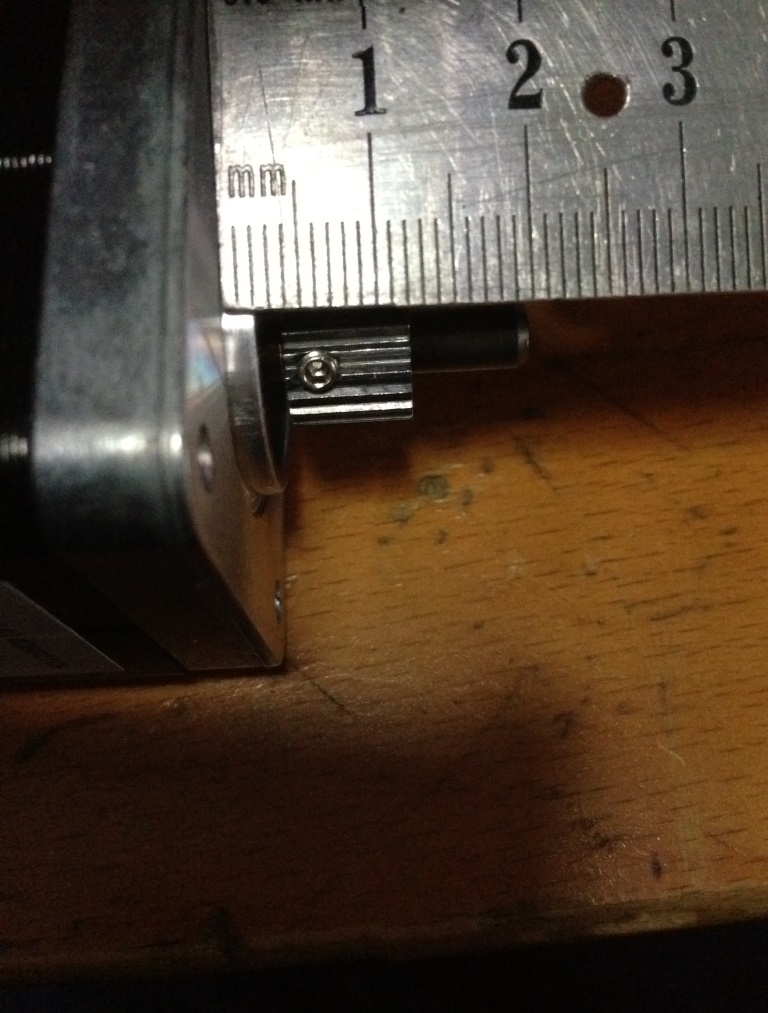
7, Then place the TITAN extruder so you can adjust the TITAN toothed cog to the correct place. Make sure the grub screw is nearest the steeper motor body
I found the correct position to be 12mm from the stepper motor body as in the picture below, you will also notice the grub screws position
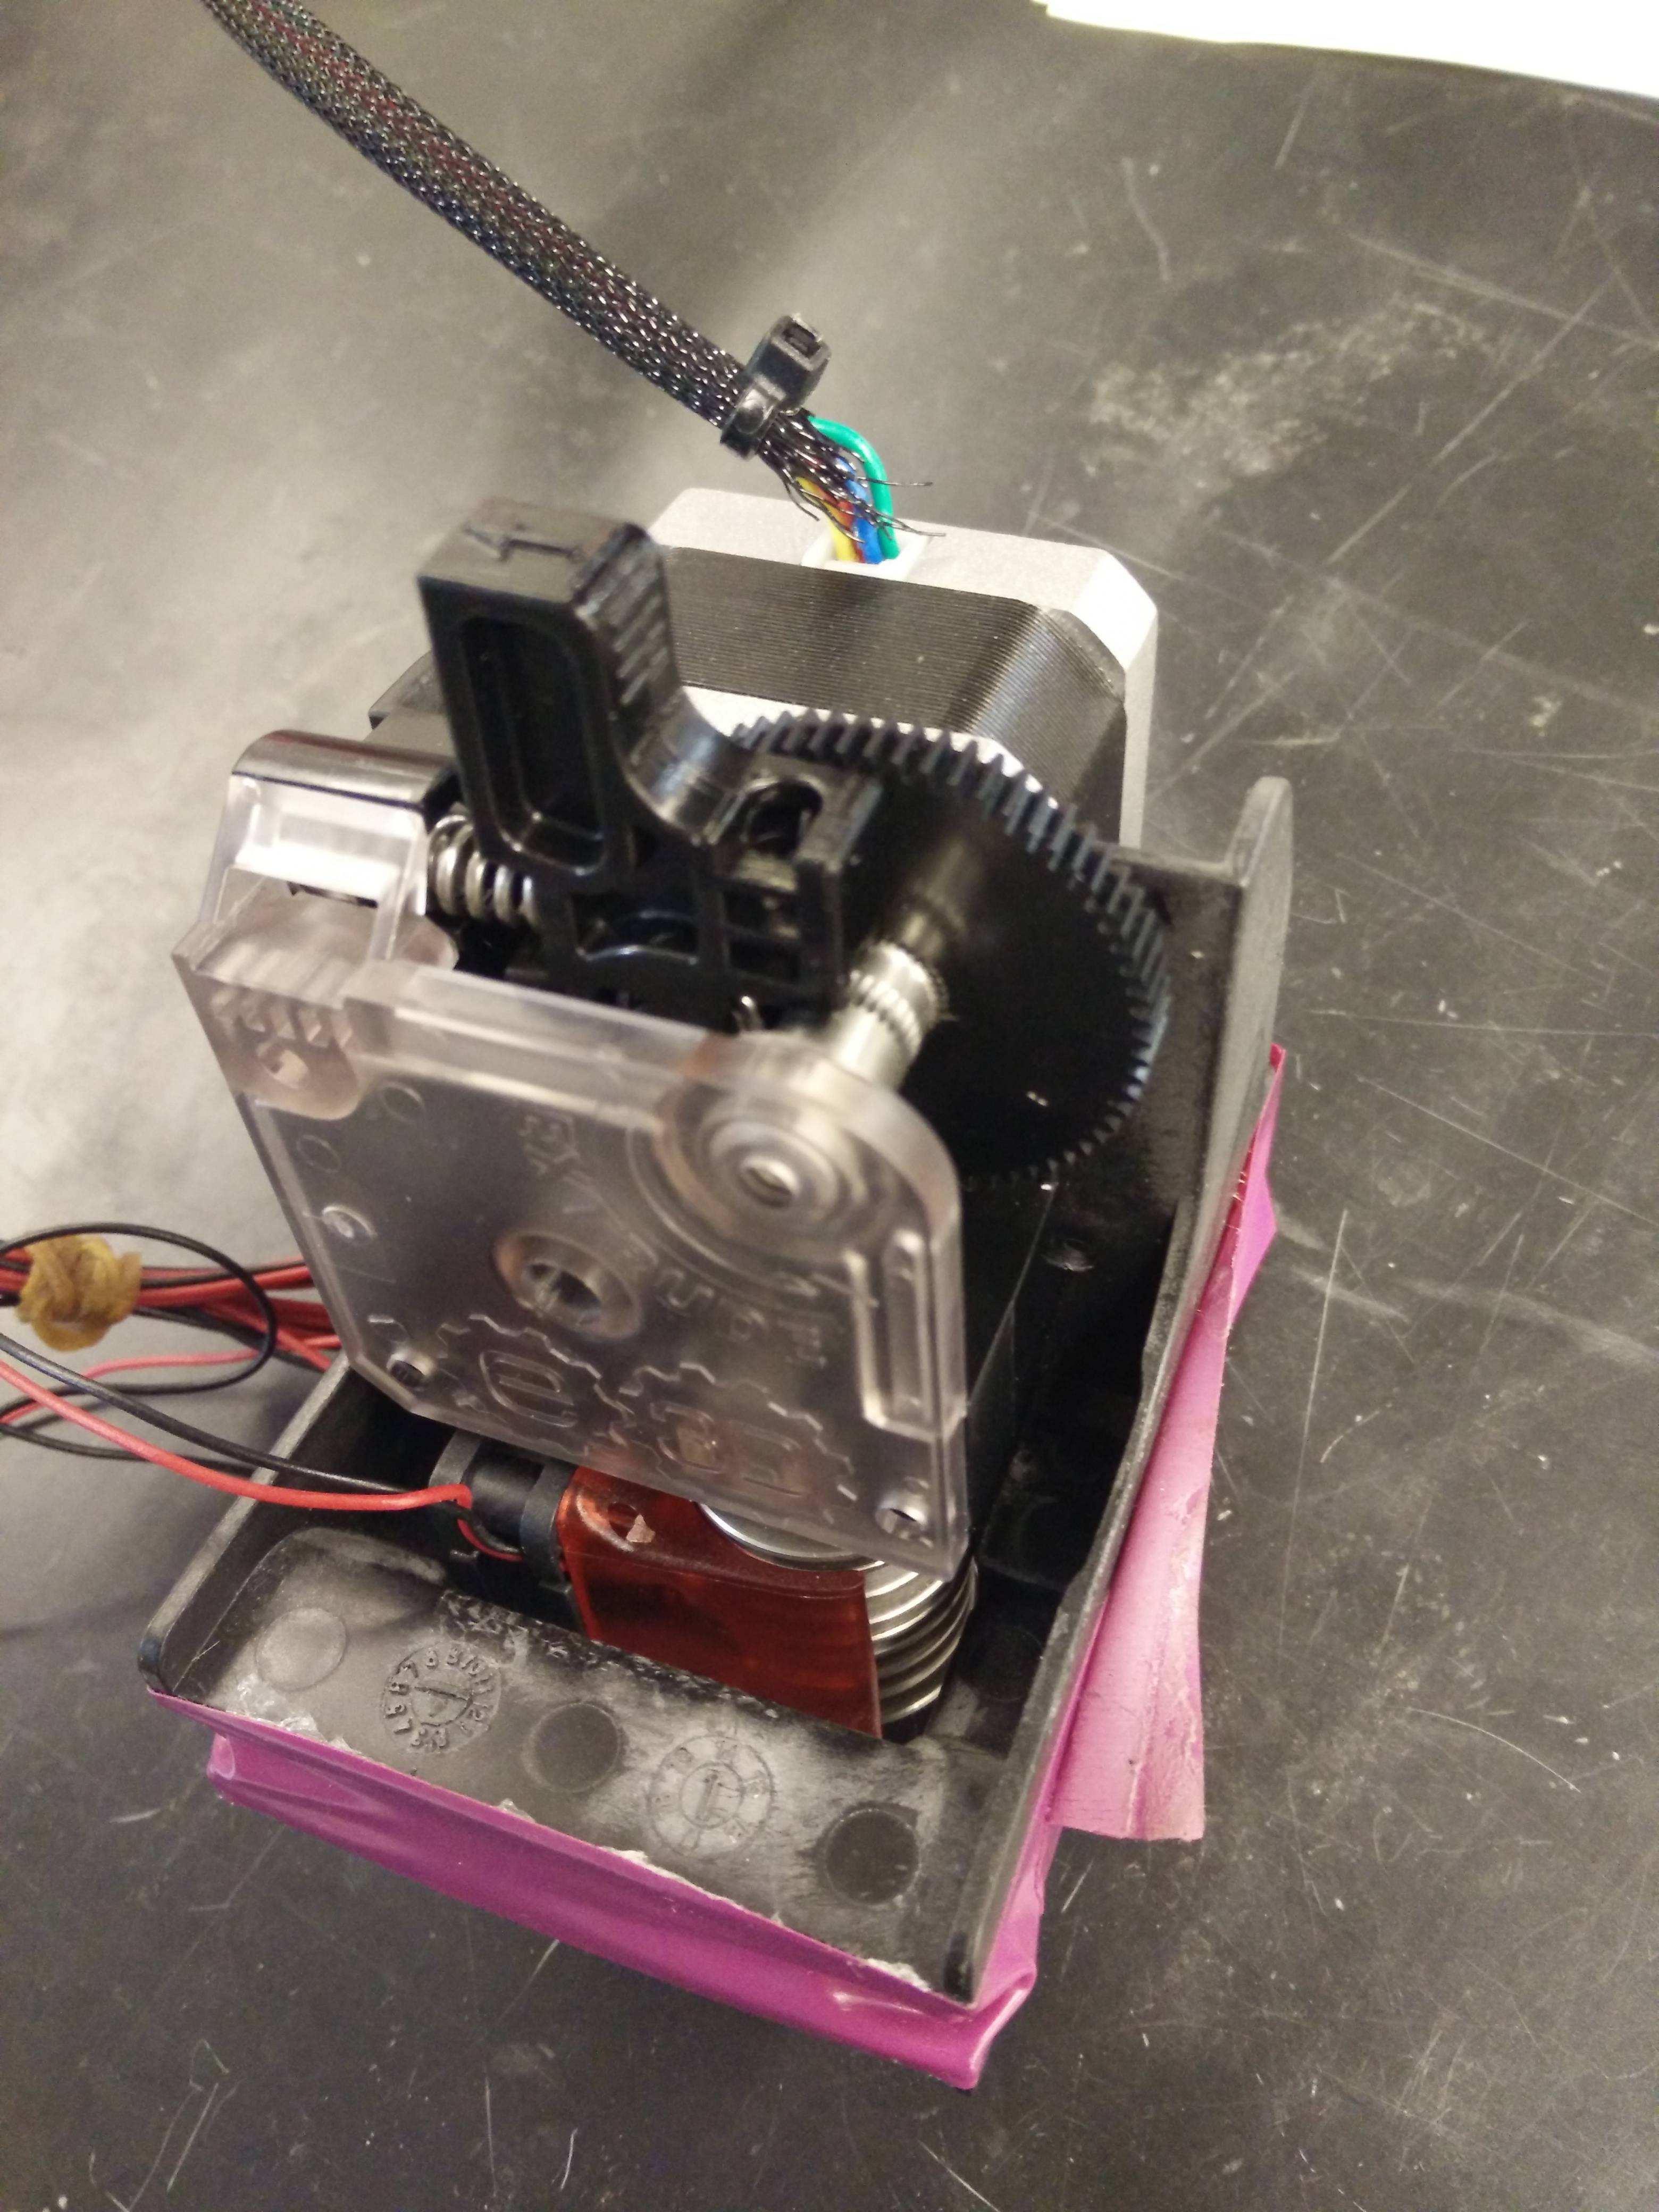
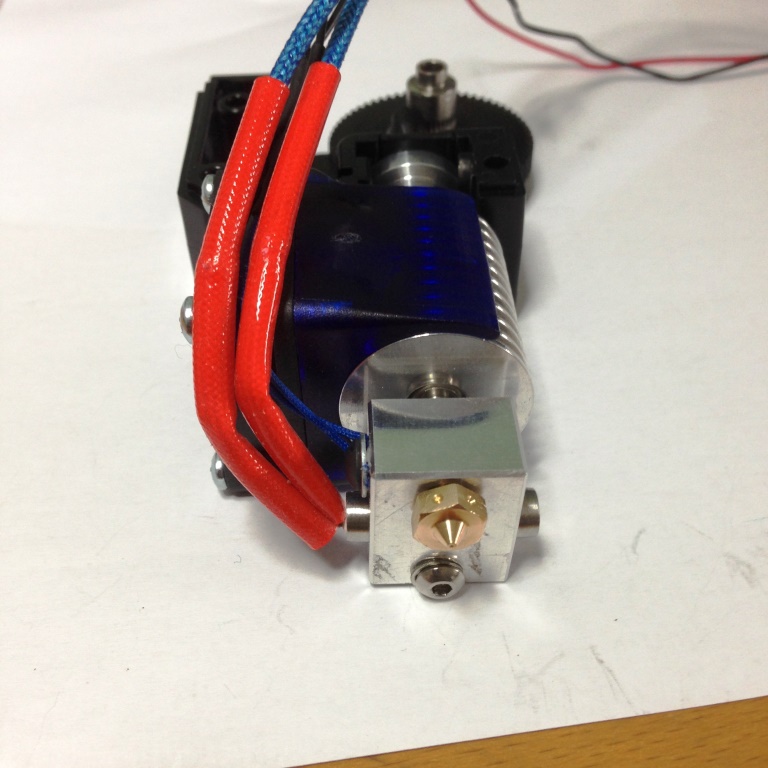
8, Setup the E3Dv6 or Lite. adding the heater cartridge, and thermistor. The fan shroud should be attached and in this orientation. I spent a long time trying different configurations. It will only fit like this and requires no more cutting of the carriage.
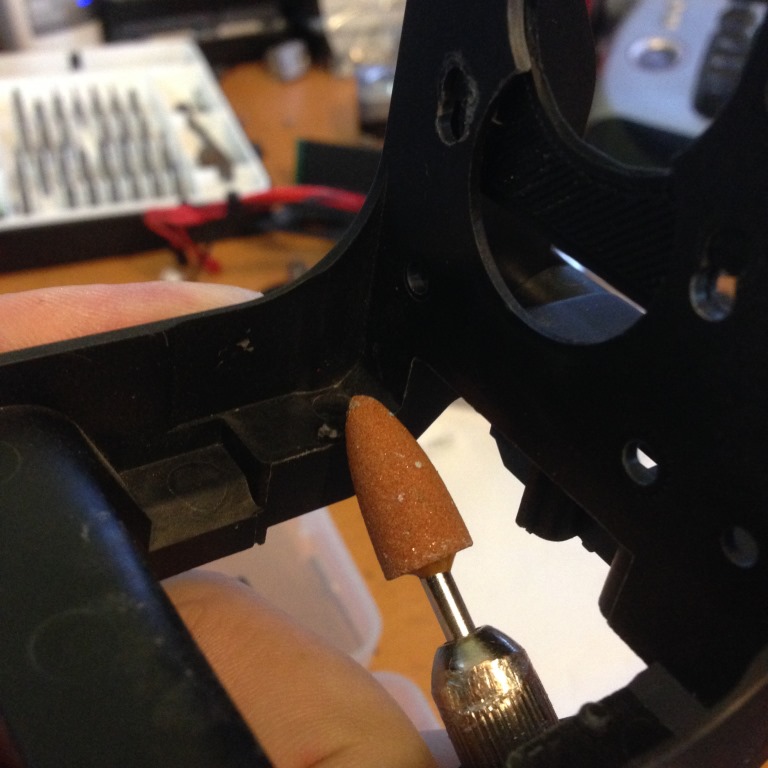
9, You will need to do a slight modification to the Carriage.
using a dremel and small grinding attachment. remove a small amount of material as below
If this is not done it will look like this
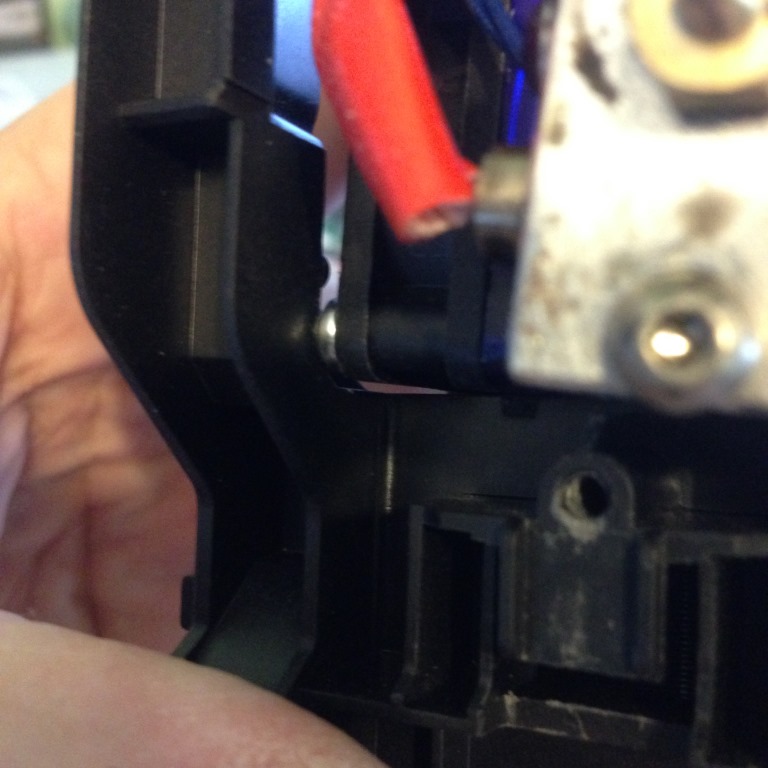
you will have difficulty getting the bolts in the stepper motor.
After using the dremel, it will look like this
This is enough to make the install way easier. You can see the Fan bolt head now sits further to the side of the carriage.
10, Take you time and follow the Titan Assembly Wiki http://wiki.e3d-online.com/wiki/Titan_Assembly
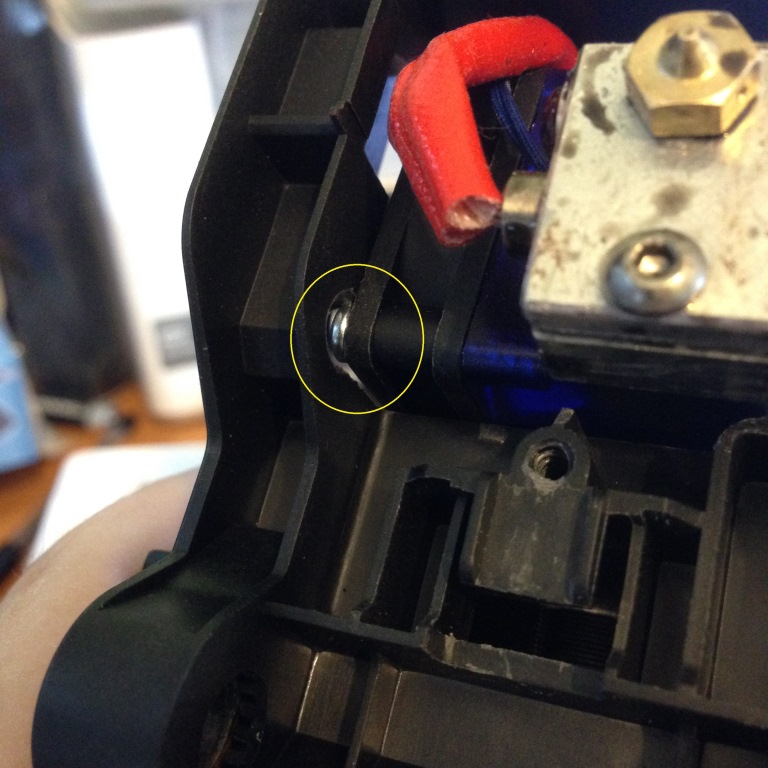
this process is rather fiddly and you could do with some extra hands. the small M3 x 10mm bolt cannot be used, otherwise you can't get the Titan in the carriage. Position of bolt left out indicated by the red circle
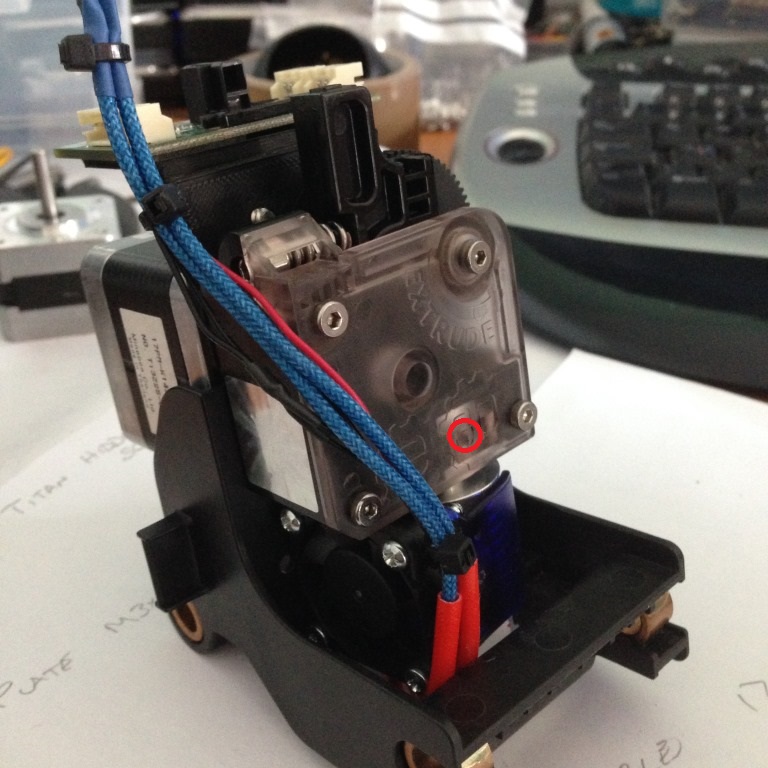
11 Tighten the other bolts and I have had not problem with the Titan being loose, I used some threadlock for extra security. You may need to loosen the bolt (marked yellow) which goes through the thumb wheel to obtain a smooth movement.

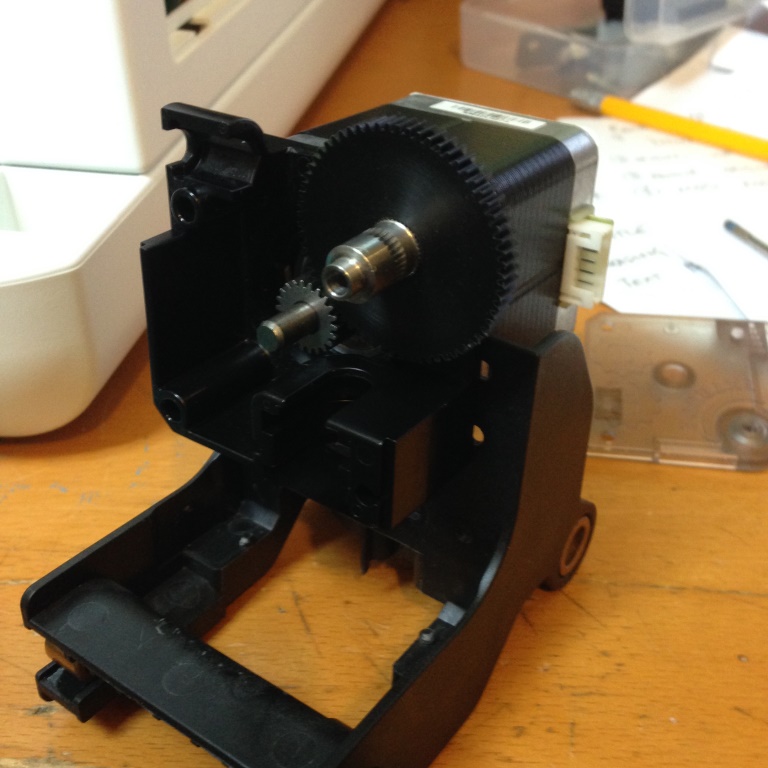
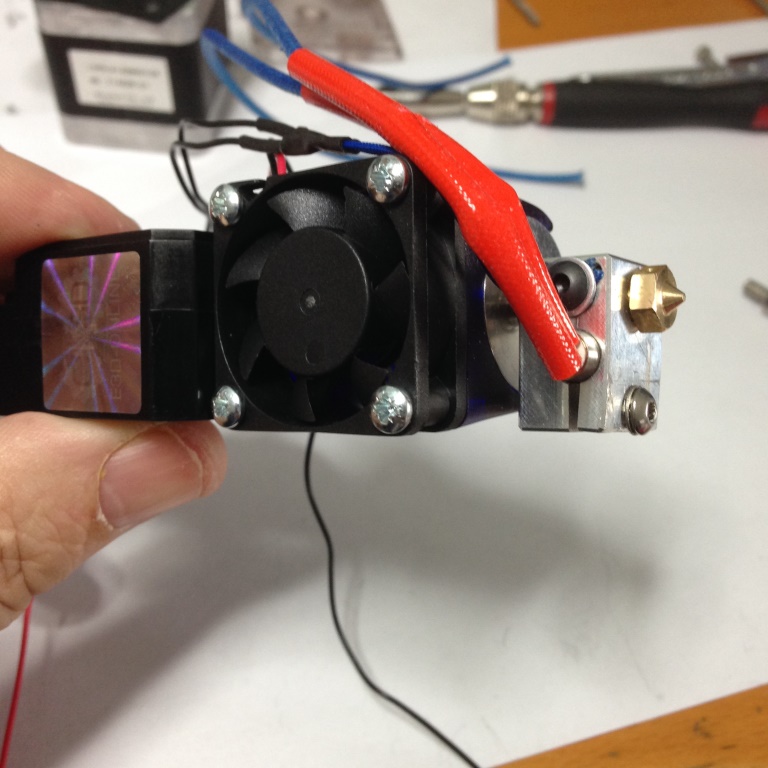
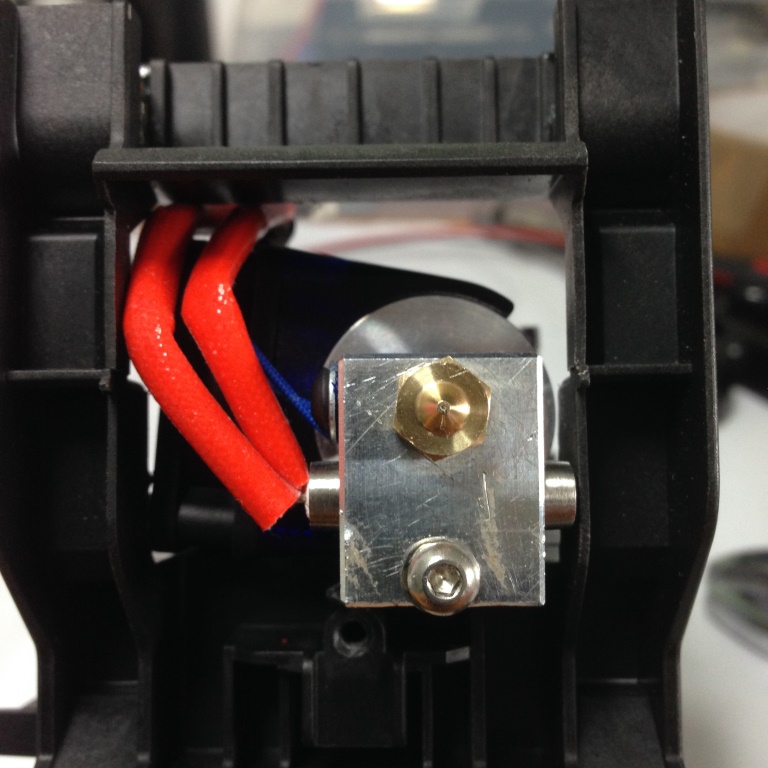
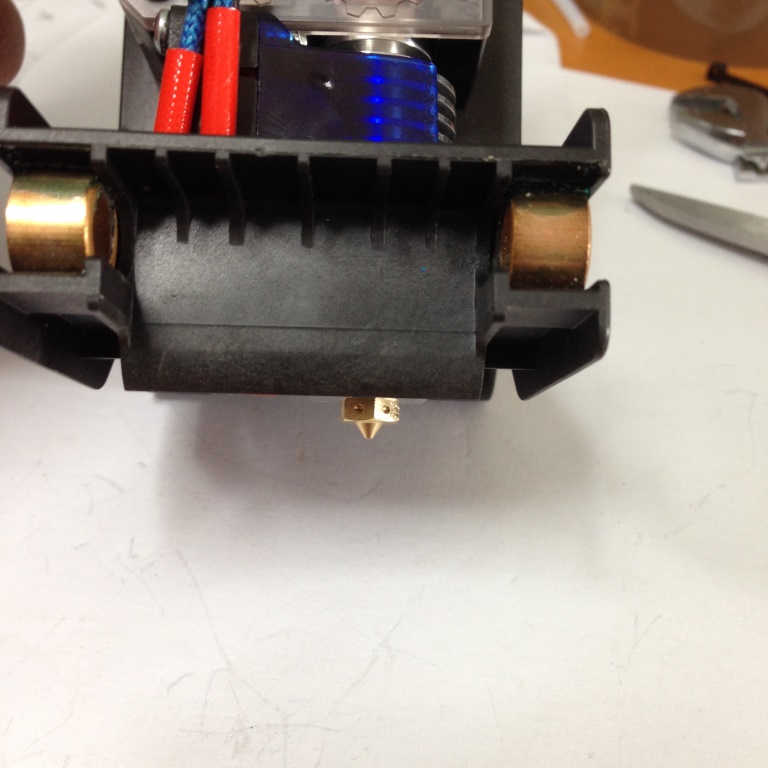
12, It should now look something like this from below
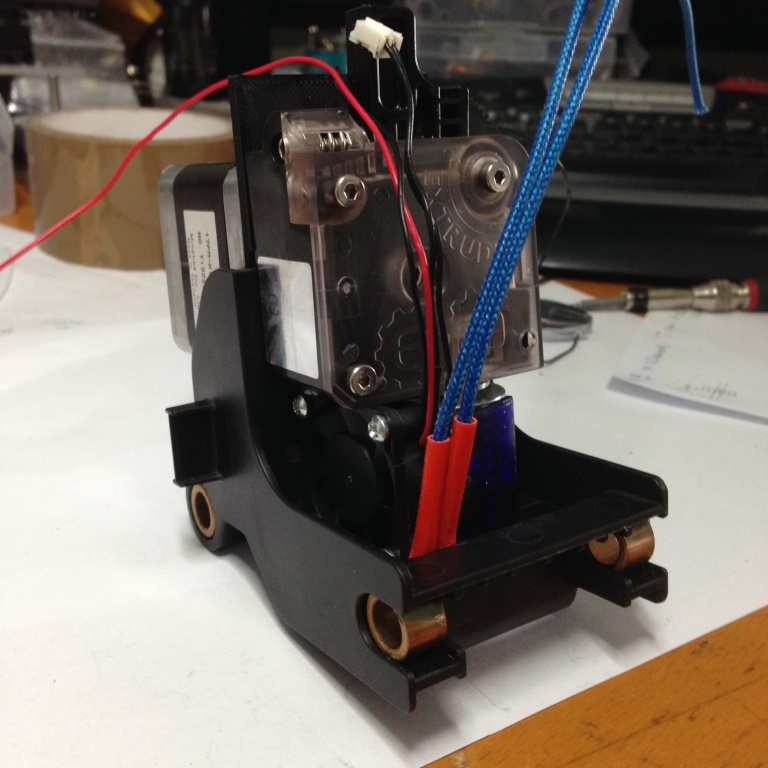
and like this from the front
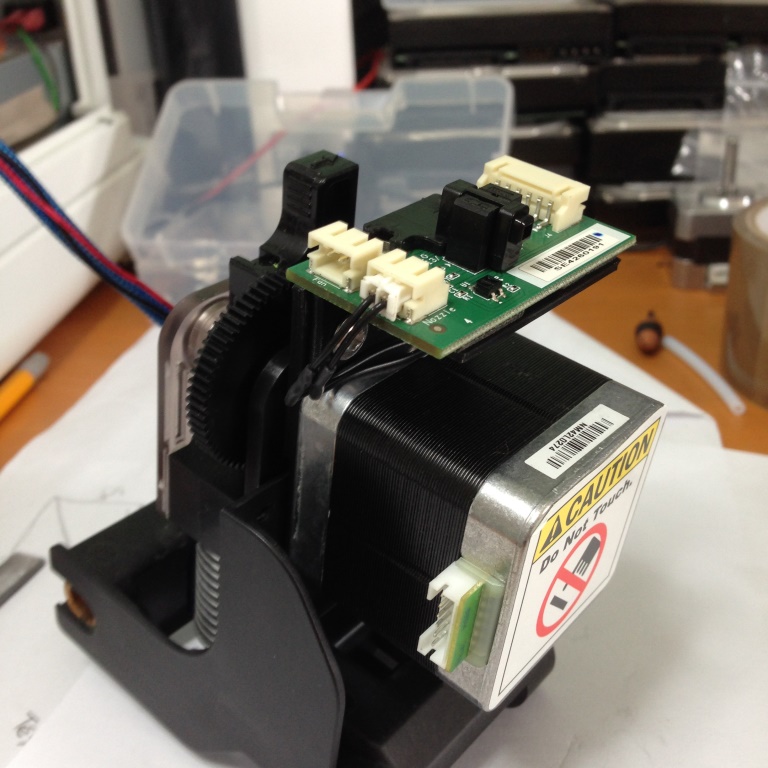
13, Now attach the Daughterboard Mount and the Daughterboard in place, I used 3mm self tapping screws and pilot holes for the mount.
and double sided tape for the Daughterboard, You will notice the thermistor cable as been reattached to this board. This uses the original wiring
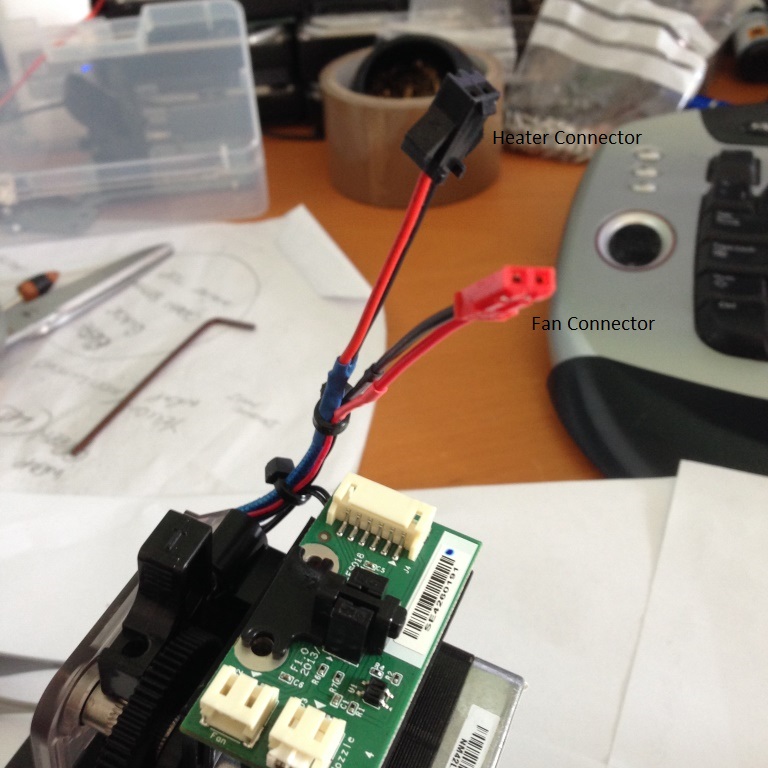
14, Now cable tie the leads in this fashion

15, You now need too attach the Connectors for the Heater and new fan power
IMPORTANT This was the position of the nozzle with no further modding if the E3Dv6 installed
I would not Drill any other holes for the sake of 2mm adjustments. However if you have never installed the E3D v6 I would follow this mod step by step.
and this will be the final position following this guide and using the attached files
It is only a drop of 2mm but I think it looks right.
*NB* one thing I have just noticed E3D have sent me the 30Watt heater cartridge. I need a 40Watt and so will replace this shortly. Make sure you get the correct wattage, otherwise it can cause errors in software.
After checking using this process I have lost 1mm of z-axis.......
Any questions, or anything needing clarification, please don't hesitate to ask. I apologies if it seems I have taken over this thread..
ENJOY!
Post's attachmentsConfiguration.h 70.95 kb, 2 downloads since 2022-09-03
cutting drill guide v2.stl 47.35 kb, 2 downloads since 2022-09-03
Daughterboard Bracket.stl 2.04 kb, 2 downloads since 2022-09-03
Extruder Bracket holes fill.stl 25.18 kb, 2 downloads since 2022-09-03
Extruder Bracket No New Holes.stl 19.91 kb, 2 downloads since 2022-09-03
You don't have the permssions to download the attachments of this post.