Topic: Downgrade/Recovery/Spoofing DaVinci Firmware on Junior/Mini/Nano/.....
Downgrade/Recovery/Spoofing Davinci Firmware on Junior/Mini/Nano/.....
After I spend a few month of research I would like to share my findings. As always I’m little late ;-)
Thanks for help and infos, Nilezon, yizhou.he and some others.
As far as we know it is not possible to downgrade the Davinci Junior/Mini/Nano using original encrypted firmware files. The installed firmware makes comparison to the firmware we are going to install and if this is lower it will reject/stop firmware update.
Some information related to Davinci firmware in simple words.
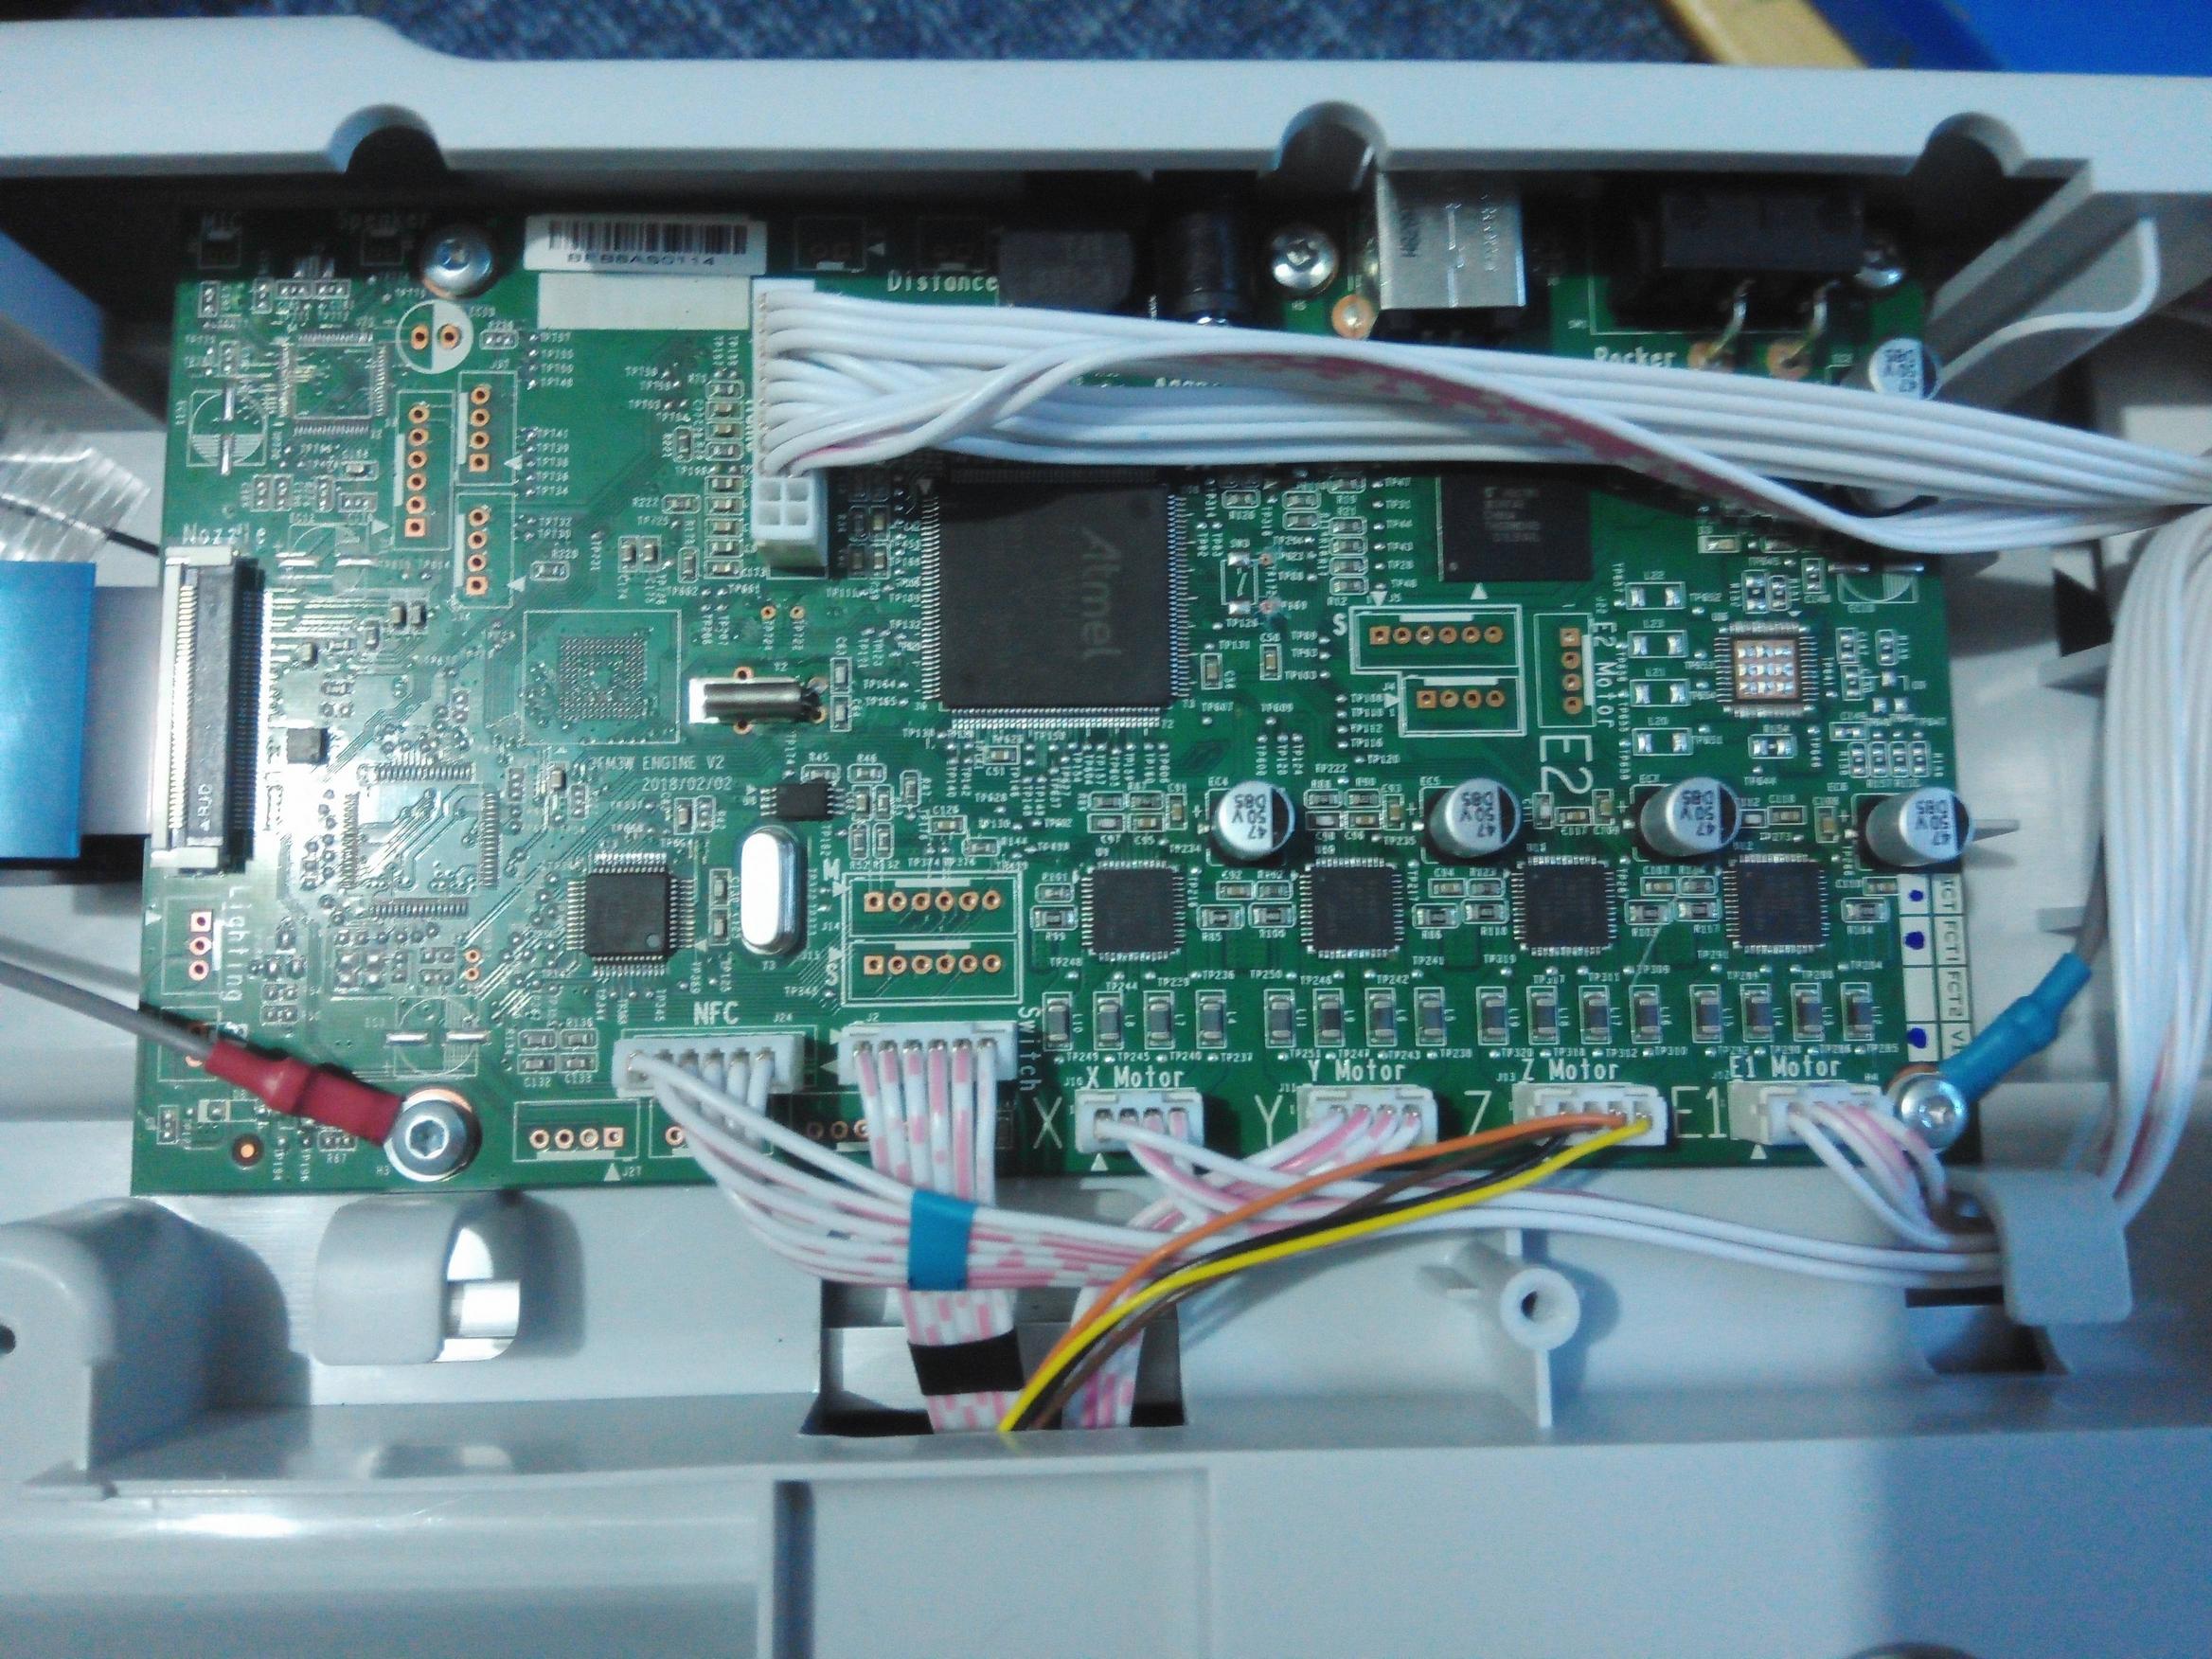
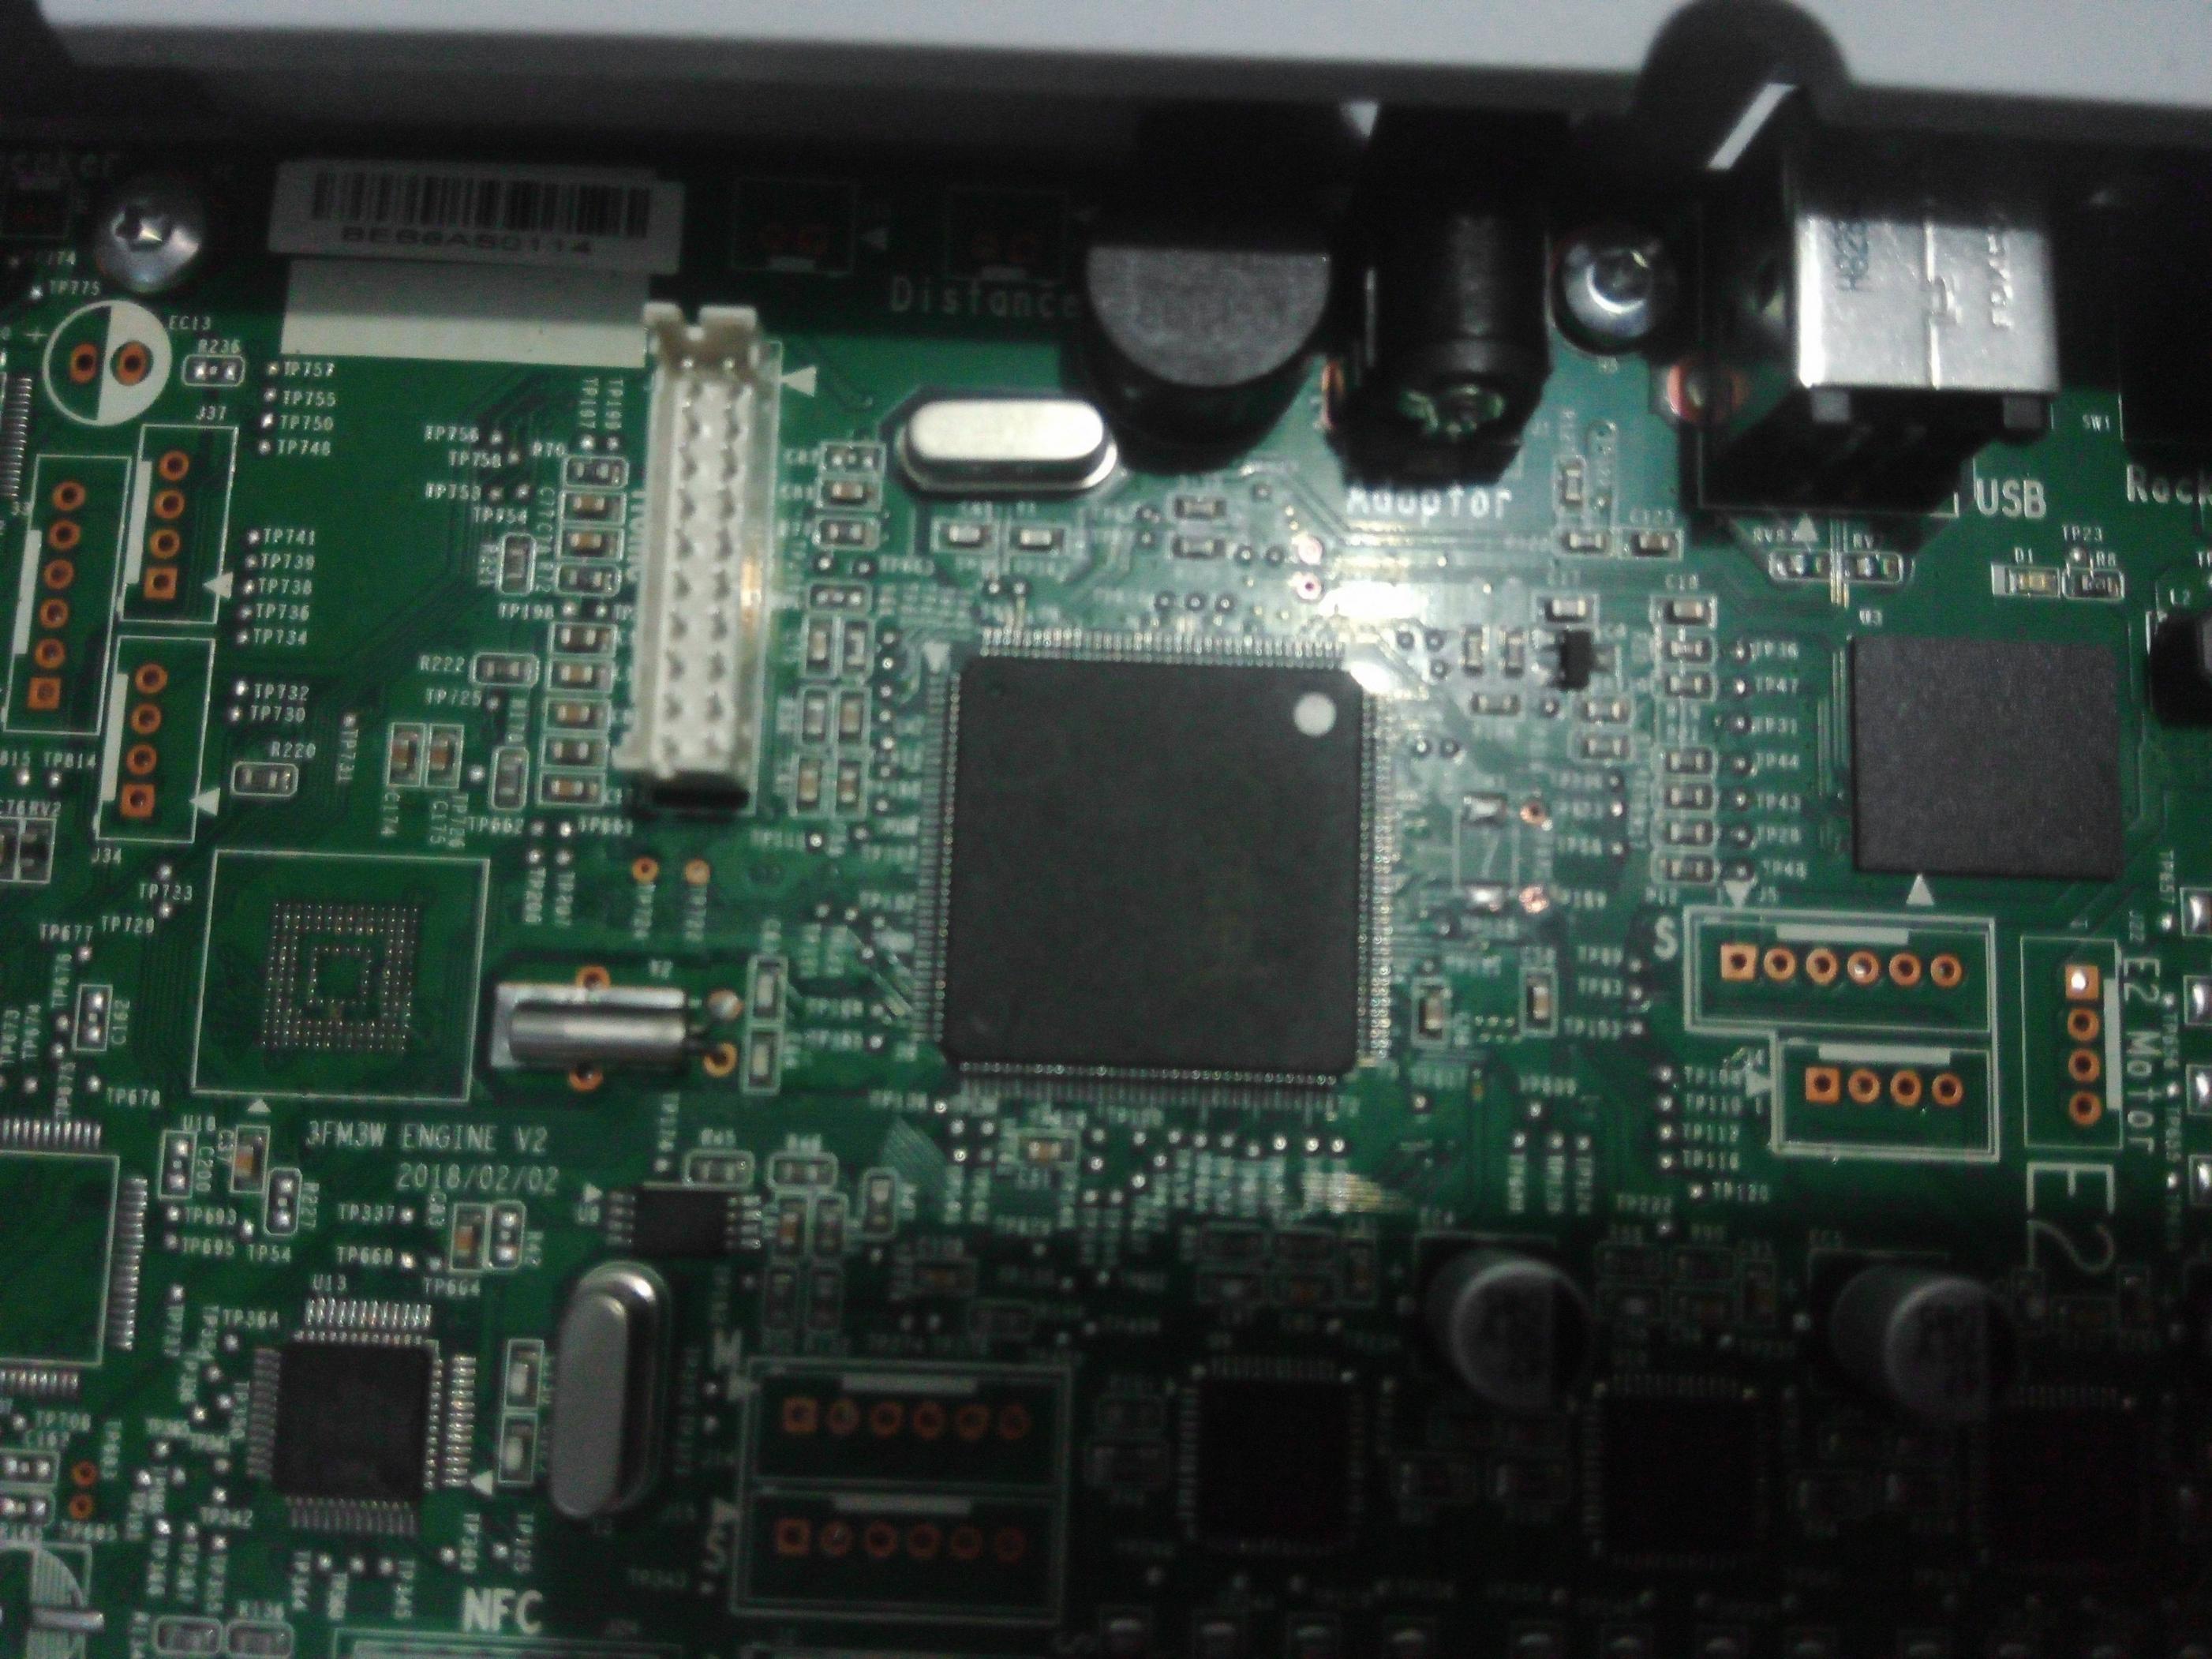
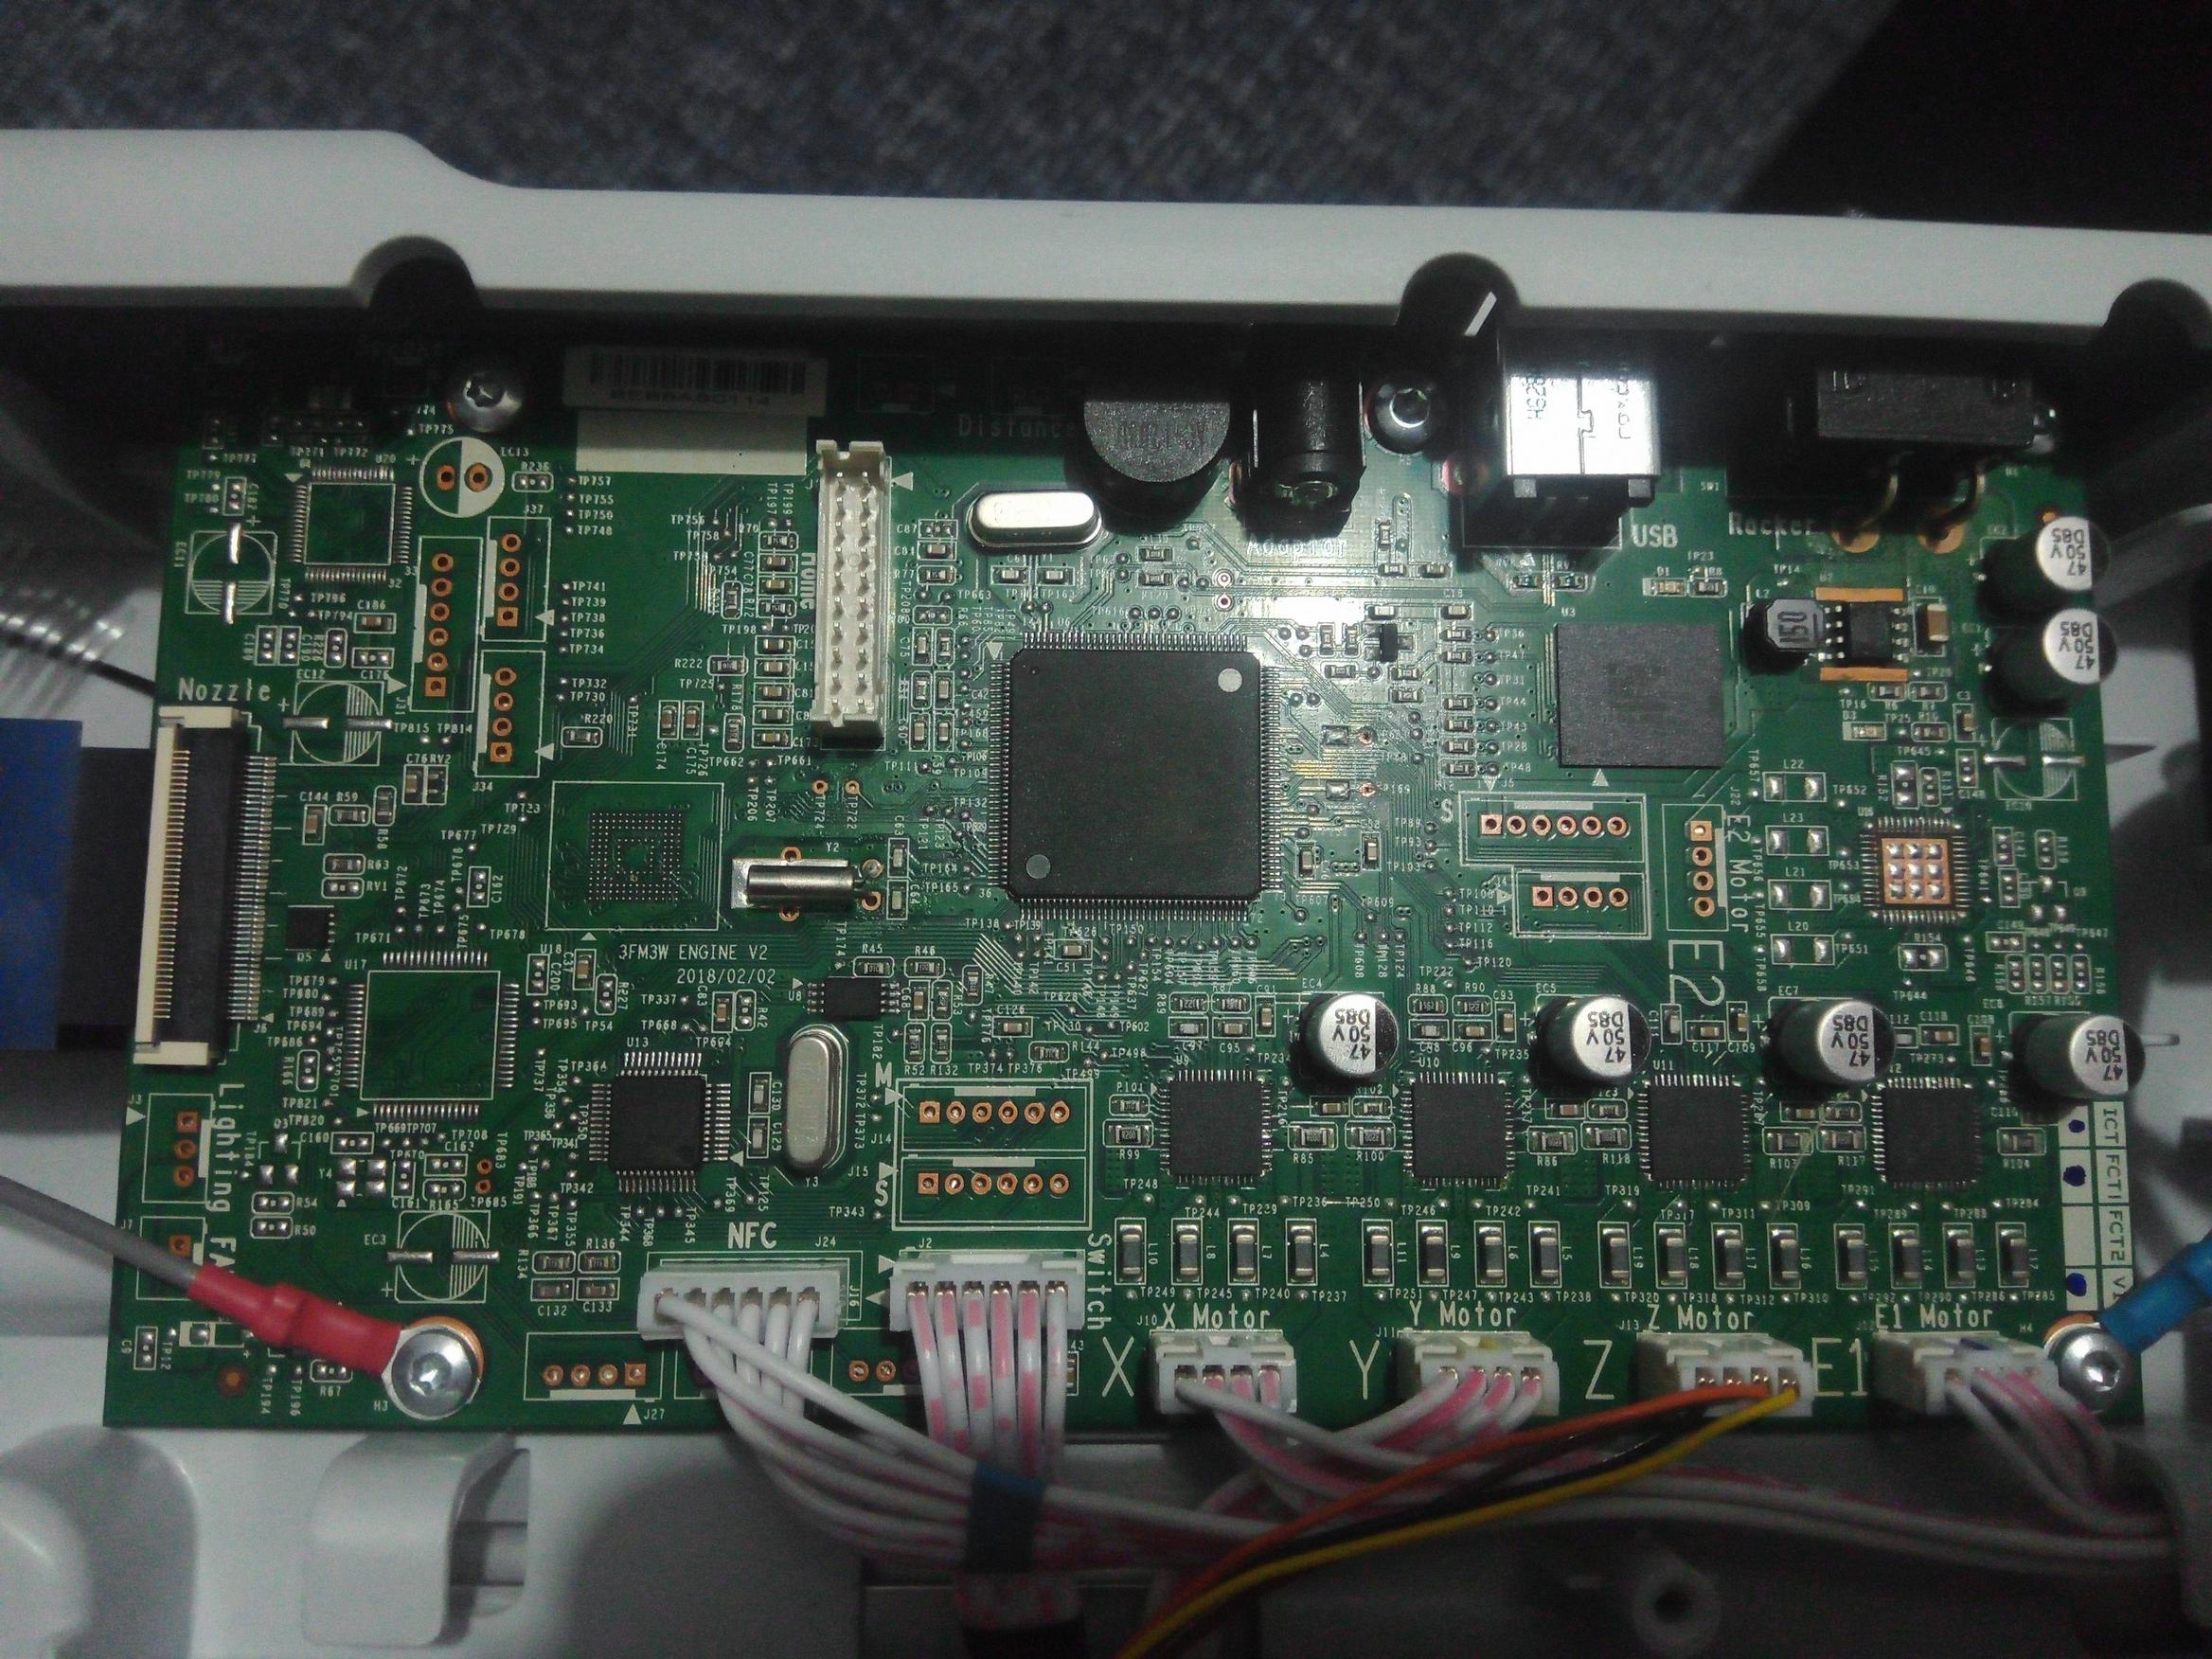
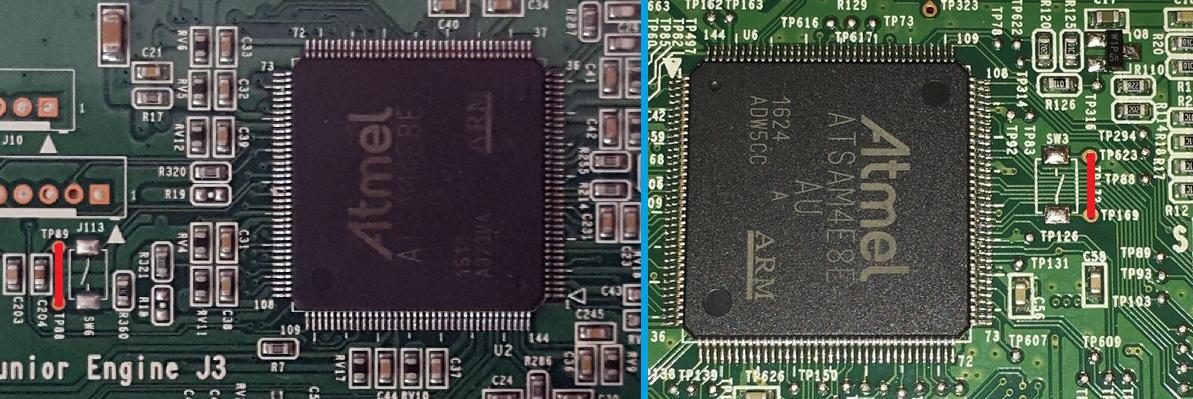
XYZ using ATSAM4E8E Microcontroller with internal AES encryption enabled, plus 4MB external SPI Flash. The firmware is encrypted with AES ECB 256-Bit Key. (Good for us ?!?!? later on this.)
The Microcontroller loads the encrypted firmware, decrypting it and save the firmware on SPI Flash, offset 0x2000
I guess it makes some checks (compatibility, fw version, ...) and update the printer fw, WLAN fw, …
We need some understanding of the firmware layout.
Here is an example of daVinci Mini w firmware v1.2.2 (dv1MW0A000+1.2.2)
The layout of the encrypted firmware:
Address      Length (bytes)
0x0000       16              Fingerprint as plain text    eg. (dv1MW0A000+1.2.2)
0x0010                       Encrypted firmware
last         16              Encrypted Fingerprint  (E28577A87873ADB9CCD4047CA539A5B5)
The layout of the decrypted firmware:
The firmware is splitted up into 4 blocks with different sizes.
The actual firmware for Atmel is built of block 4 and block 3 and should always fit to 512 Bytes.
Address      Length (bytes)
0x0000       16              Sizes of firmware blocks eg. (0006A001 00000000 0003878C 00012FF0)
0x0000        4              Slot 1
0x0004        4              Slot 2
0x0008        4              Slot 3
0x000C        4              Slot 4
0x0010                       Block1,  first block (WiFi firmware), length is specified at offset 0x00
                             Block2,  second block (not used, reserve), length is specified at offset 0x04
                             Block3,  third block (main firmware), length is specified at offset 0x0C
Block4, fourth block (bootloader), length is specified at offset 0x08 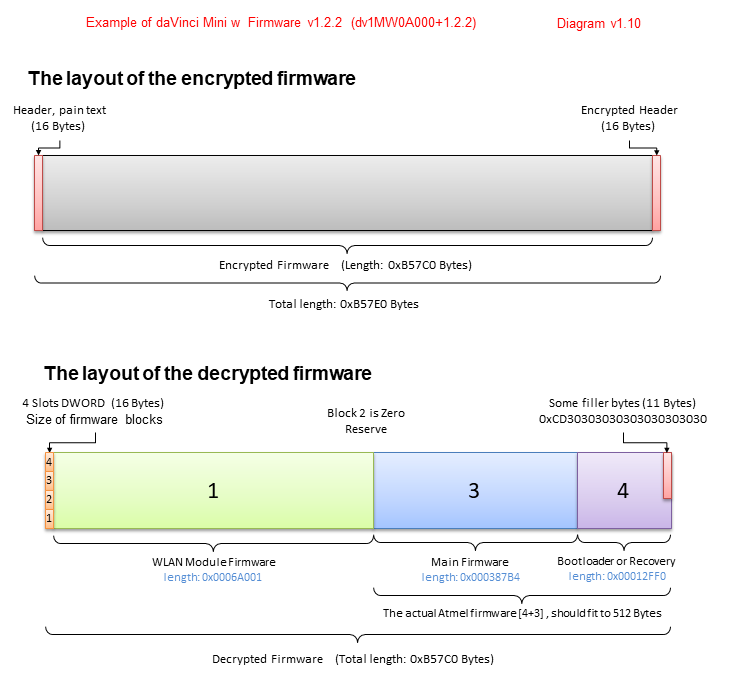
How get the Atmel dumps
Well to get Atmel dumps is a bit tricky at the moment, there is only one way to use the JTAG (SWD) hardware.
I would like to give more option do get and modify the Atmel dumps. Downgrading, recovery from bad state or from Repetier Port should no problem anymore.
- First, here is my Firmware collection for mostly all XYZ printers (old, new, decrypted Firmware and Atmel dumps)
Link to Firmware collection: https://my.hidrive.com/share/j8ee51tz13
- Second, here is my program which can convert the SPI Flash to Atmel dump. Also with this program we can change the printer serial number and spoof the firmware to any version!!
Furthermore, if we will able to get the AES Key one day, we could decrypt the firmware and vice versa.
Link to XYZ_Firmware_Converter: https://my.hidrive.com/lnk/XriGBcmS
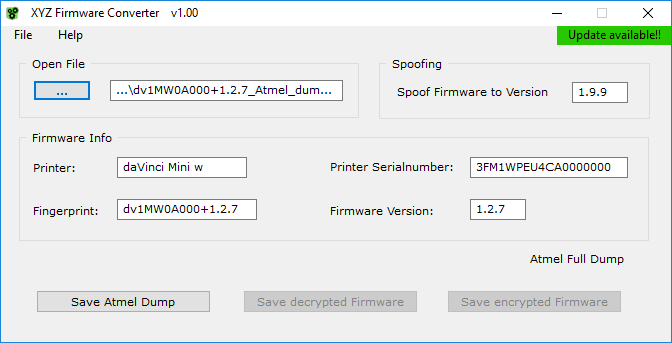
Note: You can spoof new firmware to lower version, write to the Atmel chip and use the offline update mode to update to any other wish firmware version you like!
Read this posts about offline update method.
Link1: http://www.soliforum.com/topic/16978/xy … de-v21261/
Link2: http://www.soliforum.com/topic/16988/xyzware-trainer/
Downgrading or reflashing process
So the downgrading or recovering process it very easy and discussed few times on this forum.
The Member “yizhou.he” described very good alternative methods for DaVinci Jr. and miniMaker
Link1: http://www.soliforum.com/topic/17766/ho … cartridge/
Link2: http://www.soliforum.com/topic/17763/ho … cartridge/
I will not make any tutorials, please don’t ask. Here is small summary:
1. Prepare
Write down your printer serial number. You will need to insert it back to avoid non known problems yet. Disconnect the flex/ribbon cable from the extruder or printer mainboard to avoid extruder overheating.
2. Erase the Firmware
To erase the firmware from the Atmel Microcontroller you need to short two test pins and power up the printer for 5-10sec. Power off and power on the printer again. You should see new COM connection.
3. Reflash the firmware
Get your favourite Atmel dump, you can verify that firmware with my program (XYZ_Firmware_Converter.exe)
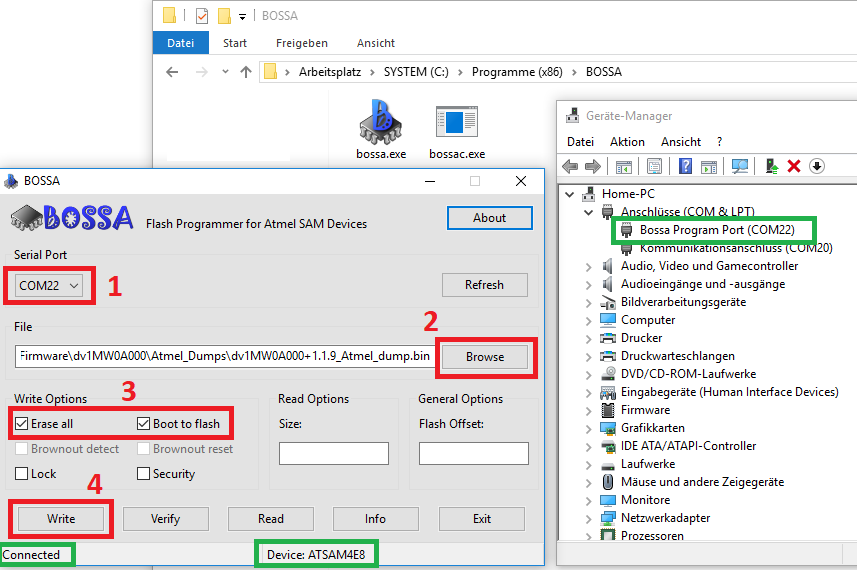
Now use the SAM-BA Software or I prefer the BOSSA program. Select your COM port and browse to the binary (*.bin) file.
Execute the program and wait till it finische the update process. Once done, power off the printer, connect the flex/ribbon cable back and power on it again.
The printer should start and run your favourite firmware.
Link to the Atmel flashing tools: https://my.hidrive.com/share/rctducz4lz
Finally:
For interested people! I have desoldered the original ATSAM4E8E chip and soldered completely new virgin chip bought at digikey.com
The printer works just fine after programming the Atmel dump via BOSSA or JTAG (SWD).
The only one thing is not working is the firmware update through XYZ Software, but this happen of course because of missing AES programmed Key.