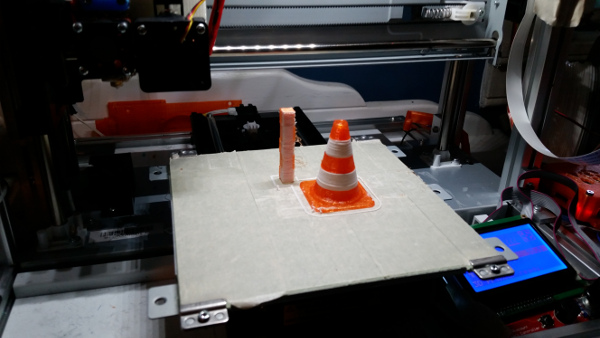
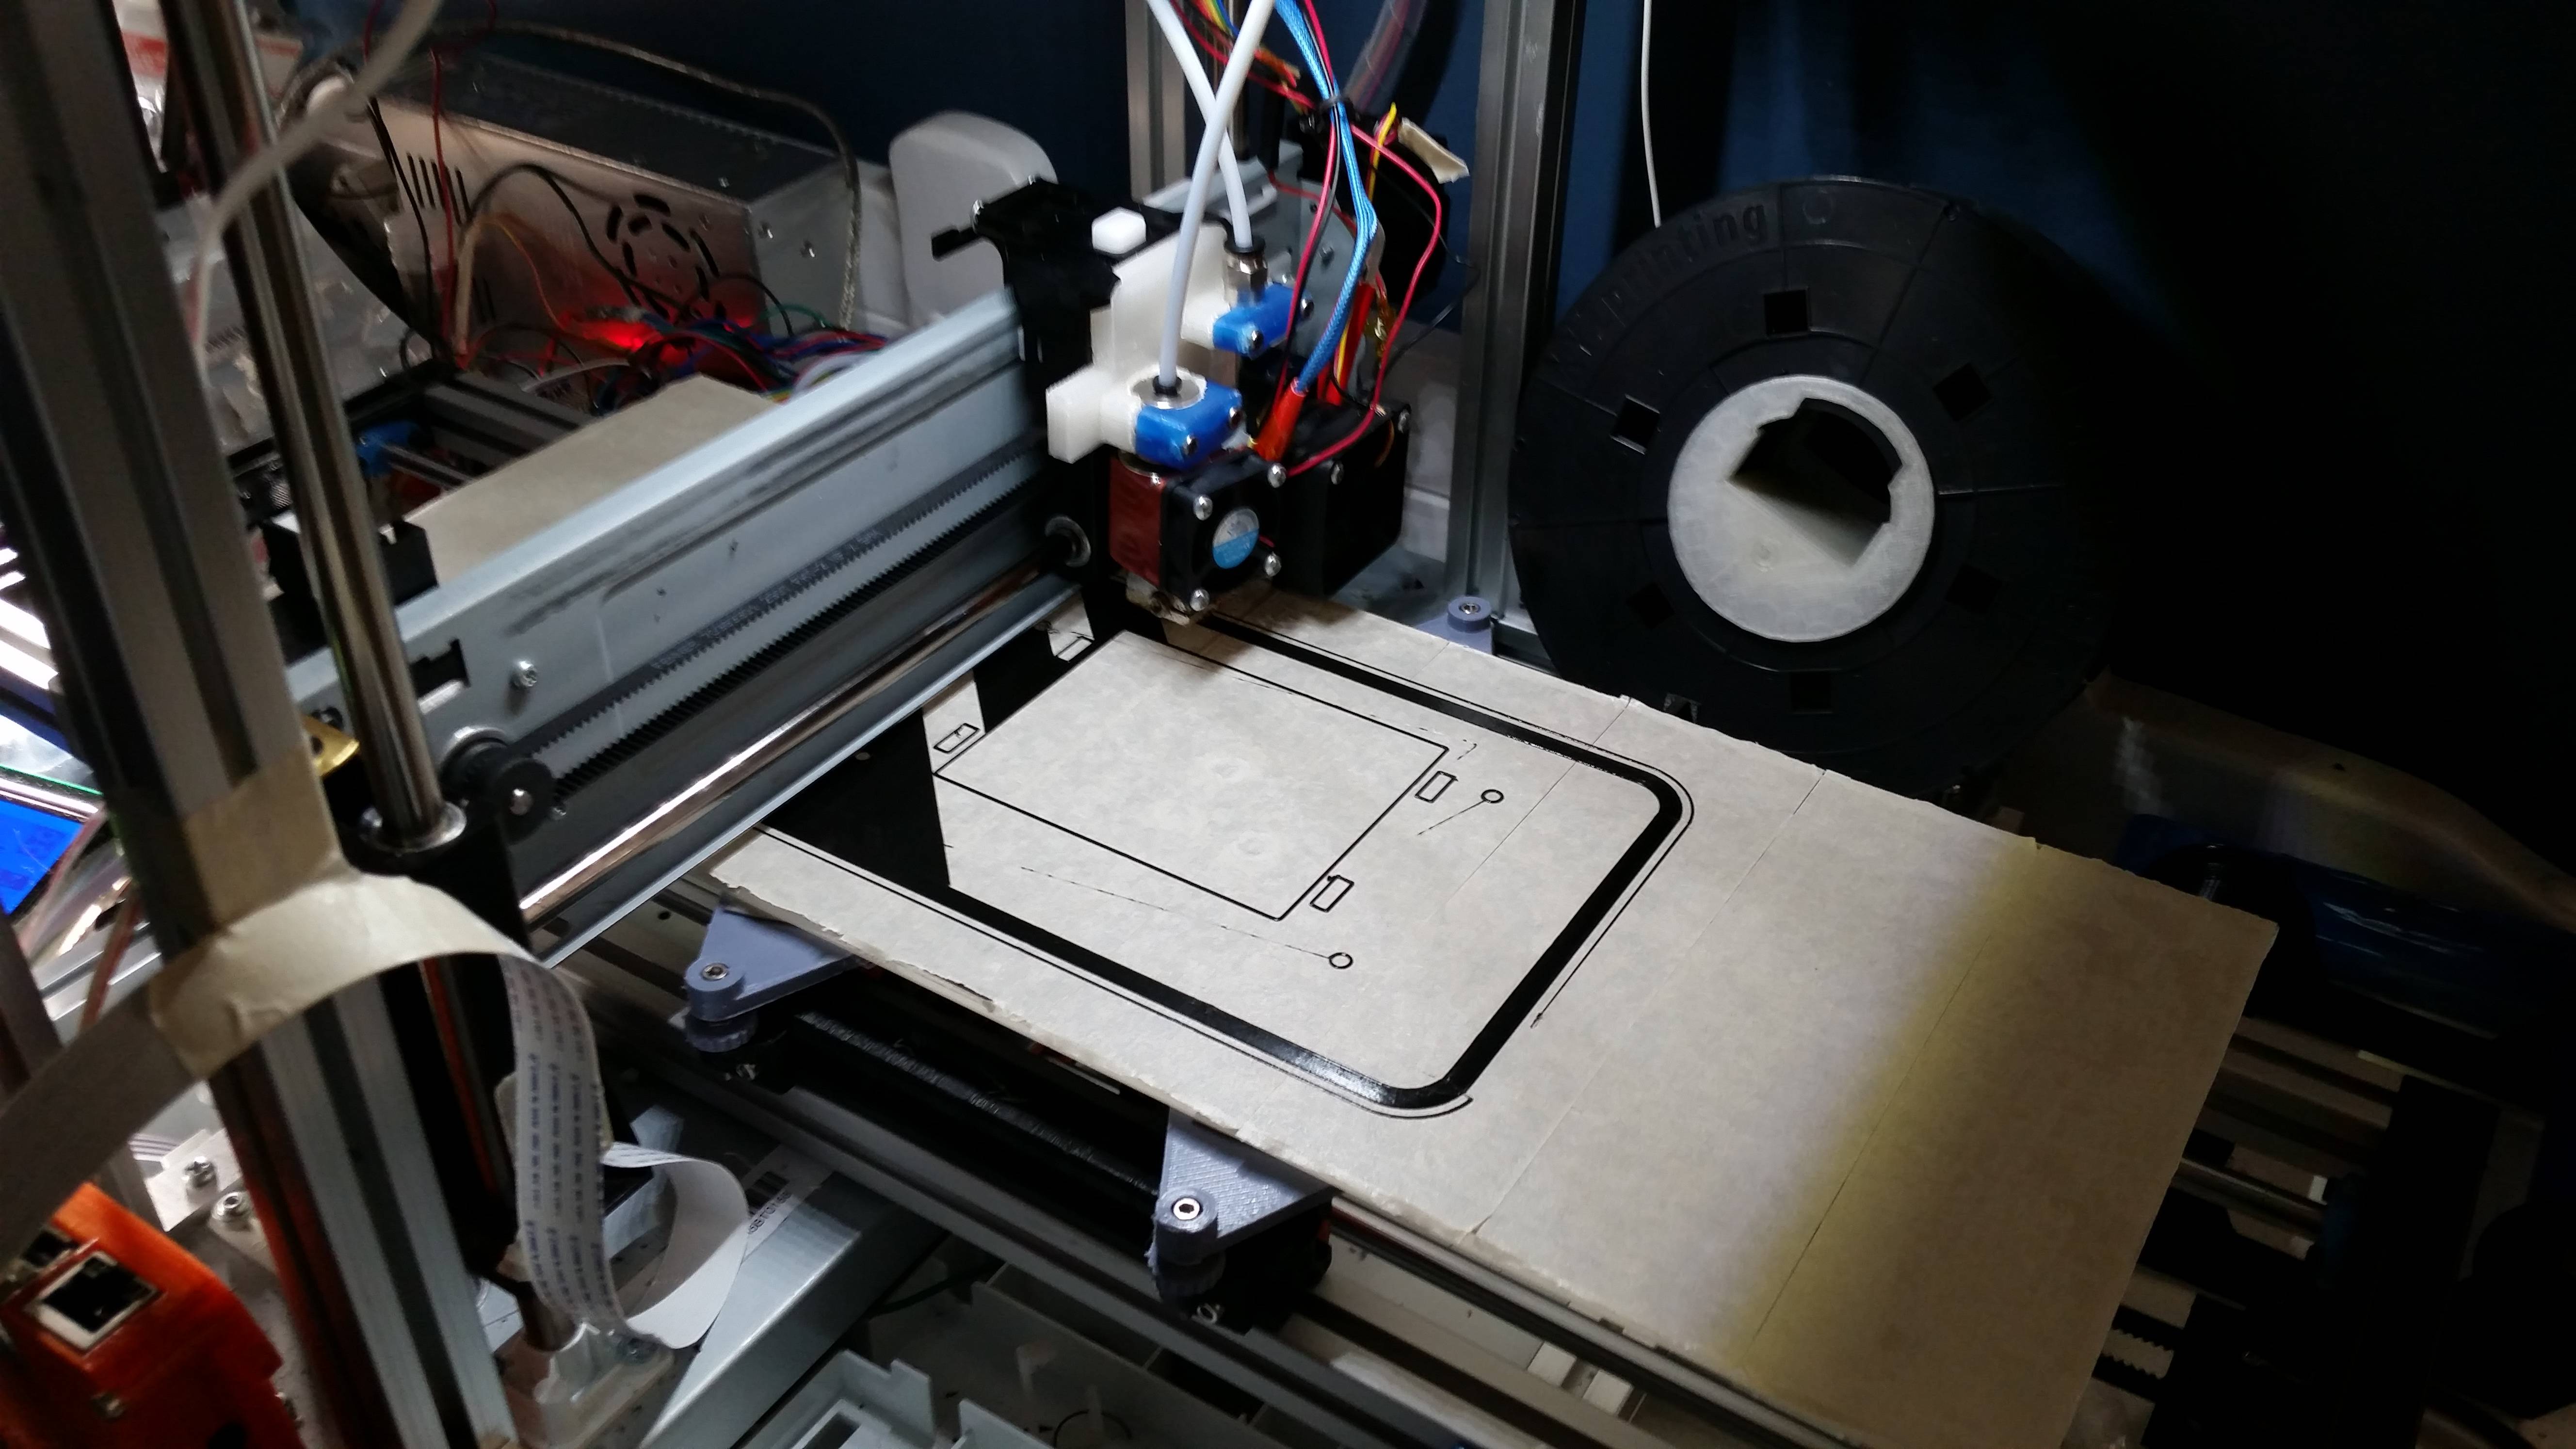
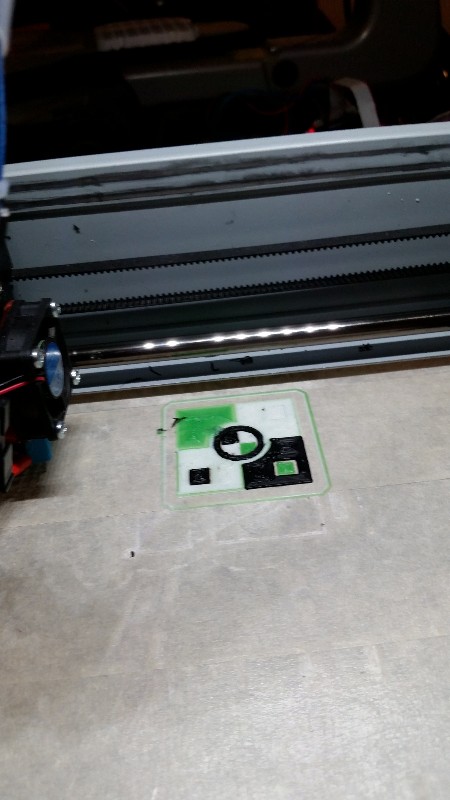
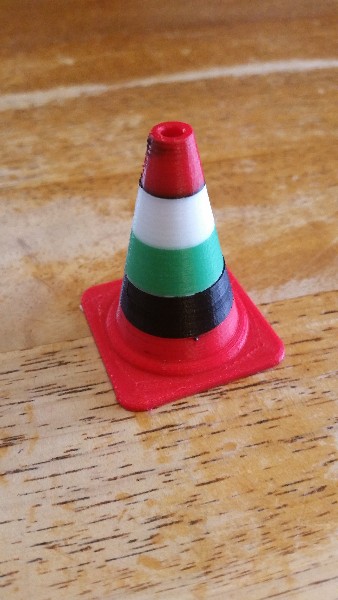
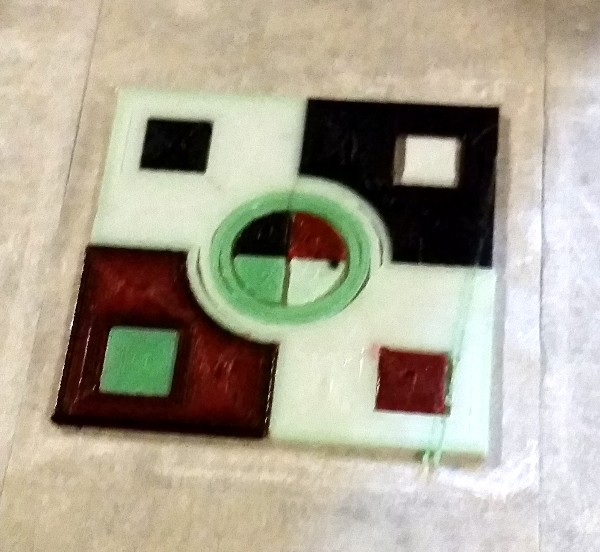
OK guys, here's my best print yet with four colors. Granted it's still just a calibration piece, but it's proof that it's working (and rather decently at that).
This has been a fun but frustrating ride. I've had the hardware set up for several days now, but getting Simplify3D to work well with four colors has been tricky. It likes to make a lot of assumptions.
This is before "cleanup" with the 3-layer/4-color ooze shield still in place, and it highlights some of the problems and solutions to them I've been solving:
(And yes, it looks like I need to tighten up some belts)
Surprisingly, I haven't had too many issues with the filament not reloading into the adapters properly. I gave everything a good reaming with drills and files to eliminate some of the early issues, but I haven't hit any major issues with stuck filament lately.
Most of the problems have been software related. First off, while S3D is pretty powerful and useful for a lot of things (and I like the surface finish I get with it), configuring it is really, really hard. I hate its configuration model. Give me Slic3r-like settings any day.
Anyhow, getting the retraction settings coordinated is the first major hurdle, and it wasn't too bad, but S3D likes to issue a toolchange on the first tool. That means my start gcode has to reload filament, only to have it retracted and reloaded again before anything even starts printing. Weird and annoying, but not a big deal.
Getting a clean print is tougher. With dual extruders, I already was decreasing the temp of the inactive extruder in my toolchange decode (S3D doesn't have built-in support for that, even though with a $150 price tag it seems like it should -- even Slic3r can do it with a prefab setting). That helps a lot. And with the filament retracted 100mm above the adapter, that means it's virtually impossible to get leakage from your inactive extruder.
The bigger problems have to do with purging colors using the same nozzle. S3D, again, fails it here. While they offer prime towers, the prime tower only appears to work with two colors, and there can only ever be ONE prime tower. Seems like for best results there should be one tower per nozzle, but there's apparently no way to achieve that, and S3D assumes I want the prime tower to use the first two colors (which for my setup are on the same nozzle, meaning the other nozzle never gets primed). So, S3D prime towers are stupid and useless with my setup.
I tried using a "purge bucket" technique, by moving the hotend away from the bed, then purging ~30mm filament after changing tools. That produces great colors, but there's a fatal flaw in my setup, where one of my nozzles is always over the bed. Purging over the bed is bad.
So, I tried a technique where the nozzle to be purged gets moved off the bed first. That means purging the left nozzle moves the carriage all the way left, and vice versa. This works... mostly. Problem is, because I have to change the active tool in order to purge the right nozzle, Marlin applies the tool offset as well. So as soon as the G1 command to extrude gets processed, it extrudes while slowly moving the carriage back over the bed. That turns into a big mess at the end of the bed that ends up dragging goop all over the print.
I'd really love to go with a purge bucket technique, since that eliminates the need for any other sort of priming and produces really clean colors, but unless I can get this offset problem figured out (where somehow I can purge T2/T3's filament without applying T2/T3's X offset), it's off the table.
So, my interim solution is to use an excessive ooze shield. This, at least, S3D does well. You can make the ooze shield print with all of the colors after a tool change, and you can set the offset and number of walls. So I create a very heavy ooze shield (in the piece shown, each loop is about 10cm in length. At 0.1 layer height, 0.4 extrusion width, each 100mm of extrusion counts for about 4mm of filament length, so three loops purges about 3cm of filament.
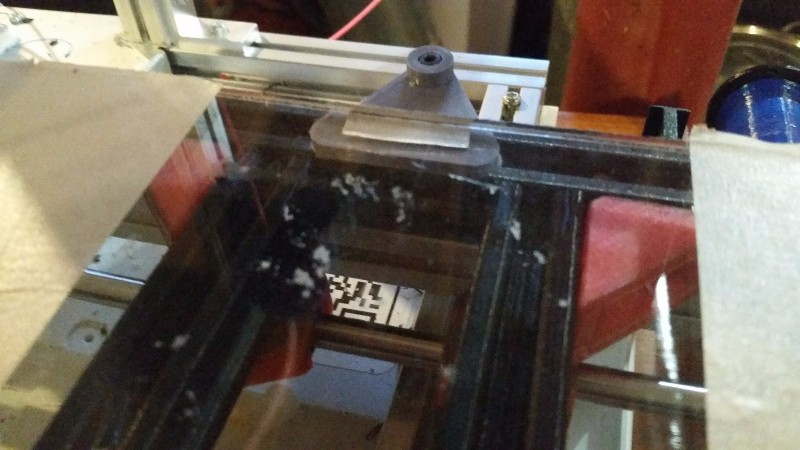
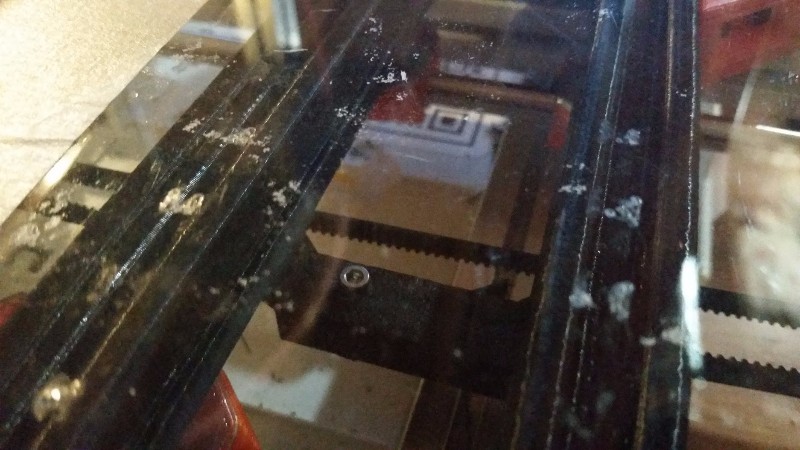
With that setup, I'm still getting some unclean color in the red (tool 4) after printing black (tool 3), making the red muddy and dark, but I'm thinking this has to do with my filament temperatures. This red prints at 210, while the black prints at 190. I'm thinking what's left of the black that's still in the nozzle when the red primes is basically liquifying at that temperature and mixing with the red. A longer purge of the red would probably help there, but without the purge bucket idea working, that's hard to achieve cleanly. You can see more evidence of this in the "pre-cleanup" shot where there's also a big black streak where the filament started to purge (or leak) on the reload.
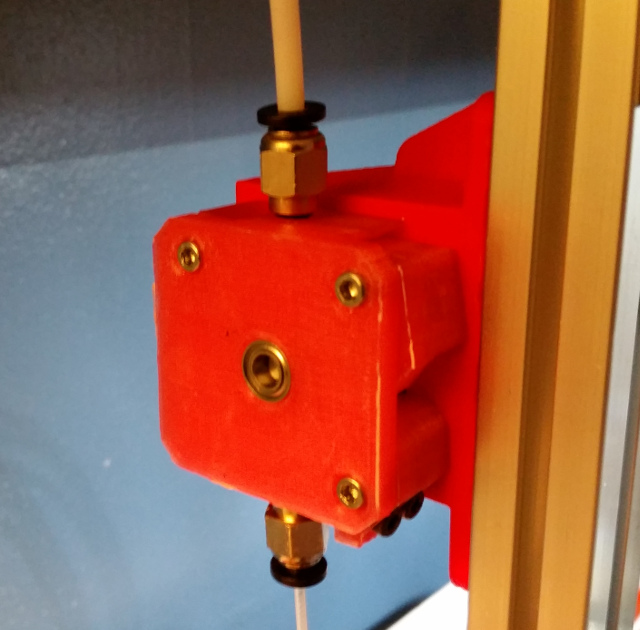
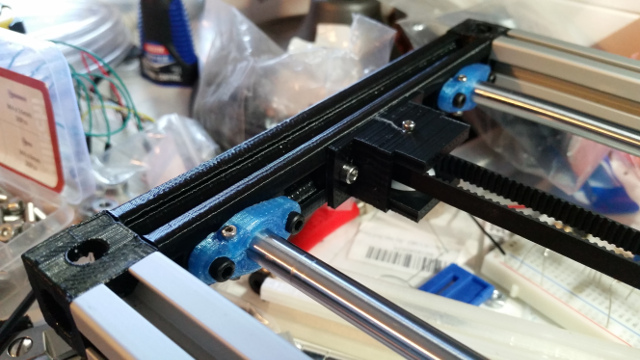
Anyhow, here are some more photos. This one's of the adapters attached to my two E3D Lite6s:
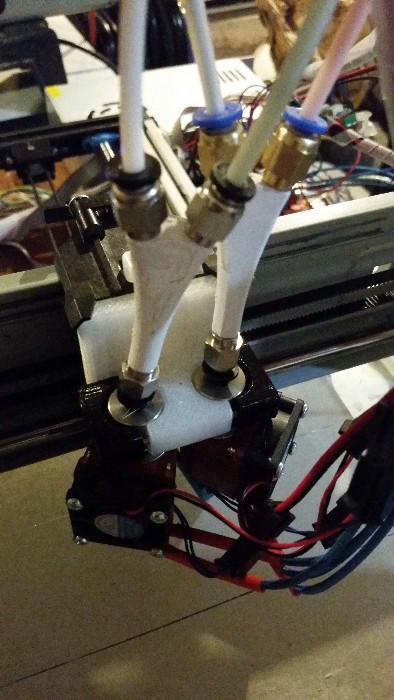
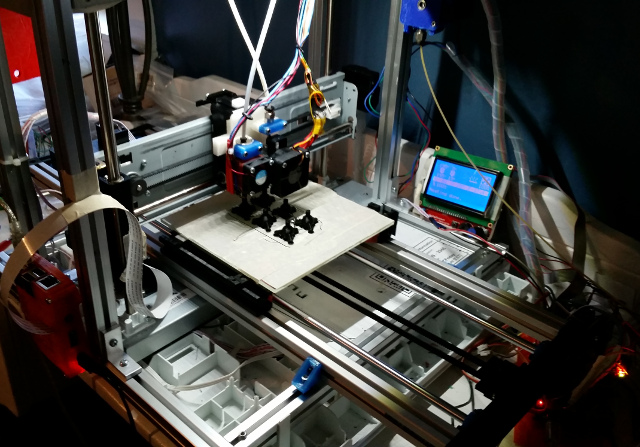
And a shot of my four extruders:
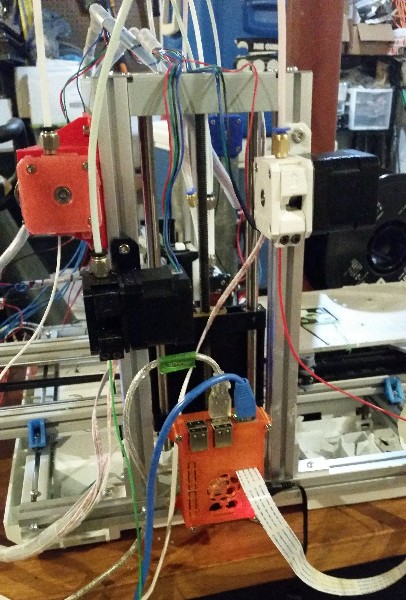
They're all different colors for easy identification. In tool order, it goes red, blue (it's in the background attached to the other side of the frame), black, then white.
All my settings at the moment are S3D specific. I configure four extruders with normal settings, then I set up two temperature controllers, one for the left nozzle, one for the right. I then define a new process for each color I'm using, and in that process configure the temperature controllers appropriately for the active/inactive tool temperatures I want. Unfortunately, though, S3D only uses the temperature controllers between layers. I need temperatures to change for the same nozzle within the same layer. So that part is handled with my toolchange gcode.
The Start, Toolchange and End gcodes work together to manage the retraction. When off, all filament needs to be retracted above the adapters. The start gcode reloads the filament (100mm in my case) up to the nozzle after heating, and uses G92 to make sure the other tool E positions are set correctly. S3D issues a G92 E0 right at the beginning of the print, after the start gcode, so this only applies to T0 which has been loaded to the nozzle.
The toolchange script moves the X carriage all the way left (so that if there's any leakage during retraction or heating, it doesn't hit the print) and retracts the filament to -100 before switching tools (this happens after any layer change or normal retraction is done - I use 6mm for my bowden setup). I set S3D's own toolchange retraction setting to 0 so that I can override its behavior without surprises in my gcode (otherwise, it would force me to use the same retraction and reload feed rates, which I want to customize -- retraction can be much faster than the reload, which needs to be slower toward the end in case of accidental purge). After fully retracting, it readjusts temperatures, switches tools, and reloads the filament before continuing the print.
This setup requires an ooze shield, not just to avoid leaks from the nozzle when moving X back into place, but also to prime the colors as I explained above.
In the photos above you can see a few artifacts of the X carriage "idle" position while reloading and reheating -- there's a couple of streaks where there was some accidental purge and the ooze shield didn't catch it all. I'm still playing with retraction settings to see if I can avoid this (another "normal" length retraction just before moving X back over the print might help).
Start gcode:
M42 P58 S255 ; turn on the lights
M104 T0 S[extruder0_temperature]
M104 T2 S[extruder2_temperature]
G28
M109 T0 S[extruder0_temperature]
M109 T2 S[extruder2_temperature]

T0 ; reset tool to T0
G92 E0
G1 E110 F1000 ; reload T0 filament at a medium pace

; record other filaments as retracted
T1
G92 E-110
T2
G92 E-110
T3
G92 E-110
T0
Toolchange gcode:
; toolchange script runs post-retraction old_tool's E is <= 0 right now
; don't use S3D's toolchange retraction with this or distances will get messed up

; move new hotend out of the way for cleaning purge
T0 ; move relative to T0
G1 X-32 F6000; move X left for reload

; if we want to purge
 do this...
;{IF NEWTOOL=0} G1 X-32 F6000; move X left for T0 purge
;{IF NEWTOOL=1} G1 X-32 F6000; move X left for T1 purge
;{IF NEWTOOL=2} G1 X155 F6000; move X right for T2 purge
;{IF NEWTOOL=3} G1 X155 F6000; move X right for T3 purge

T[old_tool] ; switch back to old/current tool for retraction past splitter
G1 E-100 F6000

; change temperatures
{IF NEWTOOL=0}M104 S[extruder2_temperature] T2 ; set T2 inactive extruder to cooldown temp
{IF NEWTOOL=0}M109 S[extruder0_temperature] T0; Set T0 new active extruder to normal temp and wait for it to reach temperature before proceeding.
{IF NEWTOOL=1}M104 S[extruder2_temperature] T2 ; set T2 inactive extruder to cooldown temp
{IF NEWTOOL=1}M109 S[extruder0_temperature] T0; Set T0 new active extruder to normal temp and wait for it to reach temperature before proceeding.
{IF NEWTOOL=2}M104 S[extruder0_temperature] T0 ; set T0 inactive extruder to cooldown temp
{IF NEWTOOL=2}M109 S[extruder2_temperature] T2; Set T2 new active extruder to normal temp and wait for it to reach temperature before proceeding.
{IF NEWTOOL=3}M104 S[extruder0_temperature] T0 ; set T0 inactive extruder to cooldown temp
{IF NEWTOOL=3}M109 S[extruder2_temperature] T2; Set T2 new active extruder to normal temp and wait for it to reach temperature before proceeding.

; switch to new tool and issue our own restart gcode. S3D's restart length if set will extrude beyond this point

T[new_tool]
G1 E-30 F6000 ; restart (fast most of the way)
G1 E0 F300 ; restart slow last 30mm

; skip purge for now
; G1 E25 F100 ; purge 25mm
; G92 E0 ; reset position to ignore purge length
End gcode:
; end gcode
; E is at <=0 (retracted) at this point

G28 X ; home X to get it out of the way
G1 E-100 F600 ; retract filament into Y-splitter
T0 ; Switch back to T0

M104 S0 T0; turn off extruder 1
M104 S0 T2; turn off extruder 2
M140 S0 ; turn off bed
M106 S0 ; turn off cooling fan

G90 ; absolute positioning

; G1 Y400 F5000 ; present part

M84     ; disable motors
M42 P58 S0 ; turn off the lights
This weekend I might try translating my settings into Slic3r to see how that goes. I worry about priming, though, because Slic3r's ooze shield is only a single color, and it has no prime towers to speak of (though there's a new post-processing prime tower script I found on reprap.org that I'm eager to try out).
I also haven't tried printing TPU in this setup yet. I was able to print TPU at <30mmps with these extruders previously, despite being a bowden configuration, but I'm wondering if the extra long retractions and the physical features of the Y-adapter construction might make that much more difficult. I'll definitely post here once I've tried it.