51 (edited by Anthem 2017-03-12 22:35:31)

Re: Thoughts on extending the Da Vinci Jr

Tin Falcon wrote:

Anthem IMHO you deserve the mod of the year award for this .

I am not a davinci fan although I was tempted to by one as a first printer.
I did however get bit by the build bug and did a kit build and just ordered a second kit build. I know in the beginning I thought you crazy  for doing this extreme mod.
What can I say it works . you did things others including myself would have not attempted. Congratulations are in order and I hope this thread has led others to follow their dreams.
Tin

Wow, thanks, Tin Falcon.

I do this mainly because I'm a hobbyist and jack-of-all-trades at heart. When I see the possibility for improvement, and it's within my means, I become obsessed with making it happen. I also embrace the open source spirit. If I know how to do something, I like to spread the knowledge and make sure anyone who has the interest is able to as well, and then hopefully they too can help improve on it. I see 3D printing as a prime example of an area where that's as important as ever -- there's so much open source hardware and software for it out there already, and working together as a community, there's so much room for new ideas and methods to take root to take even at-home printing to new levels.

Anyway, thanks. No awards are necessary when I get feedback like that.

But since I'm posting anyway, I'll add another update. I tweaked my gcode to use the M218 command, and it works! By purging 25mm on tool changes I can even get a clean red. Pics or it didn't happen:
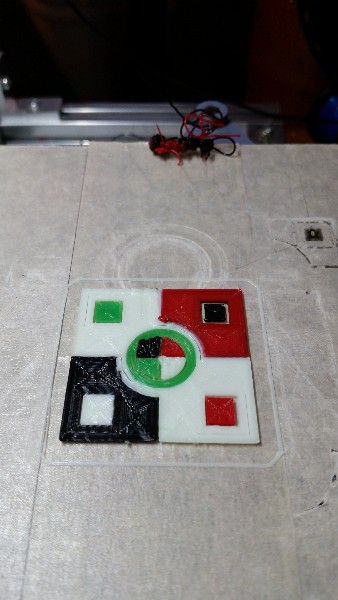
http://soliforum.com/i/?vANUwq4.jpg

(I'm not quite sure why it looks a little over-extruded; probably because I just re-leveled the bed after installing the hardened nozzles and it might be a little too high.)

In that photo you can see part of the red and black bird's nest of purges. I don't have a proper purge bucket, so I'm relying on the low height of this print and my print bed to catch the purged strings as the hotend moves over the print. But as you can see, no need for an ooze shield or prime tower here, and it produces much more reliable colors. Purging 25mm of filament with a 0.4mm nozzle produces a string about 230mm long, and while you can still see a little bit of shading on the red perimeters, I'd call a 25mm good enough for most purposes (on my 230mm string, the red starts to look "clean" in the last 10mm or so, so I'm hopefully wasting as little filament as possible).

The downside to purging is that if you do waste 25mm (or however much you decide is good enough) of filament with every tool change. Say you're printing a 10cm tall piece at 0.1mm layer height, that's going to waste 25 meters of every color, and that number is solely based on layers (and exact number of toolchanges), not actual print volume. Not only is that a lot of wasted filament, but you'll have to empty your purge bucket several times mid-print. That, of course, is perhaps an extreme example, but it does highlight part of the problem inherent in sharing nozzles between colors.

Of course, it's a trade off. You can waste filament in purging/priming by sharing nozzles, or you can deal with the frustration of getting all your offsets just right and losing print volume (and increasing your out-of-pocket expenses) by actually installing four different nozzles.

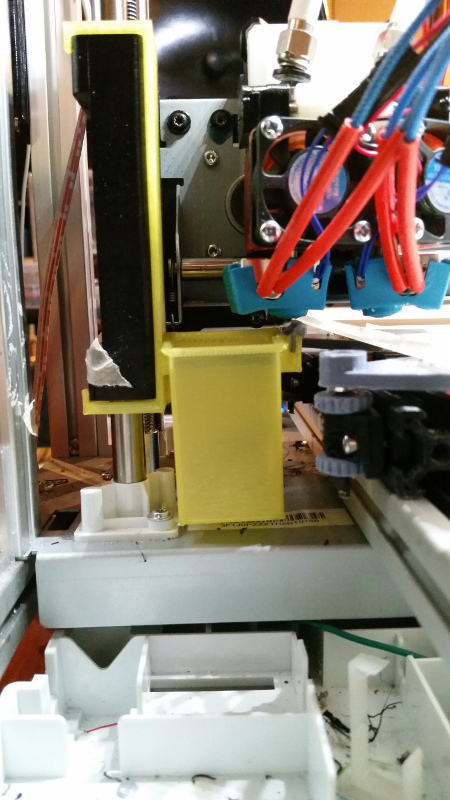
At the moment, I'm going forward with the purge idea since it seems to work so well. I'm now designing some clip-on brackets that can be used for purge/wipe buckets

52

Re: Thoughts on extending the Da Vinci Jr

Other than the prusa I3 MK 2 4 color upgrade kit  you are the first I have seen  doing 4 colors . The first in the wild if you will . I have thought of doing the whole rbg bend thing and it would likely work but one would likely factor in a a bit of Hysteresis.(The phenomenon in which the value of a physical property lags behind changes in the effect causing it, as for instance when magnetic induction lags behind the magnetizing force.)
Tin

Soliddoodle 4 stock w glass bed------Folger Tech Prusa 2020 upgraded to and titan /aero extruder mirror bed
FT5 with titan/ E3D Aero------MP mini select w glass bed
MP Utimate maker pro-W bondtech extruder
Marlin/Repetier Host/ Slic3r and Cura

53

Re: Thoughts on extending the Da Vinci Jr

I'd love to try a true RGB/CYMK mod, but one step, and color, at a time smile

For a CMYK+white setup you'd of course need five extruders. That could be done on a RAMPS 1.4 board with a Stepper Expander x3, and you'd still have enough pins. Marlin, though, would take quite a bit more editing to handle that since I don't think it has defines set up in its configuration to handle more than 4 extruders.

Now, how the color mixing itself works, I don't have experience with that. I've read a few howtos on it, but I haven't grasped the configuration and firmware setup yet.

The biggest limitation I see at the moment is software support -- until we have software that will literally let you "paint" a model either with a virtual paintbrush or an overlaid texture (and somehow add a sense of "depth" to that texture for the solid nature of the model), I'm not sure a full-color setup is all that useful. Don't get me wrong, I'm not dismissing the idea or the concept of it. I just think it would be really hard to make it do exactly what you want it to.

Maybe such software already exists somewhere, but I don't know about it. I'd love to, if anyone is aware of any.

54

Re: Thoughts on extending the Da Vinci Jr

OK, so I have a version 1 of my "purge bucket" for the left nozzle. I created it in Onshape because doing something this detailed in OpenSCAD would be insane and take forever.

https://cad.onshape.com/documents/f2aa3 … 7e53c899a4

Once I get it all printed out and fully tested I'll post it on Thingiverse. For now I'll post the bracket and blade STLs here.

The neatest thing about this is I'm using a clip-on attachment for the left side Z carriage. I wasn't sure at first how best to attach this to the Z axis, but this clip actually works quite well, and it would be easy to modify to add other attachments/tools that need to follow Z.

The blade itself I print in TPU. It can be a little tricky to wedge it into the slot, but it fits snugly, and just barely grazes the nozzle which is exactly what I wanted. The really tricky part is that there's hardly any clearance between the center of my nozzle and my Y axis bed levelers, so the tip of the blade is just a mm or two away from the nozzle center, and my levelers just barely clear the end of the bracket when Y moves. Very tight spaces smile

The bracket has to be printed with the brace flat against the bed, and you have to use supports for the clip parts since they're then floating. S3D's supports are pretty nice and pop out very easily and cleanly. However, because of the length and thinness of the bracket parts, you almost have to have a heated bed to print this properly. Fortunately I just picked up an MP Select Mini last week, which is still both large enough and hot enough to print this bracket perfectly. Printing it on my Not-so-Junior did not work well. No heated bed there, and it's currently living in a chilly basement sad The bracket lifted off the bed by a good 3mm at the far end, making it not fit properly. You could probably manage it with a very wide brim.

Pics to come soon.

Post's attachments

purge_blade.stl 1.06 kb, 4 downloads since 2017-03-14 

purge_bracket.stl 8.58 kb, 5 downloads since 2017-03-14 

You don't have the permssions to download the attachments of this post.

55

Re: Thoughts on extending the Da Vinci Jr

So for the most part, this is just a home built open source printer that XYZ parts where used on? I mean if you get rid of the case, firmware, and so fourth it really is no longer right to call it a JR. anymore is it?

Good job by the way.

Printing since 2009 and still love it!
Anycubic 4MAX best $225 ever invested.
Voxelabs Proxima SLA. 6 inch 2k Mono LCD.
Anycubic Predator, massive Delta machine. 450 x 370 print envelope.

56

Re: Thoughts on extending the Da Vinci Jr

carl_m1968 wrote:

So for the most part, this is just a home built open source printer that XYZ parts where used on? I mean if you get rid of the case, firmware, and so fourth it really is no longer right to call it a JR. anymore is it?

Good job by the way.

That's why, for lack of a better name, I'm calling it my Not-so Junior smile But yes, you're basically right. The frame, Z and X movements are stock, but practically nothing else remains of the original.

57

Re: Thoughts on extending the Da Vinci Jr

at what point do you go from a highly modifies printer to the original being an organ donor or calling it franken printer.  Jr grew into more than the sum of its parts . Anyway you had fun pushed way beyond the limits of the original and have something new and better.

A rose is still a rose ....

or is called   potpourri  if dried and mixed with other flowers hmm..
Anthems Monster ??

Soliddoodle 4 stock w glass bed------Folger Tech Prusa 2020 upgraded to and titan /aero extruder mirror bed
FT5 with titan/ E3D Aero------MP mini select w glass bed
MP Utimate maker pro-W bondtech extruder
Marlin/Repetier Host/ Slic3r and Cura

58 (edited by Anthem 2017-03-19 15:58:34)

Re: Thoughts on extending the Da Vinci Jr

So, I hit a few snags with the purge idea. I still think it's the best solution, but unfortunately the physical construction of my monster makes the intallation of a purge blade not work so well. There's just not enough clearance between the parked hotends and my bed mounts to allow for a blade that can wipe the nozzle.

I did get one designed for the left side, and it printed perfectly and fit well -- sort of. But I made the cup too tall by accident, and there just isn't enough room to get that blade past the hotend without it hitting the bed mounts. The cup idea is pretty silly anyway, since the amount of purged material I'm dealing with far exceeds what a cup this size could hold.

Anyway, I think it was a neat attempt, and the clip-on part for the Z carriage could be useful elsewhere. If I ever redesign my bed mounts I might revisit this idea.

http://soliforum.com/i/?Hd3PSGw.jpg

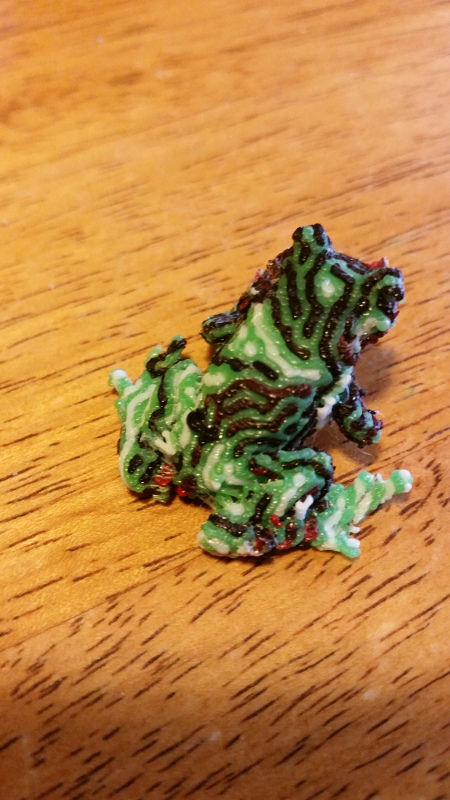
In other news, I attempted to print a 4-color frog based on the fun 2-color frog on thingiverse: https://www.thingiverse.com/thing:329436

I printed this at 0.2mm layer height by just purging into thin air and adding an ooze wall to keep the strings off the print. It's a messy process, and there are still some bugs to work out, but the results weren't completely disastrous. I had a lot of trouble removing the supports and ooze wall -- lessons learned below -- so it didn't come out that well, but you can still see basically what's possible here.

http://soliforum.com/i/?VZUiKLK.jpg

Things I learned with this print:

  • Purging into thin air is fine, but it's good to clear out the mess once in a while so it doesn't build up too bad. It wasn't an issue for me, but in theory you could end up with the purge strings interfering with your bed, gumming up the works, or just getting dragged into your print

  • I used S3D's "waterfall" ooze shield at a 2mm offset. With the messiness of the purge, the supports and ooze shield at this distance just ended up fusing with the print, and it was very, very hard to remove. I had to chip away at it gradually with wire cutters and needle nose pliers.

  • All those tool changes, especially for a piece this small where the actual time spent per color per layer is short, dramatically increases the print time. This small ~3x3cm piece (I reduced its size 50%) took 9 hours to print. It's definitely not a very scalable process.

  • Simplify3D, despite its $150 price tag, is really about $150 worth of bugs. If you don't set its ooze shield and supports to use All Extruders, it will happily attempt to cold-extrude from the inactive nozzles without using your toolchange gcode routines. I figured this out the hard way when I tried to set all the supports and ooze shield to print in white, which probably would have made removing those additions much easier.

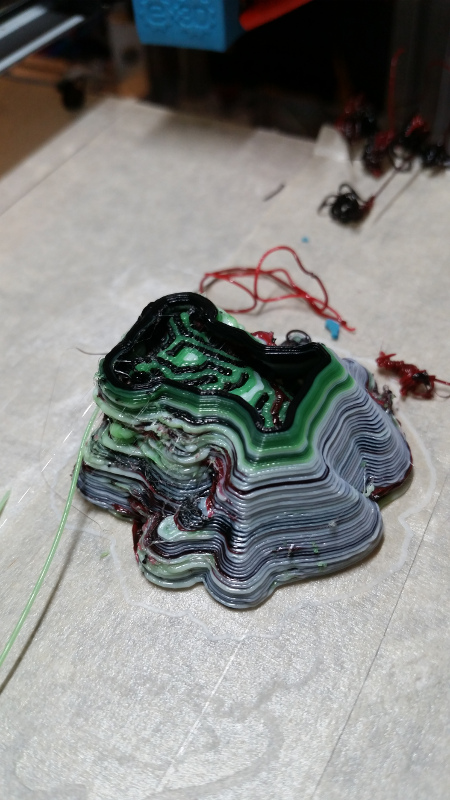
You can see the interesting-looking ooze shield in this shot:

http://soliforum.com/i/?cPgGyA7.jpg

I'm attempting a new print of the same piece, this time with a larger offset for the ooze shield, and I'm trying out using a consistent temperature for both filaments in each hotend without cooling the inactive nozzle. Since I'm retracting the inactive filaments a whole 110mm, there's really not much chance for ooze anyway, so I'm trying to reduce the print time by keeping the empty nozzles hot. I'm also keeping the left nozzle at 190 and the right at 205 so that I don't need to perform any M109s during the toolchanges. That alone seems to be reducing the print time to about 6 hours from the original 9.

59 (edited by Anthem 2017-03-21 03:40:36)

Re: Thoughts on extending the Da Vinci Jr

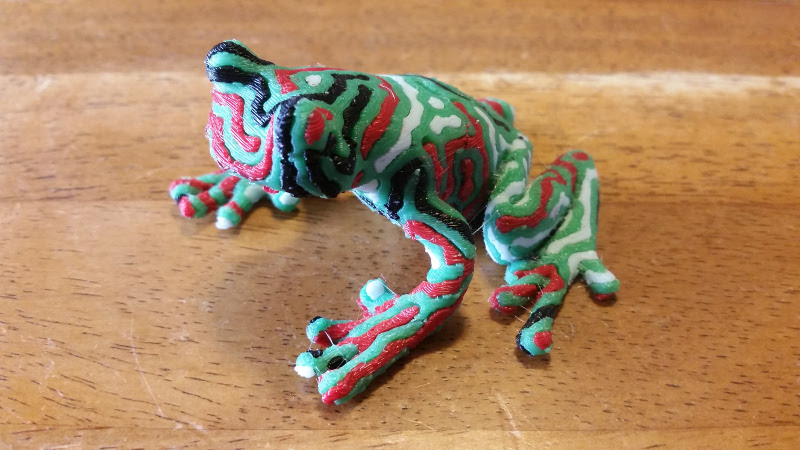
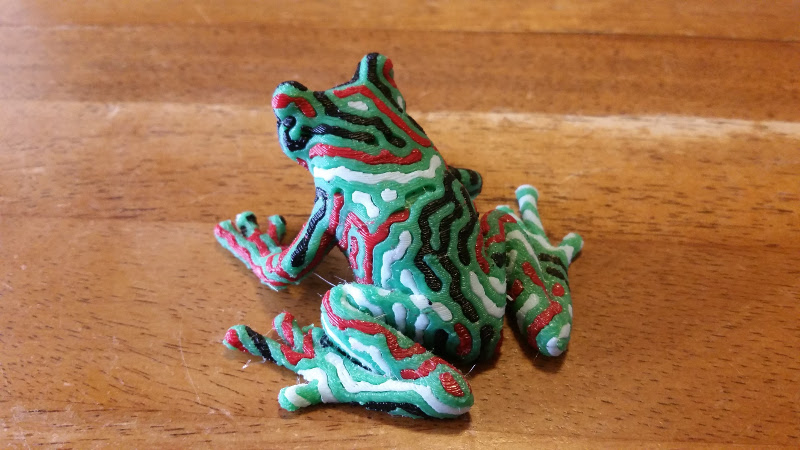
So here it is, the culmination of all this work. It's not perfect, but few things are. I got my toolchange time down a bit more, after realizing that S3D was still inserting its own M109s. So I dared print the frog full size.

19 hours of print time, and half an hour of removing supports later (multi-material/multi-color supports are horrible):

http://soliforum.com/i/?jfmdQn2.jpg

http://soliforum.com/i/?XrIEff2.jpg


The main problems with this print were that the red turned out horribly. I printed it at 205 instead of my usual 210 to try and compromise between the black and red filaments on the right nozzle without having to issue M109s and slow down the process. Definitely a tradeoff there. Some of the red didn't adhere properly, evidenced by the missing bit right in the middle of the frog's back.

The other problem was that the supports, as I mentioned, were TERRIBLE to remove. I think I have a small (0.1-0.2mm) adjustment to make in the hotend offsets, because the supports were extra dense where the green met the red. The red tended to fill in between the walls of the green support, making it a solid block that was really stuck on and really hard to break up.

The other issue is that I under-extruded slightly. That obviously didn't help the red situation either. I had been playing with my extrusion multiplier a little and I think I had it too low for this print. That seems to be why the seams between different colors are so obvious (though it gives it an interesting "bumpy" quality, it also means it's extra fragile -- I nearly broke off a front foot trying to remove the supports). I'm pretty sure this is the main reason for the wide seams, and it's not just a nozzle offset problem, because you can see the space between the green and white clearly, when both those colors were being extruded from the same nozzle (so there should be absolutely no offset issues).