1 (edited by Anthem 2016-08-06 15:33:32)

Topic: Thoughts on extending the Da Vinci Jr

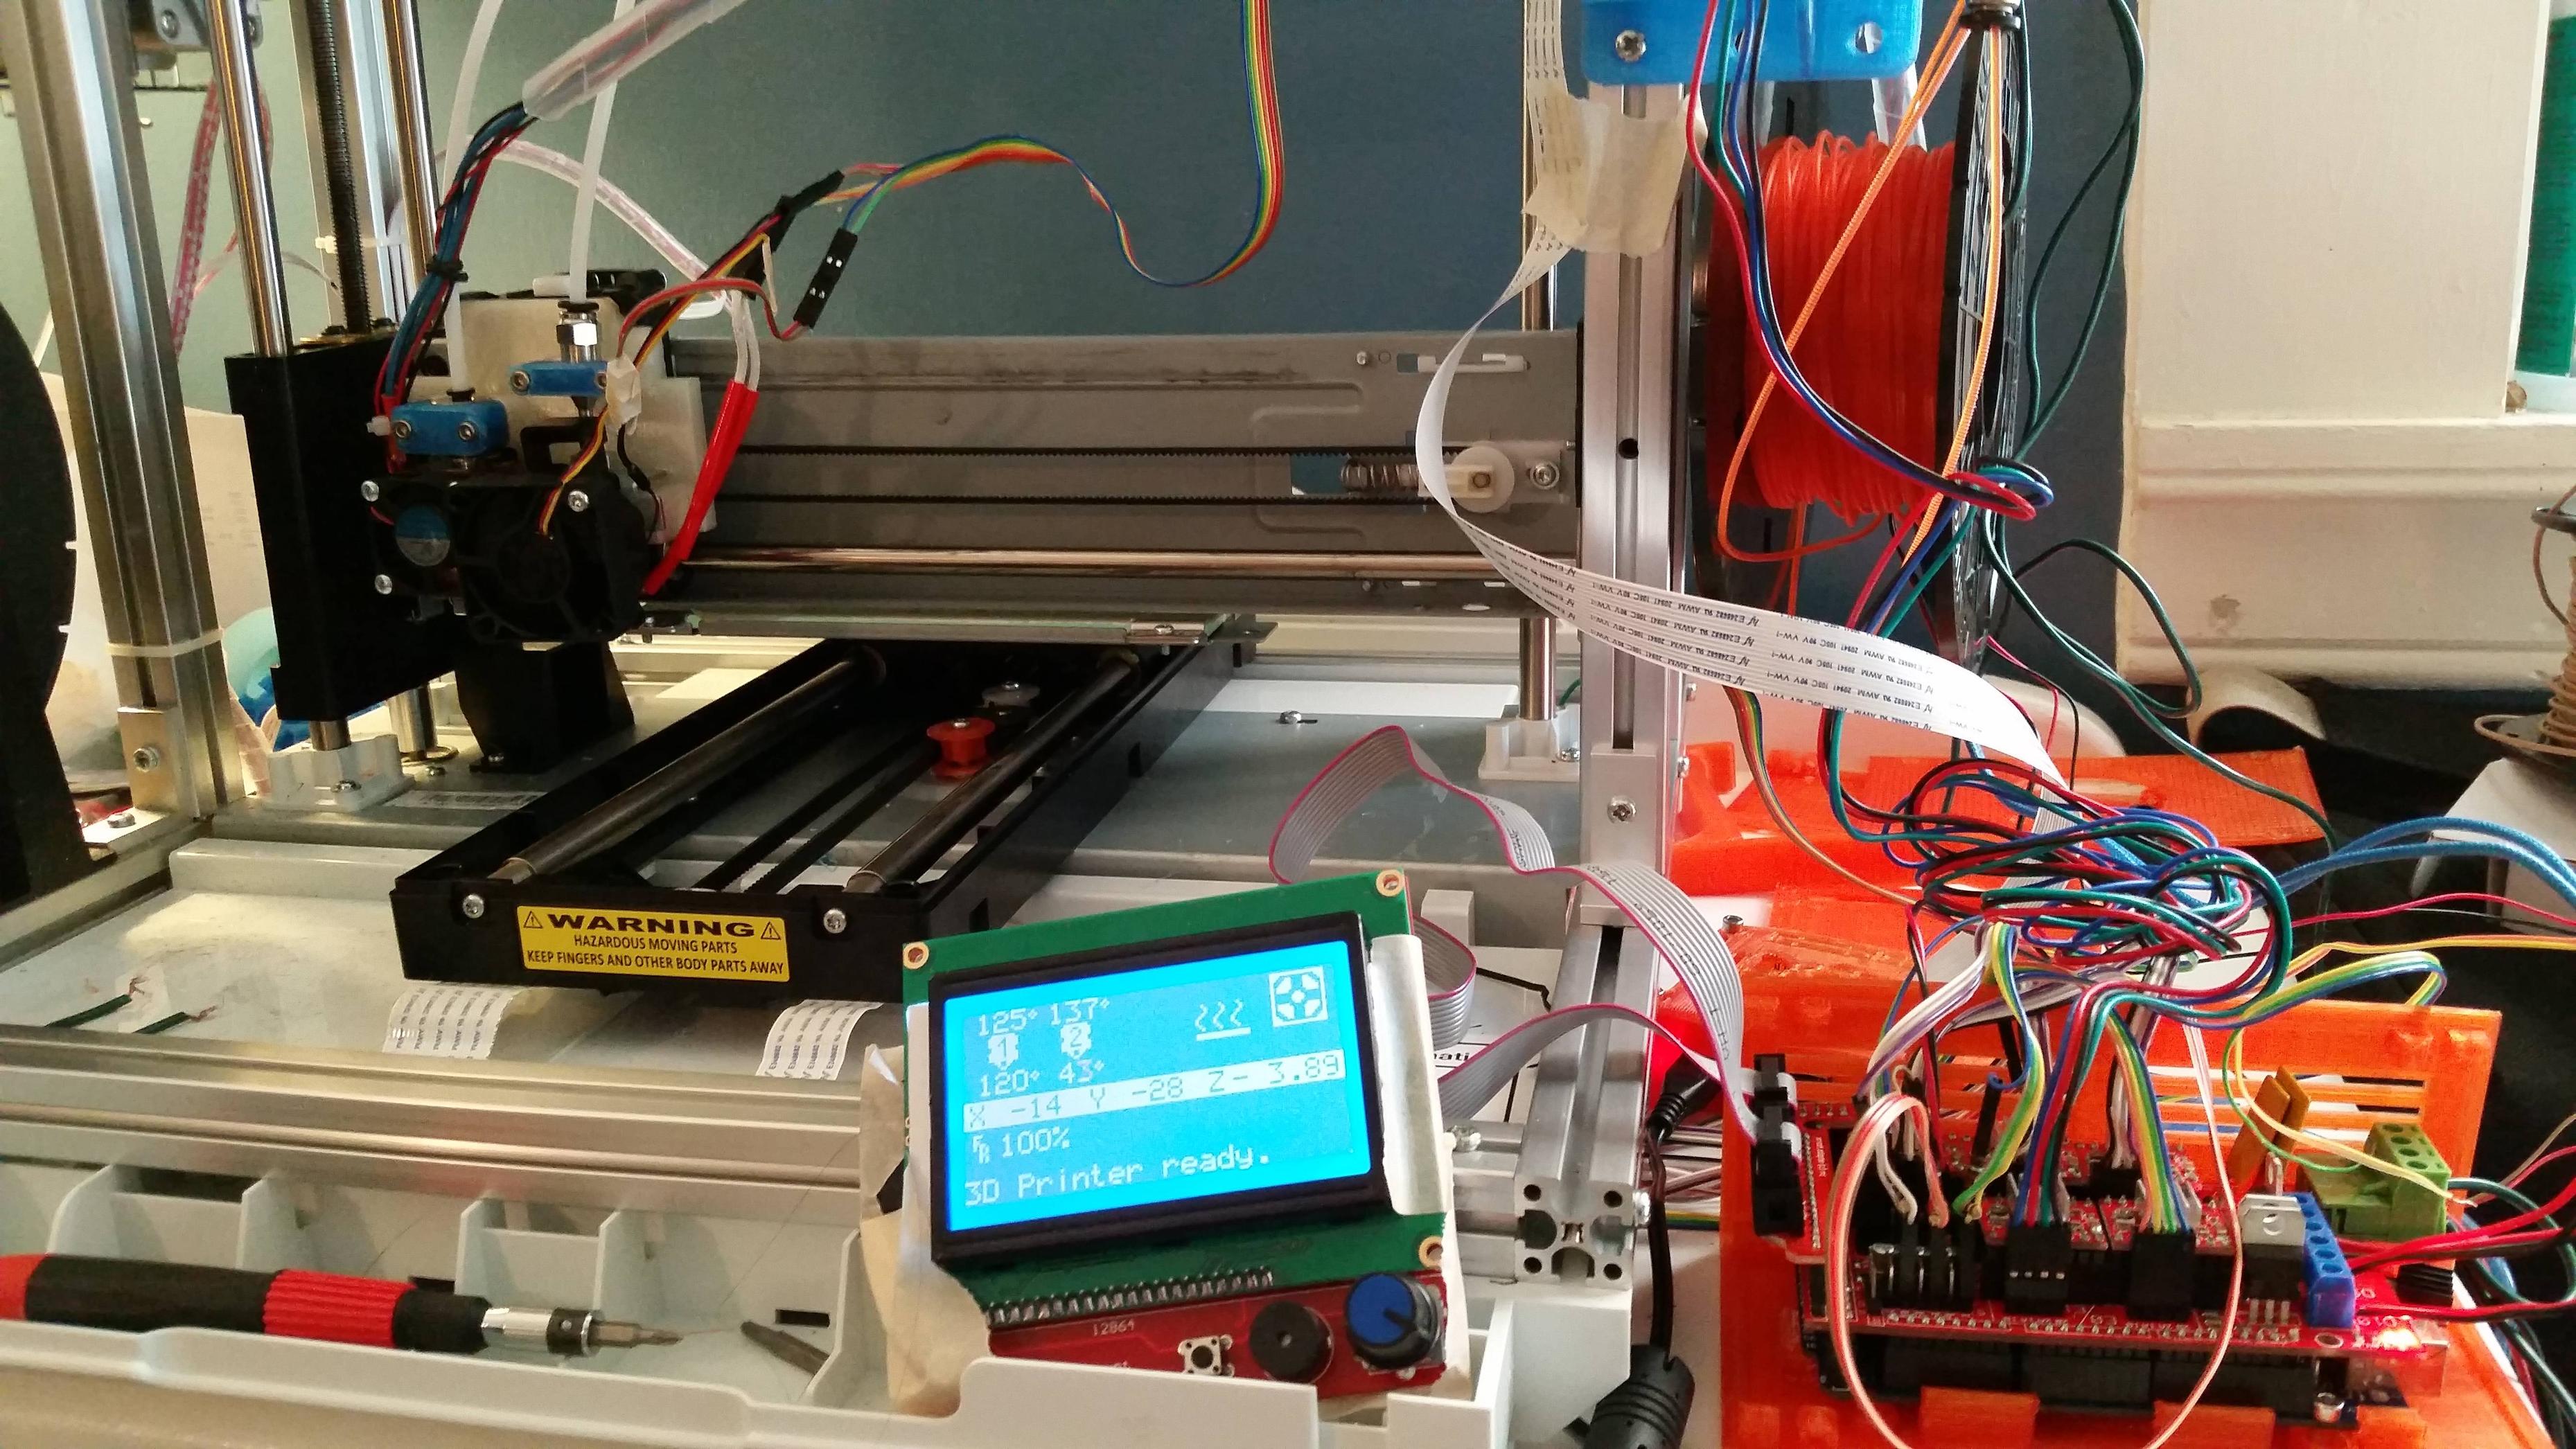
Hey guys. Since my RAMPS conversion (still working on that thread; stay tuned) I've been thinking of other ways I could trick out my Da Vinci Jr.

With RAMPS 1.4, my prints are turning out fantastically and I love not having to fuss with those stupid chips. I just printed my son a glow-in-the-dark ghost using Alchement Blue glow in the dark filament. Just this morning I printed v1 of a replacement optical endstop cover (to repair one I busted during my conversion).

Anyway, my thoughts on this have been along two lines:

  • Adding a second extruder

  • Extending the print volume

I'm not too interested at the moment in adding a heated bed, though that's a possibility. I know kr15_uk and probably others have added one to Jrs already.

I've done a bit of research on both, and I definitely think that with RAMPS 1.4, adding a second extruder is doable. However, it would cost a bit more money than I want to spend on it right now, as I would need (I think):

  • A new hotend. E36 V6 runs about US$75. An E3D V6 knock-off would be only about $15, but I'm unsure about the hassle of using a knockoff that doesn't get great reviews.

  • An extruder assembly. About $35. I could save some money here perhaps and buy the stepper and bolts separately and print the holder, but this is hardly the largest cost and sourcing the parts separately is just annoying

  • More PTFE tubing and end clamps ($5)

  • A new power supply. I'm using the stock Jr supply for now, which is only 5A. Plenty for RAMPS and the stock Jr hardware, but not enough to support a second (and higher wattage) heater (~$35).

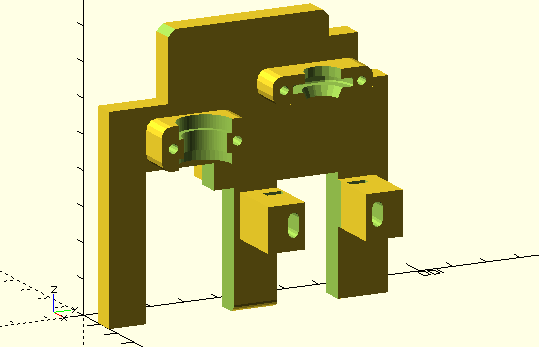
  • To design and print a new carriage bracket for the dual hot-ends

So the BOM for that project is adding up quick, and I don't want to tackle another $130-150 project right now. Definitely I think a possibility though.

On the other front, extending the actual print volume, I have some other thoughts. There are of course three axes, each taking a different approach on the Jr.

Y-axis
The Y axis seems like the easiest target for extending the printer.

This would require removing the back panel and (re)moving the front LCD (mine isn't useful or present anymore anyway).

However, the whole Y gantry assembly would have to be modified or changed out somehow. The Y endstop is at the back of the printer and clips into the Y gantry base. Easiest thing to do would probably be to remove it entirely and print new parts to make a larger version of it.

I see two options from there:

  • Buy a new belt and longer glide rails, install them in the newly (printed) gantry assembly, reusing the existing gears and pulleys with the newly-printed Y gantry assembly. This should be a pretty reasonable and inexpensive (~$30?) modification as long as you can source the rails without too much trouble

  • Replace the stepper gear and convert the Y axis to some kind of direct-drive without a belt. I'm thinking here about something similar to the RepRap Snappy's XY drive https://github.com/revarbat/snappy-reprap/wiki/Assembly. This conversion should be entirely printable (cheap!) but requires a bit of designing, plus the troublesome part of pulling the gear off the stepper (or replacing the stepper entirely at a higher price point).

Z-axis
Extending the Z-axis seems like the next easiest target. It should be possible (as far as I can tell without trying it) to print 20x20mm V-slot extenders to raise the top of the unit a few inches, swap out the vertical rails (three: two on the left side, one on the right) with longer versions using the same hold-fasts as now, and swap out the left side drive screw with a longer one.

Sounds like a simple matter, but it requires non-printable metal parts, though they should be pretty reasonably priced.

X-axis
I don't have a sound plan for this one yet. It would have to involve removing the right side of the unit entirely, extending the V-slot rails, probably moving the existing V-slot upright outward to the new edge, then somehow replacing the entire X gantry. On the bright side, changing the X dimension won't necessarily require modifying the bed bracket because the glass clips are parallel to X. A new sheet of glass could be added that (maybe temporarily) overhangs the bracket until an additional bracket or supports can be printed.

Needless the say, this extension would be a lot of work. The structure of the X gantry and the placement of the uprights makes "simple" extension impossible. A new gantry would have to be fashioned, or the entire drive mechanism changed out.

I've thought that maybe the X drive mechanism could be switched to use a geared rack, on which the X stepper itself and the hotend are mobile. Something similar to the X/Y drive mechanisms of the Dollo [uri]http://dollo3d.com/[/uri].


Anyway, I'm probably crazy even to propose any of this. Thinking about it, the Z extension is probably the easiest modification to make, but I find myself maxing out my XY dimensions far more often than the Z, so it's probably not as useful.


Has anyone else given thoughts to this kind of mod, either on the Jr or another machine? Anyone have real experiences doing so?

2

Re: Thoughts on extending the Da Vinci Jr

@anthem - personally I would recommend to avoid knock-offs. If E3D v6 is too pricey and you're not planning to print any exotic filaments which require 245c+ I'd strongly suggest to get E3D Lite6 hotend which is almost 2x as cheap... Also if you do dual extruder system in the future you could keep Lite6 as your 2nd hotend.
Talking about PSU, in theory it could handle 2x hotends and 2x extruder motors, in theory...
I haven't done any calculations but seeing that it can handle 40w heater block instead of 25w one makes me believe that you could do 2x 25w hotends. Only question is how much yet another extruder stepper draws. (I have couple of steppers sitting somewhere, I could wire it in parallel to my extruder and see simple "will it fry my PSU" test! Easier than hooking up multimeter in chain to measure! wink I'll post my findings.)
Also, you could attach another PSU and wire it up via relay to sheer of load. When you buy LED strips of eBay they usually come with 5A 12v powerbricks.
But yet again, PC PSU would be better option, much neater that's for sure.
Actually I scored one myself the other day of eBay - one of those ultra thin PC PSU's hence I wanted to avoid regular bulky PSU. It was in used condition but good one and cost me only £11 delivered. Could recommend that.

About extending print volume. Y axis is a bit of a pain hence you need to redesign whole Y carriage just to get more space. It's not like Jr wouldn't benefit from a much sturdier Y carriage, it's more about that you said initially that you want to keep all that Jr cover plastic.
Z axis - to be honest I can't remember when last time I've printed anything higher than 100mm so question is is it worth spending a money on new longer linear rails and lead screw (I'd swap lead screw to one of those ACME lead screws though, improves z layer quality drastically.
X axis is the easiest way I'd say. To be honest I've been looking on redesigning X carriage anyway hence I do hate that right hand side linear clamp which makes one side to sag. Also that hotend head design is awful where top slide is based on plastic sliding over the greasy sheet metal. And if you design it well you could easily get 10-15mm from the right hand side and if you go through the effort redesigning right hand side bit you could get extra 5-10mm there but that could include moving stepper to the other side of the Z axis rods.

Oh man, I do have so big temptation to convert my one to RAMPS myself, especially because I have already bought pretty much everything needed for the convention when I was stuck on firmware v2.2.6...

Guys, does anyone want to buy my logic board with working firmware v2.2.0 on?! I'm in London, UK though... wink

3

Re: Thoughts on extending the Da Vinci Jr

I was able to improvise a gear puller to get the stepper gear off the shaft on my solidoodle (after first using a heat gun to get the loctite secured set screw out :-). Details about half the way down here:

http://tomhorsley.com/hardware/solidood … riage.html

4

Re: Thoughts on extending the Da Vinci Jr

@kr15_uk: If I can extend my print volume I'd be happy to live without one or more side panels on my printer.

If you have ideas on how to redesign the X axis, I'm all ears and I'd even be happy to collaborate and help test some stuff out. If not for having to redesign the whole thing I'd agree is the most obvious target.

I purchased two 30" rails and some GT2 belt. US$27 shipped. I'm going to attempt the Y axis upgrade sometime in the next few weeks. Redesigning the carriage for printing is going to be the tricky part. I'll probably reuse the same carriage for the bed bit print some additional supports once I'm ready to get new glass. If you have any other ideas on that I'm curious to hear them.

5

Re: Thoughts on extending the Da Vinci Jr

kr15_uk wrote:

Oh man, I do have so big temptation to convert my one to RAMPS myself, especially because I have already bought pretty much everything needed for the convention when I was stuck on firmware v2.2.6...

Guys, does anyone want to buy my logic board with working firmware v2.2.0 on?! I'm in London, UK though... wink

Go check out my update to my conversion thread. smile  I just posted a massive update. I have full instructions up now for the build itself, the rest is just configuration and fine tuning.

6

Re: Thoughts on extending the Da Vinci Jr

Thanks for the tip about the lite6. With that and a 3maker metal extruder the upgrade cost is only $85, so I'm going to try it. I'm hoping that the 5A power supply will be enough for it all, we'll see. If not I'll improvise.

7

Re: Thoughts on extending the Da Vinci Jr

@Anthem - If you want I have designed bracket for E3D v6 and Lite6. It's early version and it's haven't been refined yet but it is place to way to start.
Also I've printed 2x extruders of thingiverse to use as many existing parts as possible.
I quite like this one, but you certainly need to get good stiff 10mm x 30mm spring for it.
http://www.thingiverse.com/thing:711401
(Printed one with longer mounting bracket so I can mount it easily, but I'm not entirely sure how it would fit if you ar using those Jr cover plastics (I ditched them all, initially I thought they are limiting noise but in my case they just resonated the sound coming from printer while operating))
Hence I haven't had stiff enough spring in hand I've printed this one.
http://www.thingiverse.com/thing:767951
It's a remix of http://www.thingiverse.com/thing:275593 so you can use MK7 drive gear instead of MK8 (Jr uses MK7 drive gear)
It's simple, works very well but it's made to be mounted on right hand side.
You can either mount it in quite awkward position which still does the job or print it in mirror and reverse direction in Marlin or simply swap pins around (what I did hence I'm on stock firmware).

That'll save you a bit more cash if you have nuts and bolts at hand.

P.S.: Sorry I haven't hooked up another stepper to see if Jr PSU will handle the load...

Regards,
Kris M

8

Re: Thoughts on extending the Da Vinci Jr

Thanks for that. I already have the extruder in hand, but it'll be a few more days for the lite6. I'm out of town next week to, so I won't have any new for a while.

In the meantime I state playing around with the RepRap Snappy models to see if I can adapt them for the Jr Y axis. The biggest rouble there seems like it'll be getting it to print without warpING as its a large rectangular piece (and I don't have a heated bed yet). I have some more experimenting to do with that.

The Y idlers are also probably going to get in the way unless I remove them or design around them. Removing will probably require removing the bottom plate of the unit, so kind of a pain. I could probably design around them if I move the drive rack to the side of the plate instead of being more centered, but I worry that would cause a lot of problems with the sled twisting slightly every time it changes direction and causing print problems.

Otherwise I'm stuck waiting a few weeks for my 30" shafts. I expect that method will be easier for the Y axis extension. I already have the belt in hand, so just need the rods and to design new brackets. If I make any progress I'll let you know.

9

Re: Thoughts on extending the Da Vinci Jr

Hey guys. So I've given a lot of thought to these ideas lately, and I'm in the process of executing a few.

Currently, I've upgraded my Da Vinci Jr hotend to an E3D Lite6 (thanks to kr15_uk who designed the bracket for this).

I'm now printing a derivation of his bracket to hold both the E3D Lite6 and the stock DVJR hotends, and I hope to be able to test that out tomorrow with a RAMPS dual-extruder setup (I'll be using a 3maker all-metal extruder for the second hotend). We've got a long weekend coming up in the 'States so I'm hoping to make some good progress.

I've also given a lot of thought to the Y-axis extension idea. I like the idea of extending the Y axis first for several reasons:

  • It's dead simple to swap out, held in with only four screws (after you get the cover off, which has been my running state for months now ever since I changed out an idler pulley)

  • The Z-axis isn't the most useful for extending. I still want to extend mine, but it's not worth it yet.

  • The X-axis is most in need of a redesign, but is a complicated beast, and I expect a redesign of it is going to have the printer out of commission much longer, whereas I can remove and replace the Y axis as a single piece in just a few minutes.

I have two 8x600mm rails and some LM8UU bearings in hand. I've printed a bunch of 125mm V-slot pieces that I'm going to stitch together into a frame for the rails using some printed clamps, then I'll use printed clamps and some more V-slot to create a carriage.

I'm still debating how I want to go about supporting the glass, but I might try something like this solution first: http://www.thingiverse.com/thing:1320658

I had given a lot of thought to not using steel rails for this mod, and trying to go with a printable solution, using either printed Makerslide (20x40 extrusion with a V-wheel rail on the top edge) or something similar to what the RepRap Snappy does for a printed slide rail. I even got as far as designing a bracket for mounting V-slot where the stock Y-axis goes http://www.thingiverse.com/thing:1745453) and a plate that was I was going to mount the V-wheels to (http://www.thingiverse.com/thing:1745457).

However, in the end I decided that my time would be better spent actually doing this thing instead of iterating with a bunch of designs that might not produce suitable results (I still wonder if V-wheels running on printed V-slot would significantly affect my print accuracy, or at the least be loud as hell).

So I'm going to be printing a ton of brackets, t-nuts, mounts, clamps, and possibly even more V-slot the next day or two to get all the stuff together that I need for this mod. Hopefully by Tuesday I'll have some news. (At the least I plan to have dual extruders! Yay!)

10

Re: Thoughts on extending the Da Vinci Jr

Here's a rendering of my Y-axis idea here. The only parts missing from the diagram are the bed clips (how I'm going to attach the glass to the V-slot), the endstop (I have optical endstops so I'll need a tab to mate with the endstop as well), and the belt clip under the bed to drive the thing. They're small parts that I'll probably design myself this weekend. Most of what you see I cobbled together from Thingiverse. I designed the idler brackets/axles especially for this purpose.

This bed assembly is currently 46mm high to the top of the bed V-slot. I'd like to keep the whole thing close to 46mm since that's about the height of the original DVJr bed. I'm thinking if I can design some end-mount rail brackets to put on the inside edge of the v-slot, I'd save at least 15mm and maybe put the total height close to stock without losing hardly any Z-axis.

http://soliforum.com/i/?KzVGeRE.png

11

Re: Thoughts on extending the Da Vinci Jr

IMHO miking something like a davinci Jr into a a larger dual extruder printer is a bit crazy.
if you want a bigger printer   there  are many options like a regular davinci. Ot one of many kit builds,

the ft 5  Has a rather large build area
https://folgertech.com/products/folger- … rinter-kit

and iirc you can order a second extruder as an option

tin

Soliddoodle 4 stock w glass bed------Folger Tech Prusa 2020 upgraded to and titan /aero extruder mirror bed
FT5 with titan/ E3D Aero------MP mini select w glass bed
MP Utimate maker pro-W bondtech extruder
Marlin/Repetier Host/ Slic3r and Cura

12

Re: Thoughts on extending the Da Vinci Jr

Crazy? Maybe. But for me it's all about the learning experience and satisfaction of having a  printer that I've customized myself.

13

Re: Thoughts on extending the Da Vinci Jr

@tin falcon - Yes it's much easier just to buy another printer which already has bigger build platform and option where you can simply buy dual extruder head makes it even more simpler... But that kind of a kills all the fun!

Some people get satisfaction from printing their designed organic looking game like characters, but some from printing brackets, mounts etc. There's a reason why some of us are classified as hackers, tinkerers etc...

But don't get me wrong, I'm not saying that you are wrong or so, it's simply based on your needs.
For example I have Ultimaker 2 and Original for my "print for money" side business, they work great, consistent result and nearly zero maintenance - they are perfect for the job and I'm not planning to tinker with them or modify anything, they just work.
But for my geeky satisfaction I'm constantly building and rebuilding my custom 3d printer and Jr was so cheap back then that I couldn't say no.

14 (edited by Tin Falcon 2016-09-03 00:01:04)

Re: Thoughts on extending the Da Vinci Jr

To each his own  . you can certainly do that with a kit  the FT 5 is big enough you could scale down one or more Axes if you wanted to.  I have often pondered a steam punk Jules Vernes looking printer  with a riveted iron frame maybe ligum vitae carriages . Or a oak frame steam punk Victorian printer.
But then an aluminum 1950s  Buck Rogers looking printer would be cool as well.

This is for most of us a hobby and we do what we enjoy. It is about fun and learning.

My concern is there comes a point when so many mods have been made there is little left of the original printer. And if you know in your heart you plan on getting to that point it just makes more sense to start fresh  and keep the old small printer working to make parts for the new one or whatever. MHO that and $2 will get you a cup of coffee in most parts of the world.

Dream on and do what is best for you.

Tin

Soliddoodle 4 stock w glass bed------Folger Tech Prusa 2020 upgraded to and titan /aero extruder mirror bed
FT5 with titan/ E3D Aero------MP mini select w glass bed
MP Utimate maker pro-W bondtech extruder
Marlin/Repetier Host/ Slic3r and Cura

15

Re: Thoughts on extending the Da Vinci Jr

Tin Falcon wrote:

To each his own  . you can certainly do that with a kit  the FT 5 is big enough you could scale down one or more Axes if you wanted to.  I have often pondered a steam punk Jules Vernes looking printer  with a riveted iron frame maybe ligum vitae carriages . Or a oak frame steam punk Victorian printer.
But then an aluminum 1950s  Buck Rogers looking printer would be cool as well.

This is for most of us a hobby and we do what we enjoy. It is about fun and learning.

My concern is there comes a point when so many mods have been made there is little left of the original printer. And if you know in your heart you plan on getting to that point it just makes more sense to start fresh  and keep the old small printer working to make parts for the new one or whatever. MHO that and $2 will get you a cup of coffee in most parts of the world.

Dream on and do what is best for you.

Tin

I'm not disagreeing with you here. Definitely if your goal is to be able to print more stuff and have more options at your disposal, it makes sense to upgrade by buying a new printer.

In my case, I actually didn't set out down this path intentionally. I was messing with the software one day and bricked my machine by accident. That led me to convert my board to RAMPS (see related RAMPS conversion thread).

But now that I've done that much tinkering and my original machine is no more, I am intentionally working toward frankensteining my machine to the point that basically nothing is left of it big_smile I find joy in finding ways to make it do things it was never intended to do.

16

Re: Thoughts on extending the Da Vinci Jr

Go for it  Dream on. I have been on hobby forums for going on ten years.  I always try to let folks have and achieve there dreams. 
On the other hand i know the dangers of rabbit trails . I encourage folks to stay grounded and have common sense.
I personally am not a fan of franken printers. 
.
And for the record I see nothing wrong with changing to a generic motherboard or adding an Ed3 and the like .

I am offering a reality check here  no more no less .
I think most of us want a bigger printer and strive for better quality and more flexibility of materials.  The path seems to vary of how to reach that goal.  Some like you upgrade to the point of there original printer has little left from the factory others buy a second third or 4th ... printer.
Forums would not be a lot of fun if everyone had the same ideas and goals
we learn from each other. So i will sit back see where your build goes and may even chuckle a little.
Tin

Soliddoodle 4 stock w glass bed------Folger Tech Prusa 2020 upgraded to and titan /aero extruder mirror bed
FT5 with titan/ E3D Aero------MP mini select w glass bed
MP Utimate maker pro-W bondtech extruder
Marlin/Repetier Host/ Slic3r and Cura

17 (edited by Anthem 2016-09-05 23:38:07)

Re: Thoughts on extending the Da Vinci Jr

Progress with the dual extruder! Not quite printing yet, but I'm very close. The wiring is done and each component is working individually. I have the height of the hotends set, and some new home offsets entered into Marlin, so the hardest parts are done. Tonight I might have time to finish calibrations and perform a first test print.

http://soliforum.com/i/?b80JueA.jpg

I attached the STL I'm using for the bracket. When I sliced this, I eliminated the legs at the bottom of the model since they're functionally unnecessary. I haven't decided whether to keep the legs in the model or not.

http://soliforum.com/i/?G6oRNQG.png

I'm using M3x16 screws for the mounting clips, and M3x20 with nuts dropped into the DVJr supports from above (since the whole thing is deeper than 20m).

I'm still considering making a V2 of this model that mounts the hotend from above using the nut, which would close the gap between the E3D and DVJr hotends even further and allow both hotends to reach the entire bed. But this would mean making the mount a little more complicated, and having to change the cooling situation as the 40x40mm fan is practically touching the E3D fan already.

In the setup shown, the E3D can reach the entire bed except the last 8mm at the right while the DVJr can reach the entire bed. It might be possible to shift the whole thing right a little so that both hotends share the center of the bed to even this out, but the tricky part is that would push the bottom quick-release clip further into the E3D negative space.

Post's attachments

dual_hotend_bracket.stl 290.73 kb, 5 downloads since 2016-09-05 

dual_hotend_bracket_dvjr_clip.stl 67.64 kb, 2 downloads since 2016-09-05 

e3d_hotend_bracket_clip.stl 95 kb, 3 downloads since 2016-09-05 

You don't have the permssions to download the attachments of this post.

18

Re: Thoughts on extending the Da Vinci Jr

Aw maaaan. Epic soft fail.

So I got all my measurements into Marlin and had a dual extrusion test print ready to go when I discovered that I somehow had left a clog in my old DVJR hotend. 20 minutes of screwing with that fixed it, so I started my print. Everything moved around fine, but nothing extruded.

I quickly realized, as I had suspected but hoped would not be the case, that the stock power supply just can't cope with two heaters, five steppers, two fans, a light, and a RAMPS board. As long as I keep the second heater off, things work fine, but that second heater just over works that PSU.

So... I'll be ordering a bigger power supply and probably won't have any news for a few days.

19

Re: Thoughts on extending the Da Vinci Jr

@anthem - good job!!!
About PSU. I've bought so called "Flex ATX" PC PSU. They are fairly small, smaller than LED PSU's so easily can be mounted sideways on 2020 extrusion. Also some of them has a AC plug which isn't inbuilt so can be relocated to more convenient spot. I've got used one of eBay very cheap.

And about that dual head mount. Do you mind posting scad file as well?! I just want to make single stock Jr extruder mount. Or you can edit it and post STL instead. wink

20

Re: Thoughts on extending the Da Vinci Jr

kr15_uk wrote:

@anthem - good job!!!
About PSU. I've bought so called "Flex ATX" PC PSU. They are fairly small, smaller than LED PSU's so easily can be mounted sideways on 2020 extrusion. Also some of them has a AC plug which isn't inbuilt so can be relocated to more convenient spot. I've got used one of eBay very cheap.

And about that dual head mount. Do you mind posting scad file as well?! I just want to make single stock Jr extruder mount. Or you can edit it and post STL instead. wink

I'll post the SCAD very soon. I just wanted to make sure it worked and didn't need any last adjustments first. I'll see if I can get that posted tonight. It should be easy to modify or for a single Jr by removing the E3D stuff and shifting it over.

21

Re: Thoughts on extending the Da Vinci Jr

I posted the file in your other E3D thread: http://www.soliforum.com/topic/15392/jr-e3d-v6lite6/

Since my power supply isn't due until tomorrow, I went back to my system to make sure everything I was encountering was actually a power problem. I attempted to do a single-head print of something this afternoon (which I expected to work fine), and still nothing extruded from the primary extruder.

So after a couple hours of debugging I figured out I had a loose crimp in one of my extruder connectors (thanks to Tin Falcon via this thread: http://www.soliforum.com/topic/15200/so … extrude/).

Still no dual extrusion for power reasons. Once the fans kick on while trying to heat both extruders at the same time, the power supply cuts in and out (and it's extra weird to experience that, because since I have my RAMPS plugged into an RPi for OctoPrint, the RAMPS CPU stays powered and the display and accessories just cut out, so the whole system "blinks" on and off every couple seconds).

Oh -- and I'm really pissed that the stock push fitting on the DVJr extruder broke. Just like in that other thread from a few weeks ago, the guide tube just kept popping out and I couldn't get it to reseat firmly. I removed it, and there were only two metal teeth left in the thing. Weak, XYZprinting. Just weak.

I had a spare from the 3maker extruder I just bought, but that one is M6 threaded instead of M5 like the DVJr's, and I can't fit an M6 nut into the slot. So currently, my guide tube is shamefully being held on with gobs and gobs of tape until I can also replace THAT part sad

22

Re: Thoughts on extending the Da Vinci Jr

All right! So I have my new power supply installed,  and until I cam get some new push fittings I've reattached my bowden tube with a couple of M4 nuts threaded straight onto the tube.

And guess what? I've got 2-color prints now!

I'll post some pics soon. I have the X/Y pretty much dialed in, and I think I need to readjust Z a little for lower layer heights, but it's printing fine at 0.3.

I'm using wipe towers via this guy's post-processing script used with Slic3r:

http://makertum.com/en/wipe-and-prime-t … or-slic3r/

I'm having a few issues with ooze, but nothing that doesn't seem  typical of a dual setup. I actually had good success with Slic3r's built-in ooze prevention, except for that damn wipe wall that just dislodges and ruins it all. I might play with some custom gcodes to get the best of both worlds.

I haven't tried Cura yet with the duals just because I prefer Slic3r, but I may give it a whirl yet just for its better dual support.

23

Re: Thoughts on extending the Da Vinci Jr

Here it is, my first real print with two colors, in all its messy glory. This was sliced with Slic3r and the wipe towers were added in post-processing.

The white wipe tower tipped over halfway through, hence the giant mess to the left, but things still printed decently all things considered. There was a lot of ooze, which I attribute to maybe using too high a temp (195) and also the lengthy travel between the towers (which were all the way in the back corner).

There's still a slight offset between the two colors, mainly in Y (by 0.1 or 0.2mm), and I need to readjust my Z offsets, as I think the E3D is just slightly higher -- this is probably why the tower fell over, and the bottom white stripe started to separate from the orange base when removing it from the bed.

http://soliforum.com/i/?9kLMUBi.jpg

Cleaned up a little (well, sort of...):

http://soliforum.com/i/?HwQorYi.jpg

All in all I think it's a decent start for my first significant dual-color print using a hacked machine that was never intended for it smile

Now to play around with my settings and improve the quality...

24

Re: Thoughts on extending the Da Vinci Jr

do you have an actual post or are the towers added parts?

Sd4 #9080 with a glass bed. E3d chimera duel extruder. Paste extruder , duet wifi.
Lawsy carriages. linear bearings. Y axis direct drive, Kinect scanner
SD4#8188 glass bed, lawsly carriages, E3d v6, octoprint http://www.ustream.tv/channel/hotrod96z28
Filastruder/filawinder, Custom Delta 300mm x 600mm

25 (edited by Anthem 2016-09-09 03:26:50)

Re: Thoughts on extending the Da Vinci Jr

Kronikabuse wrote:

do you have an actual post or are the towers added parts?

They're actual printed parts added in by that post-processing script I linked to. It's configured by adding a bunch of templatized gcode for the script to get access to slic3r variables. It's ok, but to move the towers you need to reconfigure your gcode and manually set the position you want the towers at, which is annoying and error prone if you're trying to get them close to the main print.

I'm attempting a reprint using Cura 15.04 now with its wipe towers and otherwise similar settings so well see if that's any better.


I had a thought that if you could control the ordering of parts in Slic3r that you could probably manage to import an STL to act as a wipe tower (or at least a prime tower) manually, but it appears that slic3r forces is own idea of print ordering on you with no way too override that.