1

Topic: The first mod?

Well, I bit the proverbial buckshot and ordered a SD3. Knowing that it is going to show up as stock as my honda civic, what mods do you think are essential or otherwise useful as a first step to improve performance on a stock machine? There is so much going on that i am not sure where to start.

SD3 w/ RUMBA (8825s), merlin hot end (in pieces). Ender3 w/ silent board for PLA printing. Ender5 w/ silent board, e3d v6, new z lead screw, and glass bed. DiY Kossel w/ smoothieboard (in pieces). Vellman Vertex (in pieces)
Shapeoko2 router in process of being converted to laser engraver (in pieces)
Multicam 5000 series CNC Router w/ 11HP spindle, 5x10' table, and auto tool changer (in pieces)

2 (edited by nlancaster 2013-07-20 02:53:11)

Re: The first mod?

Glass bed + hairspray.

If you do no other mods to your machine, that will still make it 1000% better.

3

Re: The first mod?

My SD3 will be here Monday and that will be first on my list. Next a fan mount for the extruder and an enclosure.

4

Re: The first mod?

I ran mine as stock doing simple parts to get a good feel for how everything works. I then added glass and hairspray followed quickly by an enclosure. Then tune and then tune some more. Then fan.

5

Re: The first mod?

Skip the glass and go with ceramic. Extruder and electronics fans are nice but require soldering. Also, I am enjoying my party tray / cardboard enclosure.

6 (edited by adrian 2013-07-20 08:04:14)

Re: The first mod?

FatalDischarge wrote:

Skip the glass and go with ceramic. Extruder and electronics fans are nice but require soldering. Also, I am enjoying my party tray / cardboard enclosure.

What he said wink

People get to glass and rave about it because they often don't bother going past it... I don't think anyone that has gone ceramic has regretted its superior performance  smile

7

Re: The first mod?

FatalDischarge wrote:

Skip the glass and go with ceramic. Extruder and electronics fans are nice but require soldering. Also, I am enjoying my party tray / cardboard enclosure.

The ceramic tile, is that a clay tile with a ceramic finish? Don't they have a grated clay bottom?  Isnt there some tecture to the ceramic?  A picture would be nice. My SD3 is due to ship in another week so I'm interested mods also. Although I plan on only making the glass/tile mod right off. Then add the others as I learn abut the printer.

Thanks for all the great posts

8

Re: The first mod?

Soldering doesn't bother me at all. I do a lot of it for work. Even have a bunch of connectors and terminal blocks to make it look nice!

This ceramic idea sounds good, I would love to have more info on it. I was reading glass bed stuff this morning. I have a supplier here in chicago for kiln window glass I think,  so I may go that route.

SD3 w/ RUMBA (8825s), merlin hot end (in pieces). Ender3 w/ silent board for PLA printing. Ender5 w/ silent board, e3d v6, new z lead screw, and glass bed. DiY Kossel w/ smoothieboard (in pieces). Vellman Vertex (in pieces)
Shapeoko2 router in process of being converted to laser engraver (in pieces)
Multicam 5000 series CNC Router w/ 11HP spindle, 5x10' table, and auto tool changer (in pieces)

9

Re: The first mod?

I have nothing to add to the above comments save to note that after you have glass/ceramic, hairspray, and an enclosure, your next dozen mods or so will all be things you print.  I would add fans on the motherboard before I'd worry about fans on the extruder myself -- easier, and in the heat, more important.

It may also be helpful to consider this list of stuff you will eventually end up wanting or needing.  I was hoping to get more people's input to make sure it's complete (in part so I'd know about the next thing I'm going to need before I need it) but I didn't get much response.  Still, the list may save you a few hardware store trips.

10 (edited by TheBaron 2013-07-20 14:06:35)

Re: The first mod?

Thanks for the list! I already own everything on it, which is convenient, aside from the filament. I have quite a few 60-120mm fans kicking about, as well as a spare 12v supply for them.

I'm so excited!

Edit: also, where would you get ceramic for a ceramic mod? Most tiles have a bit of a dome on them.

SD3 w/ RUMBA (8825s), merlin hot end (in pieces). Ender3 w/ silent board for PLA printing. Ender5 w/ silent board, e3d v6, new z lead screw, and glass bed. DiY Kossel w/ smoothieboard (in pieces). Vellman Vertex (in pieces)
Shapeoko2 router in process of being converted to laser engraver (in pieces)
Multicam 5000 series CNC Router w/ 11HP spindle, 5x10' table, and auto tool changer (in pieces)

11

Re: The first mod?

TheBaron wrote:

This ceramic idea sounds good, I would love to have more info on it..

Ceramic offers a lot more thermal mass than glass, thus provides a far more even surface tempreature 'edge-to-edge' than glass or the Alu bed alone.

It also, as a result, has a shallower cool-down curve, which for a bunch of reasons is better.

I just use a boring white glossed 195x195 ceramic tile from the hardware store...

Glass works well, but it demonstrates quite a notable gradient edge-to-edge.. meaning you have greater chances of parts warping due to differing cooldown rates causing different contraction rates...

Don't get me wrong - its still better than Alu, which is *too good* a conductor with its piddly small thermal resistance.. hence why people see massive improvements with glass+hairspray.... but it still doesn't beat ceramics+hairspray.

Its all in the mathematics of thermal resistance, conductivity and mass... its very dry reading though, so better to just try for yourself for the whole $2 a single ceramic tile should cost you wink

12

Re: The first mod?

nlancaster wrote:

Glass bed + hairspray.

If you do no other mods to your machine, that will still make it 1000% better.

+1

It's a trivial mod, but makes a *huge* difference.

Haven't tried ceramic to be honest, but for beginner glass bed will take 5 min to do (go to a store, ask them to cut, clip on, done). While at it, get two pieces, so you can quickly swap.

13

Re: The first mod?

It has been a while since thermodynamics. Ceramic does sound like a good idea, but I will try thermal glass first. If I decide to upgrade, I can mill grooves in the back of a tile and wrap nichrome in the grooves to improve the heating surface. Still, ceramic is something to think about.

SD3 w/ RUMBA (8825s), merlin hot end (in pieces). Ender3 w/ silent board for PLA printing. Ender5 w/ silent board, e3d v6, new z lead screw, and glass bed. DiY Kossel w/ smoothieboard (in pieces). Vellman Vertex (in pieces)
Shapeoko2 router in process of being converted to laser engraver (in pieces)
Multicam 5000 series CNC Router w/ 11HP spindle, 5x10' table, and auto tool changer (in pieces)

14 (edited by adrian 2013-07-20 14:40:00)

Re: The first mod?

spapadim wrote:

Haven't tried ceramic to be honest, but for beginner glass bed will take 5 min to do (go to a store, ask them to cut, clip on, done). While at it, get two pieces, so you can quickly swap.

You can do the same by walking to the tiling section, and should take 2 minutes because theres no cutting involved smile You don't need to do nichrome wire in the base - I just use it both with the stock alu bed, pcb mkIIb and a qu-bd - they just offer different heatup times is all but all work just the same as with glass - just instead you put a tile there instead of glass.

Not sure how thats any 'harder' than glass ?

Anyway, I re-present the thermal images provided at http://www.soliforum.com/topic/2230/the … ed-setups/ - in there I don't think there is a common bed combination I didn't test:

"Thermal Images Thread wrote:

Standard Solidoodle 3 Bed
Standard Solidoodle 3 Bed with Glass
Standard Solidoodle 3 Bed with a Ceramic Tile
RepRap PCB MkIIB Heated Bed with Glass
RepRap PCB MkIIB Heated Bed with a Ceramic Tile
QU-BD 200x200 Square Silicone 12v Heated Bed
QU-BD 200x200 Square Silicone 12v Heated Bed with Glass
QU-BD 200x200 Square Silicone 12v Heated Bed with a Ceramic Tile

I keep suggesting Ceramic Tile not on a personal position, but some actual testing to quantify it, which is why I keep reminding people theres more to life than glass+hairspray... I know its a common 'go to' but its by no means 'the best' (despite so many assuming its the be it and end it...)

15

Re: The first mod?

Really, my biggest potential problem with tile is that most I can think of (and keep in mind I haven't been around to look with this project in mind) is getting a tile with a uniform surface for truly flat prints. If that's not an issue, then ceramic is a fine choice.

Of course, now that I have taken a look, I realize that the glass I picked up is robax, which is a ceramic based fireplace glass. I guess I have been planning on ceramic all along :-)

SD3 w/ RUMBA (8825s), merlin hot end (in pieces). Ender3 w/ silent board for PLA printing. Ender5 w/ silent board, e3d v6, new z lead screw, and glass bed. DiY Kossel w/ smoothieboard (in pieces). Vellman Vertex (in pieces)
Shapeoko2 router in process of being converted to laser engraver (in pieces)
Multicam 5000 series CNC Router w/ 11HP spindle, 5x10' table, and auto tool changer (in pieces)

16 (edited by spapadim 2013-07-20 15:01:26)

Re: The first mod?

adrian wrote:
spapadim wrote:

Haven't tried ceramic to be honest, but for beginner glass bed will take 5 min to do (go to a store, ask them to cut, clip on, done). While at it, get two pieces, so you can quickly swap.

You can do the same by walking to the tiling section, and should take 2 minutes because theres no cutting involved smile You don't need to do nichrome wire in the base - I just use it both with the stock alu bed, pcb mkIIb and a qu-bd - they just offer different heatup times is all but all work just the same as with glass - just instead you put a tile there instead of glass.

Ah, ok, the ceramic bed mods I had seen involved nichrome, drilling, ceramic paste, etc. I stand corrected. Maybe I'll give it a shot, then... smile

Edit: Oh, I had completely missed that thermal imaging post, wow! It would be interesting to see same with a print on it (maybe w/ and w/o enclosure), or timelapse of how print cools etc.  And just as I thought I had enough distractions already... how much is that camera, again? smile

Edit2: $1-2K on eBay. Nevermind... wheww. smile

17 (edited by adrian 2013-07-20 14:52:46)

Re: The first mod?

TheBaron wrote:

robax, which is a ceramic based fireplace glass. I guess I have been planning on ceramic all along :-)

Yes, when I saw your other thread post suggesting this, I figured it would be Robax ceramic fireplace glass or similar smile Theres a reason them there has ceramics in it wink the 4.75mm variety i'm assuming too ?

Will be interesting to see how it performs vs borosilicate (pyrex) which is the common 'normal' glass used on 3D printers...

18

Re: The first mod?

I was just about to offer sending you some robax for testing, then I saw where you're located. tongue Honestly, I get my robax from a local surplus supplier. a $3 sheet will give me enough for 3 or 4 beds if I don't mess up the cutting too bad. I have never been this excited to cut and bevel glass.

SD3 w/ RUMBA (8825s), merlin hot end (in pieces). Ender3 w/ silent board for PLA printing. Ender5 w/ silent board, e3d v6, new z lead screw, and glass bed. DiY Kossel w/ smoothieboard (in pieces). Vellman Vertex (in pieces)
Shapeoko2 router in process of being converted to laser engraver (in pieces)
Multicam 5000 series CNC Router w/ 11HP spindle, 5x10' table, and auto tool changer (in pieces)

19

Re: The first mod?

Adrian, can you shed some light on the ceramic tile? From your posts you are saying that ceramic works better because it 'cools down' more uniformly thus reducing the edges from warping when the printer auto turns off the bed heater. You attribute this to the 'thermal mass'. This makes perfect sense, but I have one question: What is the difference in warm-up time between glass and ceramic tile? I would think the higher thermal mass to cool down also means higher mass to warm up, depending greatly on which heater you have (so I guess you have three answers since you tested three heater types wink ). I am guessing stock heater and ceramic tile would take awhile to heat up.

Also, in your thermal imaging tests, did you use regular glass or pyrex? I ask because I am planning to get a piece of boro-silicate to start with (regular glass is easy, but not looking forward to it breaking after so many uses). I will probably get a ceramic tile also (cheap enough) but I am concerned about flatness of tile. Its usually not anywhere near as flat as glass. Or am I supposed to find a specific type of tile?

I may also call a few local places about robax too.

Chuck Bittner is a quadriplegic gamer who is petitioning the major console developers to include internal button remapping in all console games. You can help.
Sign Chuck Bittners petition

20

Re: The first mod?

Download and print a set of new brackets. Here's mine. I posted mine on thingiverse under the same name.


It's still a work in progress.

Post's attachments

y_bracket_9a_preview_featured.jpg
y_bracket_9a_preview_featured.jpg 94.33 kb, 1 downloads since 2013-07-20 

You don't have the permssions to download the attachments of this post.

21

Re: The first mod?

Adrian, is your tile flat on the bottom?  All the tile I have seen has grooves on the back to help it bond to the mortar, and I figured this wouldn't be too good for heat transfer.

22

Re: The first mod?

IanJohnson wrote:

Adrian, is your tile flat on the bottom?  All the tile I have seen has grooves on the back to help it bond to the mortar, and I figured this wouldn't be too good for heat transfer.

I just received my decorative tiles and they are pitted on the bottom for that reason. The heat transfer is pretty bad. Still figuring out the best way to print with them.

SD3 w/ mods:
Glass bed with QU-BD heat pad upgrade, threadless ballscrew w/ 8mm smooth rod, spectra line belt replacement, lawsy MK5 extruder, Lawsy replacement carriage, E3D hotend, Ramps 1.4 w/ reprap discount controller, DRV8825 drivers, 12v 30A PS, Acrylic case, Overkill Y-idlers, Filament alarm, Extruder fan + more.

23 (edited by adrian 2013-07-21 06:33:40)

Re: The first mod?

Okies, I'll try to cover everything smile

Re the tiles thermal mass - this is relevant even during printing. If you drop something hot onto glass, all the surrounds will suddenly increase in temperature whilst simultaneously the extremities of the plate will be rapidly loosing temperature. Its these delta's in temperature that cause print stability issues. Ceramic tile, being just, bigger, will not experience these deltas to as greater degree.

Using tile is a greater mass/surface area than glass, consequently, yes, there is a *slight* increase in warm up time. In practice, the only place I saw it add a notable amount of time was the standard SD bed, which takes an eternity to heat up and soak anyway. I was able to print without problems waiting 15minutes with a covered bed vs 20minutes with the tile.. despite this, I still printed 'more', because I had far more successful prints. If you have a standard bed, dropping a dish-towel on the bed during heatup accelerates matters and the same remains true with a Tile. Using PCB or Qu-Bd beds, they have such an aggressive temp curve anyway, I saw next to no difference in practical application.
Also, you can remove objects much easier - the tiles not fragile wink So I have found I can lift pieces right off once the bed <80°C... or knock them off with a sharp grabbing motion when the tile was still at temperature. Overall, less need to cool beds.

Glass used in those tests was 'regular' glass... Pyrex (meh, I'll use a trade name, less letters to type than Borosillicate wink ) wont dramatically improve the thermal resistance et al, but it will make the glass surface stronger and less impervious to thermal failure.

You also, regardless of the bed, always want to provide time for thermal soaking... this means allowing the item to achieve equalibrium (to the extent it can) across its surface. Even without a ceramic tile, this is often forgotten. There is a BIG difference between printing the instant your bed says 90°C, and letting it 'soak' for 5 minutes...

Re the tile flatness, lets split it into two categories; 'top' and 'bottom'.

Top flatness - You will find most flat high-gloss glazes are pretty flat. I of course suggest spending some time to examine the tile stock on offer, as some will have raised ridges at one corner from where the glaze was laid down, but I have two that are flat across the top, however one of them has a tiny 'dollop' in the very corner, which gets buried beneath a clip anyway.
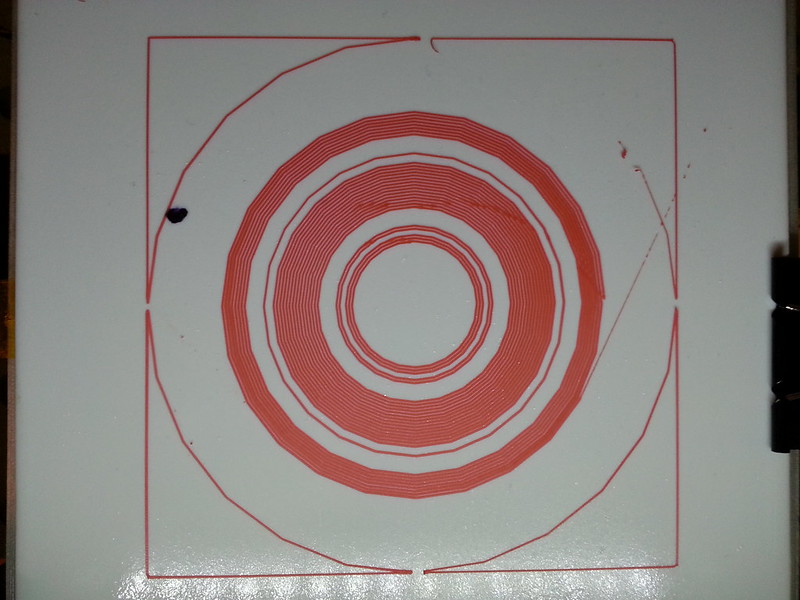
I'll take a pic of some single layer loops to demonstrate. Hand painted tiles of course are usually right out, because you'll have brush strokes and other texture detail. But commercial white high-gloss clear-glazed tiles will be pretty darn flat. And even if there is a slope across the face, it will be uniform, and thus, easily compensated for in bed levelling...

Bottom flatness - Yes, they do come in some different varieties.
If this was a Heatsink, where we were trying to measure things in terms of its Thermal Transmission and get some sexy high figure like 300°C/W, then yes, the bottom would become an issue as it would be degraded compared to what *could* be achieved. This is of course what the point of heatsink compound is when constructing a heatsink assembly on say a MOSFET or CPU. Heat doesn't transfer across air 'well', but it DOES transfer... which is more than enough given the clearances on the tiles I've been dealing with that have a 2-3mm recess .  Even back on the 'stock' bed, it took still less 'additional' time versus the overall time in the first place... Anyway, remember the key to stable prints isn't a magical arbitrary value, but it is the *rate of change* and the *uniformity*... a Uniform bed at 80°C will print 'better' than one with hotspots and sharp fall off but reads 95°C right there at the thermistor location...

This is why one of the common suggestions on a standard bed is 'increase the temperature'.. as the ratio between the hotspots and the edges decreases... it still exists, but putting more power into the aluminum means it needs to either increase dissipation, or, it heats up and becomes more stable. If we ran the bed at 350°C, besides being half the melting point of aluminium, it would also be almost even across the whole plate as the power would overwhelm the Alu's ability to dissipate, and thus, will heat up and achieve equilibrium..

If in your particularly tiles instance it has big holes, or odd shapes.. then you could:
A) Live with it - I haven't found an issue in practice. Remember, you aren't chasing a specific °C here or super low thermal resistance (in fact, quite the opposite! smile ) like you'd want on something designed to wick away and transfer heat out and away - like a heatsink wink ... you are chasing evenness and a slow-curve.
B) Lap it.. the underside is just hardened clay wink Keep the tile wet, and file/sand it back.. just dont focus on one area too long..
C) Fill it... same principles apply as to a heatsink. Use silicon that sets, and even say some of the high-temp copper-laced gasket goop, and fill the back of the tile and then screed it flat.
D) Spend more and get a flat granite paving tile thats sealed. But these can be expensive. And heavy. But theres a reason they make 'pizza stones' from this stuff, and its not that dissimiliar to what we are trying to achieve (slow rates, even temps).

Personally.. I'm pretty happy with A.. but feel free to experiment with B, C or D. It comes back to that 'we aren't building a heatsink here' which is where grooves and depressions would definitely lower the performance curve and the heatsinks ability to function as the most efficent heatsink it could. As its just a lump of uniform warm stuff around various temp ranges, then it seems to work just fine.

Having said all that waffle... I should add - I don't claim to be an expert..

24

Re: The first mod?

Speaking of pizza stones, here. Then maybe we can get some NASA funding. Sorry, couldn't resist... smile

25 (edited by adrian 2013-07-21 18:16:25)

Re: The first mod?

Heres a pic of loops on the tile. I got heavy handed with the hairspray, and the missing segment is where it started because I had anchor extrude disabled so the head had to prime. The black sharpie dot is actually a small 'nipple' in the glaze which as you can see hasn't effected the quality in that region at all.

http://farm8.staticflickr.com/7419/9337415976_197c80ce18_c.jpg

The only imperfections are where it switched loops so there is a momentary change in direction.