1 (edited by cmetzel 2013-02-13 20:03:36)

Topic: Custom Enclosure Mod

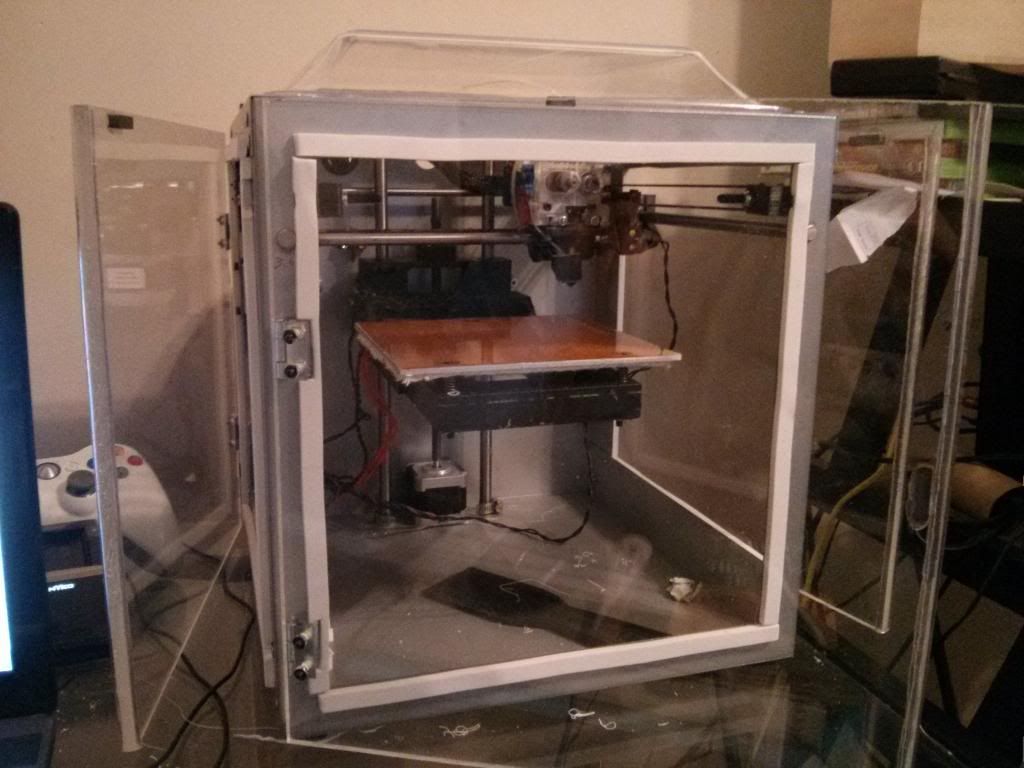
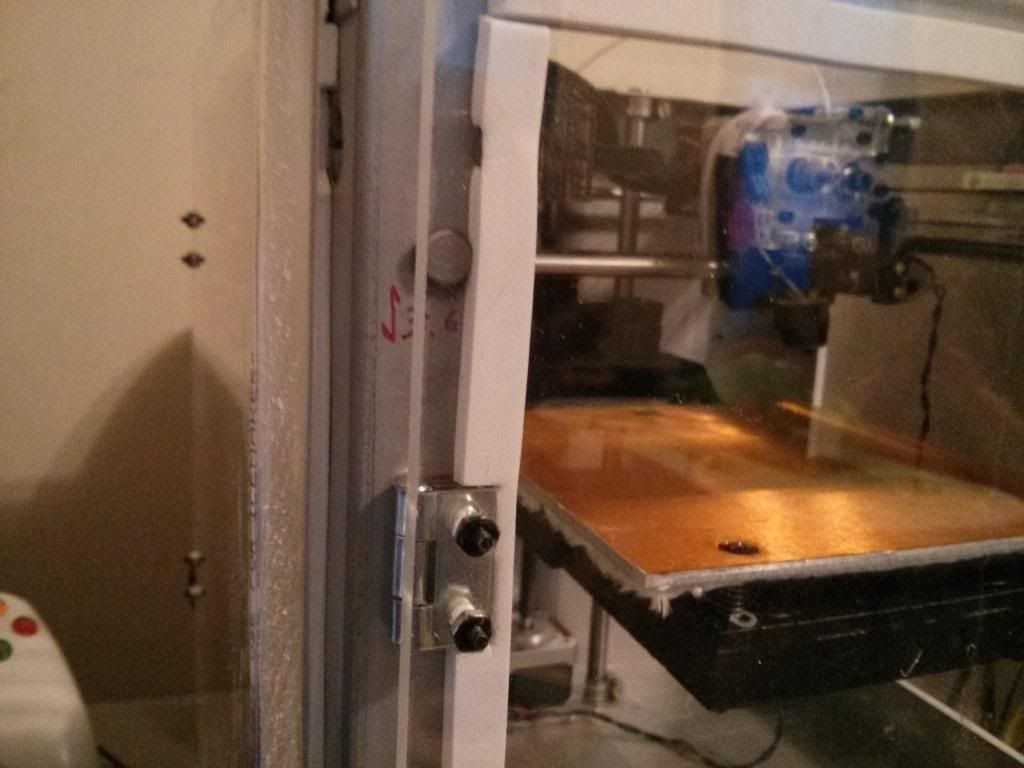
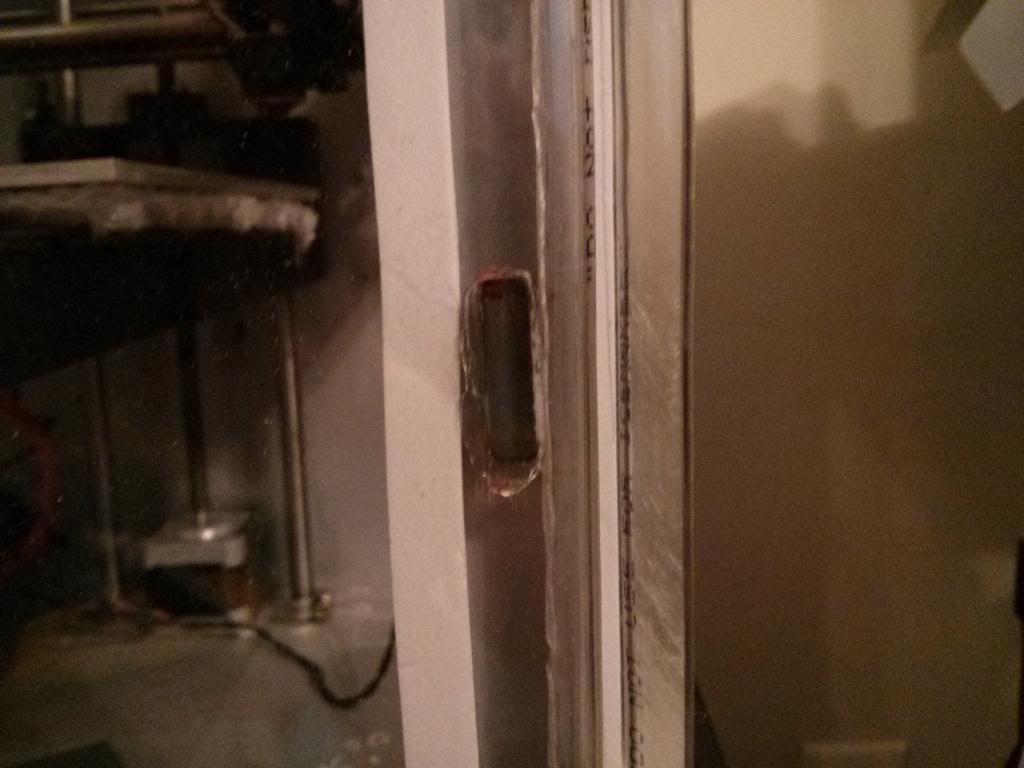
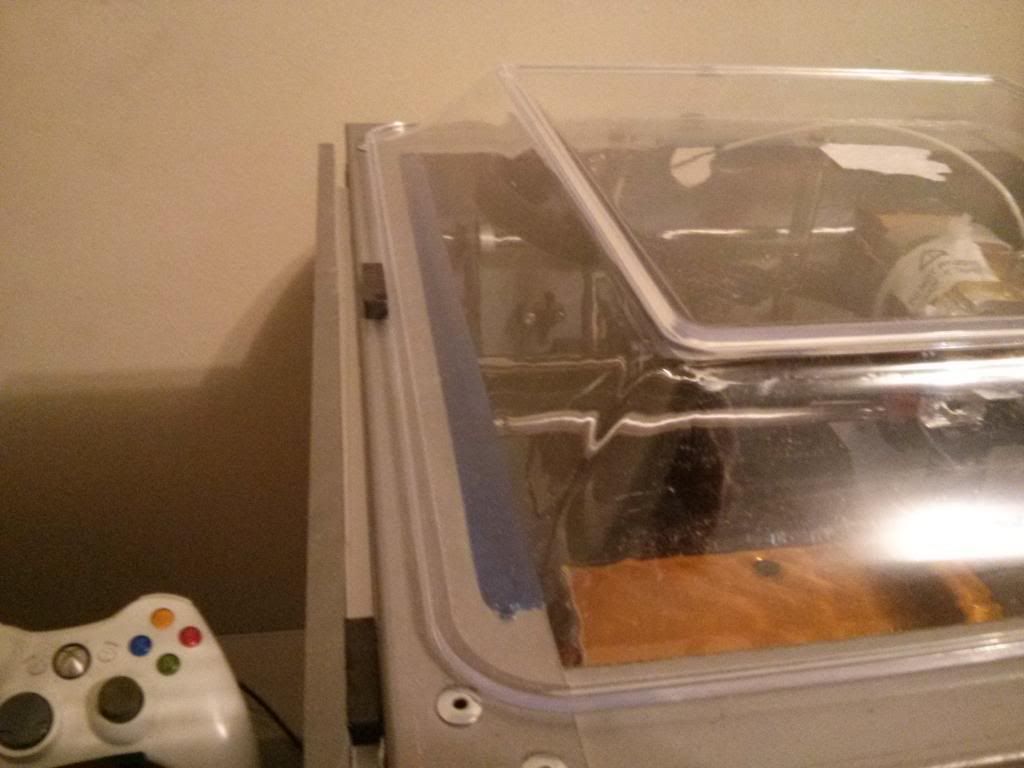
Finally got around to modding my enclosure.  Used the clear plastic tray for the top listed in the link.  I added hinges to the back, and I added plexiglass doors to each side that are also hinged.  The tray on the top allows me to watch the printing, but also adds height so the filament doesn't need to bend at a sharp angle to get into the head.  I cut a slit in clear plastic tubing and used it as piping around the edges to seal the doors.  Not sure if I'm keeping that or just going to add some weather stripping to the case and let the door seal against that instead.   I also need to find shorter screws, shortest Home Depot had was 3/4"  Whole mod is under $20

Parts list for those that are interested:
Ultimate Party Store Tray $2.99
Plexiglass doors (buy and cut from local hardware store) I paid $2.30 each door cut from scraps
M3X6mm flat head cap screws McMaster Carr (Pack of 100) $4.00
M3 Hex Nut McMaster Carr (Pack of 100) $1.04
6 hinges (3 packs) from Home Depot $1.97X3 = $5.91

Total cost $18.54


http://s9.postimage.org/xhwh4ls3z/closed.jpg
http://s7.postimage.org/lcb4re0vf/open.jpg
http://s18.postimage.org/62qsk1yfd/doors.jpg

2 (edited by vince7c95 2013-02-11 00:48:21)

Re: Custom Enclosure Mod

Very nice. That contoured top gives it a nice clean finished look. Good job! Especially like the material cost.

3

Re: Custom Enclosure Mod

Awesome Mod!  Well done, good looking and a decent price..... beautiful.

4

Re: Custom Enclosure Mod

Thanks,  Just watch your drill points to make sure you're not going to hit anything on the way through.  I also had a stack of magnets under the drill to catch the shavings so I didn't get them on any wires or motors.  Worked very well.

5

Re: Custom Enclosure Mod

Looks really nice, especially the tray for the top is a great idea! I'll keep my eyes open if I can find one like that.

6

Re: Custom Enclosure Mod

cmetzel wrote:

Thanks,  Just watch your drill points to make sure you're not going to hit anything on the way through.  I also had a stack of magnets under the drill to catch the shavings so I didn't get them on any wires or motors.  Worked very well.

That's utter genius! Just last night I got a metal shaving splinter in my hand while doing hw. I'm gonna have to try this out the next time I'm too lazy to leave my room to drill something.

7

Re: Custom Enclosure Mod

newq wrote:

Looks really nice, especially the tray for the top is a great idea! I'll keep my eyes open if I can find one like that.

I linked to the tray in the original post.

8

Re: Custom Enclosure Mod

That's really neat. I think I would consider that an upgrade from the standard case.

9

Re: Custom Enclosure Mod

cmetzel wrote:
newq wrote:

Looks really nice, especially the tray for the top is a great idea! I'll keep my eyes open if I can find one like that.

I linked to the tray in the original post.

Thank you, but I guess the shipping to Austria would make that $3 tray needlessly expensive.

10

Re: Custom Enclosure Mod

Are the plexiglass sides 11x11 also? I just ordered my SD and want to go ahead and cut these out.

11

Re: Custom Enclosure Mod

I had mine cut out of some scraps that the local ace hardware had so I didn't have to buy a full sheet.  I think they were 10-5/8" X 11".  There's a lot of room for flexibility there so buy scraps and have them cut you'll get it for much cheaper than buying a full sheet.

Parts list for those that are interested:
Ultimate Party Store Tray $2.99
Plexiglass doors (buy and cut from local hardware store) I paid $2.30 each door cut from scraps
M3X6mm flat head cap screws McMaster Carr (Pack of 100) $4.00
M3 Hex Nut McMaster Carr (Pack of 100) $1.04
6 hinges (3 packs) from Home Depot $1.97X3 = $5.91

Total cost $18.54

10' of clear tube is $2.25 at Home Depot also but I'm going to take that off and use foam tape on the frame to build up the thickness of the gap to get the seal I want.

12

Re: Custom Enclosure Mod

cmetzel wrote:

....but I'm going to take that off and use foam tape on the frame to build up the thickness of the gap to get the seal I want.

Man after my own heart.  I liked using weatherstripping for my case and I can't tell I've been printing.... until I open the case to get the print.

13

Re: Custom Enclosure Mod

Just finished this mod on my printer. Man is it nice. Thanks for the idea cmetzel. Just need to add the foam tape. 

http://www.12voltleds4u.com/Custom_Switch/SD_Case_Mod.JPG

SD2 - Glass Bed, Fans on PCB and Y motor, Custom enclosure
Slicer - Simplify3D

14

Re: Custom Enclosure Mod

Just picked up my acrylic sheets, at $8 each for 11.5" x 11.5" and the top I am looking for a local supplier for that tray.

No trees were harmed in the creation of this email, though some electrons were horribly inconvenienced.

15

Re: Custom Enclosure Mod

I also found that same party tray on amazon, shipped for $7.38 whereas the party store wanted $9.99 for shipping and that brought the total cost up to $13 shipped. As a side note, I bought 1/2" thick acrylic for my sides. Overkill? Yes. Why? I don't even know lol.
I have to trim the front door down from 11.5" square to 11" square so it won't overlap, but otherwise it should come out great. It will overhang just enough to use the slit tubing and foam insulation tape. Will post pics later.

No trees were harmed in the creation of this email, though some electrons were horribly inconvenienced.

16

Re: Custom Enclosure Mod

Any way to attach everything with magnets? I really don't wish to drill holes into the printer frame in order to add hinges.

17

Re: Custom Enclosure Mod

You can just put adhesive magnetic strips on the acrylic and stick it to the frame.  Someone did that the other day.

18

Re: Custom Enclosure Mod

You could drill a hole into the corners of each acrylic side panel, then slide in your magnet into the freshly drilled hole. After that you could just snap it onto the frame, and still be able to easily remove it when needed.

SD2 w/ mods: Rumba controller, ATX PSU, SD pro case, glass bed, with more to come...

19 (edited by iowajames 2013-03-11 13:24:28)

Re: Custom Enclosure Mod

This ^^ is what I should have done. Oh well, mine came out nice enough. (Magnets vs hinges)

No trees were harmed in the creation of this email, though some electrons were horribly inconvenienced.

20 (edited by iowajames 2013-03-11 14:20:31)

Re: Custom Enclosure Mod

Okay, here's what I did for my enclosure, thank you cmetzel.
This is the full view. I used 1/2" thick acrylic sheets, the hinges listed, the party tray listed (but found it, with shipping on Amazon for $7 as opposed to the party store, shipped costing $13) and the tubing listed.
http://img.photobucket.com/albums/v651/jaythedogg/casemod4.jpg

This is a photo of the dollar store brand foam door/window insulation (1/2") that I used to get a better fit around the frame. I wouldn't recommend this, instead I will be changing to black (soft) foam that can compress. Maybe use a 5/8" thick strip to make a better seal. The dense foam doesn't fill the gap all the way around due to the frame it is on, though it was easy to custom cut it to fit around obstacles. Also, you can see the liquid electrical tape I painted on my bolts as a thread locker.
http://img.photobucket.com/albums/v651/jaythedogg/casemod1.jpg

This image shows the magnet used on one of the doors, held on by Loctite brand "Power Grab". Sets in 15 minutes, dries completely in 24 hours. I had time, so I used it as opposed to super glue or something.
http://img.photobucket.com/albums/v651/jaythedogg/casemod2.jpg

This is an up close of the party tray, mainly to show the duct tape (2 layers) protecting the wire sleeve from rubbing the frame and fraying. The machine shop that fabs these frames could learn a thing or two about deburring their edges. many of my lines are sharp.
http://img.photobucket.com/albums/v651/jaythedogg/casemod3.jpg

No trees were harmed in the creation of this email, though some electrons were horribly inconvenienced.

21

Re: Custom Enclosure Mod

Just an FYI, I've gone away from clear tubing and use foam tape on the frame now for my seal, I thought the tubing looked like crap on mine and didn't seal as well.  I'm glad it's working for others though.

22

Re: Custom Enclosure Mod

@iowajames - instead of duct tape, have you seen this: http://www.thingiverse.com/thing:51134 ?

Apparently I'm using an older version of this thing that I can't seem to find on thingiverse anymore, but the bugga works great for me. Might look nicer than duct tape.

SD2 w/ mods: Rumba controller, ATX PSU, SD pro case, glass bed, with more to come...

23

Re: Custom Enclosure Mod

That one won't work with the case mod it will get in the way of closing the lid, but I did make a derivative of it here that works well too.

http://www.soliforum.com/topic/1224/mod … dle-guide/

24

Re: Custom Enclosure Mod

My wire bundle doesn't hit the belt, but instead rubs the rough edge of the frame, I could have grabbed a rotary tool & smoothed it down, but I'm sick and the blue duct tape doesn't look that bad. I may still print out yours cmetzel, as it will be added assurance against future belt rubs anyway.

No trees were harmed in the creation of this email, though some electrons were horribly inconvenienced.

25

Re: Custom Enclosure Mod

cmetzel wrote:

That one won't work with the case mod it will get in the way of closing the lid, but I did make a derivative of it here that works well too.

That's a great modified version, I like use of magnets on it. Looks like I'll be printing a new guide so my case will sit properly again. :-)

SD2 w/ mods: Rumba controller, ATX PSU, SD pro case, glass bed, with more to come...