Re: Custom Enclosure Mod
Will be putting this in soon, just in case.
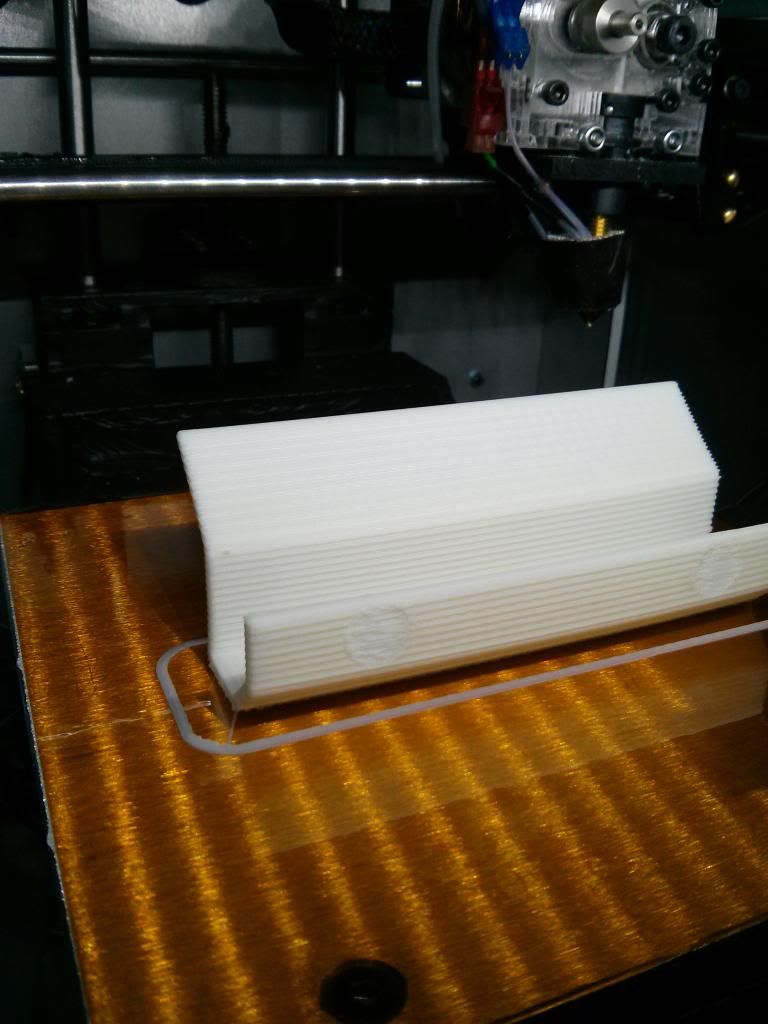
Alsso, reminds me, gotta do the Z Anti-backlash mod (with spring!)
No trees were harmed in the creation of this email, though some electrons were horribly inconvenienced.
You are not logged in. Please login or register.
SoliForum - 3D Printing Community → Hacks & Mods → Custom Enclosure Mod
Will be putting this in soon, just in case.
Alsso, reminds me, gotta do the Z Anti-backlash mod (with spring!)
you might want to acetone, sand down or reprint this guy after you do the z-wobble. my guide had rough edges like this and it actually helped wear down my wire guide.
you might want to acetone, sand down or reprint this guy after you do the z-wobble. my guide had rough edges like this and it actually helped wear down my wire guide.
Not a bad idea, I hadn't considered that.
Has anybody found a top tray similar to this one that will work with an SD3? Also, can someone direct me to the frame dimensions on an SD3 so that I can have the sides cut prior to mine shipping?
Has anybody found a top tray similar to this one that will work with an SD3? Also, can someone direct me to the frame dimensions on an SD3 so that I can have the sides cut prior to mine shipping?
Can you give the dimensions of the top side of the SD3? The frame size & the opening size in inches please?
That same company in my link also sells and 12" and 14" clear plastic tray. You'll have to measure to see which will work. Also if someone has the 11" and is in front of their printer it might be helpful to measure the actual so the SD3 people could make a decision. I didn't think mine was actually 11" when I got it but I could be wrong.
http://www.theultimatepartystore.com/pr … y-p-122492
http://www.theultimatepartystore.com/pr … y-p-122495
wilheldp wrote:Has anybody found a top tray similar to this one that will work with an SD3? Also, can someone direct me to the frame dimensions on an SD3 so that I can have the sides cut prior to mine shipping?
Can you give the dimensions of the top side of the SD3? The frame size & the opening size in inches please?
That's what I was asking in the post you quoted, so no, I cannot provide those measurements.
Thanks for the links, cmetzel. So does the 11" on the one you bought represent the outer dimensions of the tray, or the flat bottom? If it is just the bottom, then the 14" will probably be to big even for the SD3.
I went to a local Party City store and picked up a 12" as it was the only size they had. $3.99 for it and it's about 1/2" too big for the SD2. For that money, I'll try to cut and sand it down on 2 sides to make it fit.
According to the Solidoodle website, here are the dimesnions for the SD3
Standard Features:
• Creates plastic parts up to 8" x 8" x 8"!
• Uses 1.75mm plastic filament (ABS recommended)
• 13.5" x 14" x 14" case footprint (L x W x H)
According to the Solidoodle website, here are the dimesnions for the SD3
Standard Features:
• Creates plastic parts up to 8" x 8" x 8"!
• Uses 1.75mm plastic filament (ABS recommended)
• 13.5" x 14" x 14" case footprint (L x W x H)
Yeah, I was looking at that. Given the case footprint, it looks like you would need two 14" x 14" sheets and one 14" x 13.5" sheet to make the 3 sides of the enclosure. Then get the appropriate sized party tray for the top. I'm interested to know the width of the steel supports so that I can make the sheets slightly smaller to account for hinges on the front and make sure they don't interfere with each other at the sides and top of the enclosure. I'm guessing I could get by with 13.5" x 13.5" and 13.5" x 13.25", but I'd like to know for sure before I get the sheets cut.
If someone adds a drawing with dimensions or a CAD model of the SD2 or SD3 I could mock up some doors/covers. I'm working on my SD2 for a complete portable enclosure. Side panel doors are easy enough with some dimensions and grab a set of hinges from someplace national. I like McMaster-Carr for most of my parts so I can import the hinge CAD to make sure all of the design fits and align the holes.
I don't think cad exists or at least I haven't seen it.
Also something to consider on the SD3 is the the filament doesn't come through the back like the SD2. You will have to cut some sort of hole in the tray.
If someone adds a drawing with dimensions or a CAD model of the SD2 or SD3 I could mock up some doors/covers. I'm working on my SD2 for a complete portable enclosure. Side panel doors are easy enough with some dimensions and grab a set of hinges from someplace national. I like McMaster-Carr for most of my parts so I can import the hinge CAD to make sure all of the design fits and align the holes.
I have posted plans for a SD3 case that doesn't require any cutting or drilling.
I have posted plans for a SD3 case that doesn't require any cutting or drilling.
That's a nice case, but I would actually prefer to have the case drilled/bolted to the frame.
Since you are in possession of an SD3, would you measure the sides and post inner and outer dimensions of all 4 sides that need enclosing?
paeltz wrote:I have posted plans for a SD3 case that doesn't require any cutting or drilling.
That's a nice case, but I would actually prefer to have the case drilled/bolted to the frame.
Since you are in possession of an SD3, would you measure the sides and post inner and outer dimensions of all 4 sides that need enclosing?
The left and right sides are 13 15/16" wide and the front is 13 3/8" wide while being 13 3/4" high.
I'd tell you to hold off on getting anything made. At first I thought I wanted bolted on doors and only had these pieces cut until I got hinges. Now there is no way I'd want bolted on doors. If you are trying to fix something having as much room as possible is very handy. Also be aware on the right hand side of the SD3 a few bolts go slightly beyond the side of the case. It was scratching my acrylic. That is when I decided to add the insulation tape. Also be aware the SD3 doesn't have the filament go through the back of the case like the SD2 so you need to have a different setup than the one on this link to handle this.
I appreciate the dimensions. I was going to leave 1/4"+ all around the cut pieces to allow for hinges on them if I decide to put them on.

I used the bolted on hinges on my SD3 and kept the hinges on the sides towards the back of the unit and aligned them with the opening's in the case
I also used 1/4" spacers to keep the hinges offset from the case and it also accommodates for the 1/4 rubber stripping I used around the doors to seal it.
Only thing I had to modify was cut out a little of the stripping to accommodate for the rod protrusion on the from door so it closes nice and tight.
I still have to get the right size bolts or cut down the ones I used as it was all I had to test fit everything.
I appreciate the dimensions. I was going to leave 1/4"+ all around the cut pieces to allow for hinges on them if I decide to put them on.
FYI the dimensions I gave you are from outside edge to outside edge.
Are the SD3 hinges the same as the SD2 hinges for the hole patterns?
You're buying new hinges so they have to match what you buy.
Duh. I had a moment there. I was thinking of the SD2 door that already has hinges and the design I was working on. On further inspection, then SD3 has no existing doors so anything is up for grabs.
I recently completed my acrylic enclosure with some foam weather stripping and the party tray, but I am still getting significant warping issues (yes I also use glass+hairspray+bed leveling).
Does the filament hole have to be made smaller with some bushing or something, to prevent hot air from escaping? It feels like air can pretty easily flow through a hole that big. What do other people usually do about this?
I wonder if the heat is very uneven. You could try taking some readings with an IR thermometer. Put some masking tape or something over the glass first. Heating the bed with some kind of insulation on top might help it spread better, but that's a long shot. You could also try painting on an acetone/abs mixture, with only a few small pieces of plastic dissolved in it.
I get the strange feeling that my bed is just way too hot, actually. I have been doing some experiments with lowering the bed temperature and testing the amount of warping. Consistently, it has been reducing the warp every time I lower it. I started at 100C and am now printing at 60C , and the parts look amazing compared to before. There's practically no warping, and I still have excellent adhesion to the print bed. I would include pictures but my camera is not quite good enough at macro shots to capture the difference.
Obviously, this is inconsistent with the experience of everyone else, so my first inclination is to think that the bed thermistor is not properly situated.
I unfortunately do not have an IR thermometer to confirm. I really should get one.
SoliForum - 3D Printing Community → Hacks & Mods → Custom Enclosure Mod
Powered by PunBB, supported by Informer Technologies, Inc.