1

Topic: Solidoodle 4 CoreXY rebuild (completed)

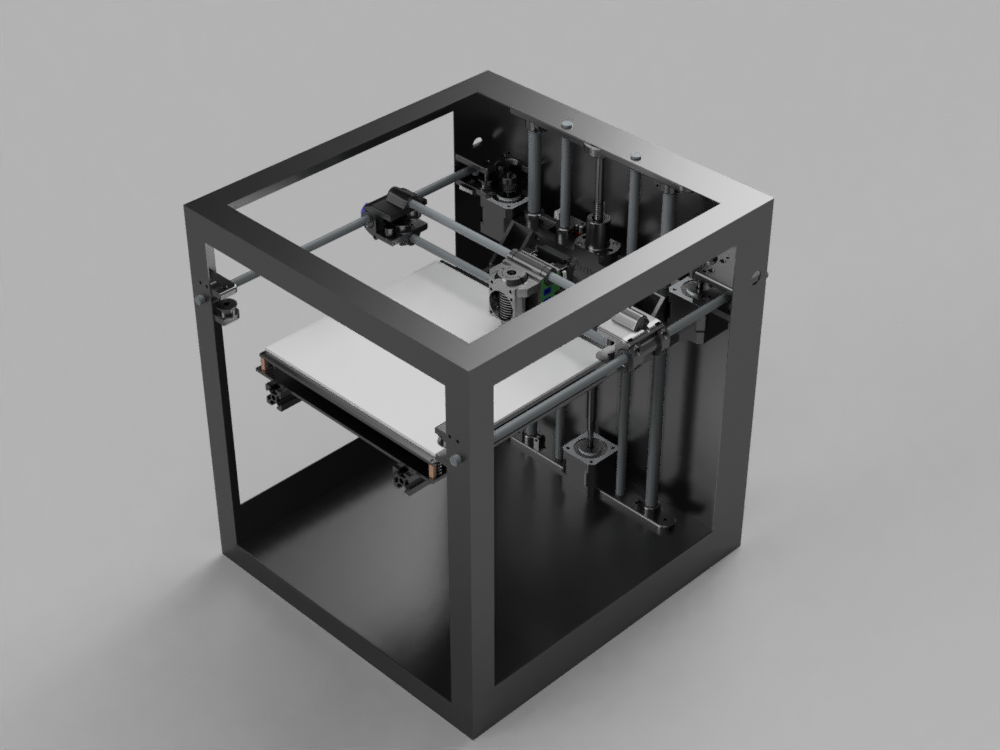
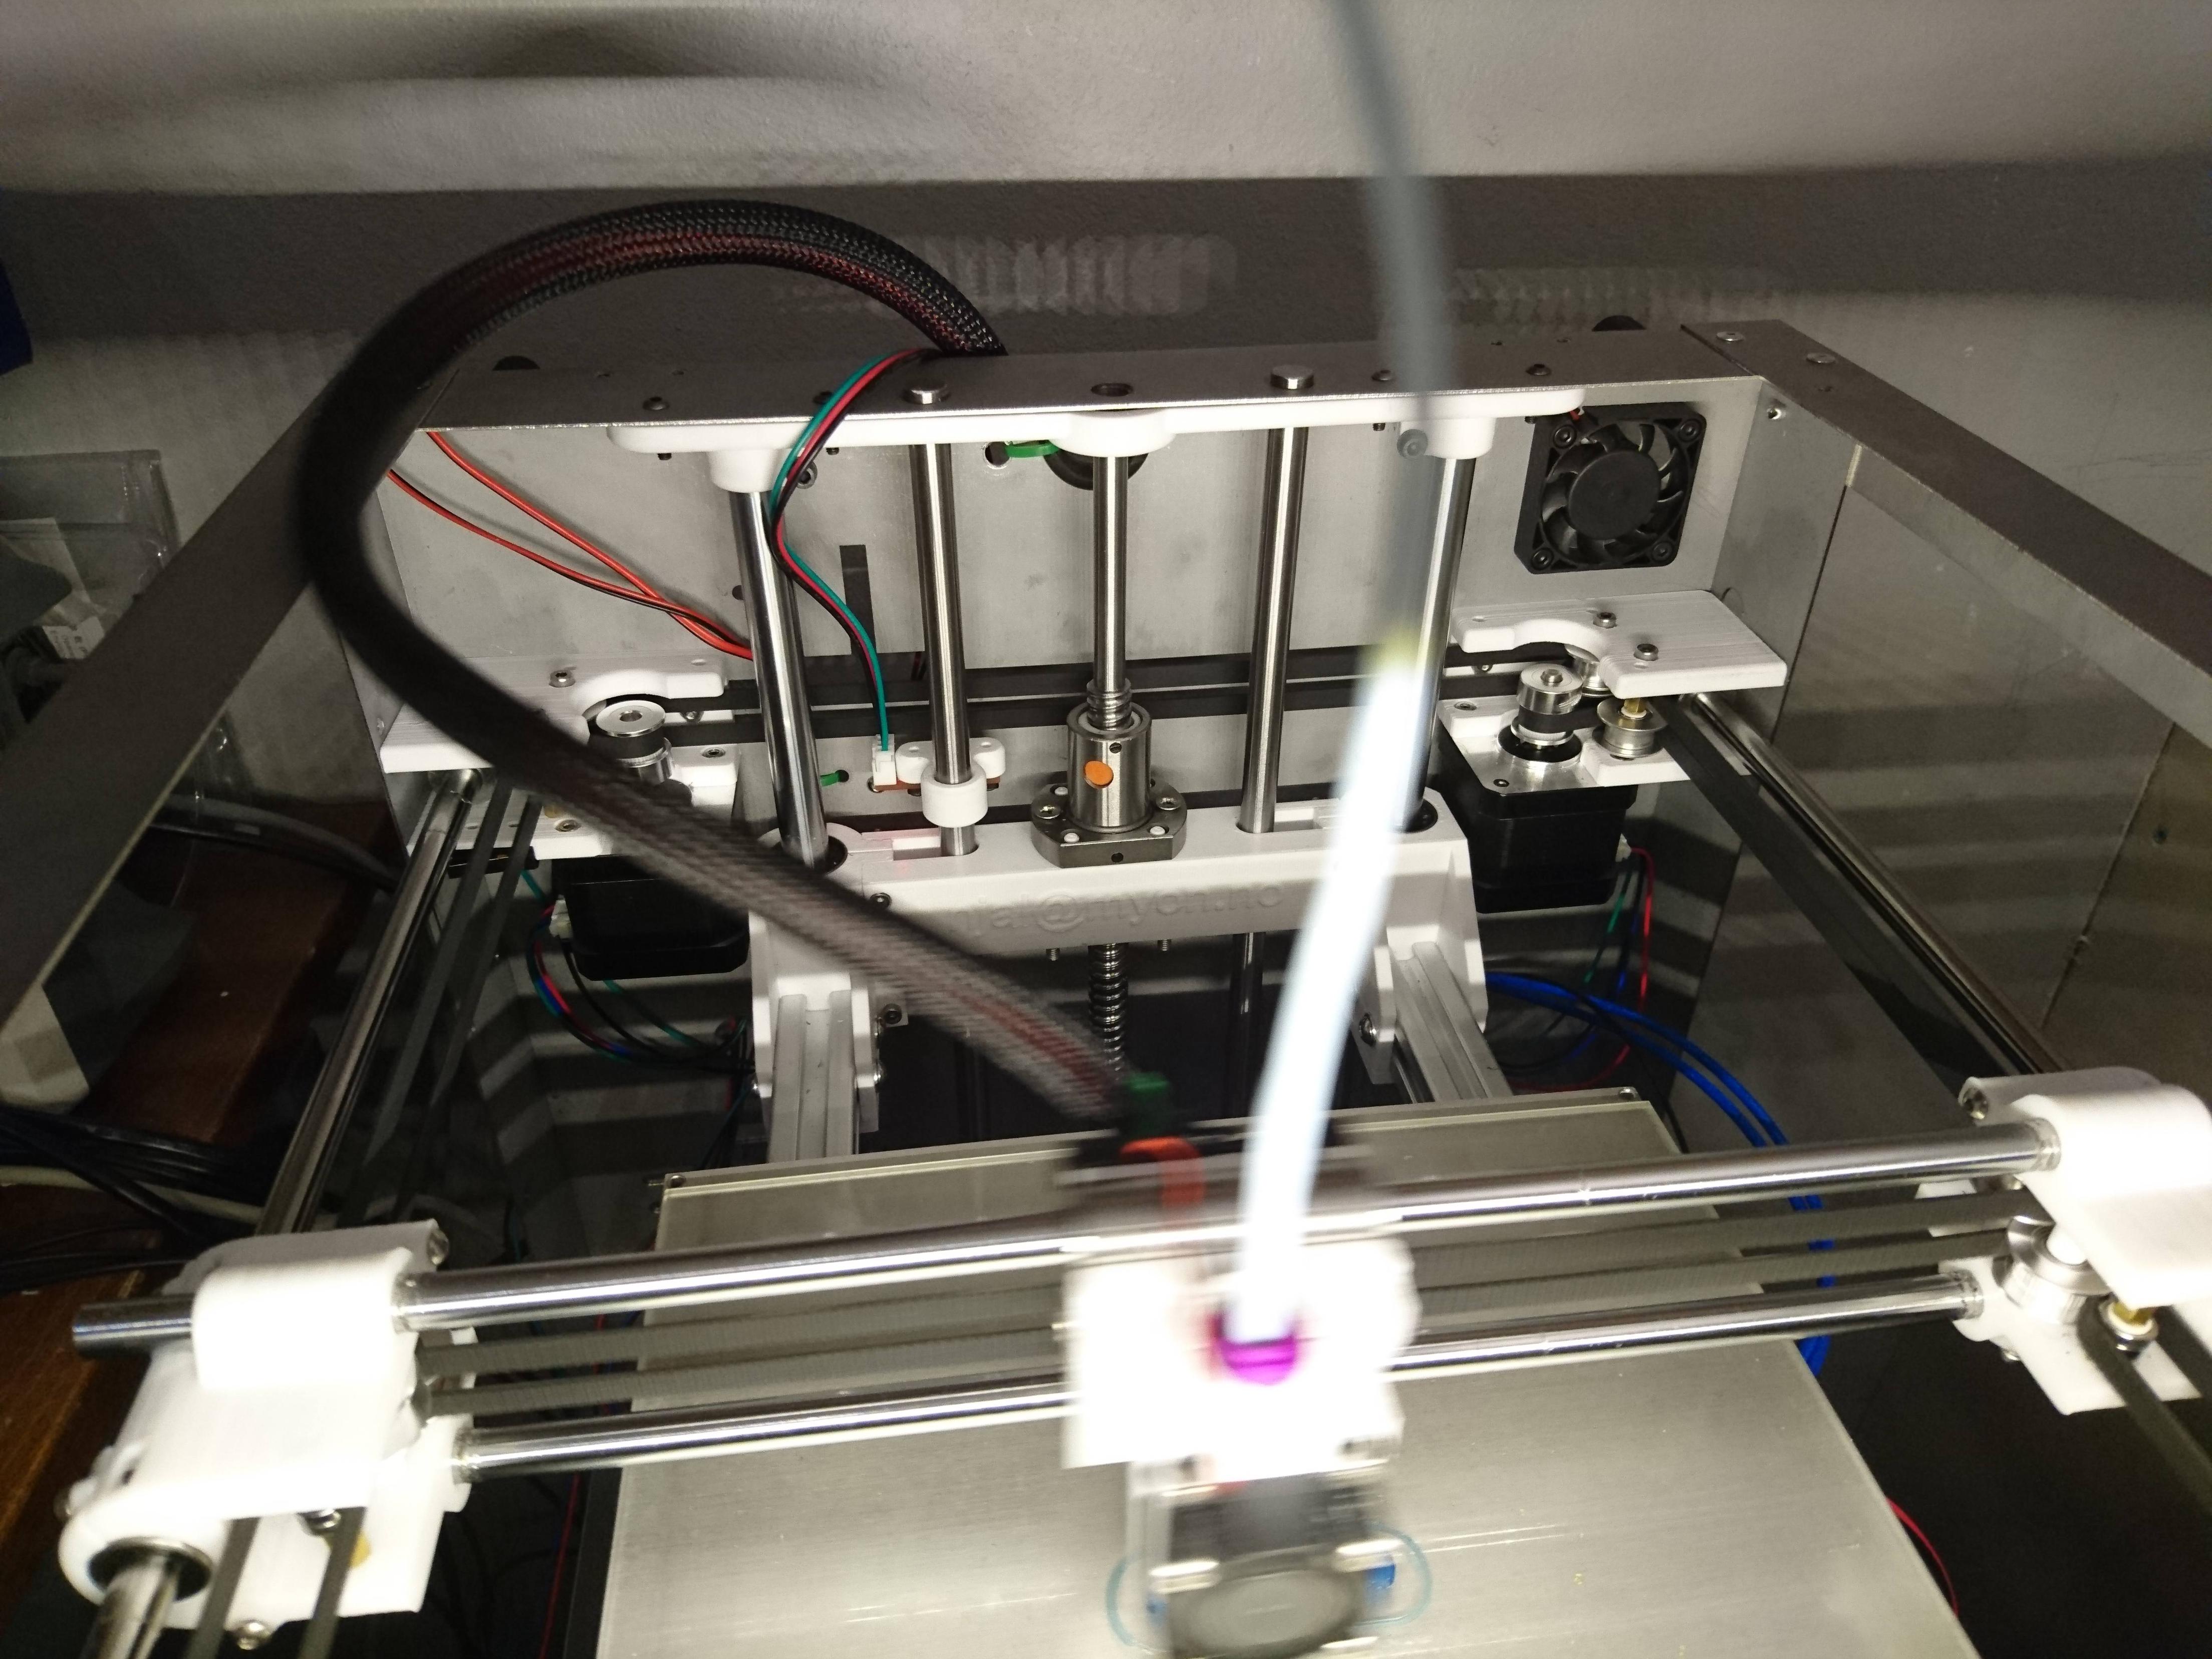
Just completed my first print after a total rebuild of my printer, I've been working with the design some nights a week the last couple of months. Quite happy with the results so far, very fast, much less vibrations and noise and great print quality (well, on the first part that is, which is a cooling duct for the filament fan).

Thingiverse linkhttp://soliforum.com/i/?dLBBppe.jpg

It's an unusal CoreXY design in that it uses some extra idlers to get the motors and belts in the back, so they don't block the door in front. This probably adds some extra drag to the belts, but it can reliably do 300 mm/s at 0.8A per stepper, so it doesn't seem to be a problem.

The new bed is kind of a stand-alone mod, and a lot more rigid than the orignal.I've also added a MeanWell 30A 15V PSU, which heats up the bed much quicker than the old 12V ATX PSU.

The design uses a bowden extruder, going direct extrusion kind of defeats the purpose of going corexy, which is to reduce the moving mass.

Solidoodle SD4, Ramps 1.4, 4x DRV8825, 16V 450W PSU, MK3 alu heatbed /w glass
E3D v6, bowden feeding, airtripper extruder, mk8 gear.
LM8UU X & Y carriages. GT2 belts and pulleys, bearings on all axles.

2

Re: Solidoodle 4 CoreXY rebuild (completed)

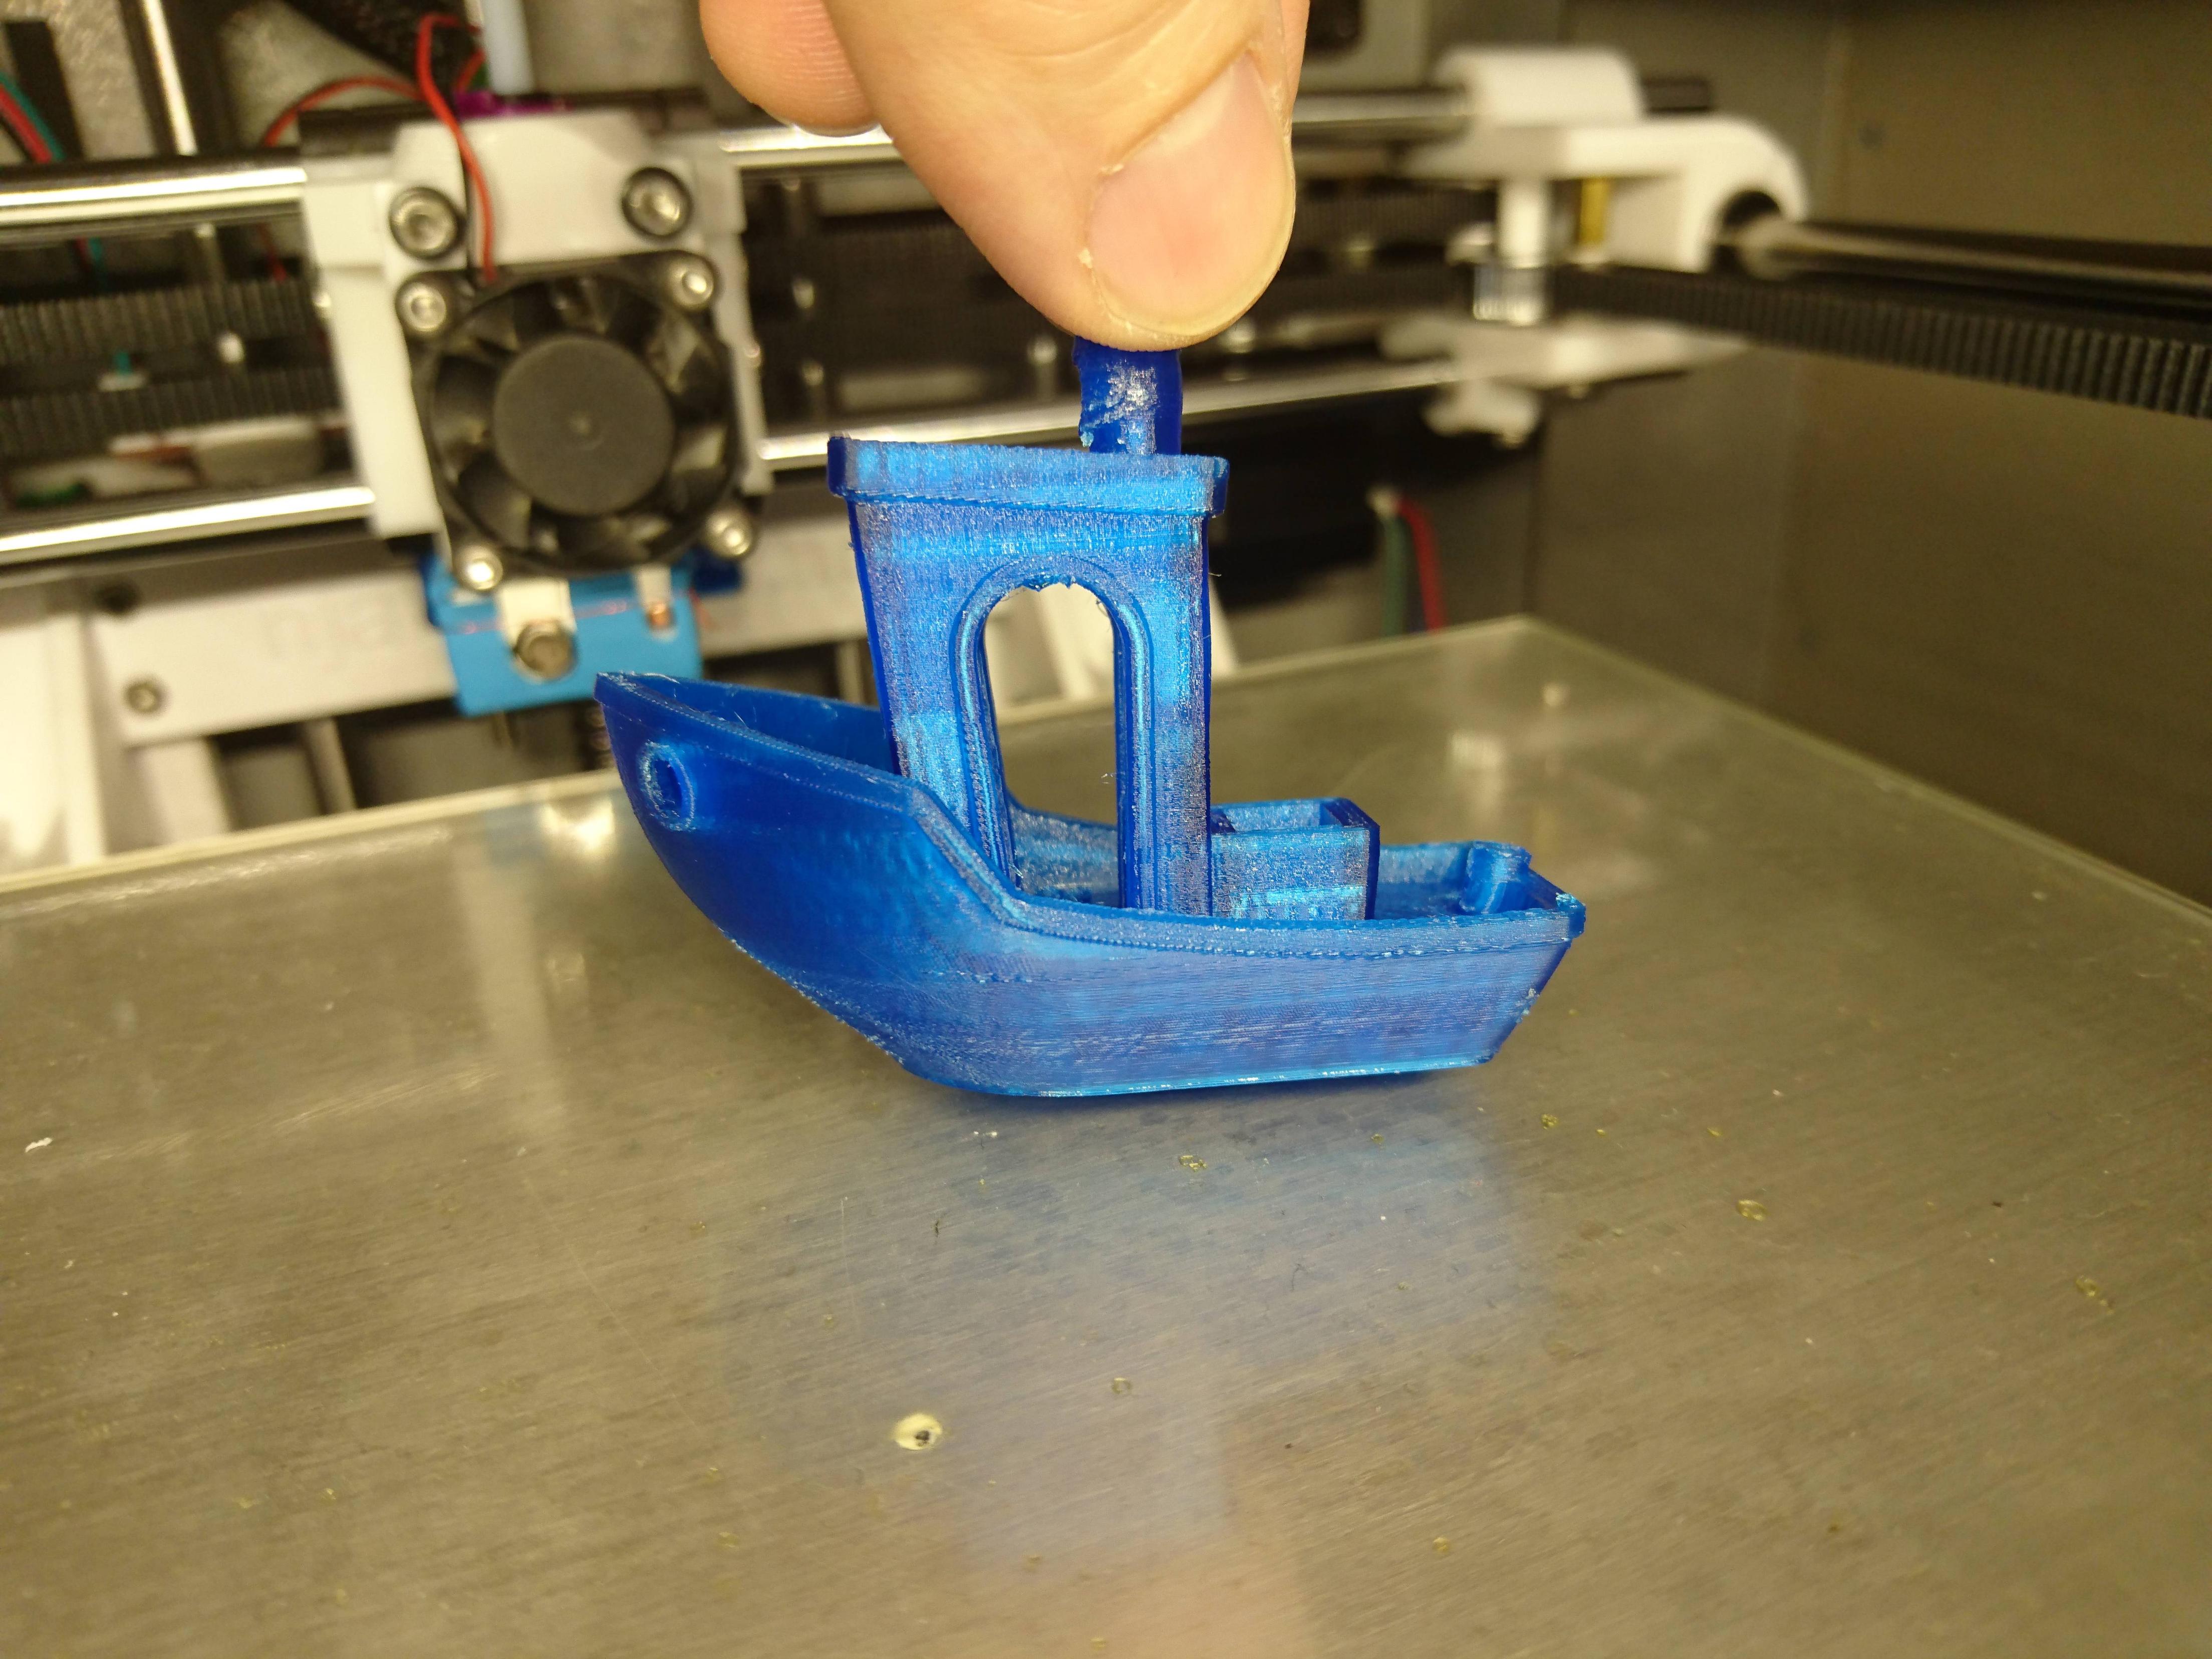
Did a testprint with benchy just now, due to the small size and minimum layer time the print speed never exceeded 110 mm/s, but the results aren't too bad. Cheap filament that I haven't dialed in the temperature for.

Short video here:
https://youtu.be/DDXMY-l8RRY

http://soliforum.com/i/?YYOFuVc.jpg

This was mostly to see that it coulld print without missing steps, but the outer perimeter were printed too fast so there is some ringing artifacts after corners. Outer perimiter printed at 75 mm/s, 0.1mm layer height. 300 mm/s travel. Infill 110 mm/s.

Solidoodle SD4, Ramps 1.4, 4x DRV8825, 16V 450W PSU, MK3 alu heatbed /w glass
E3D v6, bowden feeding, airtripper extruder, mk8 gear.
LM8UU X & Y carriages. GT2 belts and pulleys, bearings on all axles.
3

Re: Solidoodle 4 CoreXY rebuild (completed)

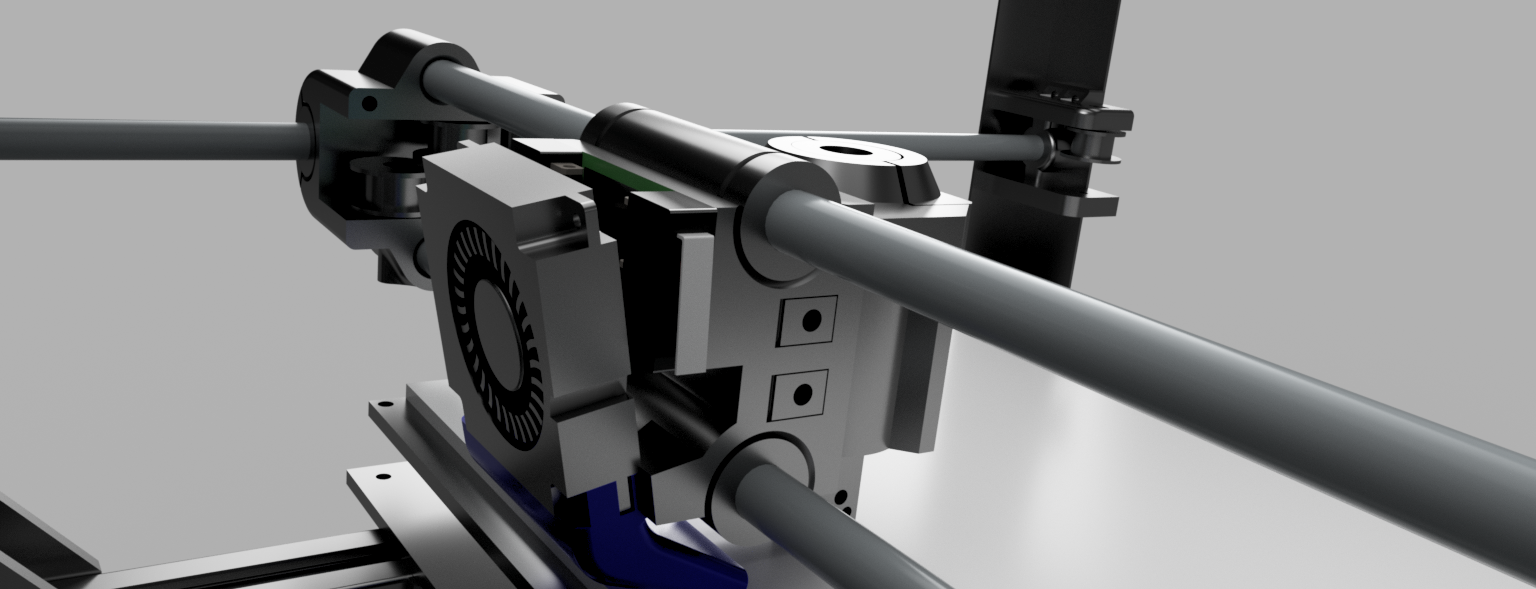
This is a really great design. I am not sure how soon I can implement it as I mentioned on Thingiverse but hopefully by January. smile Here's a few renders from Fusion 360 of your design.

http://soliforum.com/i/?vgSu5mA.png

http://soliforum.com/i/?1Z8ttrs.png

http://soliforum.com/i/?QExpRjg.png

SD2 Pro + RH + Slic3r on Win7Ent (~Craigslist Oct. 2016 my 1st printer: upgrading & calibrating to near perfection)
- E3D V6 hotend; 30A PSU; Glass bed for ABS or Blue Tape on glass for PLA
- X-axis NEMA 14 press on fan (thing:1871741); Lawsy almost everything else; 3mm Z axis rod (thing:1868824)
- Sang board w/all headers, ATmega1284P w/OptiBoot and Marlin beta firmware; VRef tuned

4

Re: Solidoodle 4 CoreXY rebuild (completed)

Wow.  Pretty dang sweet.  Smart layout and pro fabrication.

I now have serious bed envy.  Some 80-20 laying around.  Time to get to work.

5

Re: Solidoodle 4 CoreXY rebuild (completed)

rickq, thanks smile

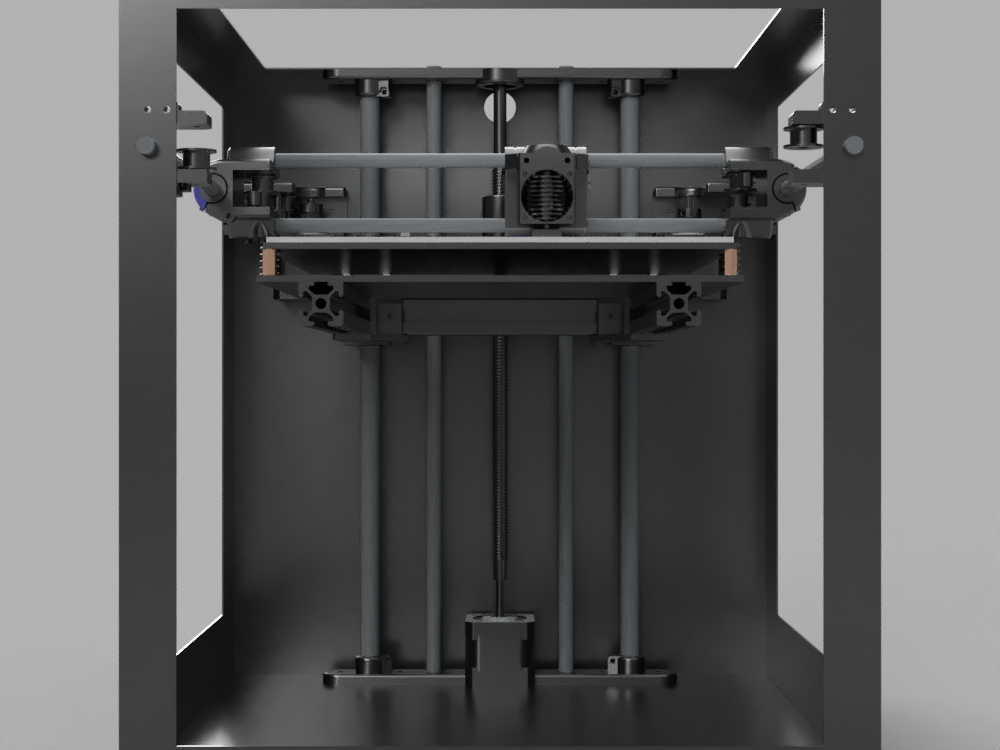
And brucesdad13, now I regret not using black plastic and spraying the cabinet matte black while I had everything out. Because those renders looks sweet smile

Solidoodle SD4, Ramps 1.4, 4x DRV8825, 16V 450W PSU, MK3 alu heatbed /w glass
E3D v6, bowden feeding, airtripper extruder, mk8 gear.
LM8UU X & Y carriages. GT2 belts and pulleys, bearings on all axles.
6

Re: Solidoodle 4 CoreXY rebuild (completed)

I thought about painting mine with BBQ grill paint. Rustoleum makes a flat black high temp paint for outdoor grills and I have several cans. It's almost a dark grey actually... maybe I will give it a go.

elenhinan wrote:

And brucesdad13, now I regret not using black plastic and spraying the cabinet matte black while I had everything out. Because those renders looks sweet smile

SD2 Pro + RH + Slic3r on Win7Ent (~Craigslist Oct. 2016 my 1st printer: upgrading & calibrating to near perfection)
- E3D V6 hotend; 30A PSU; Glass bed for ABS or Blue Tape on glass for PLA
- X-axis NEMA 14 press on fan (thing:1871741); Lawsy almost everything else; 3mm Z axis rod (thing:1868824)
- Sang board w/all headers, ATmega1284P w/OptiBoot and Marlin beta firmware; VRef tuned

7

Re: Solidoodle 4 CoreXY rebuild (completed)

This may come together for me sooner than expected. I realized Folgertech is only an hour drive away wink

SD2 Pro + RH + Slic3r on Win7Ent (~Craigslist Oct. 2016 my 1st printer: upgrading & calibrating to near perfection)
- E3D V6 hotend; 30A PSU; Glass bed for ABS or Blue Tape on glass for PLA
- X-axis NEMA 14 press on fan (thing:1871741); Lawsy almost everything else; 3mm Z axis rod (thing:1868824)
- Sang board w/all headers, ATmega1284P w/OptiBoot and Marlin beta firmware; VRef tuned

8

Re: Solidoodle 4 CoreXY rebuild (completed)

The Rustoleum high temp paint is only good for, well, grills. It is hardly cosmetics pleasing and is a thicker oil based paint. Rustoleum does, however, make some other great flat paints. Just grab one of their Painters Choice paint+primer cans and it will bond well and give the finish you want. The heat in the build chamber will have little to no effect on the paint even though it is a thinner paint.

Printit Mason and Printit Horizon printers
Multiple SD2s- Bulldog XL, E3D v5/v6/Lite6, Volcano, Hobb Goblin, Titan, .9 motor, Lawsy carriages, direct Y drive, fishing line...the list goes on
Filawinder and Filastruder #1870.....worth every penny!

9 (edited by Tin Falcon 2016-11-24 12:08:40)

Re: Solidoodle 4 CoreXY rebuild (completed)

This may come together for me sooner than expected. I realized Folgertech is only an hour drive away

You do need to order and then pick up they do not have a retail store to browse though.
The kits are on sale for BF the ft 5 kit  is on sale for $425. 15 % off    I can send you the coupon code if you like . I have considered the FT5  and could likely be converted to core x-y without too much hassle.
Seems like a nice kit either as desisined or as a jumping off point for a custom machine.
Tin

Soliddoodle 4 stock w glass bed------Folger Tech Prusa 2020 upgraded to and titan /aero extruder mirror bed
FT5 with titan/ E3D Aero------MP mini select w glass bed
MP Utimate maker pro-W bondtech extruder
Marlin/Repetier Host/ Slic3r and Cura

10

Re: Solidoodle 4 CoreXY rebuild (completed)

Yeah, I bought one of them for work a few days ago and hoping they'll honor the black friday coupon since it hasn't been fulfilled yet. I can't really justify the expense and time to make massive revisions to the work printer. For home use I've had my eye on the D-Bot for over a month. But first getting my SD2 upgraded would be a great step.

Tin Falcon wrote:

This may come together for me sooner than expected. I realized Folgertech is only an hour drive away

You do need to order and then pick up they do not have a retail store to browse though.
The kits are on sale for BF the ft 5 kit  is on sale for $425. 15 % off    I can send you the coupon code if you like . I have considered the FT5  and could likely be converted to core x-y without too much hassle.
Seems like a nice kit either as desisined or as a jumping off point for a custom machine.
Tin

SD2 Pro + RH + Slic3r on Win7Ent (~Craigslist Oct. 2016 my 1st printer: upgrading & calibrating to near perfection)
- E3D V6 hotend; 30A PSU; Glass bed for ABS or Blue Tape on glass for PLA
- X-axis NEMA 14 press on fan (thing:1871741); Lawsy almost everything else; 3mm Z axis rod (thing:1868824)
- Sang board w/all headers, ATmega1284P w/OptiBoot and Marlin beta firmware; VRef tuned

11

Re: Solidoodle 4 CoreXY rebuild (completed)

Ok good advice smile

AZERATE wrote:

The Rustoleum high temp paint is only good for, well, grills. It is hardly cosmetics pleasing and is a thicker oil based paint. Rustoleum does, however, make some other great flat paints. Just grab one of their Painters Choice paint+primer cans and it will bond well and give the finish you want. The heat in the build chamber will have little to no effect on the paint even though it is a thinner paint.

SD2 Pro + RH + Slic3r on Win7Ent (~Craigslist Oct. 2016 my 1st printer: upgrading & calibrating to near perfection)
- E3D V6 hotend; 30A PSU; Glass bed for ABS or Blue Tape on glass for PLA
- X-axis NEMA 14 press on fan (thing:1871741); Lawsy almost everything else; 3mm Z axis rod (thing:1868824)
- Sang board w/all headers, ATmega1284P w/OptiBoot and Marlin beta firmware; VRef tuned

12

Re: Solidoodle 4 CoreXY rebuild (completed)

Will this work on a Solidoodle 3? I'm trying to figure out what to do with my old lass.

13

Re: Solidoodle 4 CoreXY rebuild (completed)

I found your design on thingiverse and figured I would jump on here and post my progress.  I have a SD4 I got off craigslist that I'm currently modifying using your designs.

Thanks very much for sharing and for including the solidworks source files.  This is making it so much easier to tweak and mod.

14

Re: Solidoodle 4 CoreXY rebuild (completed)

My current plan is to utilize your corexy and slightly modify the original z. 

I think I can resolve the stability issues with the platform and modify it to take a standard PCB heated bed. 

If this doesn't work out plan b will to implement a z axis similar to the E3D BigBox with 4 linear rails and 2 6mm leadscrews.  I would move all the z motors and electronics underneath the machine at that point too.  A much larger scope of work that won't really buy me much additional build volume so I would prefer plan a.

To start off I stripped down my SD4, removed all the bushings, and primered and painted the frame satin black.  This looks pretty nice with the light green PHA/PLA from Meltink that I'm printing all the parts in.

I tweaked your corexy design a little because I felt that the motor mounts were a little thin for the weight. This also allowed me to make the endstop mounting more sturdy.  The little pieces were too brittle for me in PHA/PLA.  I'll also add a couple of braces beneath the stepper motors to help take the weight off the mounts.

For the carriages I simplified the left and right a bit so they're just one piece now.

15

Re: Solidoodle 4 CoreXY rebuild (completed)

I have my corexy portion built and assembled with all the belts and pulleys.  This weekend I'll work on the z axis.

I'm going to use a MKS SMini board that I got pretty cheap and fast from FolgerTech.  I'm also going to use an AC heated bed with SSR from MakerTurn on Tindie

I'll post pics when I'm done.

16

Re: Solidoodle 4 CoreXY rebuild (completed)

KRavEN wrote:

My current plan is to utilize your corexy and slightly modify the original z. 

I think I can resolve the stability issues with the platform and modify it to take a standard PCB heated bed. 

If this doesn't work out plan b will to implement a z axis similar to the E3D BigBox with 4 linear rails and 2 6mm leadscrews.  I would move all the z motors and electronics underneath the machine at that point too.  A much larger scope of work that won't really buy me much additional build volume so I would prefer plan a.

To start off I stripped down my SD4, removed all the bushings, and primered and painted the frame satin black.  This looks pretty nice with the light green PHA/PLA from Meltink that I'm printing all the parts in....

If you want an excellent heat bed, don't bother with the PCB type - get one of these: https://www.printitindustries.com/produ … -8-heatbed I bought one when they were first introduced and liked it so much I bought a 2nd one - both are on SD4s - no modifications needed - just remove the old silicone heater and apply the Hale (comes with adhesive already on it - peel the backing & stick it in place).

I would also recommend you upgrade the power supply (supernight, also available at PrintIt) as the stock units are not very robust.

And PLA is not the best choice for printer parts - far too brittle and it will fail in a fairly short time (been there, done that)

SD4 #1 & #2 - Lawsy carriages, E3D v6, Rumba controller board, mirror bed plate, X motor fan, upgraded PSU & Mica bed heater
SD4 #3 - in the works ~ Folgertech FT-5, rev 1
Printit Industries Beta Tester - Horizon H1

17

Re: Solidoodle 4 CoreXY rebuild (completed)

heartless wrote:

If you want an excellent heat bed, don't bother with the PCB type - get one of these: https://www.printitindustries.com/produ … -8-heatbed I bought one when they were first introduced and liked it so much I bought a 2nd one - both are on SD4s - no modifications needed - just remove the old silicone heater and apply the Hale (comes with adhesive already on it - peel the backing & stick it in place).)

I had looked at that but I wanted to try out a SSR and 120vAC heated bed.  Also the SMINI doesn't have a mosfet for a 12v heated bed.

heartless wrote:

I would also recommend you upgrade the power supply (supernight, also available at PrintIt) as the stock units are not very robust.

Not necessary with a 120vAC heated bed but I designed a power supply box very similar in dimensions to the original controller box of the SD4 that is holding the guts of a 240w mATX power supply.  This is more than enough plus gives me 5v 2amp standby power for the raspberry pi / MKS SMINI combo I'm going to utilize.

heartless wrote:

And PLA is not the best choice for printer parts - far too brittle and it will fail in a fairly short time (been there,
done that)

PLA/PHA is closer to PETG in characteristics and not brittle at all.  It comes out with an almost matte finish and works well with sandpaper and other abrasive finishing.