Topic: Quick Guide to Program PaperTags for XYZPrinters
Hello
It is my duty to publish here a short Quick Guide for program the paper tags. It is based on my experience because I recognized a lot of mistakes when using not an original Arduino Nano
I hope it helps many people to have a quicker start to program the tags. For me it takes nearly 1 1/2 months (no fulltimejob) before everything was working. :-(
My test is made with 2 different Arduino Nano & PN532 (loaded with both Firmware from cgrillo & Modfreakz), but I will write this Quick Guide for people who have only one Arduino Nano & PN532
The Software "Update NTAG213 v1.1" & "NTAG Edit Tool 1.40" you can find in this forum!
- Update NTAG213.exe (http://www.soliforum.com/topic/16946/fr … ank-ntags/)
- NTAG Edit Tool.exe (http://www.soliforum.com/topic/16950/nt … nior-mini/)
---------------------------------------------------------------------------------------------------------------------------------------------------
1) Prepare all the equipment (Arduino Nano & PN532, Papertags based on NFC213) and a Laptop with both Update NTAG213 v1.1 & NTAG Edit Tool 1.40
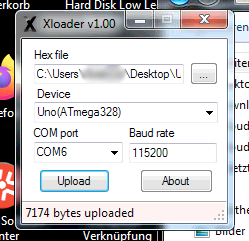
2) Flash the Bootloader to the Arduino with Xloader.exe. In my case I need to use "UNO(ATmega328) as device! probably Users of none original Arduino (clones) can use the Nano(ATmega328). Select the correct .hex file and "upload". After a couple of seconds the upload was successful (7174 bytes uploaded)
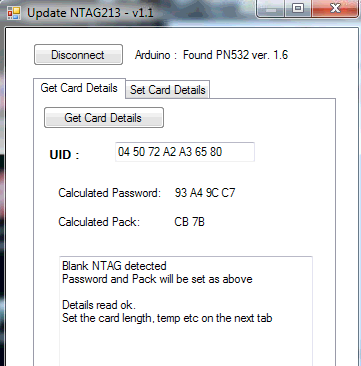
3) Start the Update NTAG213.exe and push the Connect Button
4) Click on "Get Card Details" till all the fields are filled with Hex Data
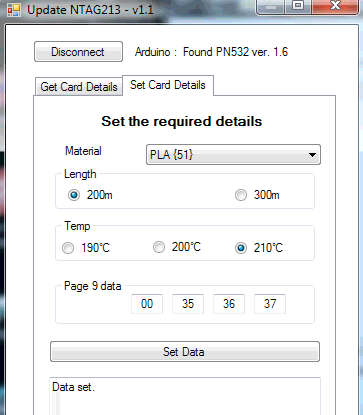
5) Switch to the next tab and set the Material to PLA and the Length to 200m and click the "Set Data"-Button. Wait till the output shows "Data set."
6) Repeat Step 4) & 5) for every paper tag you want to program!!! Each Tag gets an Unique Code (no idea were this is based on)
7) Close Update NTAG213.exe and open NTAG Edit Tool.exe (version 1.4)
Because the Arduino still has the Firmware of cgrillo, we need to first load the Modfreakz Firmware
The following steps are not necessary to use the printer, but for people who want to have the cosmetic correct information of their PLA reel stored in the NFC! ;-)
8) Click on the Connect Button while holding the CNTRL Key
Select the correct COM Port and click on Update
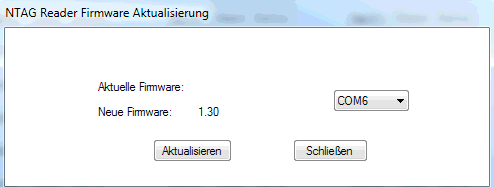
After a couple of seconds you will get an output that the writing was correct!
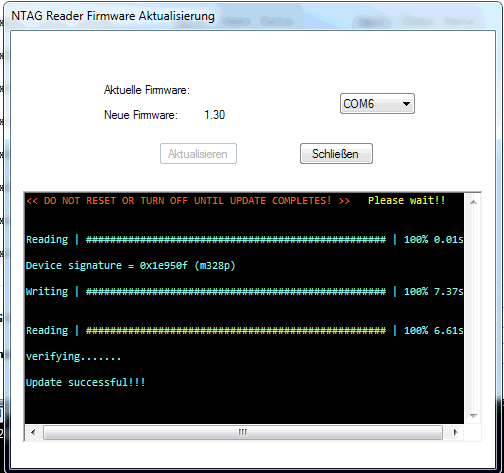
Now close this window
9) Connect the Arduino
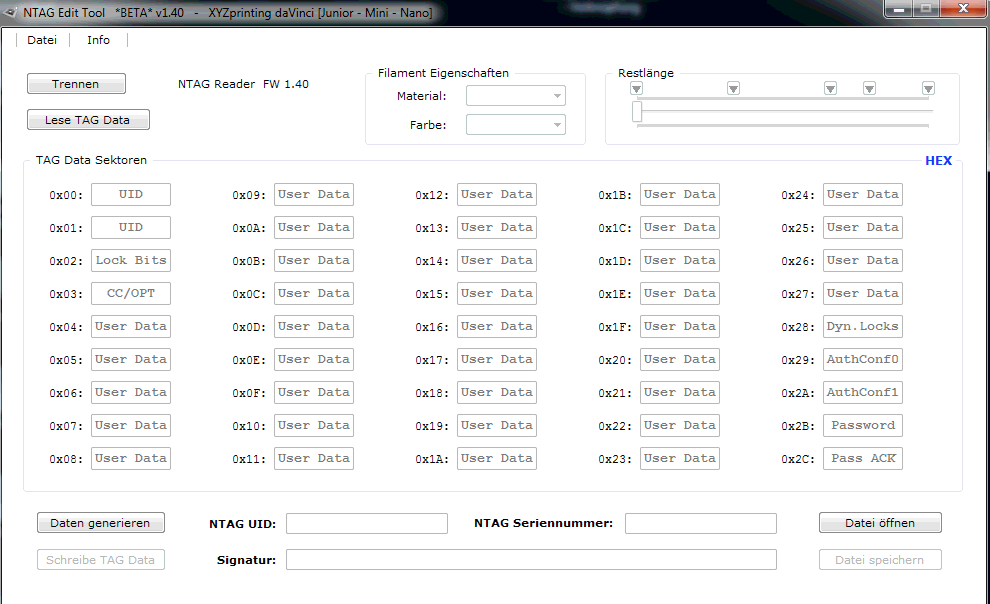
You will see that all the fields are empty
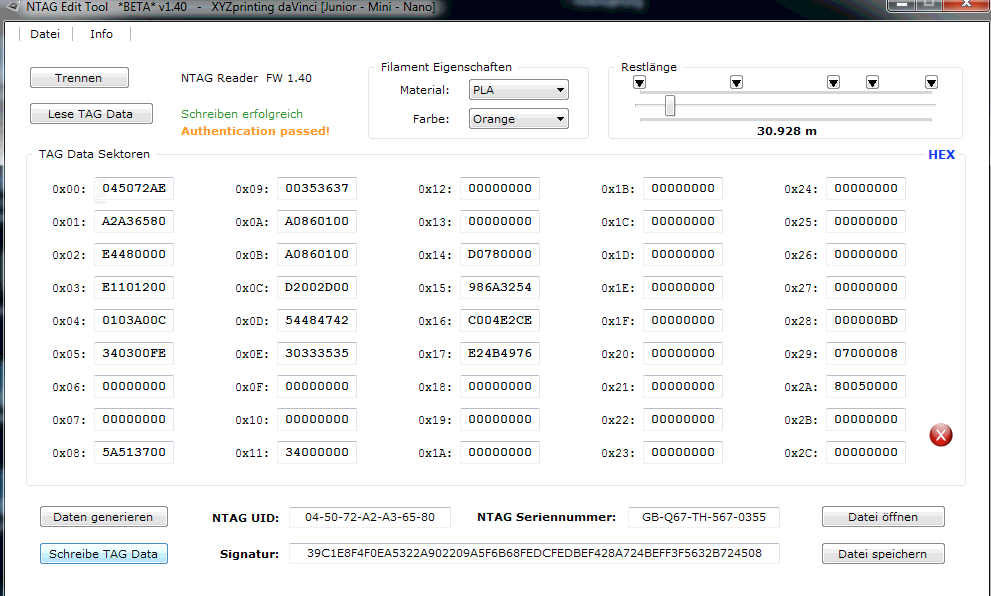
10) Put a paper tag on the PN532 and click on "Read TAG Data"
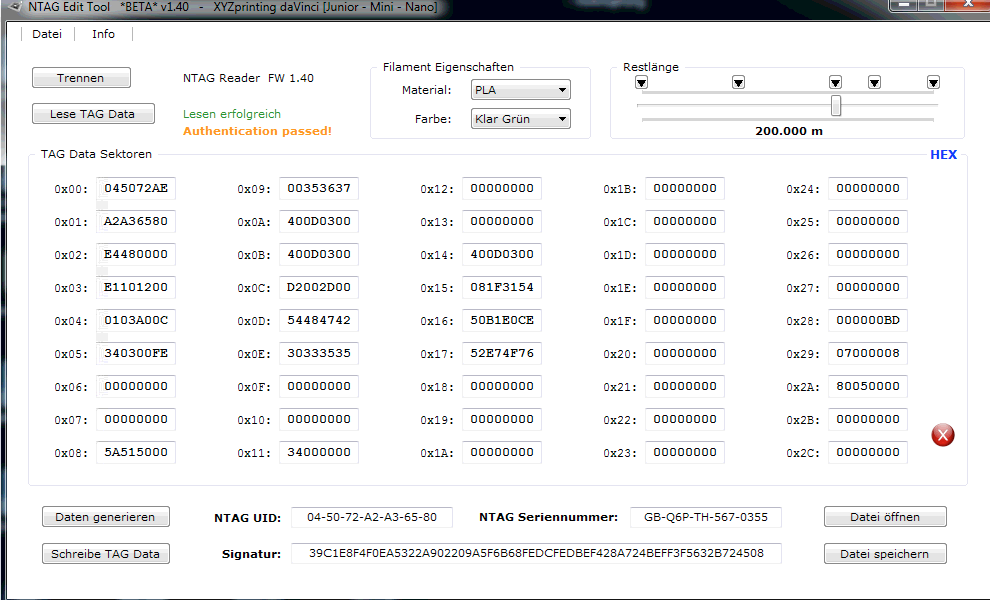
In my case the Material was PLA, Color Orange and the length was 30 meter!
I want to change this to Reel I own! Therefore I change it to Color Transparent and Length 30meter. Because of an Issue with newer Firmware of the "da Vinci 3D Printers", the length shouldn't exceed 200 meter. This could all the Values listed in the Pulldown Menu
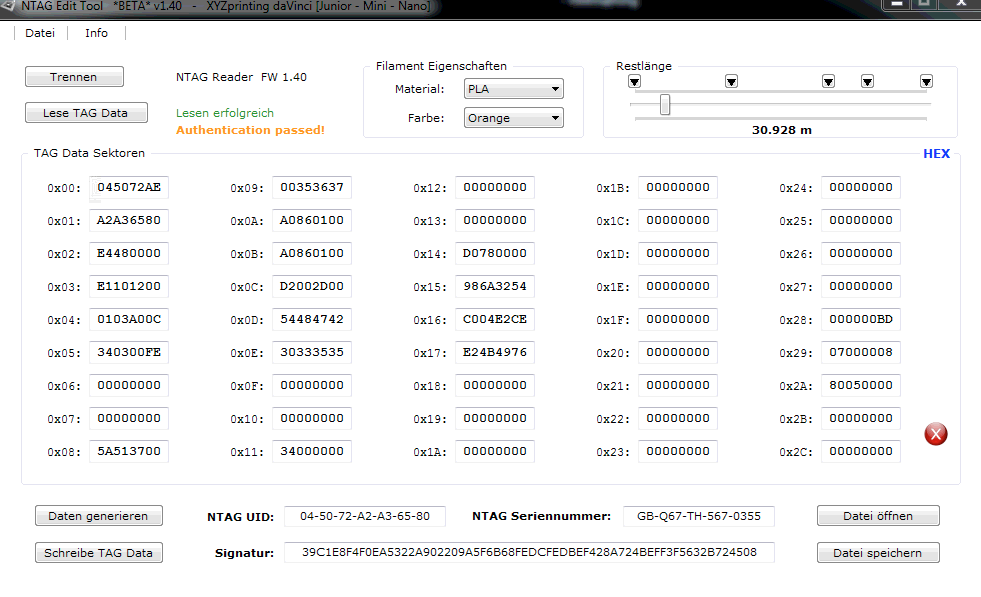
11) As next you need to "Write TAG Data" to the papertag
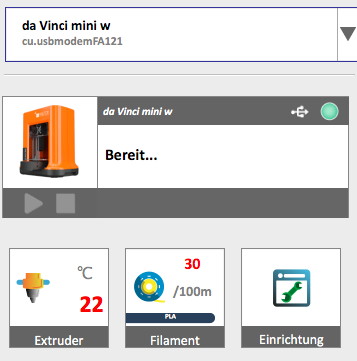
12) Now you can put the paper tag in the Holder and put the Reel in the "da Vinci 3D Printer"
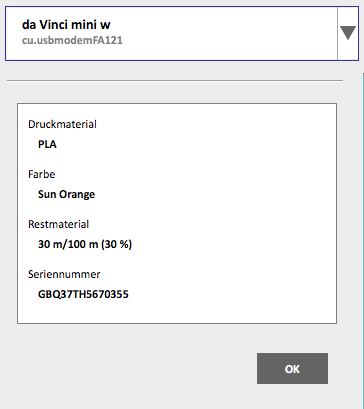
13) The Dashboard of XYZPrint shows the correct length!
In the detail Information you will find all the Info of this Tag
I hope this Quick Guide helps a lot of people and I wish everyone a lot of pleasure with using the ""da Vinci 3D Printers".
Maybe there are other ways to get to a result. For me it works. My next step need to be to mod the Original XYZ Tags. These are mapped out by XYZPrinting because of the firmware downgrades I made :-( and therefore useless (one has an rest length of 72)
I used 2 programs to finish the job, maybe in future, everything is possible with one application ?!?
Have a lot of Fun ;-)