Re: Thoughts on extending the Da Vinci Jr
Anthem IMHO you deserve the mod of the year award for this .
I am not a davinci fan although I was tempted to by one as a first printer.
I did however get bit by the build bug and did a kit build and just ordered a second kit build. I know in the beginning I thought you crazy for doing this extreme mod.
What can I say it works . you did things others including myself would have not attempted. Congratulations are in order and I hope this thread has led others to follow their dreams.
Tin
Wow, thanks, Tin Falcon.
I do this mainly because I'm a hobbyist and jack-of-all-trades at heart. When I see the possibility for improvement, and it's within my means, I become obsessed with making it happen. I also embrace the open source spirit. If I know how to do something, I like to spread the knowledge and make sure anyone who has the interest is able to as well, and then hopefully they too can help improve on it. I see 3D printing as a prime example of an area where that's as important as ever -- there's so much open source hardware and software for it out there already, and working together as a community, there's so much room for new ideas and methods to take root to take even at-home printing to new levels.
Anyway, thanks. No awards are necessary when I get feedback like that.
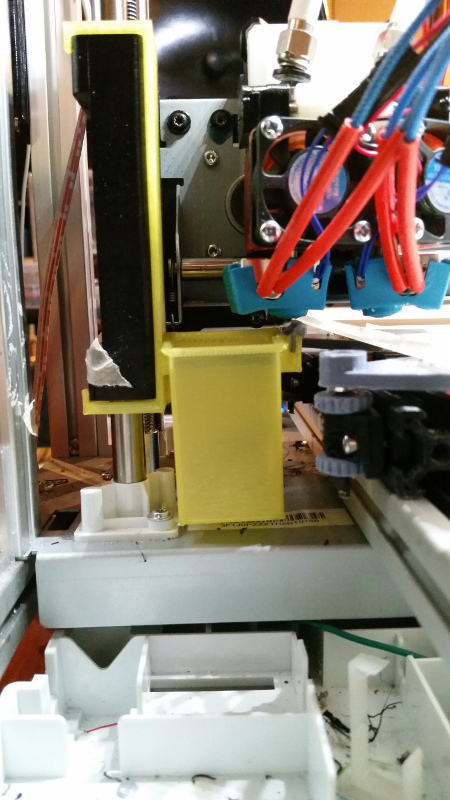
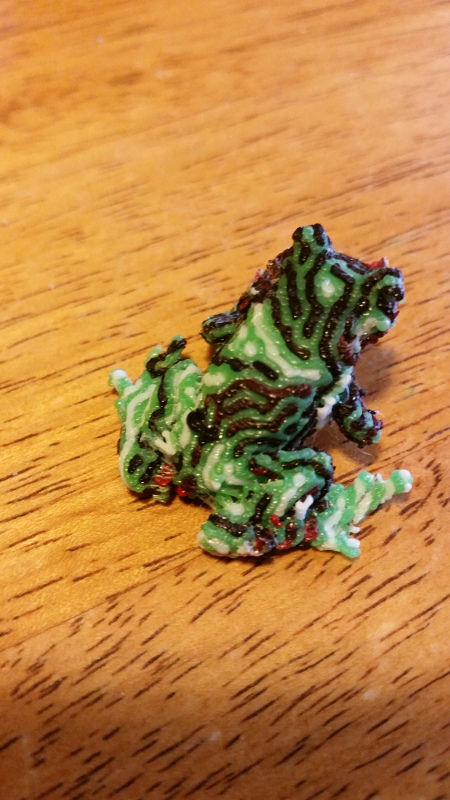
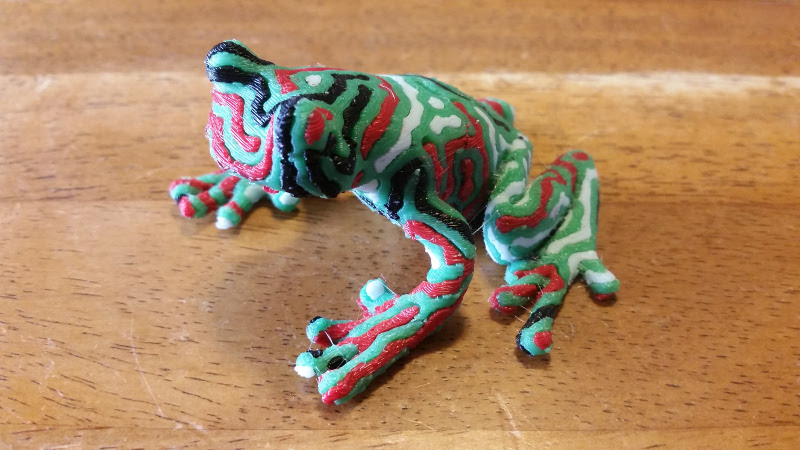
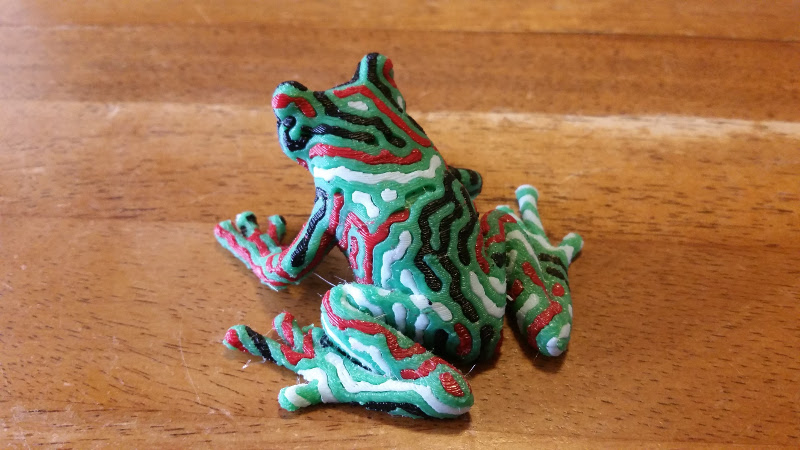
But since I'm posting anyway, I'll add another update. I tweaked my gcode to use the M218 command, and it works! By purging 25mm on tool changes I can even get a clean red. Pics or it didn't happen:
(I'm not quite sure why it looks a little over-extruded; probably because I just re-leveled the bed after installing the hardened nozzles and it might be a little too high.)
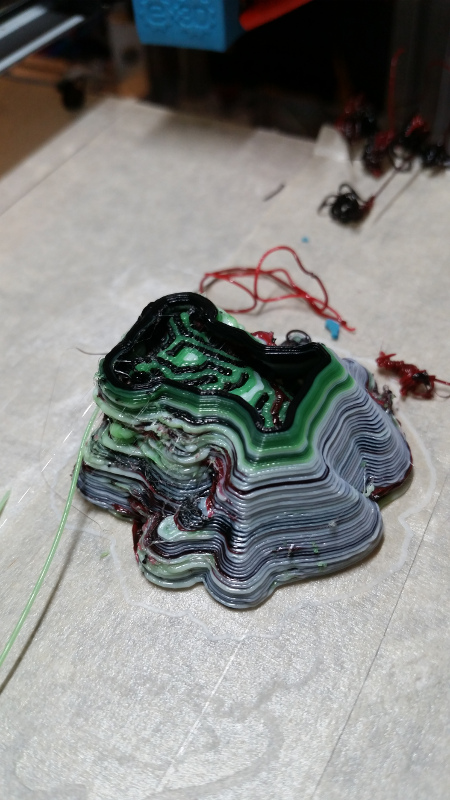
In that photo you can see part of the red and black bird's nest of purges. I don't have a proper purge bucket, so I'm relying on the low height of this print and my print bed to catch the purged strings as the hotend moves over the print. But as you can see, no need for an ooze shield or prime tower here, and it produces much more reliable colors. Purging 25mm of filament with a 0.4mm nozzle produces a string about 230mm long, and while you can still see a little bit of shading on the red perimeters, I'd call a 25mm good enough for most purposes (on my 230mm string, the red starts to look "clean" in the last 10mm or so, so I'm hopefully wasting as little filament as possible).
The downside to purging is that if you do waste 25mm (or however much you decide is good enough) of filament with every tool change. Say you're printing a 10cm tall piece at 0.1mm layer height, that's going to waste 25 meters of every color, and that number is solely based on layers (and exact number of toolchanges), not actual print volume. Not only is that a lot of wasted filament, but you'll have to empty your purge bucket several times mid-print. That, of course, is perhaps an extreme example, but it does highlight part of the problem inherent in sharing nozzles between colors.
Of course, it's a trade off. You can waste filament in purging/priming by sharing nozzles, or you can deal with the frustration of getting all your offsets just right and losing print volume (and increasing your out-of-pocket expenses) by actually installing four different nozzles.
At the moment, I'm going forward with the purge idea since it seems to work so well. I'm now designing some clip-on brackets that can be used for purge/wipe buckets