the process for adjusting voltage is the same on your sang board as for the printrboard - use a ceramic or plastic screwdriver to turn the little trimpot - clockwise to increase voltage, counter-clockwise to decrease... do NOT use a metal screwdriver while the printer is powered up... 
a good share of us don't really adjust by actual voltage numbers - those just get you in the ballpark, and often need fine tuning anyway, so don't get hung up on hard numbers.
Set the printer up where you can easily access the board while it is running.
load and slice a model - preferably something larger with longer movements... or...
Alternatively you can send longer manual movement commands to work one axis at a time... but I find it easier to set up a print and do a "dry run" (no filament extruded) and just let the printer run while I adjust (setting infill angle to 90 degrees will make it easier to work one axis at a time).
For X & Y - with the printer running, turn down one trim pot until the motor stops moving the axis, then slowly turn it back up, in very small increments, until it is just moving smoothly. Then move on to the other one.
Z is a little trickier to do, but can be done... drop the bed as far as you can, then hit the home button and adjust as it moves up.
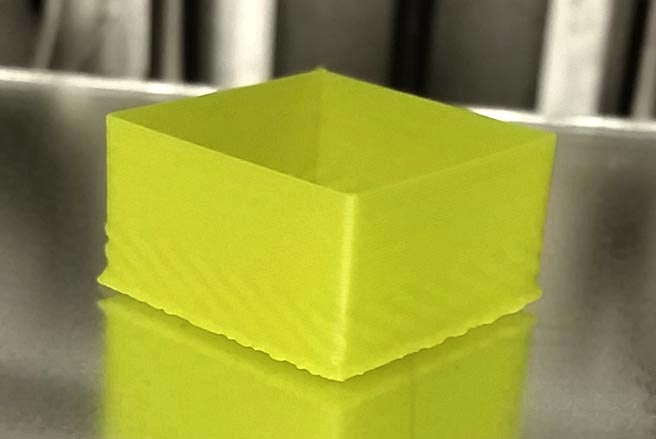
For the Extruder - again I set up a print - usually a tall, single wall box, so I can see what is happening as I adjust - this time you want to actually print the model.
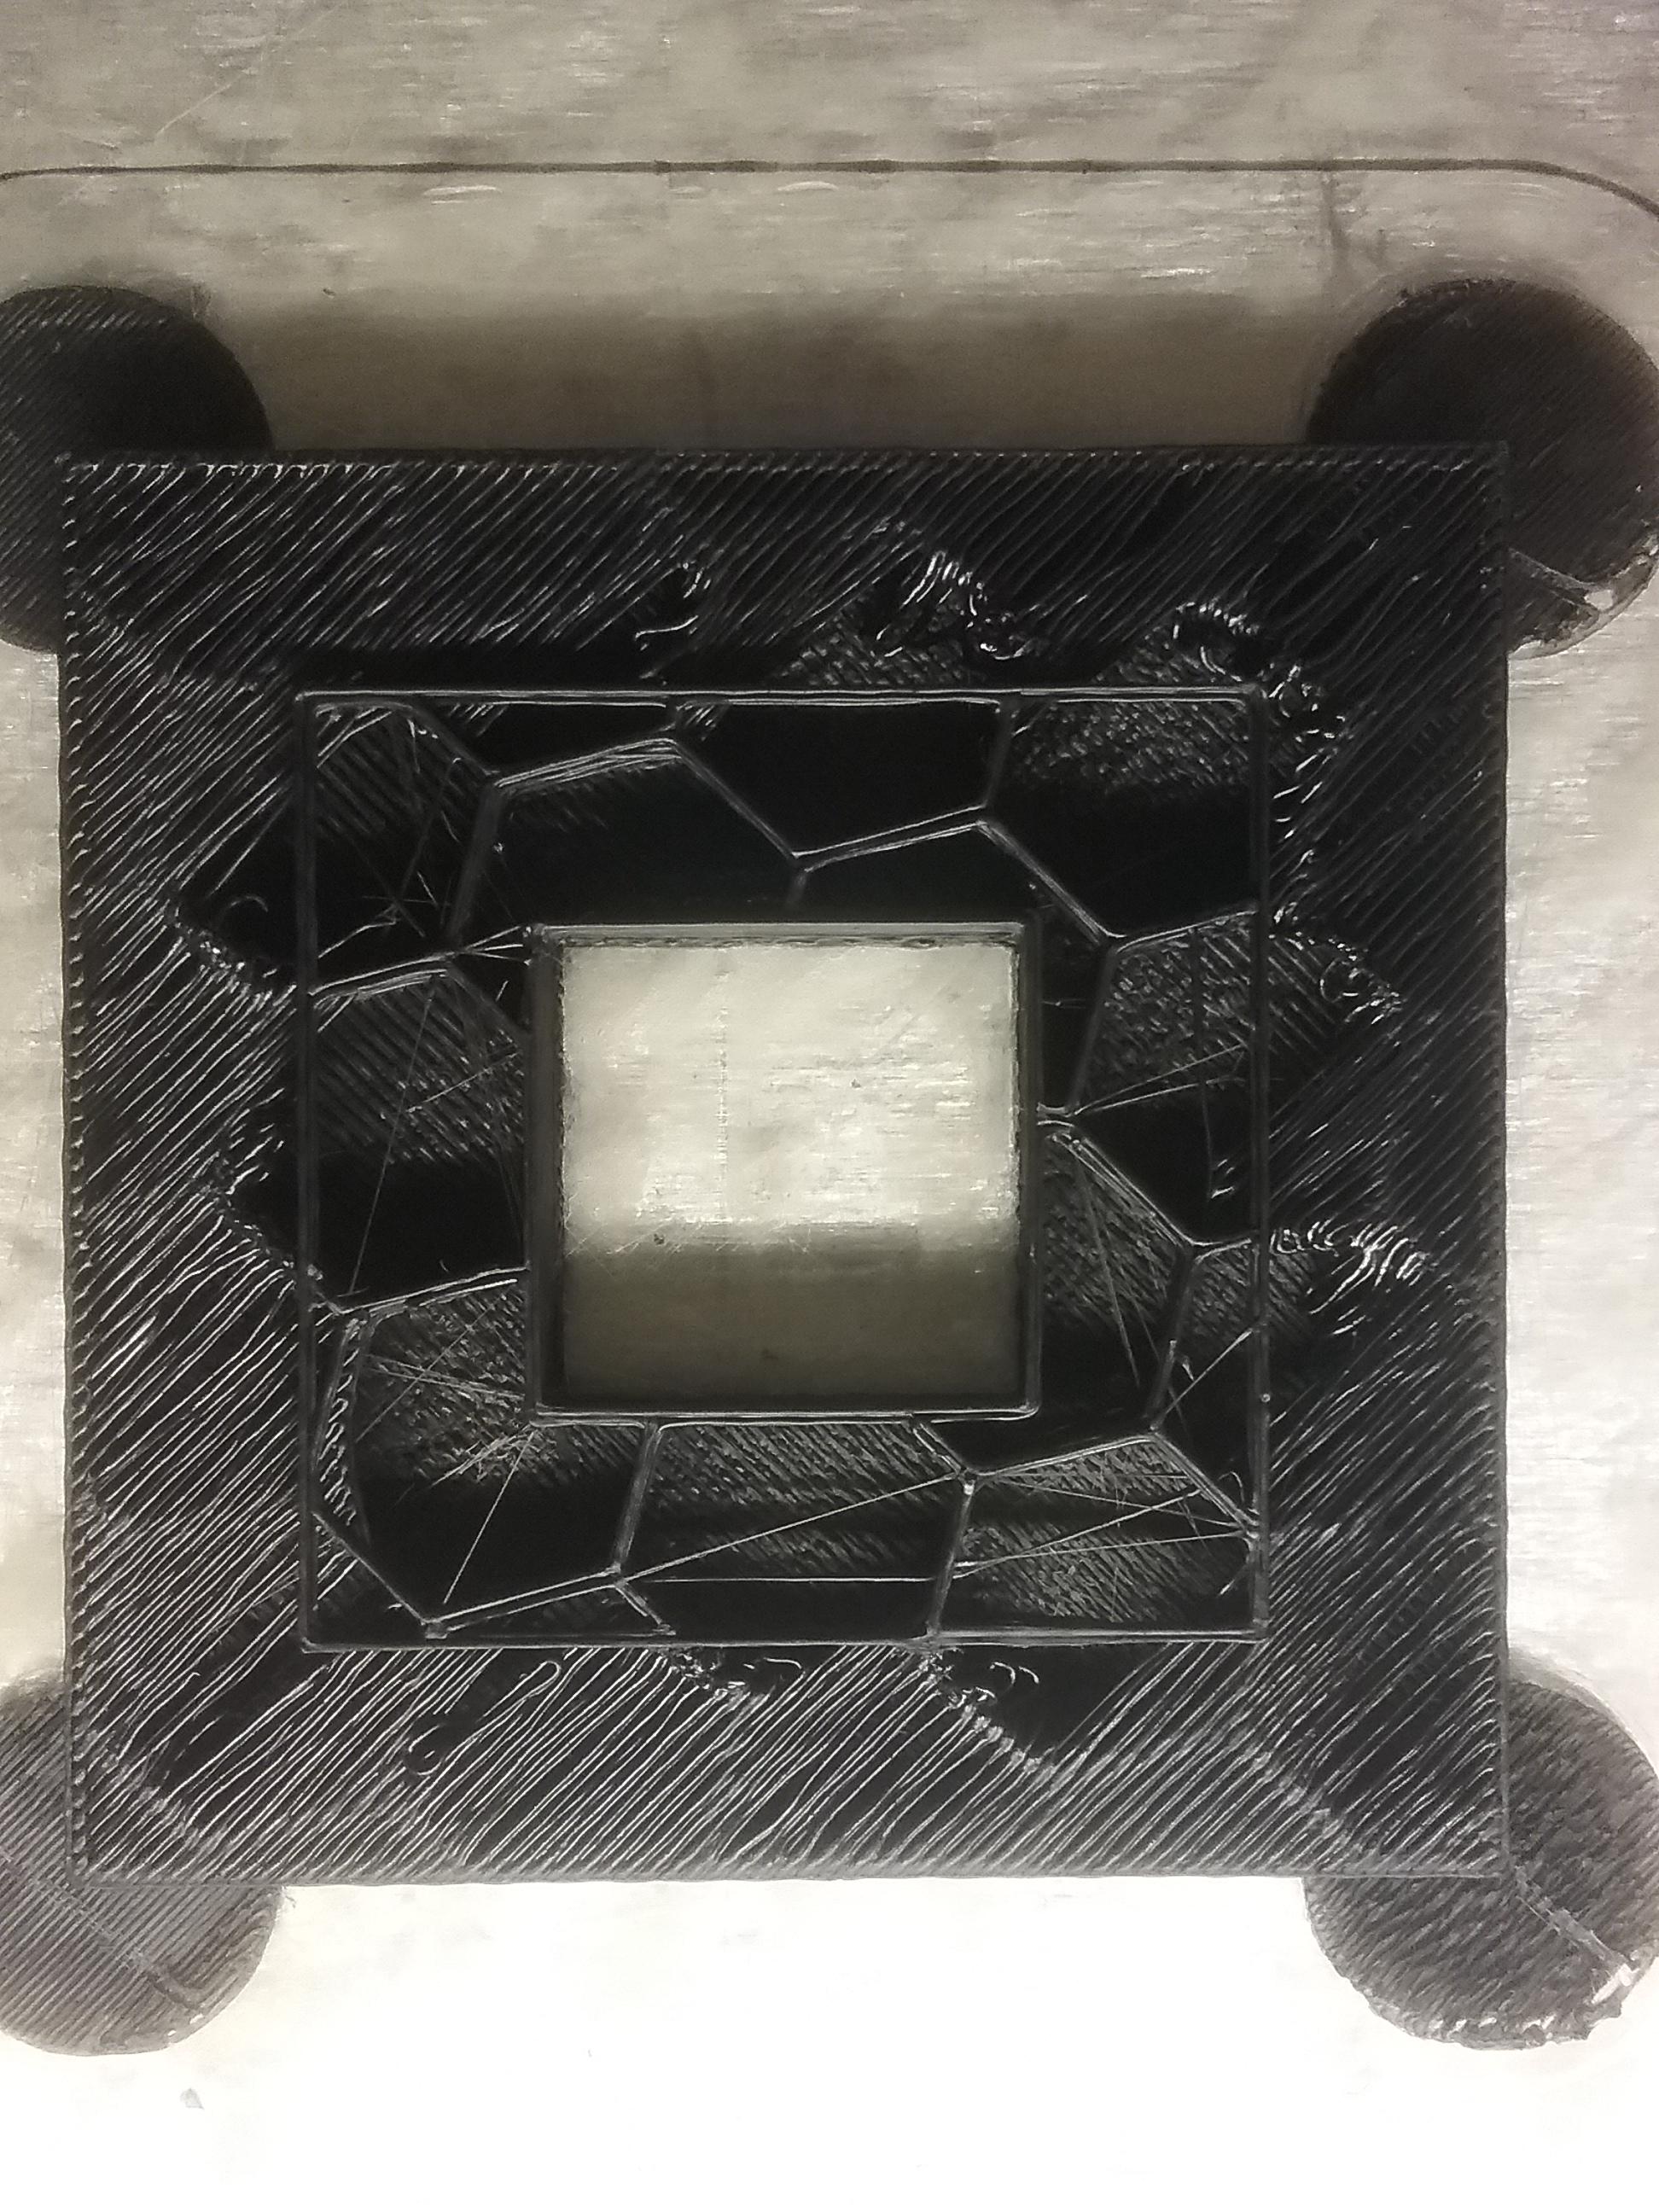
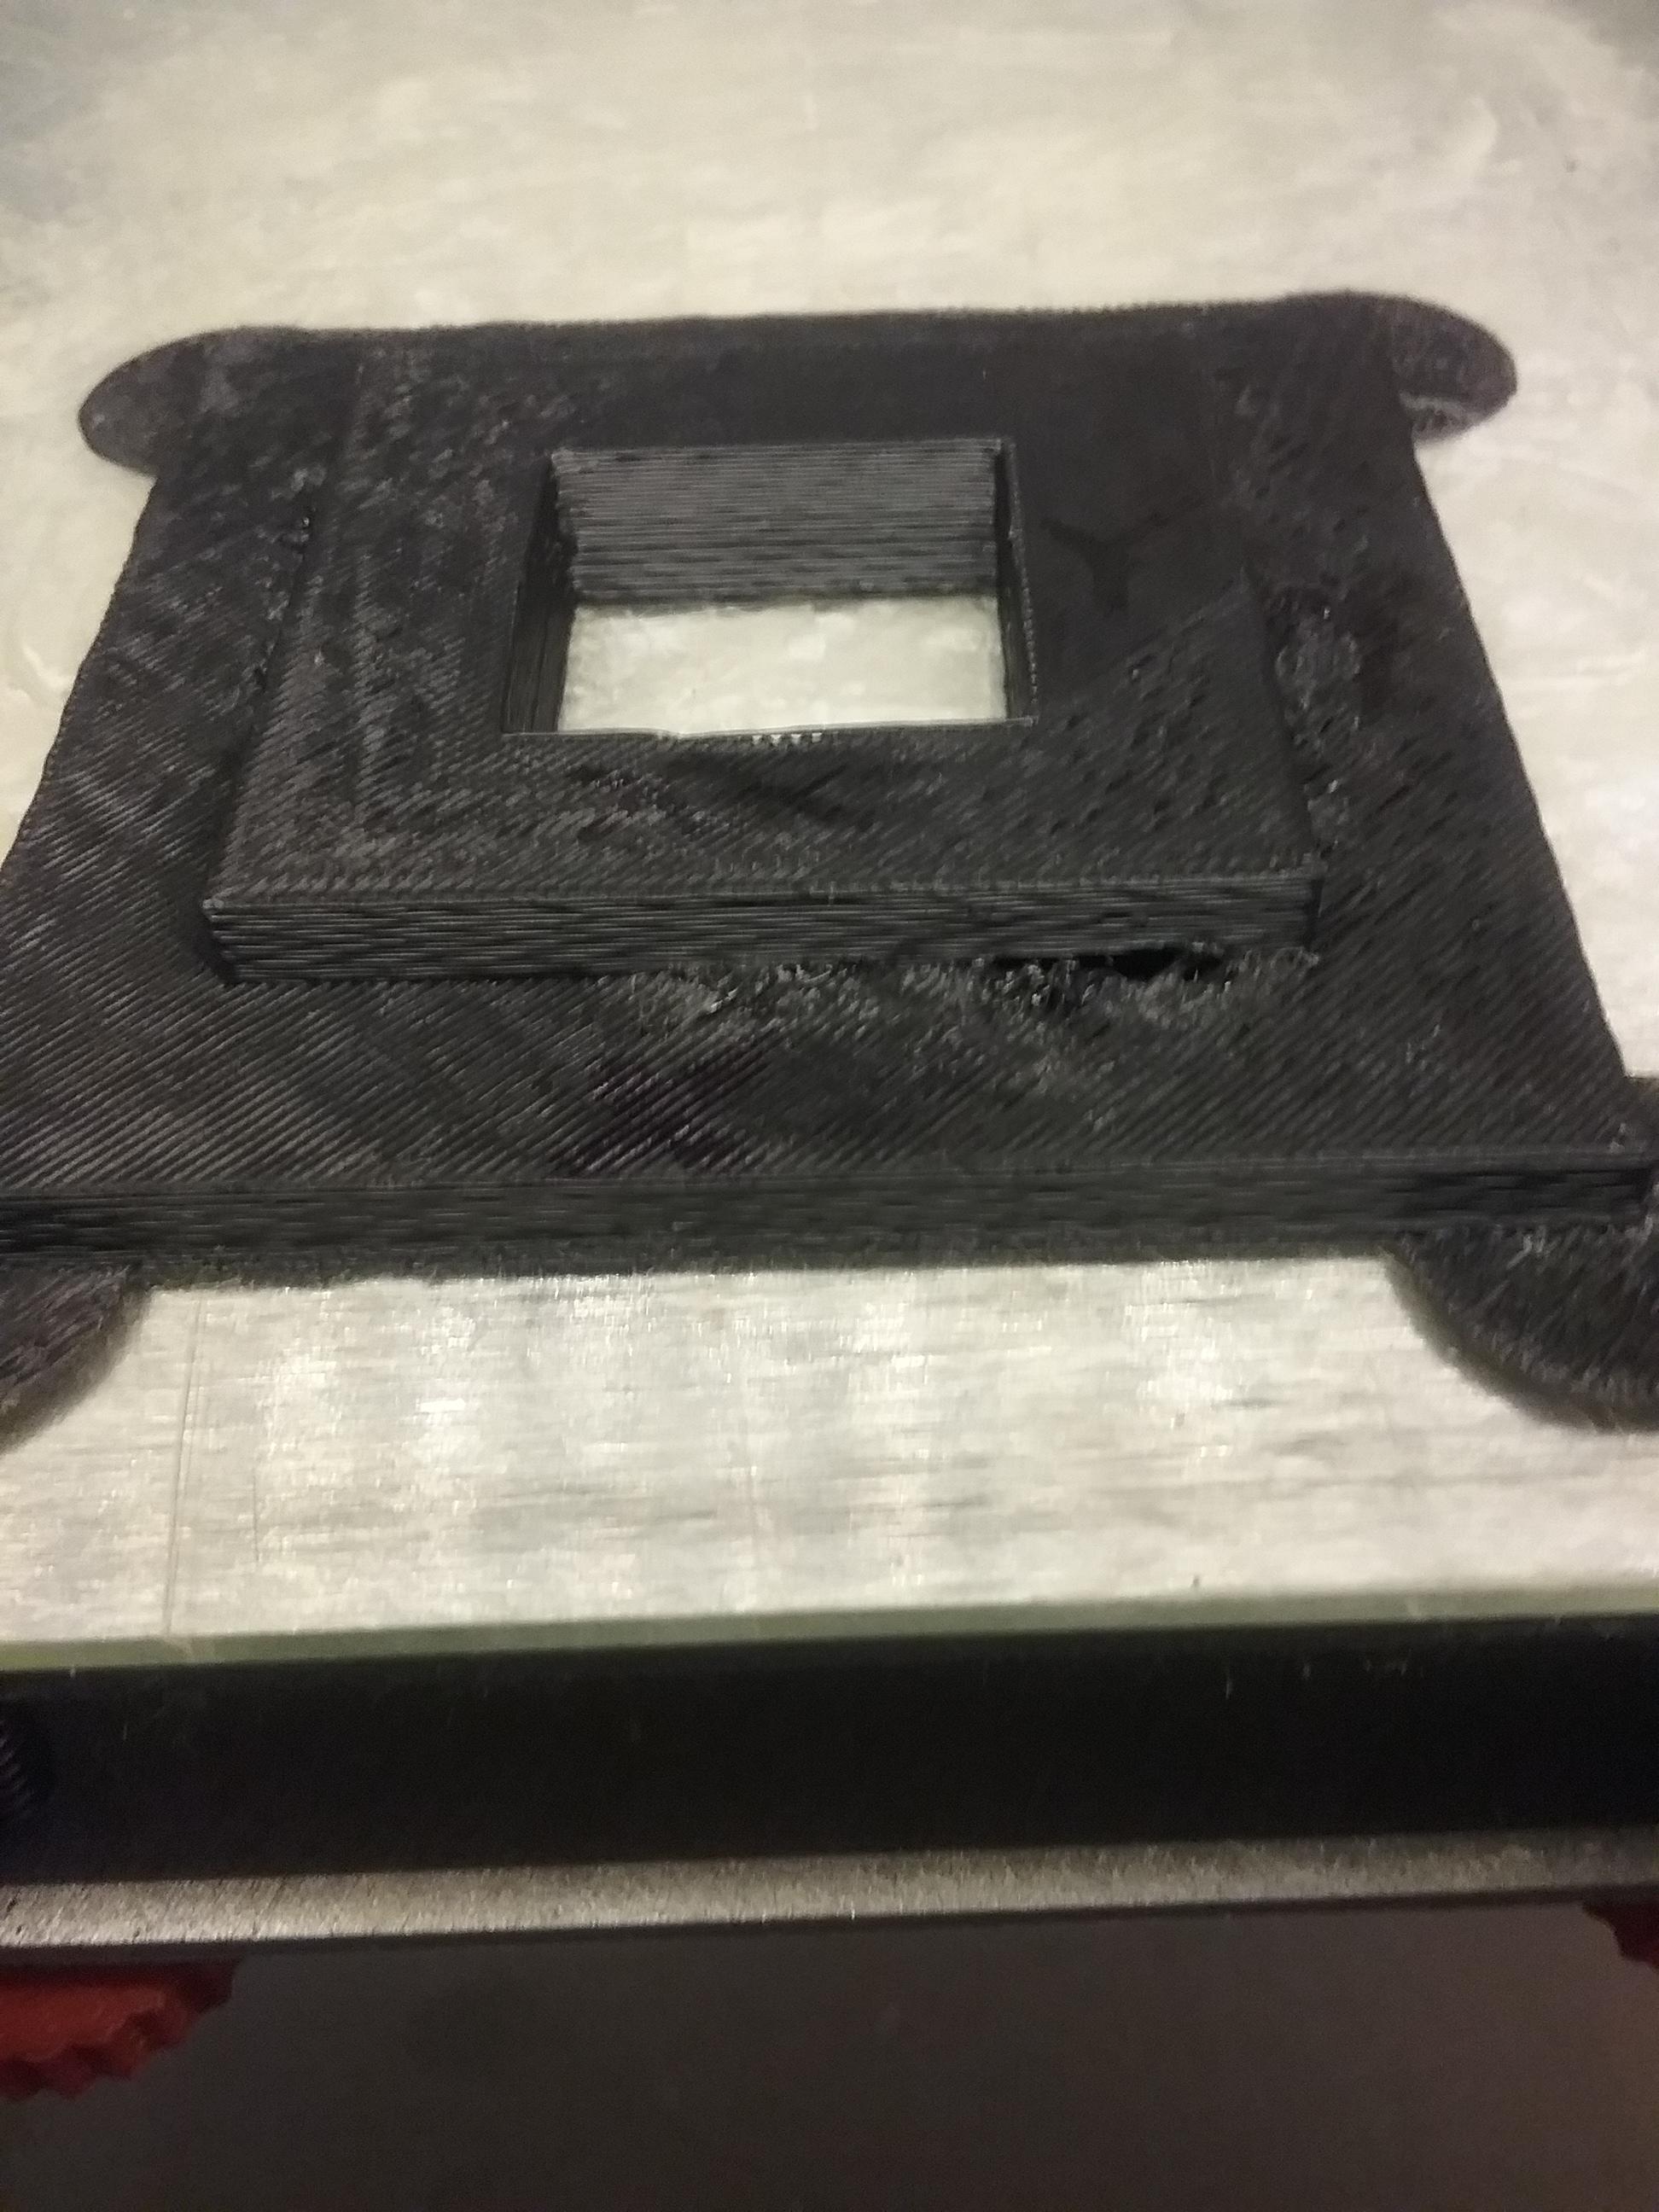
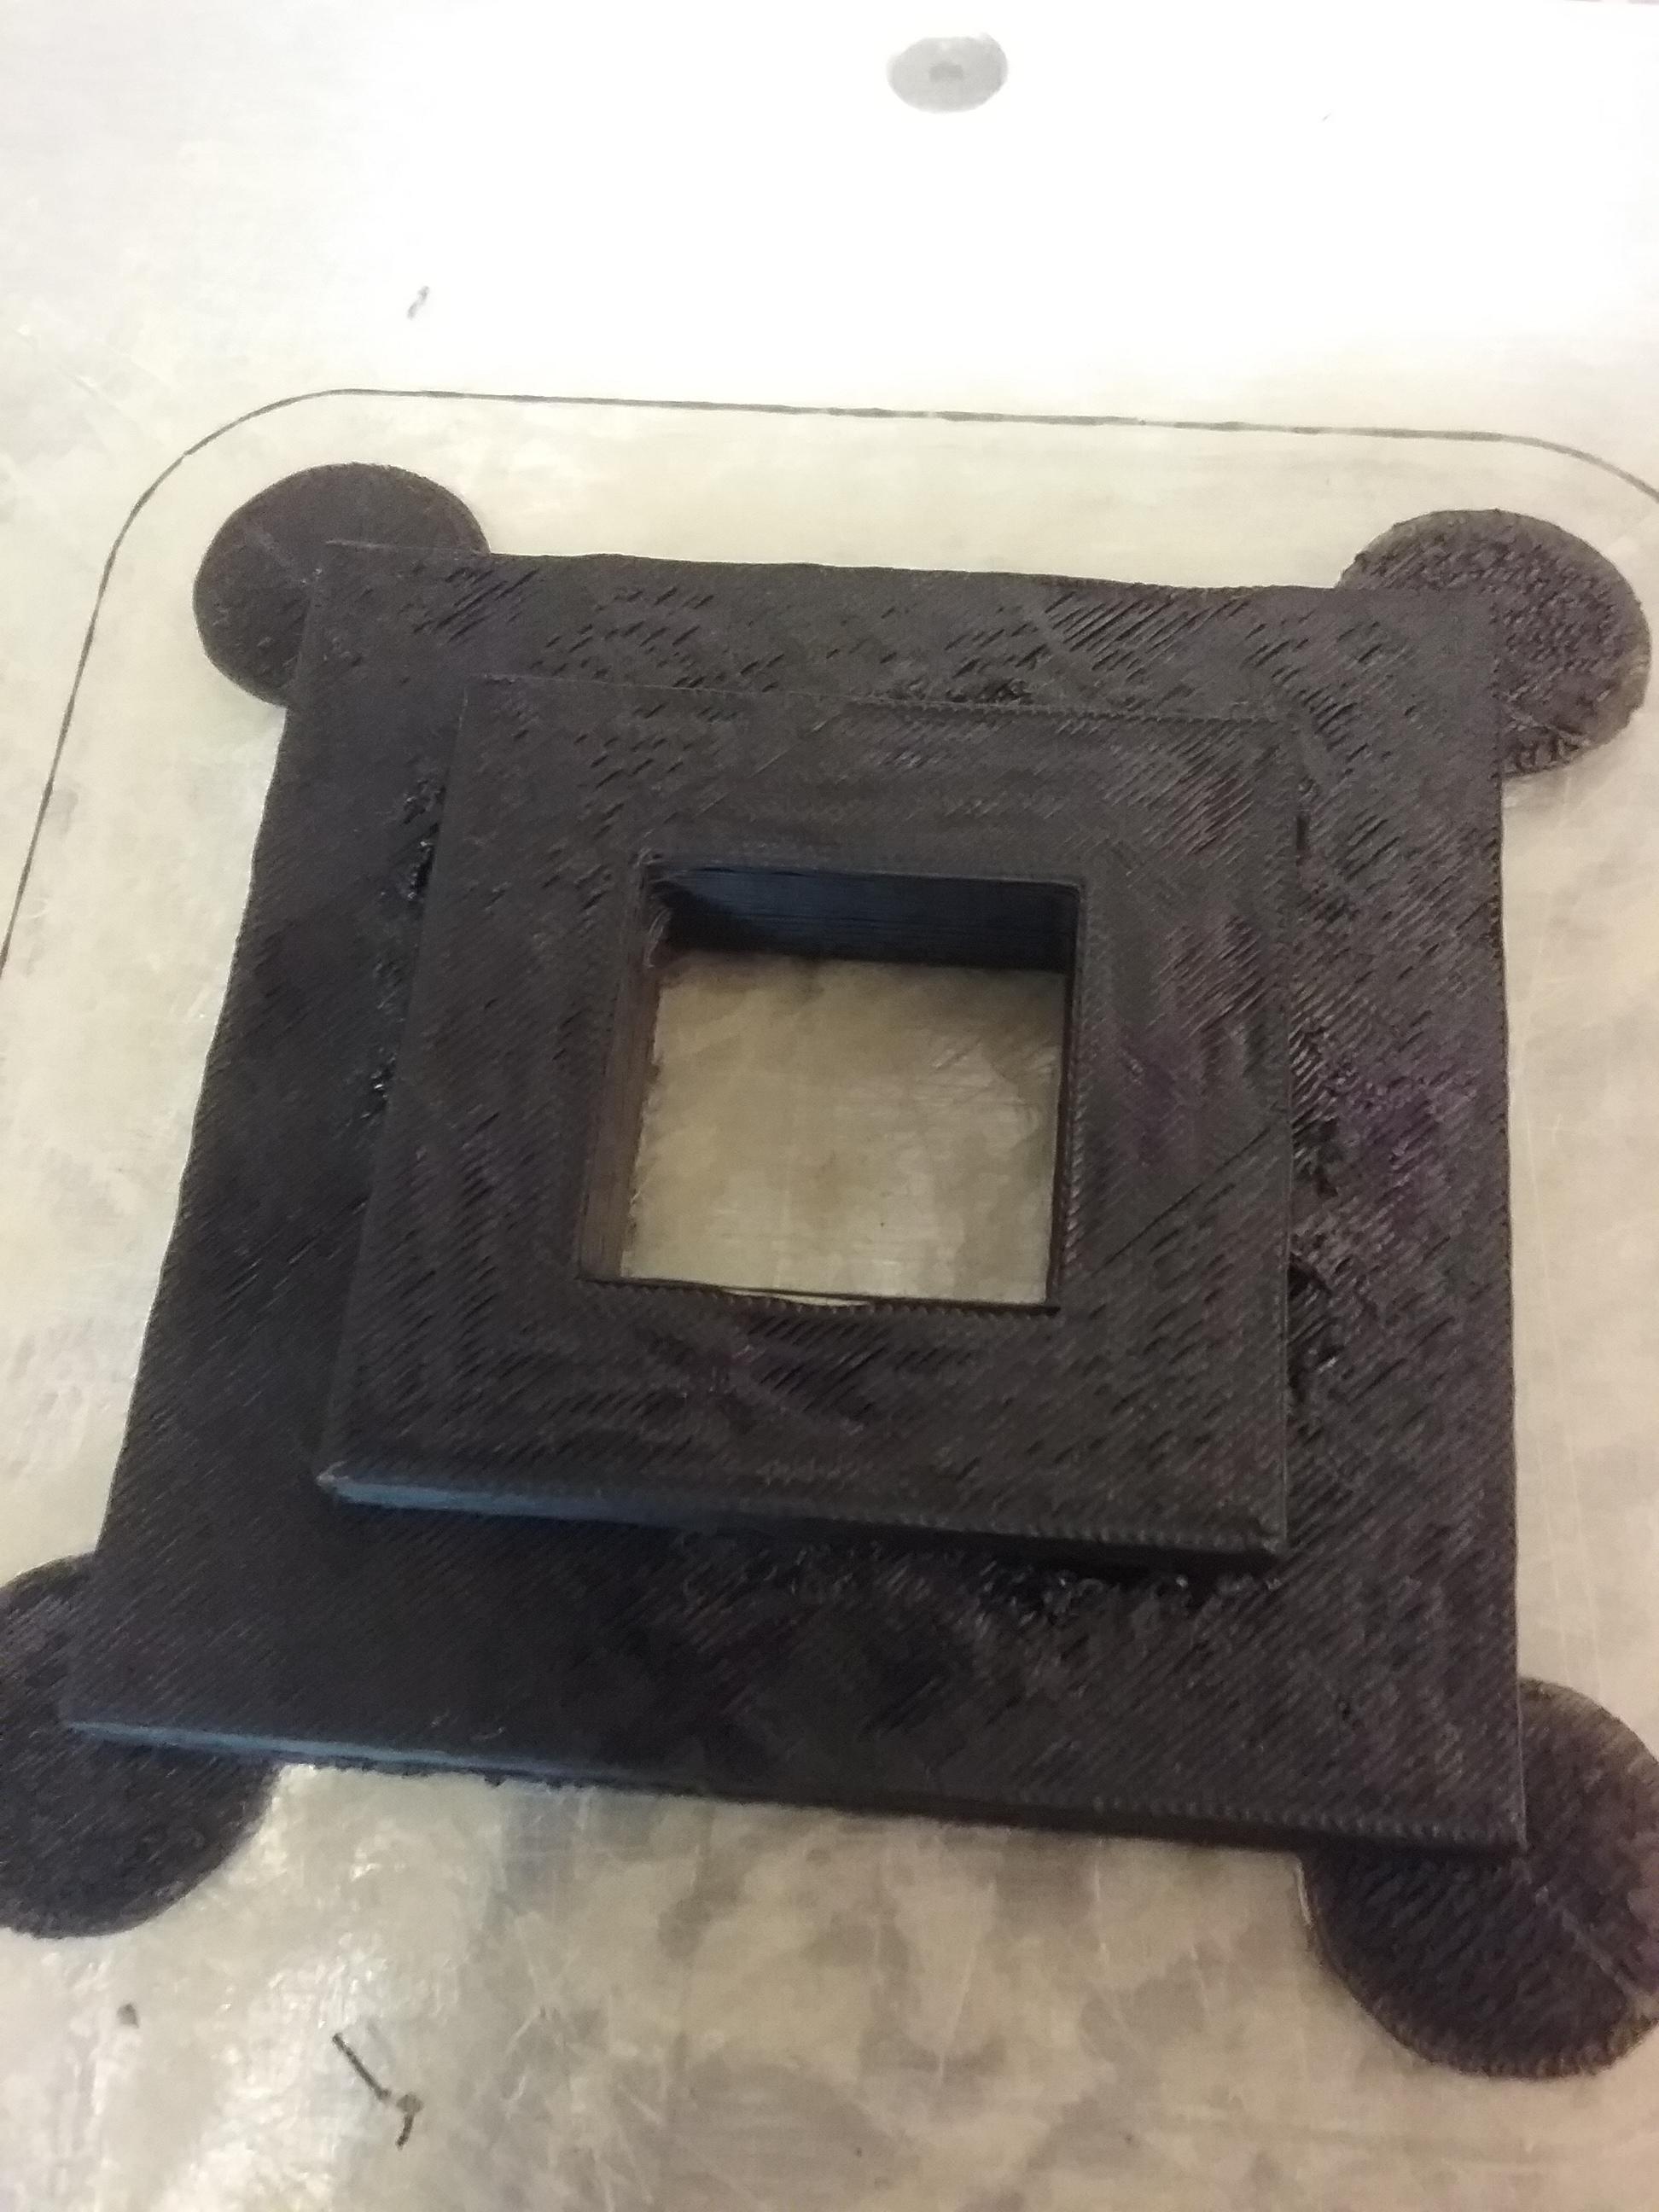
If you are getting diagonal banding (see pic below), then you want to turn the voltage down - in very small increments - until it goes away...
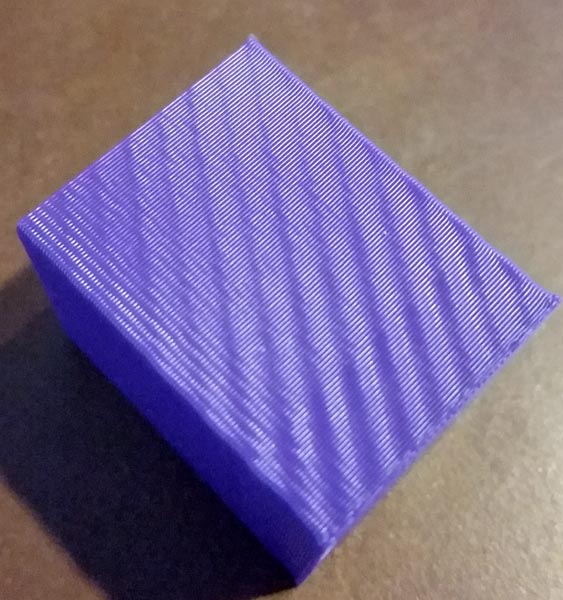
note the banding on the lower half of this one, but it is nice and smooth on the upper half - this is what you are shooting for.
SD4 #1 & #2 - Lawsy carriages, E3D v6, Rumba controller board, mirror bed plate, X motor fan, upgraded PSU & Mica bed heater
SD4 #3 - in the works ~ Folgertech FT-5, rev 1
Printit Industries Beta Tester - Horizon H1