26

Re: SD3 help...please...

Well I Spend all day trying to get that to print with ZERO Success. First try was going well, until the filament jammed up and worked its way from between the bearing and drive gear. Managed to get the 1.5mm set screw loose after it about striped. realigned the drive gear and with the bearing better. Since then I can't get a single print to stick anymore? I've re-leveled the print bed using feeler gauges, from .005-.010inchs. In the past .005 has been what worked. Along with hairspray on glass plate. I am rather flabbergasted. I the bed temp set to 97 and 240 on hot-end. Does that sound reasonable? it was working...

"SD3" 5/02/13 03943, RAMPS 1.6+, Enclosed,  360W12V30A PSU, E3DV6(new model), Nema17 .9 (E)  Over kill Y brackets, Y drive Bearings, Y-Direct Drive, Hale bed heater on 3/16 aluminum, Lawsy Carriage upgrade, gt2 20T Pulleys.

27

Re: SD3 help...please...

Even 0.005" is too large a gap for the 1st layer.  Try to get it around .002-3"

SD2 - Stock - Enclosure - Heated Bed - Glass Plate - Auto Fire Extinguisher
Ord Bot Hadron - RAMPS 1.4 - Bulldog XL - E3D v6 - 10" x 10" PCB Heated Build w/SSR - Glass Plate
Thanks for All of Your Help!

28

Re: SD3 help...please...

IronMan wrote:

Even 0.005" is too large a gap for the 1st layer.  Try to get it around .002-3"

DONE used a good Ol' posted note! what a difference .002" made. Off to a good start today on printing test print posted by heartless. Thank You both! My heated bed is wondering when it is going to get upgraded with one from printitindustries:) (I start back to work Monday:)) I'll be compiling addional upgrades/parts list...

Okay, so the print seemed to be going well until this point
http://soliforum.com/i/?eAbA4Uo.jpg Need to change slic3r settings?

"SD3" 5/02/13 03943, RAMPS 1.6+, Enclosed,  360W12V30A PSU, E3DV6(new model), Nema17 .9 (E)  Over kill Y brackets, Y drive Bearings, Y-Direct Drive, Hale bed heater on 3/16 aluminum, Lawsy Carriage upgrade, gt2 20T Pulleys.

29

Re: SD3 help...please...

heartless wrote:

now print something of a known size and measure to see where you are.

I prefer to do something a bit larger on the X & Y axis as sometimes small discrepancies dont show up on small pieces...

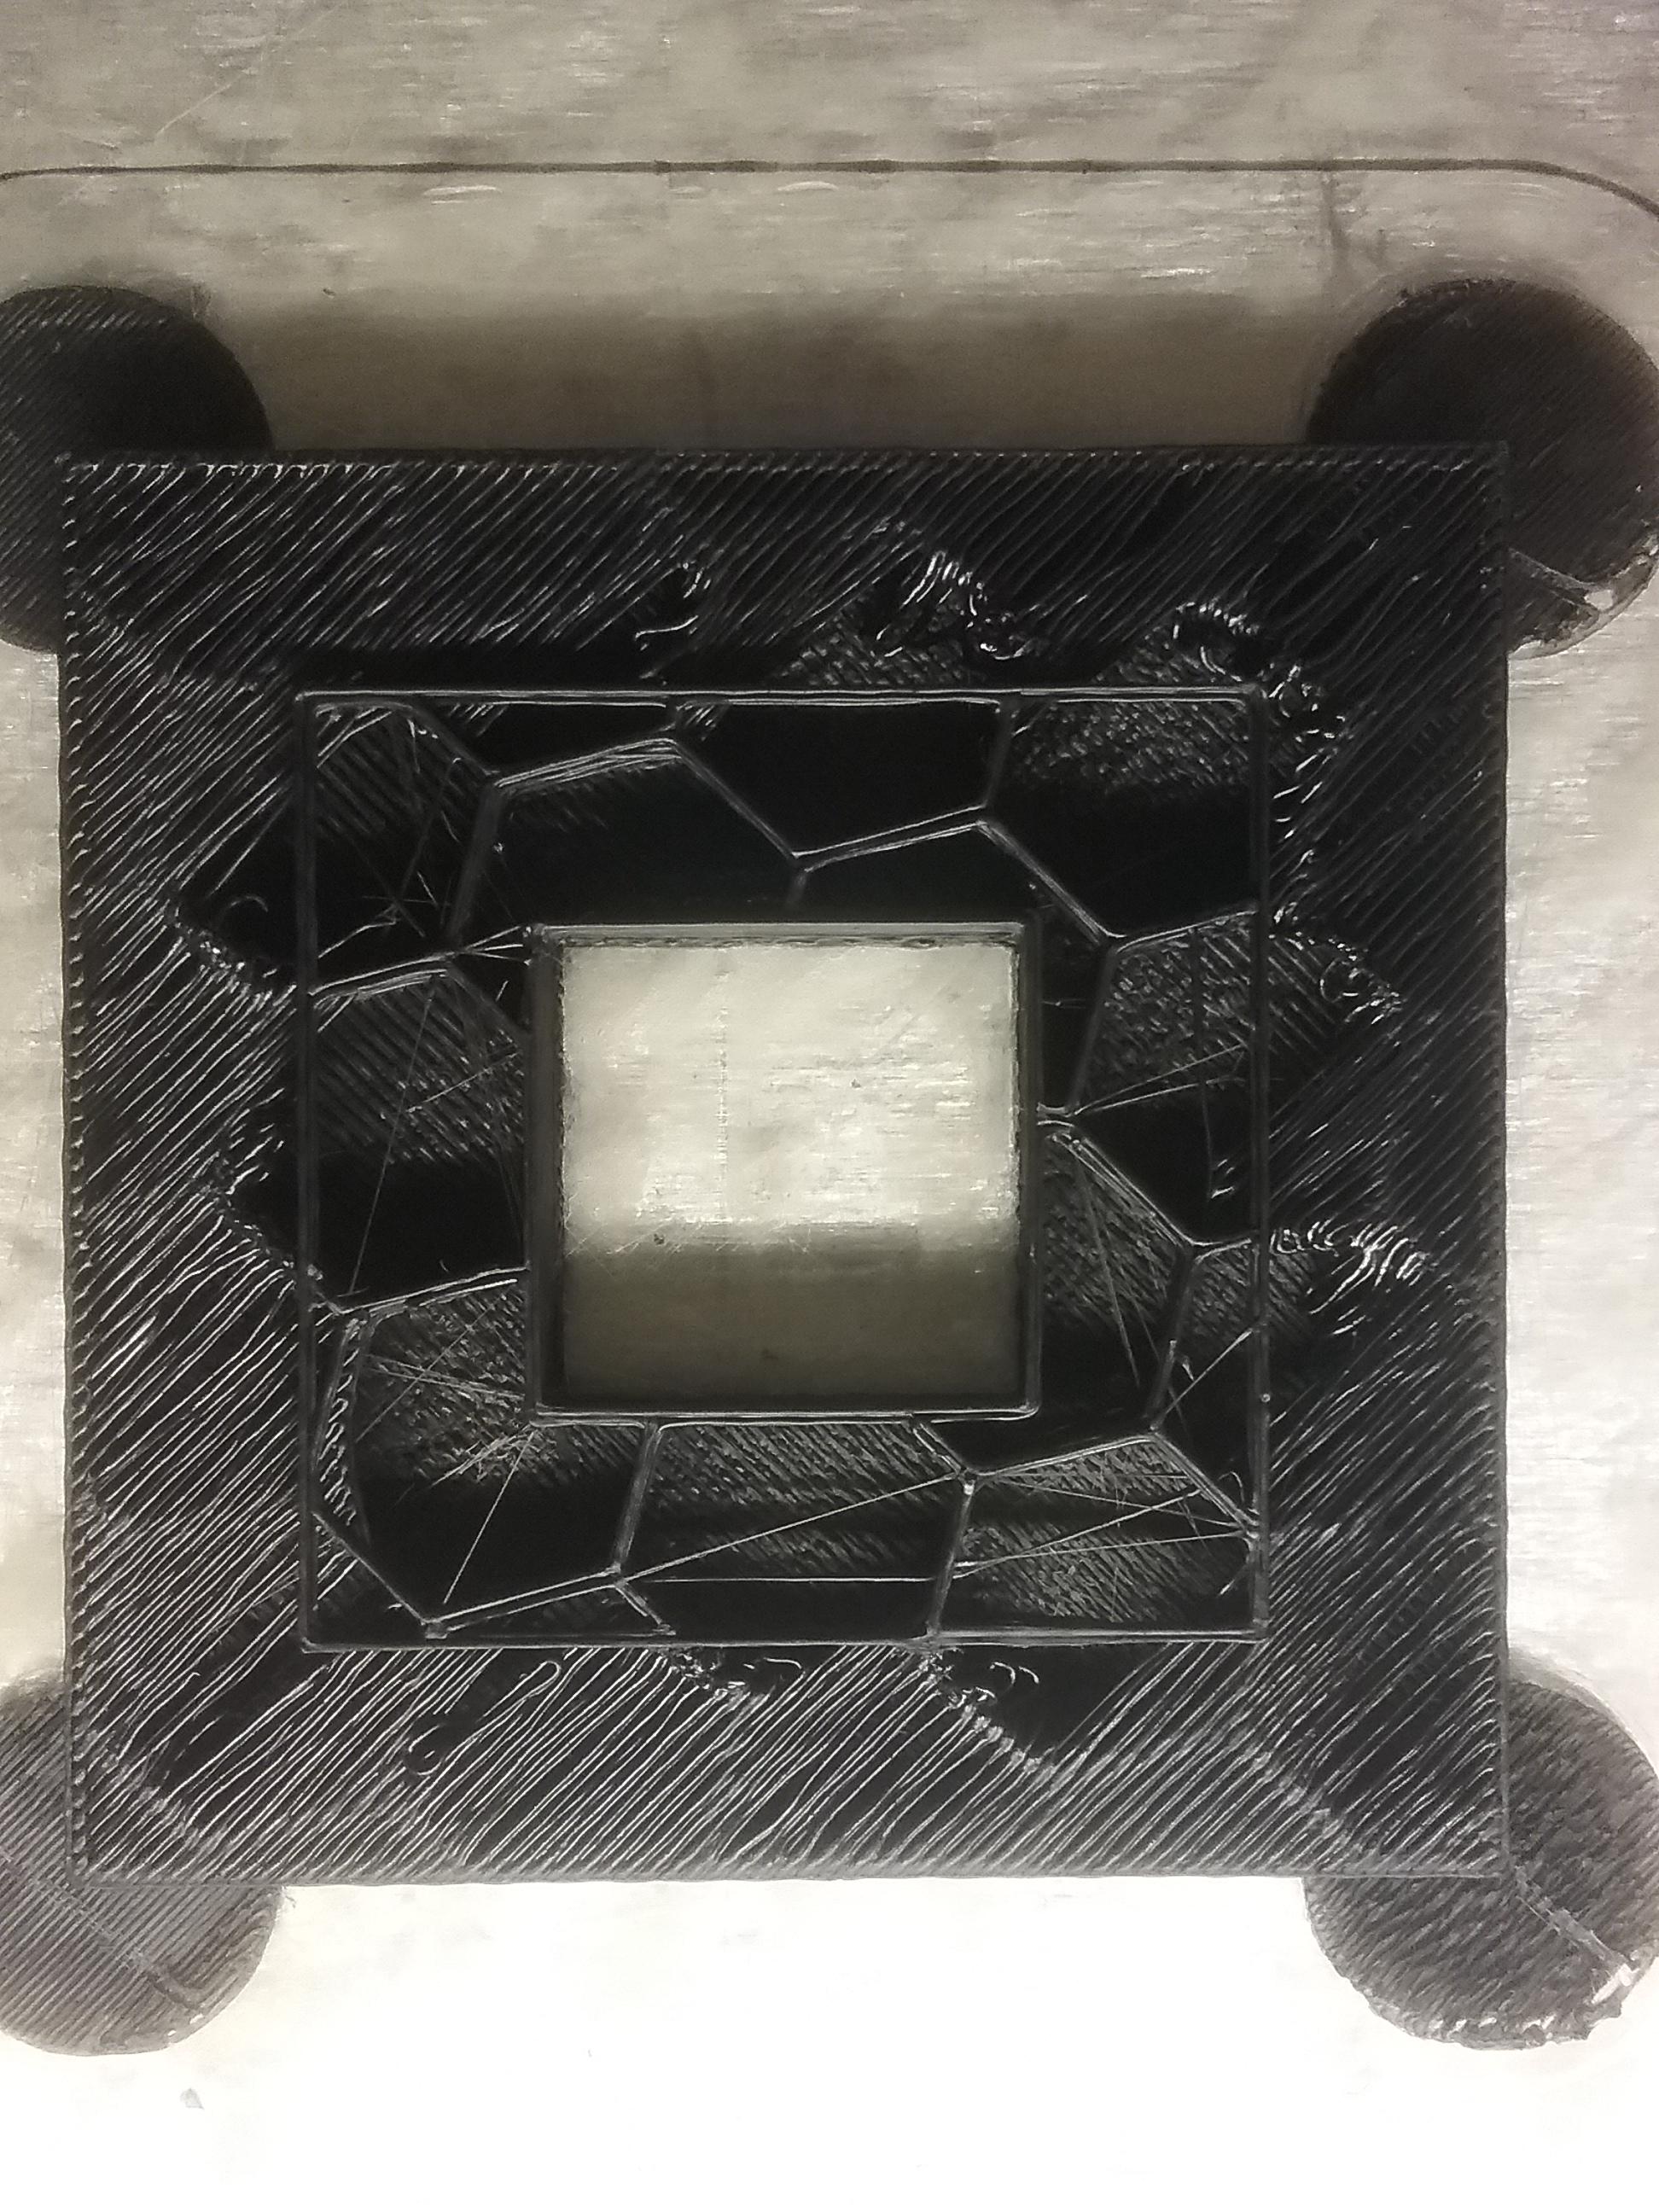
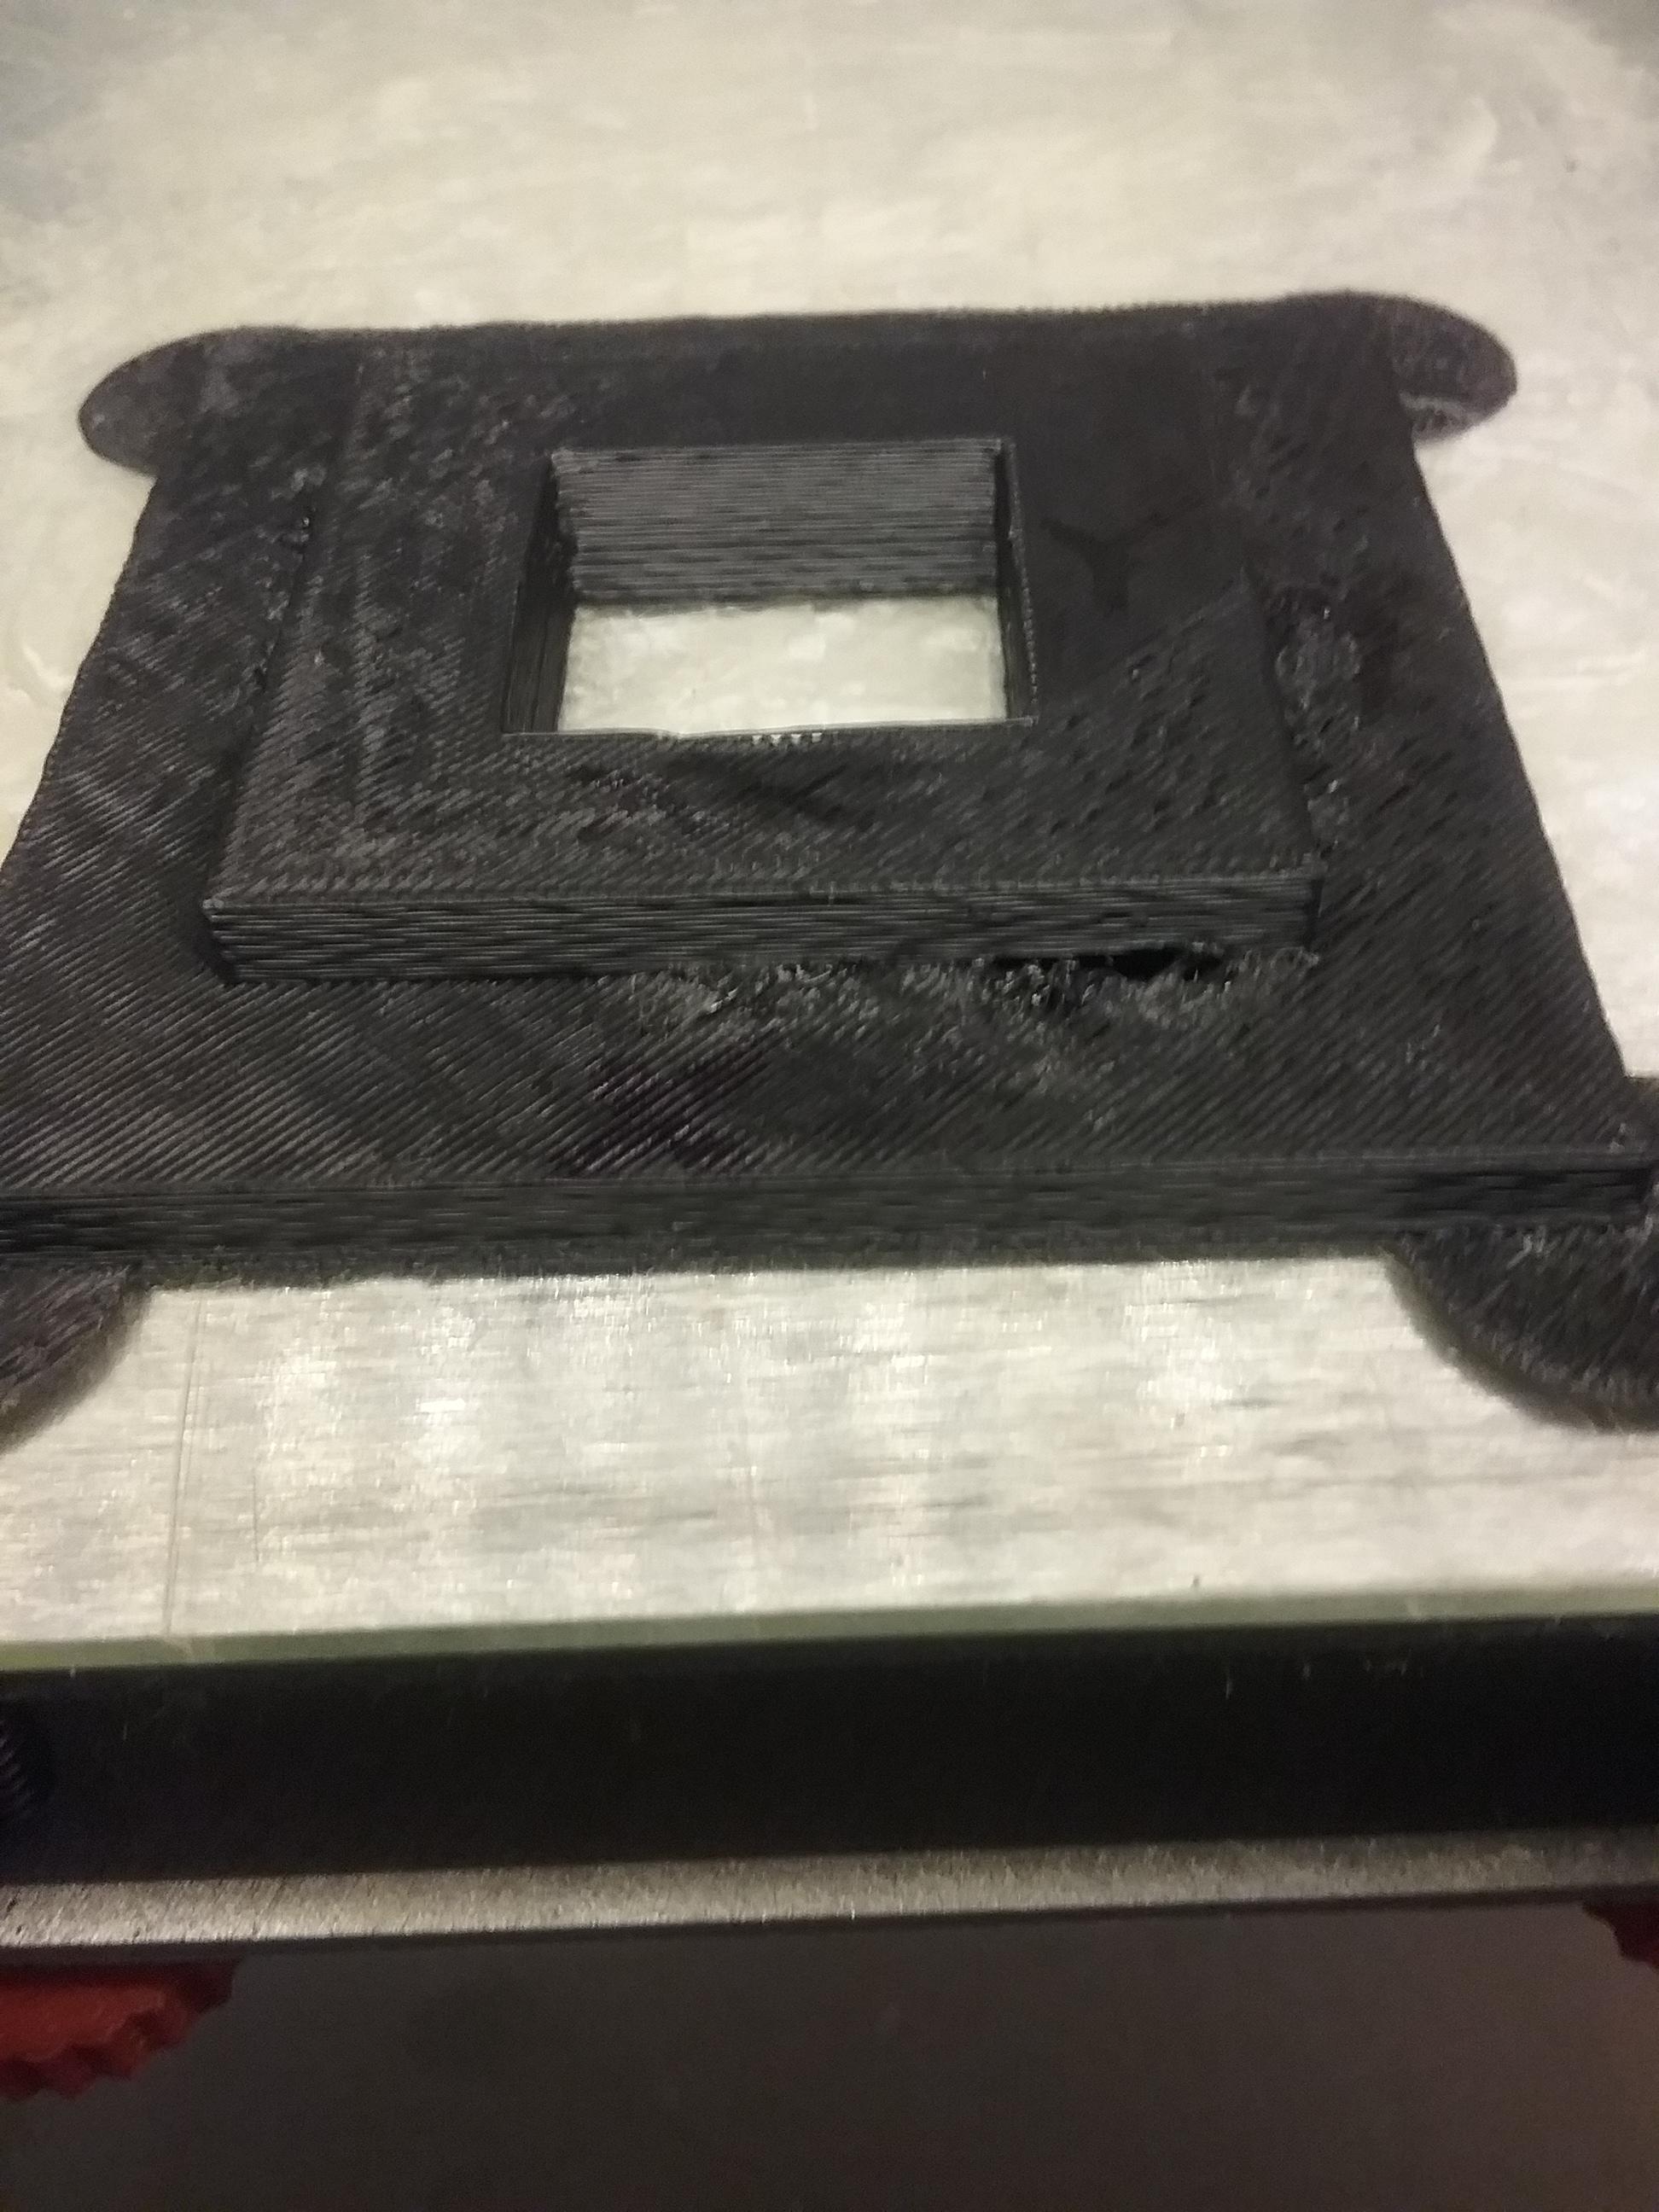
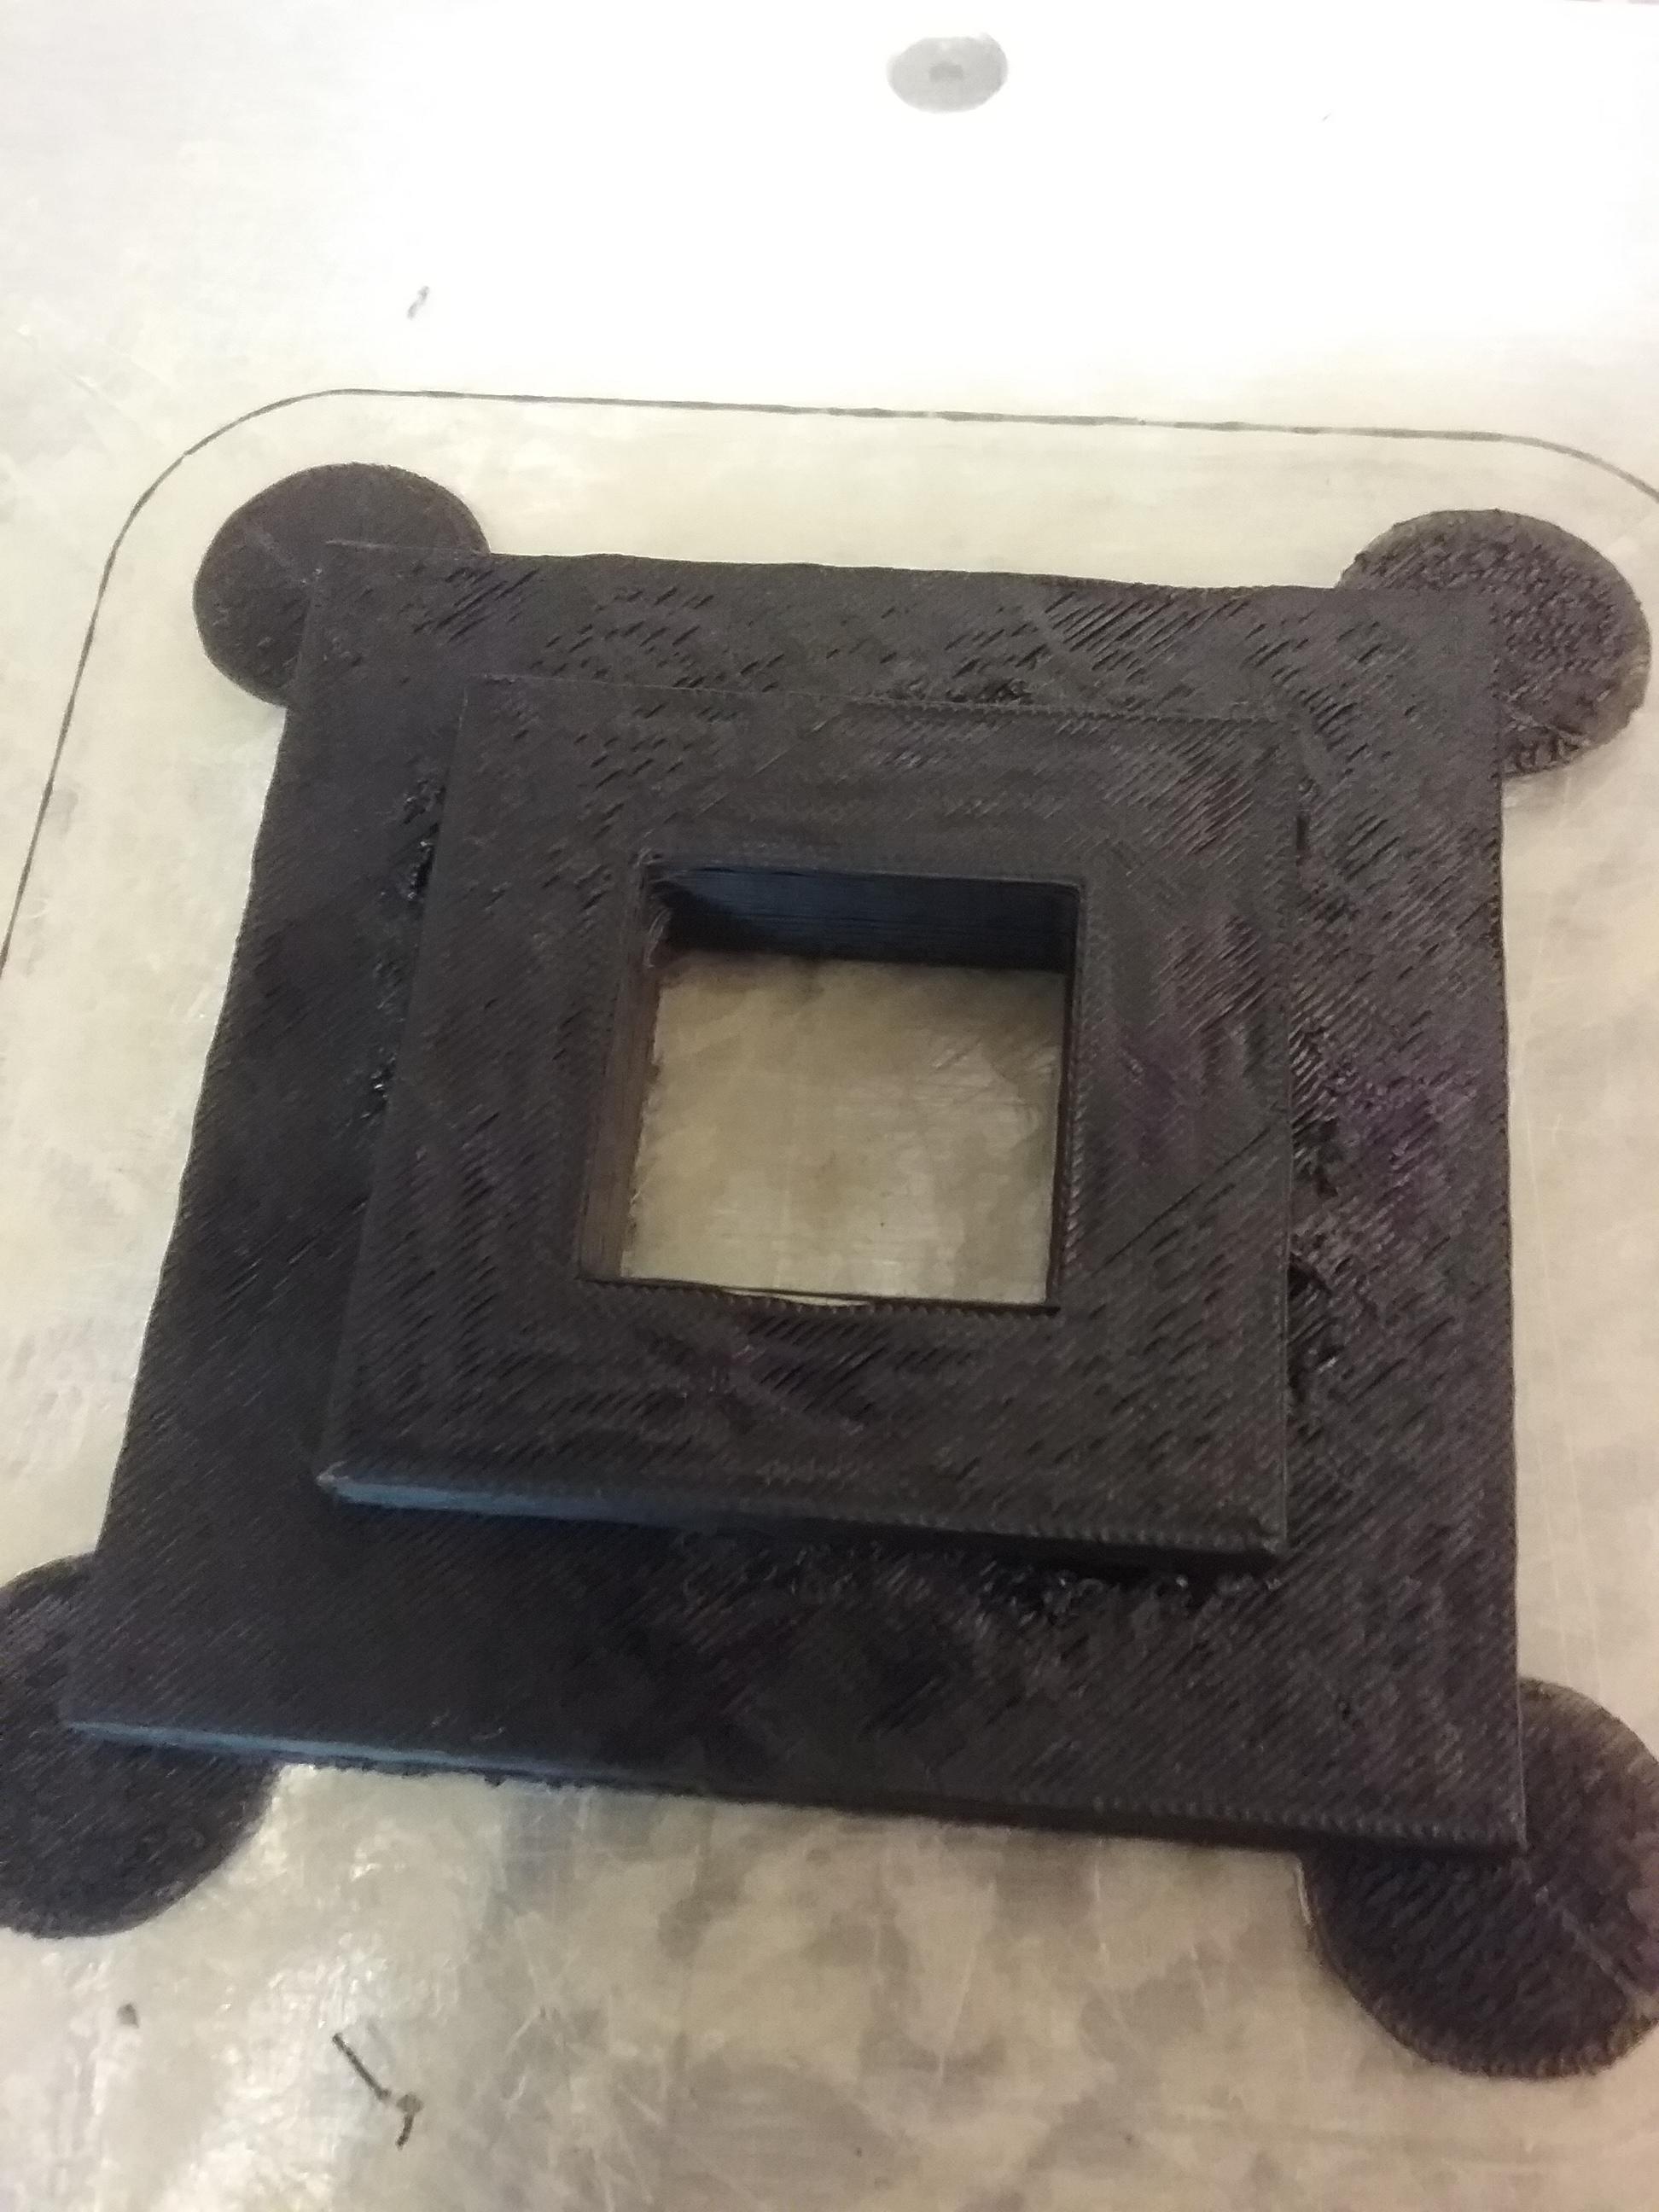
the attached is one of my test designs - it has multiple sizes to verify... the larger base is 75mm square, the upper level is 50mm square and the center hole is 25mm square. The steps are 5mm each (total height should be 10mm)

print it out, and mark X (left/right) and Y (front/back) directions before you remove it from the bed. then measure with your calipers.
It should fall within 0.5mm in any given direction

These are what the results look like after waiting 1hr10mins...measurements range slightly from good spots to rough areas,  due to quailty of print measurements fluxuate slightly in different areas. X measured in the middle of part is  75.05/74.95 &50.0or 49.91  &25.35  Y 74.54 49.55 & 25.10 Z 4.82 and 5.0 despends where and 9.62... think i need better slic3r settigs before i change and steps...
http://soliforum.com/i/?OQsjmxO.jpg
http://soliforum.com/i/?TvwlwAi.jpg

"SD3" 5/02/13 03943, RAMPS 1.6+, Enclosed,  360W12V30A PSU, E3DV6(new model), Nema17 .9 (E)  Over kill Y brackets, Y drive Bearings, Y-Direct Drive, Hale bed heater on 3/16 aluminum, Lawsy Carriage upgrade, gt2 20T Pulleys.

30 (edited by heartless 2016-08-04 23:36:31)

Re: SD3 help...please...

for a single top layer, yeah - it is going to be ugly with low infill. tongue

I generally do 3 top & a minimum of 2 bottom - usually 3 there, too. I also run 3 perimeters.

your measurements are not too far off, however. But yeah, try 3 perimeters, 3 top & bottom layers and see how it turns out.

also looks like you have a little moire going on (the diagonal pattern on the sides of the print), you may want to try lowering the vref for the extruder motor just a tad

SD4 #1 & #2 - Lawsy carriages, E3D v6, Rumba controller board, mirror bed plate, X motor fan, upgraded PSU & Mica bed heater
SD4 #3 - in the works ~ Folgertech FT-5, rev 1
Printit Industries Beta Tester - Horizon H1

31

Re: SD3 help...please...

heartless wrote:

for a single top layer, yeah - it is going to be ugly with low infill. tongue

I generally do 3 top & a minimum of 2 bottom - usually 3 there, too. I also run 3 perimeters.

your measurements are not too far off, however. But yeah, try 3 perimeters, 3 top & bottom layers and see how it turns out.

also looks like you have a little moire going on (the diagonal pattern on the sides of the print), you may want to try lowering the vref for the extruder motor just a tad


I Changed those settings looking better still getting some what of a gap from where the 50mm step starts. This new print is really close on the X. (Y)- as well as (Z). Vref:( I cant find a how to check or what it should be with SD3 running a Sang rev1.3a board. Maybe i over read, I did read about it with the print board...:p. i see the similar little screws on my my board which are Drivers?RIGHT OR WRONG (lol I be learning here) I also noticed when re-leveling the build platform i have some vertical play in the Front (X) Bearing bracket...(after i placed my small order with PrintitINC after reading replacing the E gear drive) i guess i could always wrap the bearings for now anyway? What has me is how did i manage to print my own replacement carriages on a fully stock SD3...way back when...(even tho i just installed them) long story. Like this post...

"SD3" 5/02/13 03943, RAMPS 1.6+, Enclosed,  360W12V30A PSU, E3DV6(new model), Nema17 .9 (E)  Over kill Y brackets, Y drive Bearings, Y-Direct Drive, Hale bed heater on 3/16 aluminum, Lawsy Carriage upgrade, gt2 20T Pulleys.

32

Re: SD3 help...please...

the process for adjusting voltage is the same on your sang board as for the printrboard - use a ceramic or plastic screwdriver to turn the little trimpot - clockwise to increase voltage, counter-clockwise to decrease... do NOT use a metal screwdriver while the printer is powered up... tongue

a good share of us don't really adjust by actual voltage numbers - those just get you in the ballpark, and often need fine tuning anyway, so don't get hung up on hard numbers.

Set the printer up where you can easily access the board while it is running.
load and slice a model - preferably something larger with longer movements... or...
Alternatively you can send longer manual movement commands to work one axis at a time... but I find it easier to set up a print and do a "dry run" (no filament extruded) and just let the printer run while I adjust (setting infill angle to 90 degrees will make it easier to work one axis at a time).

For X & Y - with the printer running, turn down one trim pot until the motor stops moving the axis, then slowly turn it back up, in very small increments, until it is just moving smoothly. Then move on to the other one.

Z is a little trickier to do, but can be done... drop the bed as far as you can, then hit the home button and adjust as it moves up.

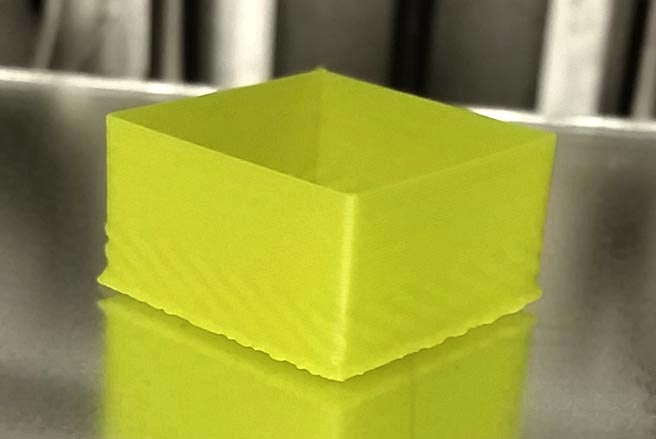
For the Extruder - again I set up a print - usually a tall, single wall box, so I can see what is happening as I adjust - this time you want to actually print the model.
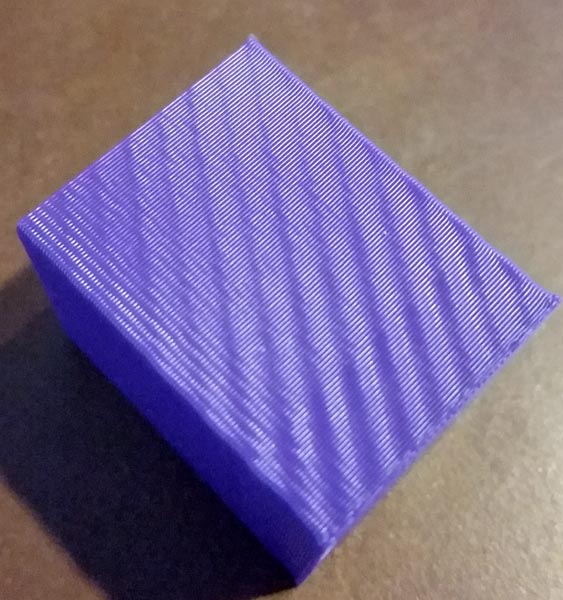
If you are getting diagonal banding (see pic below), then you want to turn the voltage down - in very small increments - until it goes away...
http://soliforum.com/i/?YWifYW4.jpg

note the banding on the lower half of this one, but it is nice and smooth on the upper half - this is what you are shooting for.
http://soliforum.com/i/?o36mdry.jpg

SD4 #1 & #2 - Lawsy carriages, E3D v6, Rumba controller board, mirror bed plate, X motor fan, upgraded PSU & Mica bed heater
SD4 #3 - in the works ~ Folgertech FT-5, rev 1
Printit Industries Beta Tester - Horizon H1