1 (edited by Albertatinker 2015-01-13 03:16:13)

Topic: How to fix your circles.

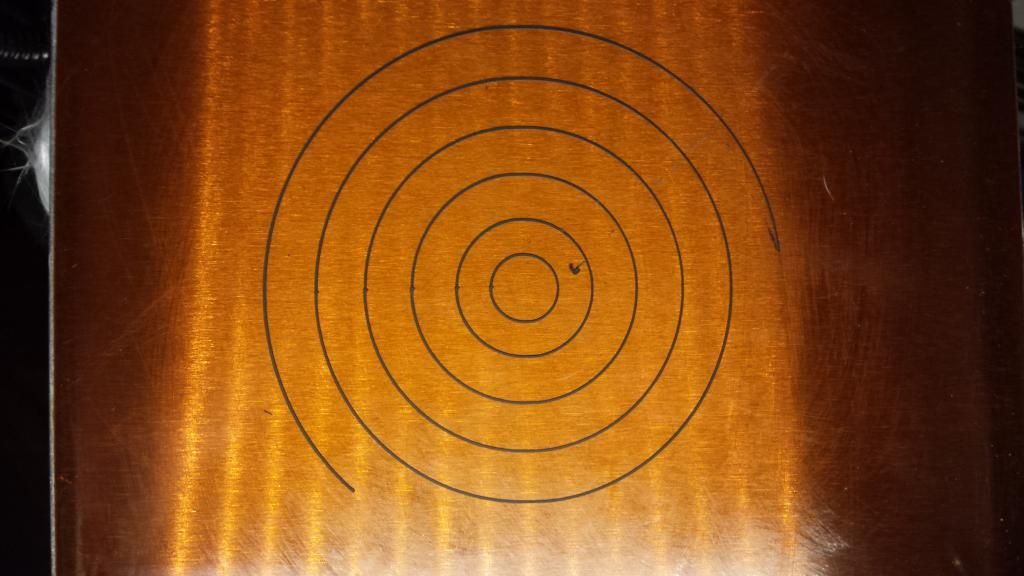
I messed around with my printer till I found the source of the circle issue. The frame is flimsy, and creates all our problems. However, you can fix it with a set of pliers and an allan key. Here's a picture of my results from this quick fix, printed at 100mm/s.
http://i1064.photobucket.com/albums/u366/rcphotobucketaccount/Mobile%20Uploads/20150112_191022_zpss5fqbagw.jpg
And here's a video of how to do the fix.

http://youtu.be/yvlehVBA-xE

Hope this helps everyone out.

2

Re: How to fix your circles.

On the SD3's they came with hose clamps that when tightened naturally pushed against the frame and accomplished the same thing.  Good find smile

Printit Industries Model 8.10 fully enclosed CoreXY, Chamber heat
3-SD3's & a Workbench all fully enclosed, RH-Slic3r Win7pro, E3D V6, Volcano & Cyclops Hot End
SSR/500W AC Heated Glass Bed, Linear bearings on SS rods. Direct Drive Y-axis, BulldogXL
Thanks to all for your contributions

3

Re: How to fix your circles.

Indeed, nice find! This explains what I was noticing and thought was the poor quality front idlers. Nice work.

4

Re: How to fix your circles.

SD2 also has hose clamps. I do want to upgrade to lock collars though so this is great news to learn. also explains why E clips in grooves on rods is not as good since they cant be adjusted like that.

Solidoodle 2 with Deluxe kit cover & glass bed with heater. and 2nd board SD2 used not 3rd and alum platform not installed yet still wood. also need cooling fan installed to board. use Repetier Host couple vers. Slic3r also have all free ware STL programs

5

Re: How to fix your circles.

Good idea. I sure hope this is all there is too it.
But I'm a bit skeptical.
Everyone owning a SD4 please try this and see how it works out for you. I'm gonna too when I get the time.
The reason I'm skeptical is while I haven't used a plier, I've pushed the collar onto the wall with all my force before screwing it in place each time I've disassembled my printer.
But maybe that's not enough. I'll try squeezing it with a plier to the wall instead soon.
Second reason being I still see about 0.2mm backlash on the circle, but I could be wrong.
Again, I sure hope this will do it and I'll report back when I test it out.

Another way I see "reinforcing" the frame there is printing the tensioner wider so there's no gap between it and the side frame wall, or putting something between that gap.

Solidoodle 4

6

Re: How to fix your circles.

redbarret wrote:

Good idea. I sure hope this is all there is too it.
But I'm a bit skeptical.
Everyone owning a SD4 please try this and see how it works out for you. I'm gonna too when I get the time.
The reason I'm skeptical is while I haven't used a plier, I've pushed the collar onto the wall with all my force before screwing it in place each time I've disassembled my printer.
But maybe that's not enough. I'll try squeezing it with a plier to the wall instead soon.
Second reason being I still see about 0.2mm backlash on the circle, but I could be wrong.
Again, I sure hope this will do it and I'll report back when I test it out.

Another way I see "reinforcing" the frame there is printing the tensioner wider so there's no gap between it and the side frame wall, or putting something between that gap.

It might not be clear in the video, but I'm actually squeezing the end of the shaft and the collar. I also tightened mine by hand before, and my circles had very noticeable imperfections. You definitely can't get them that tight without pliers. The trick is to not overly tighten or the collars wont sit flat, causing backlash again. You're correct they're still a little out. Three things could be the cause. There could be still a slight flex at the tensioner blocks. I also have a bent y-drive from factory, and the frame deflects at the y motor mount location. I've come up with a plan to fix all of that, but I'm waiting for parts to show up.

My solution is to go to a direct y-drive. I'm upgrading to a 8mm shaft, mounted with bearings. I'm then adding another 8mm idler shaft to the front, mounted on bearings as well. Since I was at it, I also ordered GT2 belts and pulleys for everything. I'm also going to install a brace for the vertical z rods with a stabilizer bearing for the threaded rod end. Then I plan to lower resistance by going to a carriage setup using linear bearings. Should be running pretty smoothly once I'm done.

7 (edited by redbarret 2015-01-15 13:14:49)

Re: How to fix your circles.

Albertatinker wrote:

Since I was at it, I also ordered GT2 belts and pulleys for everything

If you don't mind me asking, if you ordered them together, where did you order both 5mm GT2 pulleys, 6mm GT2 pulleys and belts to be shipped together and how much did it all cost?

And what are you thinking of doing with enclosure after you've moved the Y motor outside of it? Cut the side aluminum cover? Make one from plexiglass or other and cut that instead?

Solidoodle 4

8

Re: How to fix your circles.

I tried this and I haven't really noticed a significant improvement. At first, I clamped down the collar and the wall really tight, and it cause my Y axis to bind up. I tried different levels of force clamping it down and didn't really seem to see an improvement compared to before. Out of curiosity, aside from OP, has anyone else gotten this to help? It's possible that my problems are coming from somewhere else as well.

9 (edited by redbarret 2015-01-19 17:09:47)

Re: How to fix your circles.

In theory it should help, but it didn't make much difference in practice to me if everything else was calibrated already.
Just wiggle the frame the Y motor is on and the frames the brackets are on while it prints circles or similar and you'll see you can't spot any difference.

There's a backlash in the after photo. It's not much, maybe less for the OP than before, but its there.

What is it then? I don't know man, I'm fed up with this. I'll try out the direct drive mod when my couplers and heatbed arrive as I can't print anything at all at this point, maybe my heater is damaged or something.
If there's no backlash with direct drive, then side belts/pulleys and front brackets just can't be the issue and the only possibilities will remain the short motor belt, drive rod bending or back frame bending as possible issues. There's nothing left then.

Solidoodle 4
10

Re: How to fix your circles.

Tightening the rods in the frame helped a lot, but the frame flexes where the motor is mounted as well. I could only eliminate lash with the direct drive mount. For the case side where the motor mounts, I'm notching the cover to fit around it. Very happy with my results.

11 (edited by jagowilson 2015-02-05 20:48:13)

Re: How to fix your circles.

Albertatinker wrote:

Tightening the rods in the frame helped a lot, but the frame flexes where the motor is mounted as well. I could only eliminate lash with the direct drive mount. For the case side where the motor mounts, I'm notching the cover to fit around it. Very happy with my results.

I am wondering if this is the source of the slop I witness on the drive rod. I did some tests a few days ago with the side belts disconnected. I put a dot on the rod and did some .1mm moves. The slop is just ridiculous, regardless of belt tension. I'm waiting for a 5 to 6 mm oldham coupler and I'll be going direct drive as well with bearings on each end of the frame, possibly some pillow bearings in the middle as well if necessary.

12 (edited by redbarret 2015-02-05 21:47:35)

Re: How to fix your circles.

Flex the frame with your hands the same amount while its printing a cube or a circle. Do you notice any difference? I don't. http://www.soliforum.com/post/81693/#p81693
My moneys on the MXL belt being the issue as some articles claim it has more slack on the teeth at higher tensions than GT2, which the new Workbench seems to be using instead too.
The GT2 pulleys and belt should arrive in few days I guess and I an test this.
I've bought two couplers too though.

jagowilson, did you try to pliers thing suggested in this thread yet?

Solidoodle 4