26 (edited by delorean175 2019-08-04 23:14:42)

Re: SD3 w/ new e3d upgrade, issues with prints collapsing in

heartless wrote:
delorean175 wrote:

So I really tried my absolute best so square up everything in terms of the rods. I measured, I used a right angle, it looks perfectly square. It made the circles worse. Something isn't right at all. Is it possible to calibrate the steps needed for the X and Y axis? It should be sorta like calibrating the extruder feed rate right? could you post your EEPROM settings?

No, I will not post EEPROM settings, because you should never use settings from someone else's printer. Each printer is unique in what it needs.

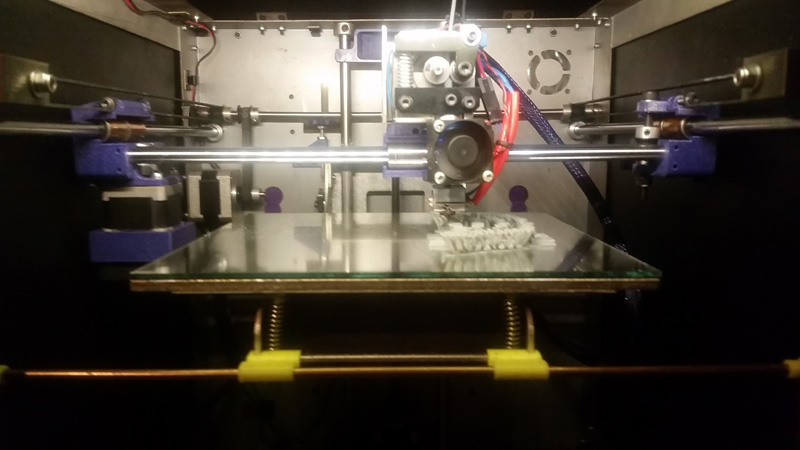
carriages need to be squared up and in a neutral position on the Y rods (no binding)
belts need to be tight and running true - there should be no deviation in the path
Don't forget to adjust the X belt as well - it should be running level and tight.

there should not be "slop" anywhere

now, all of that aside.. how much wiggle does the front of your bed have?? if you put your finger on the center front, and wiggle side to side.. how much does it move? That can also be a source of out of round circles and other anomalies

The belts seam to be tight and even. I get a low tone when I pluck them. Both make the same note. Same for the X belt. I'm really starting to look at the carriages them selves. The bearings sit loosely in them. I rolled the tape around them to help tighten it up but they still have a little wiggle. When the belts are tight and everything is tightened down they don't have any slop in them. I'll try to run through everything again.

I didn't finish going through all of your spool calibration write up last night. But I did the 7 measurements part, averaged that up and inputted the number into slic3r, re-calibrated the feed rate. I had just enough time to print off one calibration box. The extrusion was way better. The edges of the box sit flat now. The walls measured out to .35mm thick. So I'm going in the right direction. The box its self measured 10mm wide 8.3mm deep. So its still not perfectly square but the extrusion looks really nice. :-)

I drew up a 100mm by 100mm box with a single wall thickness. Front to back is measures 99mm and side to side it measures 100mm. The walls look 90 degrees. I'll check that to be sure in a little bit here. The box is short 1mm on the Y axis. Could belt length effect this? Like stretched out belts? My belts are 5 years old. They are tight though.     

The front of my print bed has a stabilizer bar on it. So it doesn't move a whole lot. It has a tiny bit of wiggle though. But it looks like its wiggling at the bed leveling screws not the aluminum platform thing. I don't see any flexing at the rivets.

27

Re: SD3 w/ new e3d upgrade, issues with prints collapsing in

just for grins, leave them slightly cock-eyed but moving smoothly and see what you get

SD4 #1 & #2 - Lawsy carriages, E3D v6, Rumba controller board, mirror bed plate, X motor fan, upgraded PSU & Mica bed heater
SD4 #3 - in the works ~ Folgertech FT-5, rev 1
Printit Industries Beta Tester - Horizon H1

28

Re: SD3 w/ new e3d upgrade, issues with prints collapsing in

heartless wrote:

just for grins, leave them slightly cock-eyed but moving smoothly and see what you get

ok will do. I used the same formula for calibrating the feed rate. it came out to 88.8888889 setps for 100mm of travel. So i put in 88.89 steps. it fixed my square and made it an even 100 x 100 square. :-) but the circles are still messed up. so i'll make the carriages cockeyed again and see what happens.

29 (edited by delorean175 2019-08-07 01:00:08)

Re: SD3 w/ new e3d upgrade, issues with prints collapsing in

Hey guys sorry to keep you hanging. My kid has been keeping me busy. Haha

So I ended up making the carriages cockeyed again, it didn't fix the circles. So I decided to straighten them out again. This time I moved my machine to the island in my kitchen. I wanted more space to work and be able to see how everything moves from dead front. I usually access my printer from the side/ front when It's in its usual spot. Anyway, I noticed the front pulleys didn't look right. I decided to flip them over, the belts lined up better with the carriages. I re-tensioned everything, this time I went tighter than I usually do. It prints a looked better. :-)

I went through the entire spool calibration, extrusion width, extrusion multiplier process. I got my extrusion width pretty close to perfect. I'll work in this a little more. But the print quality got even better.

Below is what I'm getting. My 90 degree angles aren't perfect, but they are better.  Also the Circles got better, but not perfect yet. I will keep tweaking the carriages. 

I'm having issues with tall and smaller objects melting a little once they get over an inch or so. The rear corner of this 90 degree angle is curving up. Minimum layer times should fix the small er objects. I'm not sure about the rear of the right angle.

I have some messy first layers. The inner parameters look really nice and the outer one is wavy and doesn't stick that well.

Post's attachments

IMG_20190804_105442.jpg 984.05 kb, file has never been downloaded. 

IMG_20190806_172949.jpg 1.73 mb, file has never been downloaded. 

IMG_20190806_173000.jpg
IMG_20190806_173000.jpg 1.52 mb, file has never been downloaded. 

IMG_20190806_173051.jpg
IMG_20190806_173051.jpg 1.63 mb, file has never been downloaded. 

IMG_20190806_173125.jpg
IMG_20190806_173125.jpg 1.75 mb, file has never been downloaded. 

You don't have the permssions to download the attachments of this post.

30

Re: SD3 w/ new e3d upgrade, issues with prints collapsing in

Your bed is not level. That is very critical to good first layer adhesion. Don't worry about lifting in the corner. Get your dimensional issues fixed first. Then we will move to temperature which is the reason your layers look strange. But don't bother with temp for now. On 3d printers it is very important to solve one issue at a time. If you try to solve several you could create another.

Printing since 2009 and still love it!
Anycubic 4MAX best $225 ever invested.
Voxelabs Proxima SLA. 6 inch 2k Mono LCD.
Anycubic Predator, massive Delta machine. 450 x 370 print envelope.

31

Re: SD3 w/ new e3d upgrade, issues with prints collapsing in

ok, stop trying to calibrate with such small items.. you are doing yourself, and your printer a disservice.

for filament calibration (flow rate), use the testbox i have added here.. and set up a calibration profile in Slic3r to do:
2 bottom layers,
no top layers,
no infill and
1 perimeter.
this is the proper way to calibrate for flow. do NOT use a model made with what is called a "single wall" - that is not helping you to calibrate properly.
You do not need to print the entire height of this piece, just 5-10mm is plenty - enough to give you good measurements.

And again, your single wall thickness should be 0.48 - get this correct BEFORE trying to move on to accuracy! If this is not correct, your dimensional accuracy will not be correct.

next, for dimensional accuracy testing - AFTER you get the flow rate set correctly - try the other file - the one labeled "accuracy test"
It has multiple dimensions that can be checked for accuracy.

print it, and mark it with X & Y directions BEFORE removing from the print bed. Then measure the outside the inner cut out, and the steps in Z

outer dimension = 75mm x 75mm
mid level dimension = 50 x 50
inner cutout = 25 x 25
each step should be 5mm tall, with total being 10mm (measured at the inner cutout)

this will you give you a MUCH more accurate picture of what your printer is doing than little things will.

Post's attachments

25x25x50 testbox.stl 3.27 kb, 6 downloads since 2019-08-07 

accuracy test 75x50x25x10h.stl 238.38 kb, 6 downloads since 2019-08-07 

You don't have the permssions to download the attachments of this post.
SD4 #1 & #2 - Lawsy carriages, E3D v6, Rumba controller board, mirror bed plate, X motor fan, upgraded PSU & Mica bed heater
SD4 #3 - in the works ~ Folgertech FT-5, rev 1
Printit Industries Beta Tester - Horizon H1

32

Re: SD3 w/ new e3d upgrade, issues with prints collapsing in

carl_m1968 wrote:

Your bed is not level. That is very critical to good first layer adhesion. Don't worry about lifting in the corner. Get your dimensional issues fixed first. Then we will move to temperature which is the reason your layers look strange. But don't bother with temp for now. On 3d printers it is very important to solve one issue at a time. If you try to solve several you could create another.

Alright, I'll check it again and see whats going on. I'm going to be changing the extruder to one that will hold a dial gauge. I use paper as a feeler gauge but I really want to see some numbers. lol Then I'll tweak the carriages again and see if I can get it even closer to perfect. I appreciate your help! I added some pics of whats going on in my previous reply.

33

Re: SD3 w/ new e3d upgrade, issues with prints collapsing in

heartless wrote:

ok, stop trying to calibrate with such small items.. you are doing yourself, and your printer a disservice.

for filament calibration (flow rate), use the testbox i have added here.. and set up a calibration profile in Slic3r to do:
2 bottom layers,
no top layers,
no infill and
1 perimeter.
this is the proper way to calibrate for flow. do NOT use a model made with what is called a "single wall" - that is not helping you to calibrate properly.
You do not need to print the entire height of this piece, just 5-10mm is plenty - enough to give you good measurements.

And again, your single wall thickness should be 0.48 - get this correct BEFORE trying to move on to accuracy! If this is not correct, your dimensional accuracy will not be correct.

next, for dimensional accuracy testing - AFTER you get the flow rate set correctly - try the other file - the one labeled "accuracy test"
It has multiple dimensions that can be checked for accuracy.

print it, and mark it with X & Y directions BEFORE removing from the print bed. Then measure the outside the inner cut out, and the steps in Z

outer dimension = 75mm x 75mm
mid level dimension = 50 x 50
inner cutout = 25 x 25
each step should be 5mm tall, with total being 10mm (measured at the inner cutout)

this will you give you a MUCH more accurate picture of what your printer is doing than little things will.

Heartless, Thank you for the files. I will use them then and post my progress!

34

Re: SD3 w/ new e3d upgrade, issues with prints collapsing in

heartless wrote:

ok, stop trying to calibrate with such small items.. you are doing yourself, and your printer a disservice.

for filament calibration (flow rate), use the testbox i have added here.. and set up a calibration profile in Slic3r to do:
2 bottom layers,
no top layers,
no infill and
1 perimeter.
this is the proper way to calibrate for flow. do NOT use a model made with what is called a "single wall" - that is not helping you to calibrate properly.
You do not need to print the entire height of this piece, just 5-10mm is plenty - enough to give you good measurements.

And again, your single wall thickness should be 0.48 - get this correct BEFORE trying to move on to accuracy! If this is not correct, your dimensional accuracy will not be correct.

next, for dimensional accuracy testing - AFTER you get the flow rate set correctly - try the other file - the one labeled "accuracy test"
It has multiple dimensions that can be checked for accuracy.

print it, and mark it with X & Y directions BEFORE removing from the print bed. Then measure the outside the inner cut out, and the steps in Z

outer dimension = 75mm x 75mm
mid level dimension = 50 x 50
inner cutout = 25 x 25
each step should be 5mm tall, with total being 10mm (measured at the inner cutout)

this will you give you a MUCH more accurate picture of what your printer is doing than little things will.


For some reason RH isn't opening the files you sent me. After trying to drag and drop explorer crashed. I'm not sure whats going on. I even tried restarting. I did re- level the bed and swap out some parts on the print bed. That managed to clean up my first layer a bit. I replaced my Z stop with one I designed to be more ridged. The adjustment screw in the old z stop had a little play in it. Since I couldn't get the 25x25x50 cube to work I tried with mine a few more times. I used the same settings you I would have used with yours. The walls are .48mm thick. I definitely want your stl files.

35

Re: SD3 w/ new e3d upgrade, issues with prints collapsing in

Are you downloading and saving on your computer?
or trying to load directly from here?
you need to save them on your computer for them to load correctly in RH

these are crazy simple files with very few triangles, so not sure why they wont load.

Post's attachments

25x25x50 testbox.stl 3.27 kb, 2 downloads since 2019-08-08 

accuracy test 75x50x25x10h.stl 3.21 kb, 2 downloads since 2019-08-08 

You don't have the permssions to download the attachments of this post.
SD4 #1 & #2 - Lawsy carriages, E3D v6, Rumba controller board, mirror bed plate, X motor fan, upgraded PSU & Mica bed heater
SD4 #3 - in the works ~ Folgertech FT-5, rev 1
Printit Industries Beta Tester - Horizon H1

36

Re: SD3 w/ new e3d upgrade, issues with prints collapsing in

Hey! I've been away for business but, I'm back now.

I'm not sure why they wouldn't load. I re-downloaded them and now they load. I'm not sure what the issue was. The computer I run my printer from is an old offline computer dedicated to a few basic things like printing, so I have to move the files over with an SD card. Maybe it didn't copy correctly. I'll print those out and see what happens.

37

Re: SD3 w/ new e3d upgrade, issues with prints collapsing in

So I printed the test print, It looks good. It's a little out of spec. So looking straight at the printer the X axis printed the square at 75.16mm, Y axis is 75.54mm. The mid level measured 50.24mm for X, 50.28mm on the Y axis. The Inner cutout 25mm Y axis, 25.06mm for the X axis. Whats the best method to calibrate the accuracy?

38

Re: SD3 w/ new e3d upgrade, issues with prints collapsing in

i would like to see a picture of the print before you go messing with numbers.

SD4 #1 & #2 - Lawsy carriages, E3D v6, Rumba controller board, mirror bed plate, X motor fan, upgraded PSU & Mica bed heater
SD4 #3 - in the works ~ Folgertech FT-5, rev 1
Printit Industries Beta Tester - Horizon H1

39 (edited by delorean175 2019-08-26 22:23:16)

Re: SD3 w/ new e3d upgrade, issues with prints collapsing in

Sure here are a few. I tried some bridging, it comes out horrible. My settings are 75mm/s and the flow rate is turned down to .7. Any advice to improve bridging? Possibly more settings I'm missing? I can take some pics of my current results if you want.

Post's attachments

IMG_20190826_130036.jpg
IMG_20190826_130036.jpg 4.17 mb, file has never been downloaded. 

IMG_20190826_130054.jpg
IMG_20190826_130054.jpg 2.65 mb, file has never been downloaded. 

IMG_20190826_130113.jpg 2.71 mb, file has never been downloaded. 

IMG_20190826_130137.jpg
IMG_20190826_130137.jpg 1.2 mb, file has never been downloaded. 

You don't have the permssions to download the attachments of this post.

40

Re: SD3 w/ new e3d upgrade, issues with prints collapsing in

It still looks looks like your temp is too low. What temp are using and what material was it again?

You should work on mastering all the other aspects for printing before trying to tackle bridging. Even the pros get bummed by it. Bridging depends on three things. Speed, distance, and temperature. It is very careful balance of all three and is different nearly every time and has to be adjusted accordingly. If possible it's best to try to throw in a few supports under a bridge rather than trying to make a span of more than a few mm in free space.

Printing since 2009 and still love it!
Anycubic 4MAX best $225 ever invested.
Voxelabs Proxima SLA. 6 inch 2k Mono LCD.
Anycubic Predator, massive Delta machine. 450 x 370 print envelope.

41

Re: SD3 w/ new e3d upgrade, issues with prints collapsing in

you are still trying to go way too fast - turn it down to about 40mm/s print speeds. Solidoodles do better at slower speeds.
i also see some Z wobble in that print.. that can throw your measurements off.

Calibration is done in a series of specific steps. try skipping one and you are wasting your time, and mine.

step 1. have you properly calibrated the feed rate?
ie: when you ask it to feed 100mms in, it feeds exactly 100mms? not 97, not 102 - but 100 on the dot.
be aware that temperature will affect this! make sure your temps are appropriate for the material being used.

step 2. Filament calibration - average diameter to start with.
7-9 measurements over 8-10 feet of the material. average the diameters and enter into your slicing program.
Save the settings! (this is an important part of the process)

step 3. Initial flow rate calibration.
multiplier needs to be set to 1 for the first test box and saved.

print the single wall box as discussed earlier - via slicer settings, NOT a pre-made model - to about 5mms tall.
carefully measure each wall of the box and average that. be careful not to cut into/squash the printed wall with the caliper blades.
for a first run i would expect the dimensions to be in the 0.50 to 0.52 range.

do the math to get the correct multiplier for that filament.
     expected dimension / (actual dimension x current multiplier) = new multiplier value
            0.48 / ( 0.52 x 1 ) = 0.92
or the shorthand version - 0.48 / 0.52 = 0.92

enter the new multiplier and save settings - reslice the box and print again to verify the setting is correct. you must slice again every time you make a change and save the setting.
You may need to make a small adjustment up or down to get it come out to 0.48 (for a 0.4 nozzle) - and by "small" i mean 0.01 or 0.015 either way, depending on the results.

it will be very rare that you should see something below a 0.88 for a multiplier..
that you are using 0.7 tells me you are trying to shortcut things & it does not work.

"Anything worth doing, is worth doing right." - Hunter S. Thompson, Journalist

SD4 #1 & #2 - Lawsy carriages, E3D v6, Rumba controller board, mirror bed plate, X motor fan, upgraded PSU & Mica bed heater
SD4 #3 - in the works ~ Folgertech FT-5, rev 1
Printit Industries Beta Tester - Horizon H1

42 (edited by delorean175 2019-08-27 03:05:40)

Re: SD3 w/ new e3d upgrade, issues with prints collapsing in

carl_m1968 wrote:

It still looks looks like your temp is too low. What temp are using and what material was it again?

You should work on mastering all the other aspects for printing before trying to tackle bridging. Even the pros get bummed by it. Bridging depends on three things. Speed, distance, and temperature. It is very careful balance of all three and is different nearly every time and has to be adjusted accordingly. If possible it's best to try to throw in a few supports under a bridge rather than trying to make a span of more than a few mm in free space.

I'm running ABS at 240c first layer and 235 for all others. I've had decent results with those temps so far. The bridges I'm trying to make aren't big. Its more like a round arch. The base of it is 10mm long, just for a size reference. I'll post a pic of what I'm trying to print. With the factory hotend setup I've always been lucky with bridging. I tweaked some settings one afternoon and got it to print things with an outwards taper of roughly 60 or 70 degrees hanging over. From that point on I always tweaked my designs to cater to the printers quirks. Back then I didn't know how to calculate the extrusion multiplier correctly. But I knew roughly how much to compensate in my designs so they would come out close to the right size. lol This thread has been a huge learning curve. If I can get bridges and circles dialed in, my printer is printing way better than it ever did before. And there is still room for more improvement.

43 (edited by delorean175 2019-08-27 03:07:15)

Re: SD3 w/ new e3d upgrade, issues with prints collapsing in

heartless wrote:

you are still trying to go way too fast - turn it down to about 40mm/s print speeds. Solidoodles do better at slower speeds.
i also see some Z wobble in that print.. that can throw your measurements off.

Calibration is done in a series of specific steps. try skipping one and you are wasting your time, and mine.

step 1. have you properly calibrated the feed rate?
ie: when you ask it to feed 100mms in, it feeds exactly 100mms? not 97, not 102 - but 100 on the dot.
be aware that temperature will affect this! make sure your temps are appropriate for the material being used.

step 2. Filament calibration - average diameter to start with.
7-9 measurements over 8-10 feet of the material. average the diameters and enter into your slicing program.
Save the settings! (this is an important part of the process)

step 3. Initial flow rate calibration.
multiplier needs to be set to 1 for the first test box and saved.

print the single wall box as discussed earlier - via slicer settings, NOT a pre-made model - to about 5mms tall.
carefully measure each wall of the box and average that. be careful not to cut into/squash the printed wall with the caliper blades.
for a first run i would expect the dimensions to be in the 0.50 to 0.52 range.

do the math to get the correct multiplier for that filament.
     expected dimension / (actual dimension x current multiplier) = new multiplier value
            0.48 / ( 0.52 x 1 ) = 0.92
or the shorthand version - 0.48 / 0.52 = 0.92

enter the new multiplier and save settings - reslice the box and print again to verify the setting is correct. you must slice again every time you make a change and save the setting.
You may need to make a small adjustment up or down to get it come out to 0.48 (for a 0.4 nozzle) - and by "small" i mean 0.01 or 0.015 either way, depending on the results.

it will be very rare that you should see something below a 0.88 for a multiplier..
that you are using 0.7 tells me you are trying to shortcut things & it does not work.

"Anything worth doing, is worth doing right." - Hunter S. Thompson, Journalist


I have my print speeds set to 35mm/s. The only speed I have turned up was bridging (75mm/s). I got that speed setting from a thread Lawsy created a while ago. I know his machine is different from mine but I figured It was a starting point. I can't remember off hand what the setting is called but it's basically the flow rate while bridging. I currently have set to .7 and have been playing around with it to see if it makes any improvements. I wanted to see if reducing the amount of material coming out would clean up bridging.

I followed your steps exactly the first time you posted them. I didn't skip anything, I'm not trying to waist anyone's time here.

I can't remember my exact extrusion multiplier but it's not .7. My test box walls come out .48mm on all 4 walls. Using Slic3r settings, not the model being single walled. After following your steps I got my extrusion multiplier dialed in.

So now I'm at the point of measuring the test print box and It's not coming out exactly the size it should be. Also I'm pretty sure my carriages aren't perfectly square because when I measure square prints diagonally both ways they come out to different measurements. 

As for the Z wobble, the sheet metal frame is tight, the springs allow the bed to sway a little bit. I didn't think it was effecting my prints. You have a better eye for this sort of thing than I do. I'll try tightening the thumb screws, re-level and see if the print bed is more stable. If not I'll try swapping the springs for stiffer ones. The top of my build plate sits 7mm higher than the factory build plate.

I appreciate all the help you've given me. I learned a lot and made sure not to skip any steps along the way.

44

Re: SD3 w/ new e3d upgrade, issues with prints collapsing in

sorry if I came across a little snippy (or a lot).. been a long week already, and it is only monday.

Z wobble can come from a couple of different things, but all have to do with the bed.
I run a stabilizer bar on the front of my bed to control any movement there.

seen here - the yellow pieces hold the bar to the front edge of the platform, and there are bearings that ride on the sides of the frame.. (was printing tpu here, so it isnt real pretty)

http://soliforum.com/i/?oevjePd.jpg

tightening up the springs might help.. you dont want a lot of movement in the bed plate.
and yes, my bed is much thicker than stock - 3/16" aluminum plate, with a Hale heatbed (PrintIt Industries) and mirror tile top - some serious thermal mass there.

getting things calibrated right will go a long ways toward helping other areas.
for the record, I run 60,,/s for bridging speed, but then again, I have never really "tested" it either with those test prints...

don't go getting the cart before the horse, here.. one step at a time.

SD4 #1 & #2 - Lawsy carriages, E3D v6, Rumba controller board, mirror bed plate, X motor fan, upgraded PSU & Mica bed heater
SD4 #3 - in the works ~ Folgertech FT-5, rev 1
Printit Industries Beta Tester - Horizon H1

45

Re: SD3 w/ new e3d upgrade, issues with prints collapsing in

heartless wrote:

sorry if I came across a little snippy (or a lot).. been a long week already, and it is only monday.

Z wobble can come from a couple of different things, but all have to do with the bed.
I run a stabilizer bar on the front of my bed to control any movement there.

seen here - the yellow pieces hold the bar to the front edge of the platform, and there are bearings that ride on the sides of the frame.. (was printing tpu here, so it isnt real pretty)

http://soliforum.com/i/?oevjePd.jpg

tightening up the springs might help.. you dont want a lot of movement in the bed plate.
and yes, my bed is much thicker than stock - 3/16" aluminum plate, with a Hale heatbed (PrintIt Industries) and mirror tile top - some serious thermal mass there.

getting things calibrated right will go a long ways toward helping other areas.
for the record, I run 60,,/s for bridging speed, but then again, I have never really "tested" it either with those test prints...

don't go getting the cart before the horse, here.. one step at a time.


No worries man, we all have those days.

I think we have the same bed stabilizer setup. It was one of the first mods I did back in 2014. Originally I wanted to go with the silicone heat pad on the ABS printed bed. That didn't go well. So my new and improved build plate setup is an Amazon special. haha I bought a 220 x 220 x 2mm thick build plate for a reprap, I drilled the 3 holes for the Solidoodle bed leveling screws. Then i bought a heated bed for a reprap which is 220 x 220 x 3mm thick and actually flat, then a 3mm thick piece of borosilicate. The only one I could find was 200 x 200. My plan is to print spacers to hold the glass centered. For now binder clips will have to do, just like they always have. lol

Post's attachments

IMG_20190826_202849.jpg
IMG_20190826_202849.jpg 3.42 mb, file has never been downloaded. 

IMG_20190826_202922.jpg 2.67 mb, file has never been downloaded. 

You don't have the permssions to download the attachments of this post.

46

Re: SD3 w/ new e3d upgrade, issues with prints collapsing in

yup, that does look like the same stabilizer.. except the supports on the bed platform should be at the corners for greater stability. I had to trim mine a little for clearance of the wing nuts - i cut a slight curve in the underside.

but yeah, crank those springs down more... get more tension on them.
i rarely need to mess with bed leveling anymore - maybe about once a month it might get a tweak, but for most day to day stuff, i don't need to touch it.

use hairspray to hold the glass down & get rid of those binder clips. do a search of the forum for more info on that. notice on mine that there are no clips in sight... or plastic holding the corners - the hairspray works very well.

might help stabilize things more if you close that gap between plates, too.. the taller that is, the less stable things will be. If it were mine, I would close it pretty much completely. you can sandwich a layer of cork gasket material in between for insulation (so the heat goes up, not down) then close it up tight. get the weight as low as possible.

SD4 #1 & #2 - Lawsy carriages, E3D v6, Rumba controller board, mirror bed plate, X motor fan, upgraded PSU & Mica bed heater
SD4 #3 - in the works ~ Folgertech FT-5, rev 1
Printit Industries Beta Tester - Horizon H1

47 (edited by delorean175 2019-08-27 20:45:56)

Re: SD3 w/ new e3d upgrade, issues with prints collapsing in

heartless wrote:

yup, that does look like the same stabilizer.. except the supports on the bed platform should be at the corners for greater stability. I had to trim mine a little for clearance of the wing nuts - i cut a slight curve in the underside.

but yeah, crank those springs down more... get more tension on them.
i rarely need to mess with bed leveling anymore - maybe about once a month it might get a tweak, but for most day to day stuff, i don't need to touch it.

use hairspray to hold the glass down & get rid of those binder clips. do a search of the forum for more info on that. notice on mine that there are no clips in sight... or plastic holding the corners - the hairspray works very well.

might help stabilize things more if you close that gap between plates, too.. the taller that is, the less stable things will be. If it were mine, I would close it pretty much completely. you can sandwich a layer of cork gasket material in between for insulation (so the heat goes up, not down) then close it up tight. get the weight as low as possible.

I'll definitely crank them down then. I never thought to use hair spray to hold the glass down. I'll read up on it. I like the idea of sandwiching the beds together with a layer of cork. I'll be acquiring a piece soon!

I had fitment issue with the Z wobble support when I printed it off a long time ago. So I mounted them the way I have it. I've been wanting to revamp the stabilizer for a while now. I saw a design somewhere using an LMUU8 bearing and an old 8mm rod mounted vertically. It was an intriguing idea so I started designing a mount for the 8mm rod but, didn't get very far with it. lol I'm also making a Y rod stabilizer with a bearing. Mine isn't perfectly straight.

48

Re: SD3 w/ new e3d upgrade, issues with prints collapsing in

i dunno, mounted correctly, the current one works just fine. have had the same one on my #1 printer for several years now.

and yeah, the hairspray works very well, when done right. the best one here in the USA is Aqua Net Extra Super Hold - comes in a purple can.
lasts a long time, too.. one can will last me nearly a year, and I do small run production type stuff.

SD4 #1 & #2 - Lawsy carriages, E3D v6, Rumba controller board, mirror bed plate, X motor fan, upgraded PSU & Mica bed heater
SD4 #3 - in the works ~ Folgertech FT-5, rev 1
Printit Industries Beta Tester - Horizon H1