Topic: War Machine Print - Do or Die Trying
As I previously posted in another thread, I decided to try my hand at printing the model of the War Machine modeled by Joe Grundfast.
http://grundfast.cgsociety.org/art/marv … 3d-1231417
This project was tackled before by before by Mattia Mercante, and the results were absolutely stunning. THis gave me the impetus to print one of my own.
http://formlabs.com/stories/mattia-merc … r-machine/
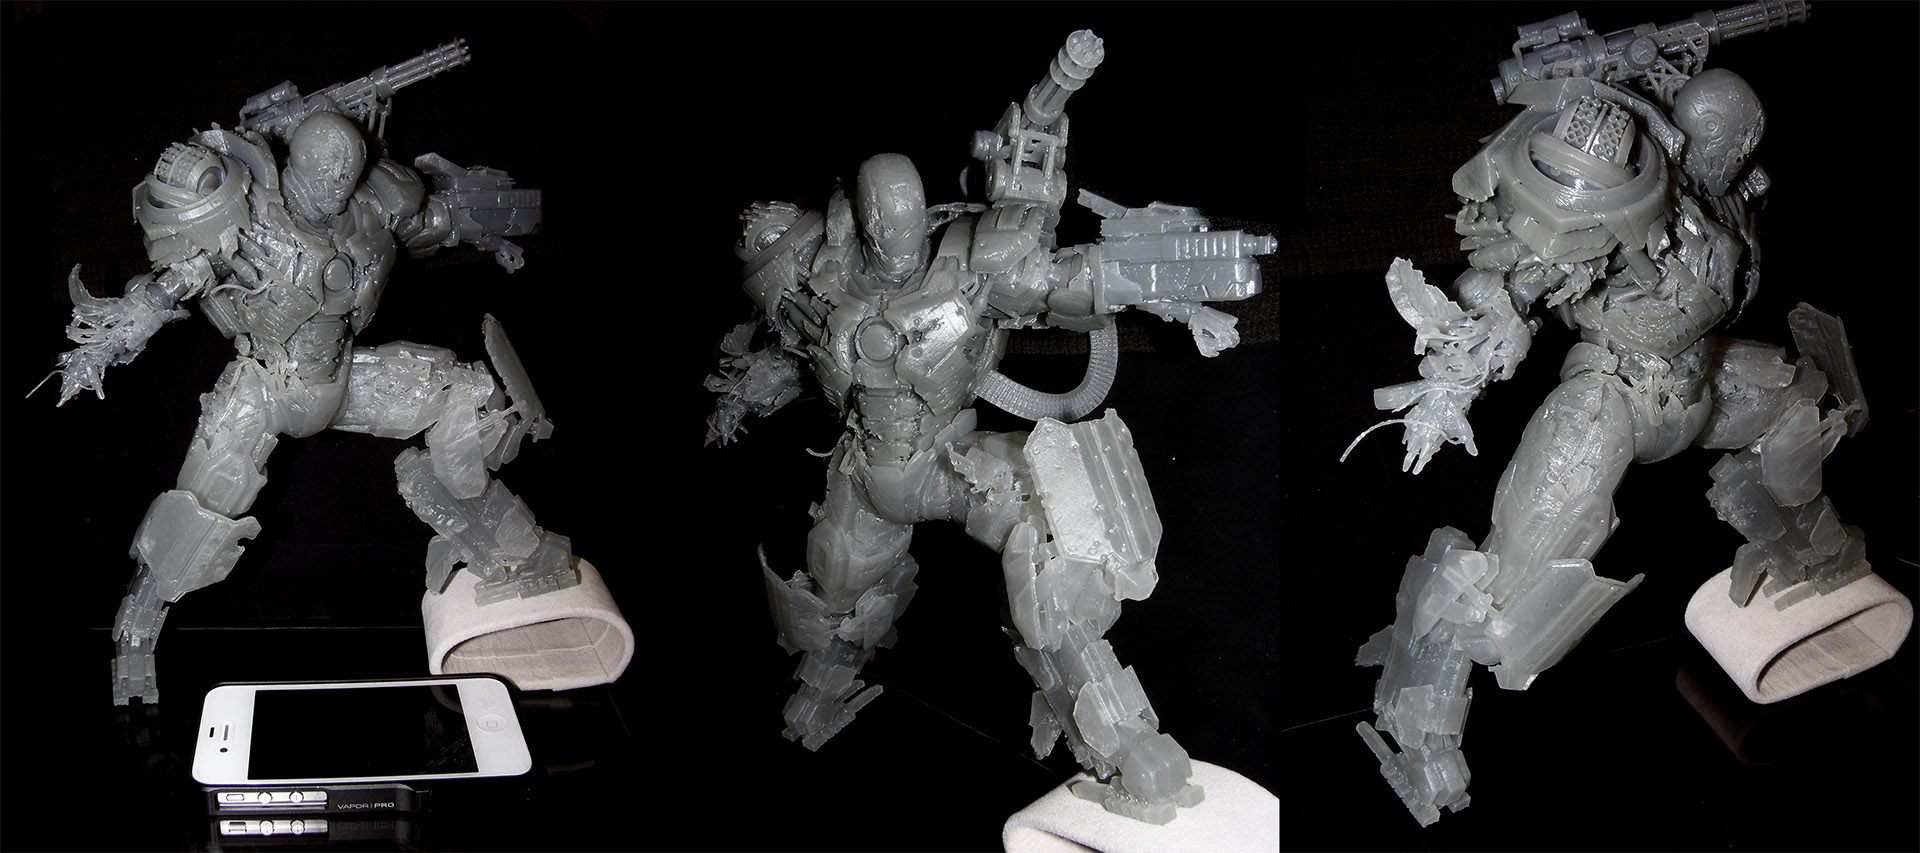
Mattia printed his model in multiple (50 or so) pieces, and enlarged it to be approximately 18" tall. My model will be about half that.
Joe Grundfast made his model available as 2 parts (torso and legs) in the native format he created it in, Z-Brush. Since I'm not familiar with Z-Brush at all, I had a friend export the 2 parts to .OBJ, so I can import them into something I can manipulate.
The torso itself is about is about 500MB in size, and contains 23 million+ vertices. This created a serious problem for me, as my system had a very hard time doing anything with the model without running out of memory (16GB). So I ended up upgrading the memory to 24GB, and even then, it was too painfully slow. So I reduced the mesh to half ( about 12M).
even at that size, the model was impossible to work with in either MeshLab or NetFabb. However MeshMixer was another story.
Once I was able to load the model in MeshLab, I started to separate it into smaller groups. This allowed me to easily work on any subset, then once done, I could recombine the groups into the bigger whole.
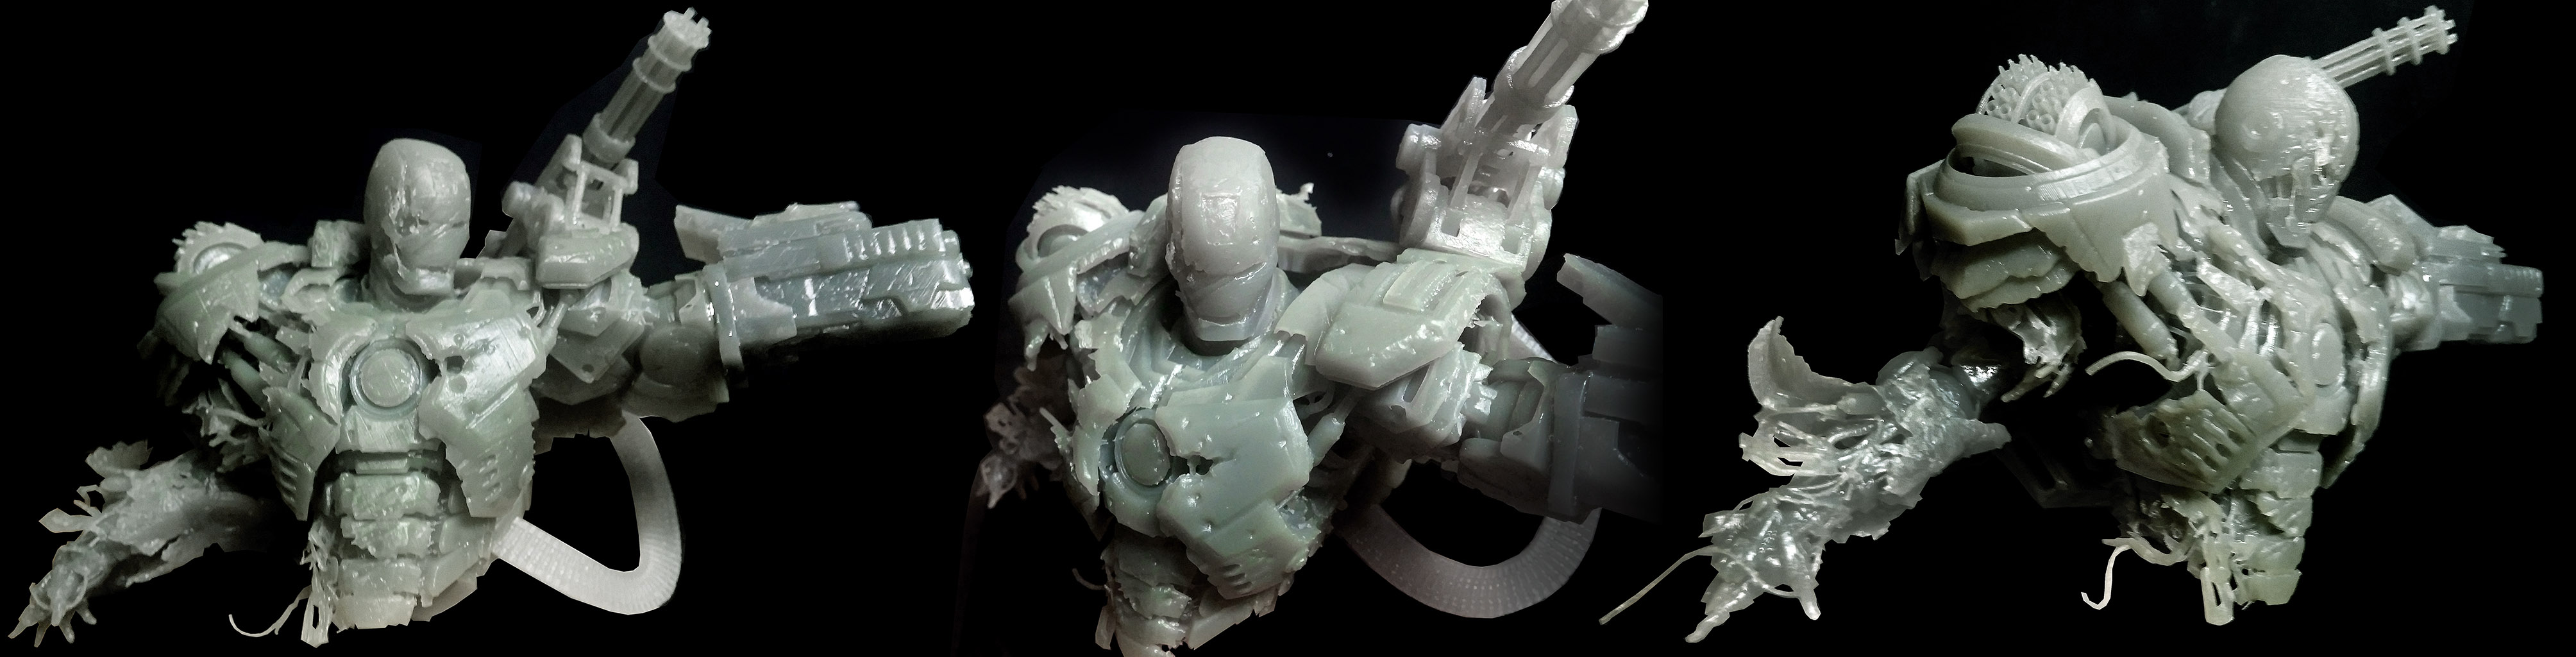
Conservatively speaking, there are probably 200K discrete parts or mode in this model from tubing to bolts and screws to wiring and flying bullet casings. So the first thing that needed to be done is to remove all the parts that could be modeled in mid air (like flying parts and casings).
Once that was done, I started to look at what armor parts I wanted to keep that were visible and hidden. Unfortunately that proved to be a major undertaking, as there are many tiny separate shells inside larger ones, so while I removed some stuff, there's still lots of those tiny shells still there.
Next there were many details I wanted to keep, like wires, conduits and plates, but their size was too small to print, so I had to thicken them up (bulk up the volume. Additionally there are many parts here that are basically floating in mid air, unattached. While that's fine for 3D rendering and animation, it doesn't work very well as a physical model. So I had to somehow interconnect everything so it's a cohesive object.
This was done by a variety of methods. Parts that were stacked on top of each other or next to each other had to have some connection, so I either extruded an adjacent face or a part of a face, or I used another piece primitive like a block or a cylinder between them. Next came the body itself. Other than the hands and the face which can be seen through the partially torn face mask, there is no body inside, just the armor. So I built a body to fit inside the armor. Basically a crude shape that fit inside, which I then re-shaped to fit the particular areas as needed Using the outside shape of the armor as the fixed boundary, I pushed and pulled n the body mesh until it met and connected to all the armor parts.
I also try to fix the errors present in these groups, and there are thousands of these errors (usually holes and non-manifold/crossed over triangles). MeshMixer was able to fix some of these issues but not all, so the resulting model still had few non-manifold errors. Fortunately, PreForm's repair engine (which is built on NetFabb), was able to fix them
BTW, even with 24GB of RAM, MeshMixer would crash every 15-20 steps, so after loosing some hours of work, I got used to clicking Save every time I finished a section and mode to another step.
When I got done (or at least I think I was done, I ended up with 4 parts for the torso: the Main body, Left and right Forearms, and the Mini-gun. In all, I think I have about 20+ hours of work in this, not counting the print job.
Printing the model:
For my first test I tried printing the main body last night. I enlarged the model to 1.200. The model itself would use 135ml of resin, while the supports added another 42ml, for a total of 177ml.
Unfortunately, the print failed. I have yet to see where exactly the model failed, or why, I'll do that tonight, but after all the work I put into it already, I'm determined to see it through, even though it might get costly. The failed print, cost about $25 in wasted resin (@ FormLabs Resin prices).
SD3 printer w/too many mods, Printrbot Simple Maker Ed., FormLabs Form 1+
AnyCubic Photon, Shining 3D EinScan-S & Atlas 3D scanners...
...and too much time on my hands.