Topic: Printit Industries new Mica Heatbed install on SD4
I have to preface this write-up by saying that I had modified my #1 SD4 by installing a much thicker aluminum plate for the bed due to severe warping of the stock plate. The aluminum I chose to use is 3/16" plate (4.66mm according to my calipers), the stock bed is only 3mm thick. I also use mirror tile cut to size on top as my actual print surface, adding another 3mm of thickness.
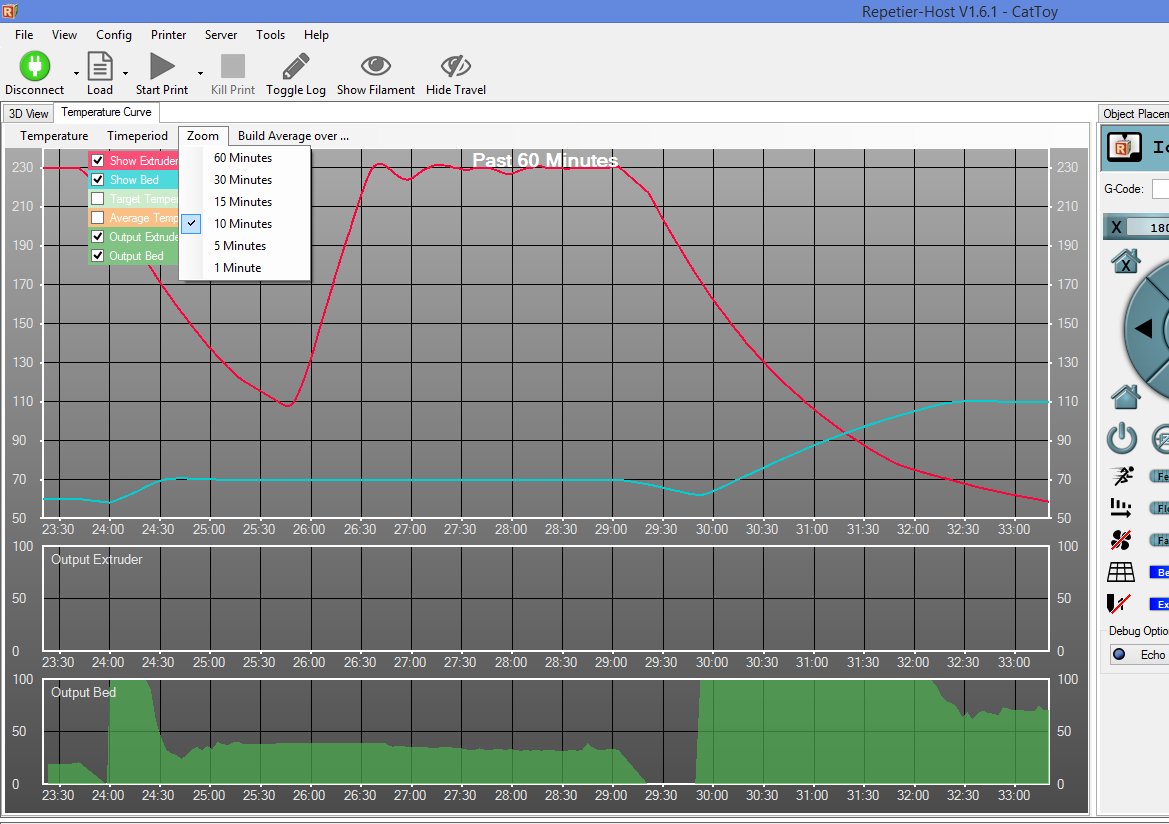
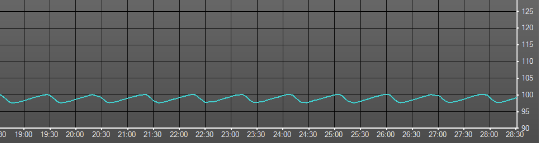
I don't have bed warping problems anymore, but with the stock silicone heat pad (150x150mm) it would take a looonnng time to heat to 100C for printing ABS... roughly 22-23 minutes from cold... but once there, it would hold it very well. (And before someone says it, no, it is not a power supply issue, it is a small pad trying to heat a large thermal mass)
Temperature graph of the old set up...
So, when Printit Industries introduced the new Mica Heat bed, I grabbed one hoping that the full 8x8 dimension would help with the heat up times - more than 20 mins gets old after a while...
so, 1st things 1st - had to remove the old heat pad, which means pulling the bed out of the printer. This is pretty straight forward, disconnect the wiring from the controller board, remove the adjusting wing nuts and the whole thing lifts out pretty easily.
I had stuck a layer of cork under the bed to help insulate and drive the heat upward, so that had to be removed to get to the heat pad...
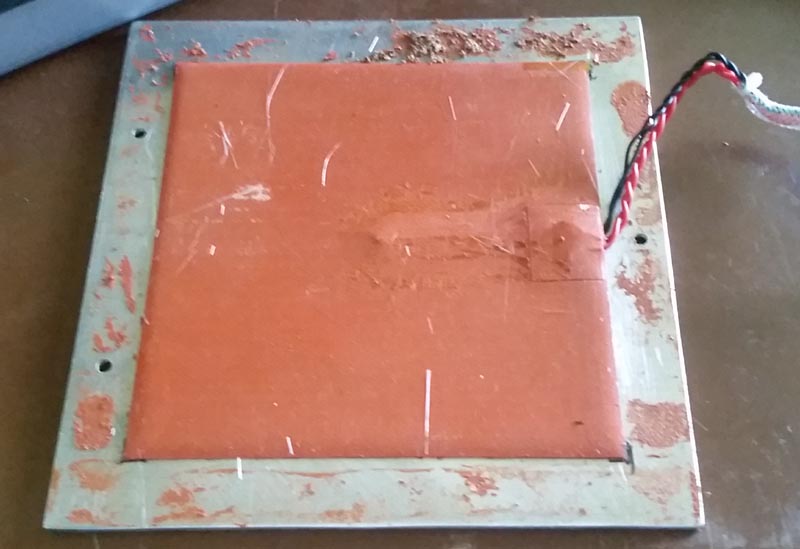
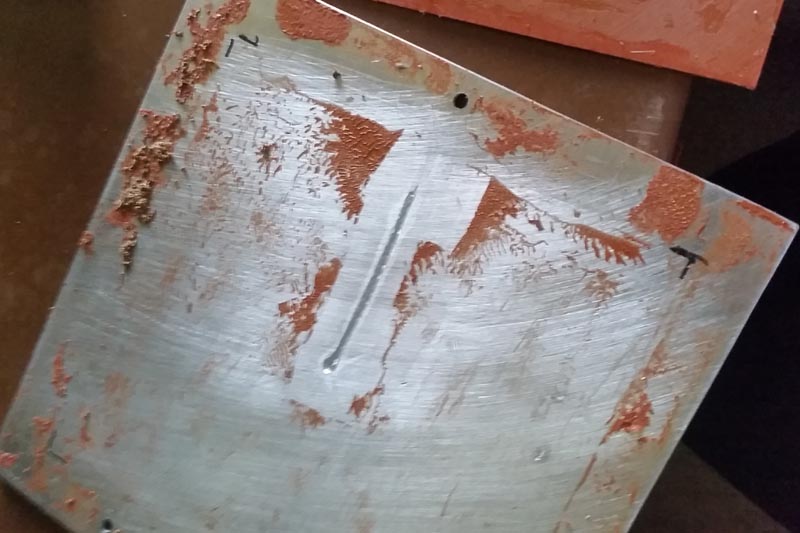
you can see how much smaller the stock heater is compared to bed size... those outer, unheated edges have been a problem when trying to do larger parts...
The silicone pad is quite tough so don't worry about destroying it. To remove it you just need to get under a corner and start pulling it loose. I had used automotive Ultra Copper gasket maker to stick the heat pad on the thicker bed, and the cork insulating material as well - it works very well and I had a time getting it all removed. This is the hardest part of the whole process.
Now I had a bit of a mess to clean up after removing the old heater...
Goof Off is some great stuff for cleaning up adhesive residues. ![]()
Got the aluminum bed all cleaned up and placed the new Mica heater...
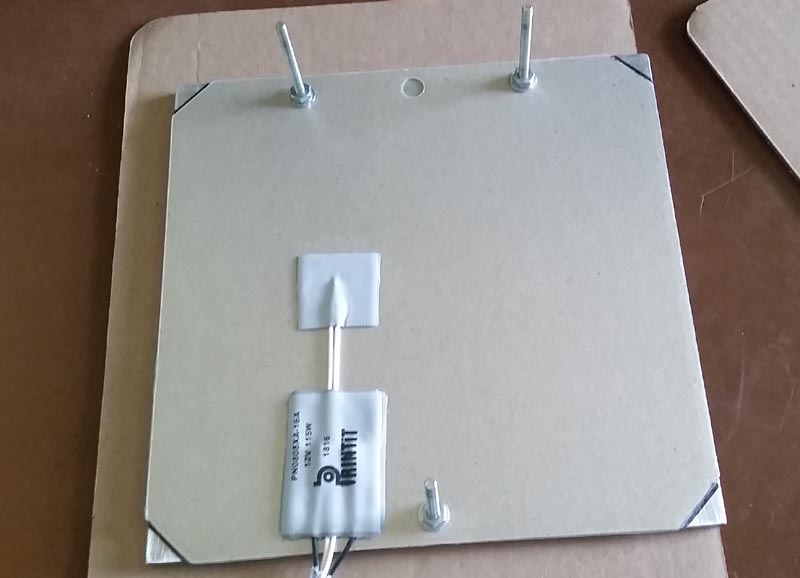
It really is just that easy to install - I lined it up where I wanted it, marked the corners to help with re-alignment, peeled off the 3M adhesive backing and stuck it on... easy peasy.
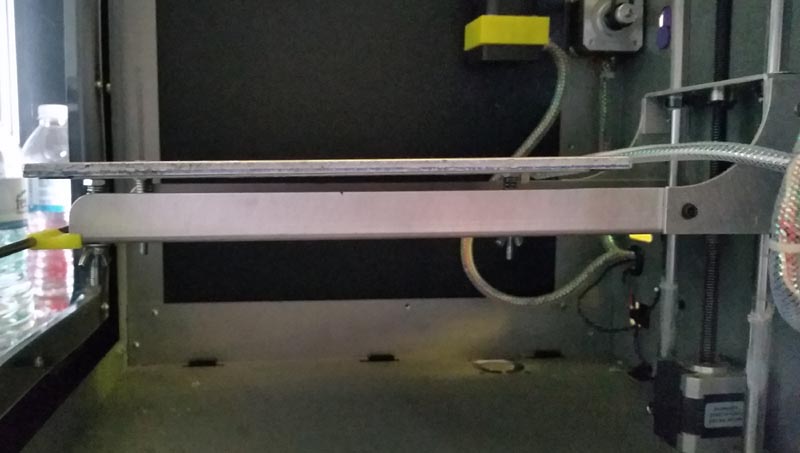
back into the printer it goes...
Then route the wiring and make the connections to the controller board...
I only had one gripe - the wire gauge used for the thermistor wiring is a bit large, making it difficult to crimp ends on for the connector. I ended up snipping about 8 strands of the wire off to get the ends on successfully. Have already mentioned this to one of the guys at Printit, so hopefully that gets resolved in the next batch. Other than that, wiring went smoothly.
One thing I did not realize right away was that the thermistor needs to be changed in the firmware for accurate temp reading - it uses table 5, just like the E3D hotends (stock uses table 1). Perhaps a note included in the package, reminding purchasers of this would be advisable. ![]()
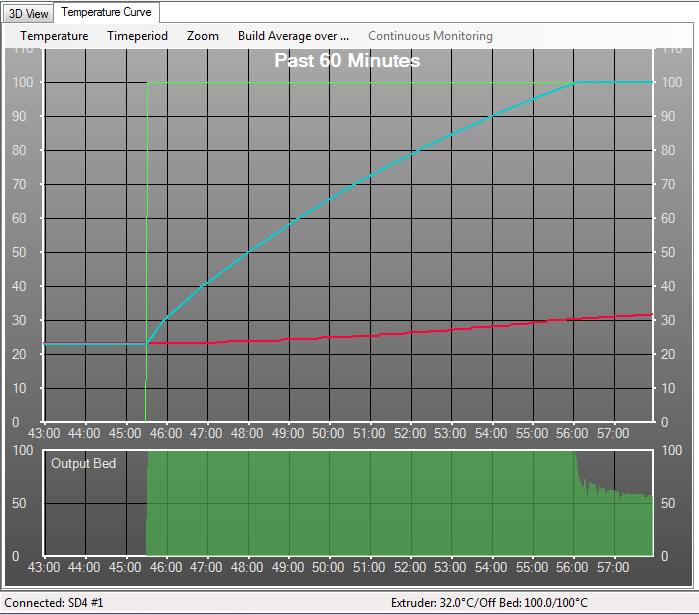
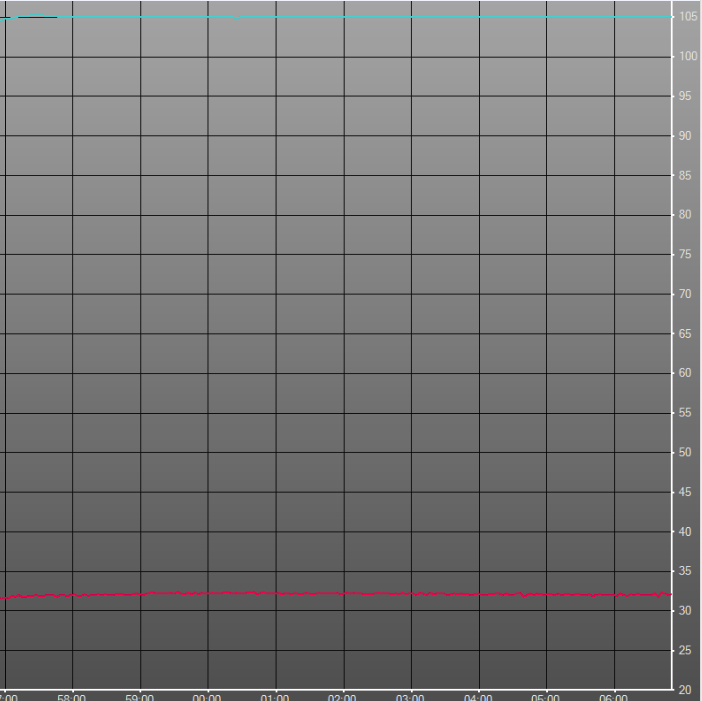
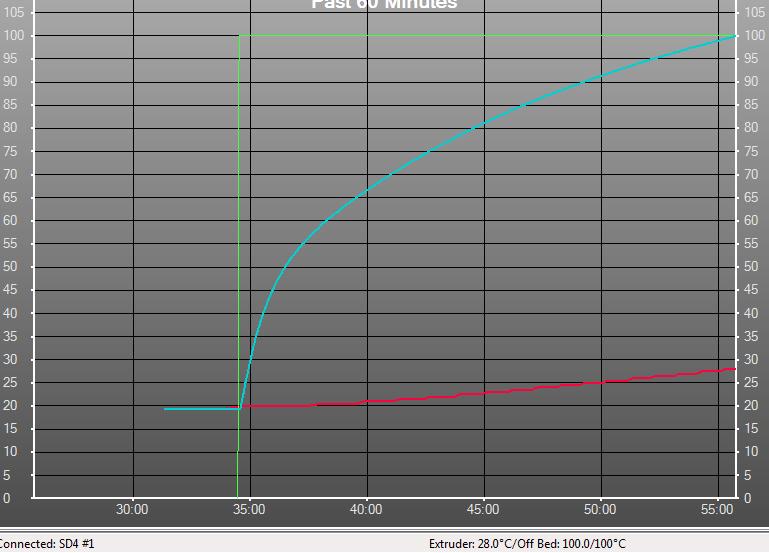
Anyway, a test run (after updating my firmware) shows heat time from cold to be cut nearly in half - approximately 13mins - and this is with NO insulation underneath...
temp graph of the new mica heater...
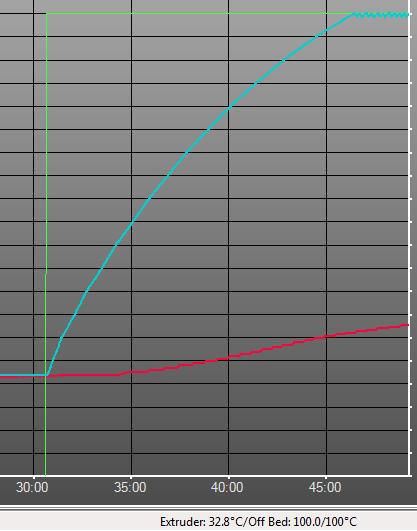
I plan on putting cork under this one, as I had with the old one - hoping it will help reduce heat up times just a little more. I would be quite happy to get heat up time to under 10 mins - keep in mind that I am heating 7.5mm of thickness... so yeah, under 10 mins would be outstanding.
I still need to re-level the bed and run some prints, but so far, I am quite happy with my purchase. I will update after further testing/use.
SD4 #3 - in the works ~ Folgertech FT-5, rev 1
Printit Industries Beta Tester - Horizon H1