Topic: Converting CraftWare Gcode for XYZware DaVinci Printers - Tutorial
Hey all!
I posted this on the CraftWare forums and I hope this will help others here.
After struggling for a while trying to get CraftWare Gcode to work with XYZware, I finally succeeded and decided to put together a tutorial!
Thank you to 3DForms, on the CraftWare forums, for patiently steering me in the right direction.
I have not made many tutorials, so I hope this is thorough and easy to follow ![]()
Some beginning info:
-I am using the stock software and firmware on my DaVinci 1.0 printer, software v1.1.31.7 and printer v1.2.3 on Windows 7 64-bit. My printer has not been flashed with any host, etc.
-I forego auto-bed leveling and level with a single sheet of 8.5x11 standard printer/copier paper.
-Header and Footer Gcode is provided at the bottom of the tutorial.
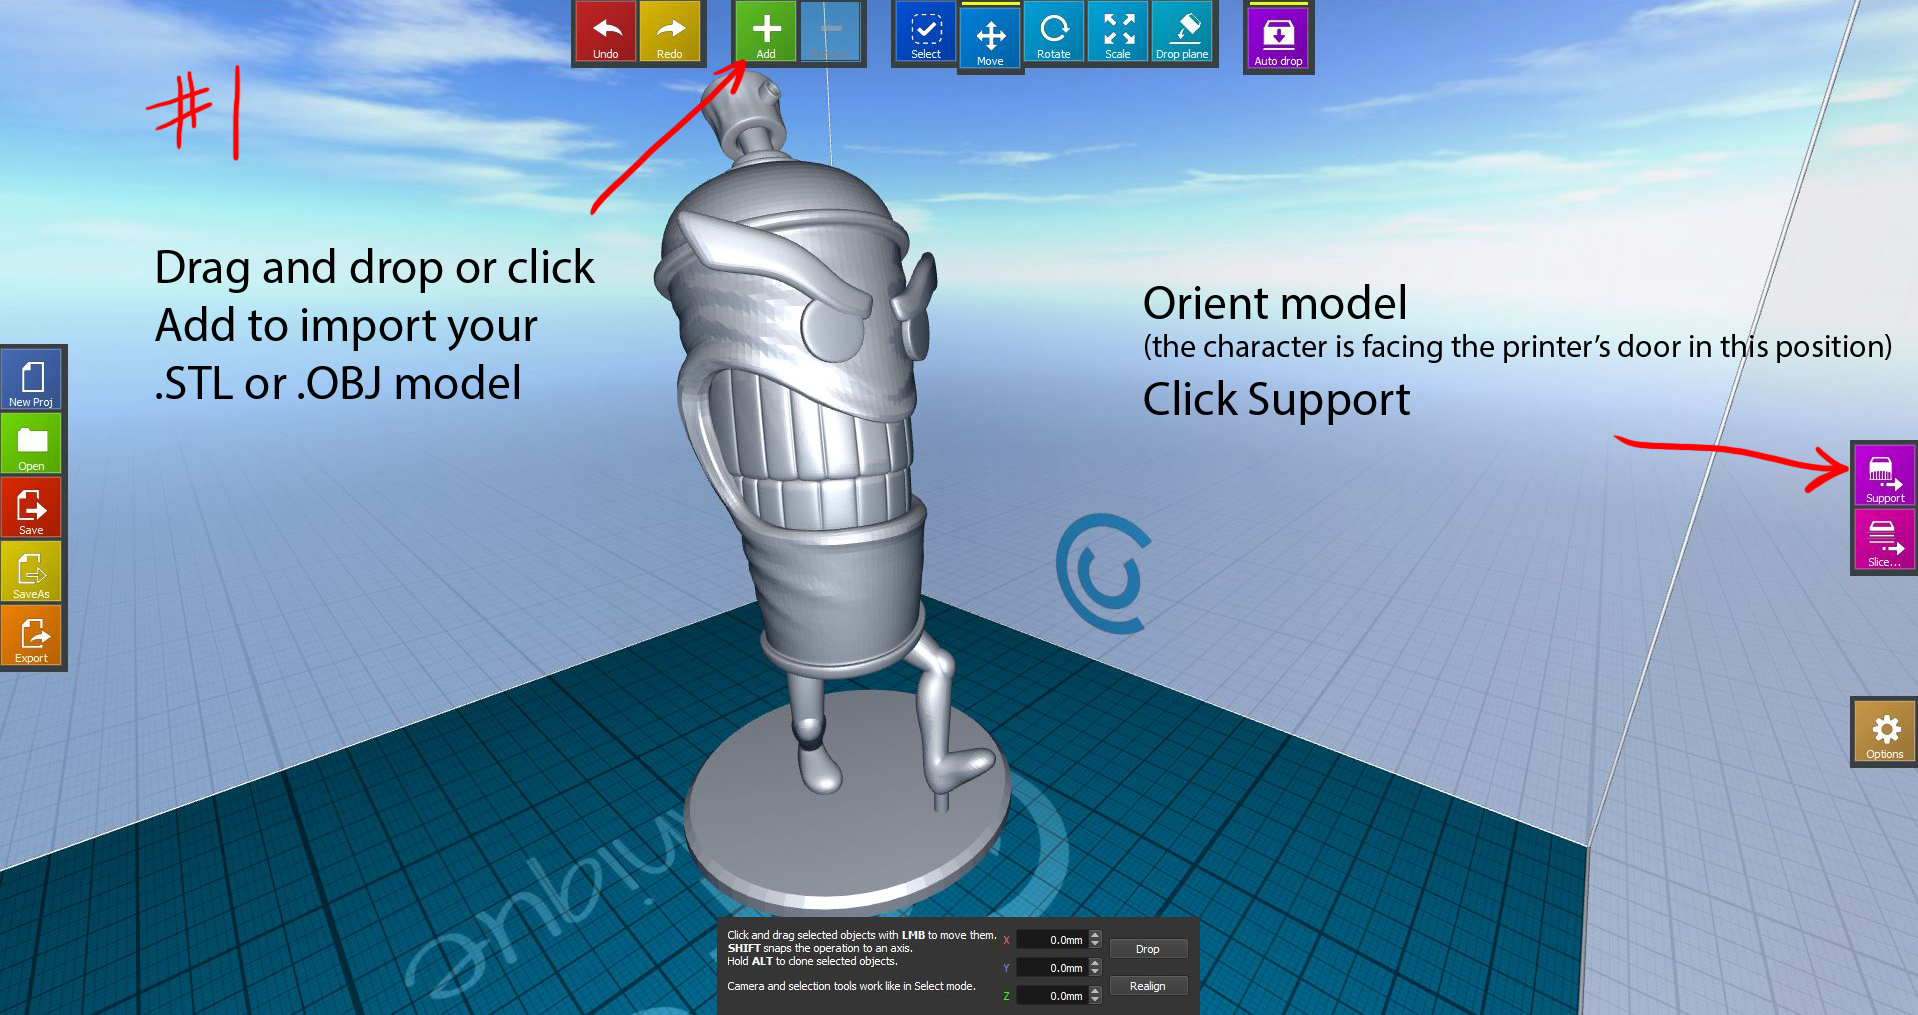
-Images in the post are a little small. Right click and open image in a new tab to view the full image.
Let's jump in!


Travel Speed: I recommend lowering this from the default of 180 mm/s down to 90 mm/s or below, until you know for sure your bed-to-nozzle height is accurate. I had my finger on the power switch just in case the nozzle clipped the bed or got hung up. In the next step, I raise the Z-adjust to help compensate for this. 


Copy and paste this Header/Footer Gcode into Craftware, under the Gcode tab in the Slicing options window on step #8.
Header Gcode:
; filename = composition.3w
; machine = daVinciF10
; material = abs
; extruder = 1
M140 S90 ; Bed (no wait)
M106 S210 ; Start fan
G90 ; set absolute coordinates
G28 ; home all axis
M190 S90 ; Bed (wait)
M104 S210 ; Extruder (no wait)
M109 S210 ; Extruder (wait)
M117 Start
M117 Cleaning
M100 ; Cleaning
M117 Printing
Footer Gcode:
M117 Done
G92 E0 ; reset extrusion distance
G1 E-3 F600 ; Retract
M104 S0 ; turn off extruder
M140 S0 ; turn off Bed
G90 ; Absolute
G28 X-33 Y-12 ; home x & y
G1 Z100 ; Lower bed
M117 Down Bed
M100 ; Cleaning
M117 Cleaning
G28 X-33 Y-12 ; home x & y
M84 ; Disable motors
M117 Remove Print
Once initiating the print, the DaVinci will go through its normal warm up procedure; raise the bed, wipe the nozzle, move down the Y-axis towards the front door, then, it will return to the drip box, where it may sit for a minute or two before traversing back onto the bed to begin printing.
The finished print, supports removed and vapor smoothed: 
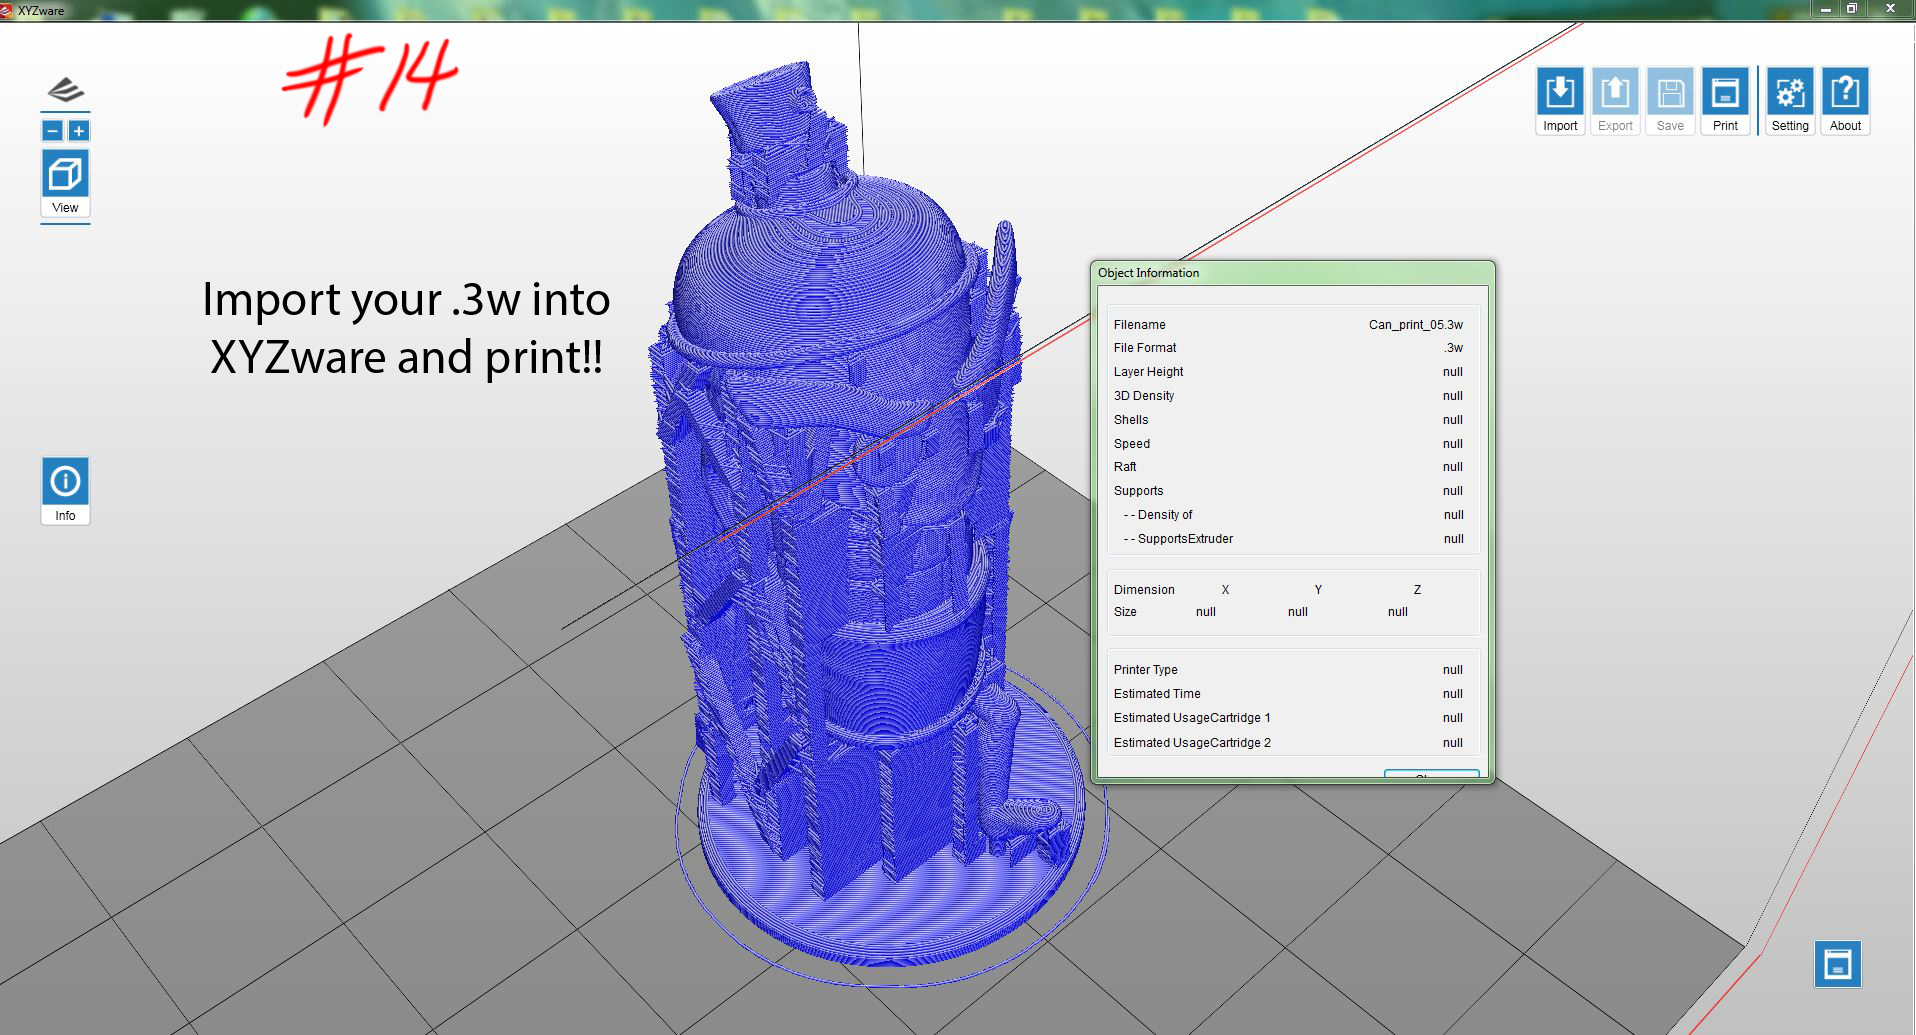
Thanks and happy printing!
