1

Topic: How to level dual extruder?

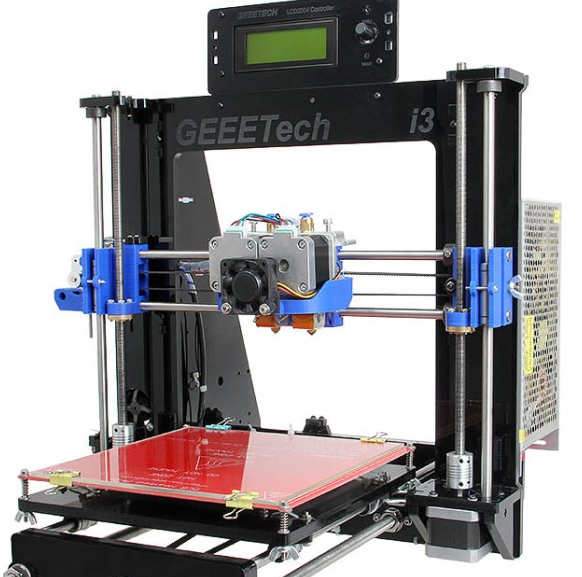
I bought a dual extruder from Geeetech, now I am confused by a question. Because the 2 nozzles are not at the same level, the printed item looks not so good.
As you can see in the picture, the peirimenter is printed by extruder 1, infill is printed by extruder 2. Because the distance between the nozzles and hot bed are different, the perimeter was printed not perfect.
http://soliforum.com/i/?Gterrna.png
Do you have any idea or tool to have them at the same level?? I will be grateful if you share your ideas. Thank you.
http://soliforum.com/i/?xoBmaGw.png

2 (edited by IronMan 2015-05-29 12:56:28)

Re: How to level dual extruder?

More pics of back, top and side might help...

Also, those two nuts on the bottom may have something to do with it.

How is this mounted to your printer?  If the base sits flat on your printer carriage, then perhaps a cheating method would be to put a shim under one of the mounting flanges.  This assumes that they are off by only a very small amount.

SD2 - Stock - Enclosure - Heated Bed - Glass Plate - Auto Fire Extinguisher
Ord Bot Hadron - RAMPS 1.4 - Bulldog XL - E3D v6 - 10" x 10" PCB Heated Build w/SSR - Glass Plate
Thanks for All of Your Help!

3

Re: How to level dual extruder?

I'd be willing to bet the 2 ARE supposed to be at the exact same height.  You might contact the vendor /maker for verification.

S2 , E3d hotend,glass bed, stock otherwise,vista

4

Re: How to level dual extruder?

From the one pic, my guess is that the nuts on the threaded portion are there for locking in place. If you back off that nut, you may be able to thread the nozzle in/out as necessary.

It's just a theory, though.

SD3 w/ RUMBA (8825s), merlin hot end (in pieces). Ender3 w/ silent board for PLA printing. Ender5 w/ silent board, e3d v6, new z lead screw, and glass bed. DiY Kossel w/ smoothieboard (in pieces). Vellman Vertex (in pieces)
Shapeoko2 router in process of being converted to laser engraver (in pieces)
Multicam 5000 series CNC Router w/ 11HP spindle, 5x10' table, and auto tool changer (in pieces)

5

Re: How to level dual extruder?

IronMan wrote:

More pics of back, top and side might help...

Also, those two nuts on the bottom may have something to do with it.

How is this mounted to your printer?  If the base sits flat on your printer carriage, then perhaps a cheating method would be to put a shim under one of the mounting flanges.  This assumes that they are off by only a very small amount.

http://soliforum.com/i/?sSKi6Za.png
This is what the printer looks like after mounting the extruders.
The altitude differrence is recommended under 0.02 mm, that 's hard to tell with only eyes.

6

Re: How to level dual extruder?

TheBaron wrote:

From the one pic, my guess is that the nuts on the threaded portion are there for locking in place. If you back off that nut, you may be able to thread the nozzle in/out as necessary.

It's just a theory, though.

It's really a theory, because it's really hard to tell the height difference with only eyes.

7

Re: How to level dual extruder?

@wenganxiang,

Just a suggestion…after seeing the machine, this is what I would do:

With a dual Z screw setup, you want to be sure your X gantry is parallel to the moving base from side-to-side.

-    Remove the heated build platform to expose only your moving base.
-    Get a spacer block (can be anything of a stable length, say 50mm long)
-    Position the X gantry above the Base about the same distance as the spacer block.
-    Using the spacer block adjust one or the other Z lead screws, rotating by hand with motors disabled until the X axis rods are level to the moving base from side-to-side on the spacer block.
-    Now re-install the heated bed and glass and adjust the leveling screws so the bed is around 1mm lower than it was originally.
-    Home the Z axis.
-    Now, using the bed leveling screws, bring the glass bed up to the nozzles.  Using a piece of paper(about 0.1mm thick) under both nozzles, slowly adjust the bed until the lowest nozzle (you will feel which one by the resistance on the paper) is touching the paper.
-    Disable your motors again, and moving the carriage side to side, level the bed to that nozzle so the resistance on the paper is the same; then front-to-back by moving the bed.

Now you have your lowest nozzle parallel to the bed, you should be able to adjust the other nozzle down to the same level with the paper resistance method using the adjusting nut as suggested by TheBaron above.

SD2 - Stock - Enclosure - Heated Bed - Glass Plate - Auto Fire Extinguisher
Ord Bot Hadron - RAMPS 1.4 - Bulldog XL - E3D v6 - 10" x 10" PCB Heated Build w/SSR - Glass Plate
Thanks for All of Your Help!

8

Re: How to level dual extruder?

IronMan wrote:

@wenganxiang,

Just a suggestion…after seeing the machine, this is what I would do:

With a dual Z screw setup, you want to be sure your X gantry is parallel to the moving base from side-to-side.

-    Remove the heated build platform to expose only your moving base.
-    Get a spacer block (can be anything of a stable length, say 50mm long)
-    Position the X gantry above the Base about the same distance as the spacer block.
-    Using the spacer block adjust one or the other Z lead screws, rotating by hand with motors disabled until the X axis rods are level to the moving base from side-to-side on the spacer block.
-    Now re-install the heated bed and glass and adjust the leveling screws so the bed is around 1mm lower than it was originally.
-    Home the Z axis.
-    Now, using the bed leveling screws, bring the glass bed up to the nozzles.  Using a piece of paper(about 0.1mm thick) under both nozzles, slowly adjust the bed until the lowest nozzle (you will feel which one by the resistance on the paper) is touching the paper.
-    Disable your motors again, and moving the carriage side to side, level the bed to that nozzle so the resistance on the paper is the same; then front-to-back by moving the bed.

Now you have your lowest nozzle parallel to the bed, you should be able to adjust the other nozzle down to the same level with the paper resistance method using the adjusting nut as suggested by TheBaron above.

Thank you IronMan, your method is so detailed! I will try it later. And thank you TheBaron.

9

Re: How to level dual extruder?

Let us know how it goes!

SD3 w/ RUMBA (8825s), merlin hot end (in pieces). Ender3 w/ silent board for PLA printing. Ender5 w/ silent board, e3d v6, new z lead screw, and glass bed. DiY Kossel w/ smoothieboard (in pieces). Vellman Vertex (in pieces)
Shapeoko2 router in process of being converted to laser engraver (in pieces)
Multicam 5000 series CNC Router w/ 11HP spindle, 5x10' table, and auto tool changer (in pieces)

10 (edited by wenganxiang 2015-06-04 03:09:59)

Re: How to level dual extruder?

I tried to use vernier calipers to calibrate thier height difference today, and it works! It performs better than before.
http://soliforum.com/i/?Wf8QJze.png

11

Re: How to level dual extruder?

That is a great looking print!  Nice job!

SD2 - Stock - Enclosure - Heated Bed - Glass Plate - Auto Fire Extinguisher
Ord Bot Hadron - RAMPS 1.4 - Bulldog XL - E3D v6 - 10" x 10" PCB Heated Build w/SSR - Glass Plate
Thanks for All of Your Help!

12

Re: How to level dual extruder?

I have a Replicator 2X and both extruders have to be the same height or one of them will knock the print over.

using the lowest extruder level the bed using a piece of post a note.
then lower the other extruder until  the post a note feels the same under both nozzles.

I do the leveling with the bed up to temperature .
after I think I have it t I do a dual test print.
sometimes it takes me 3 to 4 times before I have it rite .

Ultimaker S3.

13

Re: How to level dual extruder?

I'm glad we were able to help. The prints look a lot better.

SD3 w/ RUMBA (8825s), merlin hot end (in pieces). Ender3 w/ silent board for PLA printing. Ender5 w/ silent board, e3d v6, new z lead screw, and glass bed. DiY Kossel w/ smoothieboard (in pieces). Vellman Vertex (in pieces)
Shapeoko2 router in process of being converted to laser engraver (in pieces)
Multicam 5000 series CNC Router w/ 11HP spindle, 5x10' table, and auto tool changer (in pieces)

14

Re: How to level dual extruder?

dubbsd wrote:

I have a Replicator 2X and both extruders have to be the same height or one of them will knock the print over.

using the lowest extruder level the bed using a piece of post a note.
then lower the other extruder until  the post a note feels the same under both nozzles.

I do the leveling with the bed up to temperature .
after I think I have it t I do a dual test print.
sometimes it takes me 3 to 4 times before I have it rite .

What if the bed is not level itself?

15

Re: How to level dual extruder?

wenganxiang wrote:
dubbsd wrote:

I have a Replicator 2X and both extruders have to be the same height or one of them will knock the print over.

using the lowest extruder level the bed using a piece of post a note.
then lower the other extruder until  the post a note feels the same under both nozzles.

I do the leveling with the bed up to temperature .
after I think I have it t I do a dual test print.
sometimes it takes me 3 to 4 times before I have it rite .

What if the bed is not level itself?


You mean warped or just higher on one side than the other?  If it id warped it would need to be replaced. If just unlevel then you would adjust and level it to one extruder and then go back and level the second extruder to the bed. This is where a set of feeler gauges would come in handy.

Printing since 2009 and still love it!
Anycubic 4MAX best $225 ever invested.
Voxelabs Proxima SLA. 6 inch 2k Mono LCD.
Anycubic Predator, massive Delta machine. 450 x 370 print envelope.

16

Re: How to level dual extruder?

carl_m1968 wrote:
wenganxiang wrote:
dubbsd wrote:

I have a Replicator 2X and both extruders have to be the same height or one of them will knock the print over.

using the lowest extruder level the bed using a piece of post a note.
then lower the other extruder until  the post a note feels the same under both nozzles.

I do the leveling with the bed up to temperature .
after I think I have it t I do a dual test print.
sometimes it takes me 3 to 4 times before I have it rite .

What if the bed is not level itself?


You mean warped or just higher on one side than the other?  If it id warped it would need to be replaced. If just unlevel then you would adjust and level it to one extruder and then go back and level the second extruder to the bed. This is where a set of feeler gauges would come in handy.

So what's the precision of feeler gauge? Can it reach 0.01mm?

17

Re: How to level dual extruder?

wenganxiang wrote:
carl_m1968 wrote:
wenganxiang wrote:

What if the bed is not level itself?


You mean warped or just higher on one side than the other?  If it id warped it would need to be replaced. If just unlevel then you would adjust and level it to one extruder and then go back and level the second extruder to the bed. This is where a set of feeler gauges would come in handy.

So what's the precision of feeler gauge? Can it reach 0.01mm?


Feeler gauges are made sort of like a pocket knife with maybe 50+ blades. These blades are of various thickness. The thickest being .88mm (.035) to the thinnest being .0015mm.

So yes it can go that small. However .10 should be lowest you ever go. Any thing lower can cause glogs.

Printing since 2009 and still love it!
Anycubic 4MAX best $225 ever invested.
Voxelabs Proxima SLA. 6 inch 2k Mono LCD.
Anycubic Predator, massive Delta machine. 450 x 370 print envelope.

18

Re: How to level dual extruder?

Since getting my Geeetech Prusa i3 PRO C dual extruder 3D printer about a month ago no matter how many times I pulled the extruder apart and tried to get both extruder's the same hight, I couldn't.

Not saying I'm not happy with the printer or Geeetech. As both have been great. The printer wasn't too hard to put together and think they have fixed most of the issues they have found to sell a printer that is pretty much build and print. Deliver was amazing with the item taking around 5 days to arrive from China To Melbourne, Australia. Plus the email support for pre sales has been quick and concise. The Wiki and forums has also been a great source of information to complete the addition of the Auto bed levelling, but thats a different topic.
Once built with minimal adjusting I managed to print a small object straight away no problem. So thats a big win in my book.

Now back to my winging.

As the extruder are not the same hight when you go to print an object that was big enough for the second extruder to travel over the printed part from first extruder it would either damage the print or pull the printed part off the bed.

After taking the extruder off and on like 15 times over the month to get it working I had screwed the second extruder up high and used it as a single extruder printer. Till today. I found the energy to give it another go.
After messing around for a few hours, I came to the conclusion that its just a design flaw and the threads where slightly different. So no matter how much i played with it, as is it wouldn't work.
As to get the extruder's even close to level one extruder needed to turn half a turn around and then both the extruder's Y Axis was different.
This wasn't so much of an issue as you can fix that with an offset but you still cant get them to be millimetre (sorry America we have real measurements here) perfect.

With such small differences making an impact i thought there had to be a better way and thought if there could be a way to mod the design. Figured as I cant use the second extruder if i damaged it in the mean time wouldn't be a big deal to wait till a new one arrived.

What I came up with was to drill out the thread (i know but stay with me smile ) in the hole where one of the extruder's screwed in. This way it could slide up and down to get it exactly the same as the other.
I then drilled a hole in the side and threaded it with a M5 Tap set. As I didn't have a Tap and Die set I was lucky to find a 3 piece Tap set with M5,M6 and M8 for around $10 aus. As the my extruder mechanism is Aluminium, which is very soft. I suggest you do much smaller hole then normal then Tap that.
Once this new hole was drilled and had a thread I then put in a M5 Grub Screw.
The reason I went with a M5 was that if I made a mistake or the thread didn't work I could then go up a size in the Taps I bought. Though seeing as though this was my first experience with threading something I did a few tests on a scrap bit of metal first.

You can see the black grub screw in the pictures, I have circled them in red. The location I did the hole for the grub screw I put in green. Sorry for the bad pictures I didn't think about posting my idea till after it was all back together and working.

So the process to get them the same was to set the un-modified extruder to the correct high that would reach the bed before the mounting hardware. Then slide up and down the other extruder till that was correct.
Basically using the same method posted in this video (https://youtu.be/XGpcueIfUn8) but with the modded extruder being able to be adjusted to perfection.
The nut that you normally have to use to set the extruder high, is still needed to be tightened as this holds the 2 parts of the extruder mount together. But the top part is held in my the grub screw, so just need the bottom one.
I also noticed that that when i tightened the nut it would change the high ever so slightly so found the amount it would change by and added this to the hight so when you tightened it, everything was at correct hight.

Please let me know if you needed something explained better if I haven't made sense. Hope this helps your issue like it has mine.

http://soliforum.com/i/?aO9jKRT.jpg
http://soliforum.com/i/?JvYBTUL.jpg
http://soliforum.com/i/?SOLILac.jpg
http://soliforum.com/i/?lqpmPva.jpg
http://soliforum.com/i/?R6RdSGa.jpg

19

Re: How to level dual extruder?

ritzy wrote:

Since getting my Geeetech Prusa i3 PRO C dual extruder 3D printer about a month ago no matter how many times I pulled the extruder apart and tried to get both extruder's the same hight, I couldn't.

Not saying I'm not happy with the printer or Geeetech. As both have been great. The printer wasn't too hard to put together and think they have fixed most of the issues they have found to sell a printer that is pretty much build and print. Deliver was amazing with the item taking around 5 days to arrive from China To Melbourne, Australia. Plus the email support for pre sales has been quick and concise. The Wiki and forums has also been a great source of information to complete the addition of the Auto bed levelling, but thats a different topic.
Once built with minimal adjusting I managed to print a small object straight away no problem. So thats a big win in my book.

Now back to my winging.

As the extruder are not the same hight when you go to print an object that was big enough for the second extruder to travel over the printed part from first extruder it would either damage the print or pull the printed part off the bed.

After taking the extruder off and on like 15 times over the month to get it working I had screwed the second extruder up high and used it as a single extruder printer. Till today. I found the energy to give it another go.
After messing around for a few hours, I came to the conclusion that its just a design flaw and the threads where slightly different. So no matter how much i played with it, as is it wouldn't work.
As to get the extruder's even close to level one extruder needed to turn half a turn around and then both the extruder's Y Axis was different.
This wasn't so much of an issue as you can fix that with an offset but you still cant get them to be millimetre (sorry America we have real measurements here) perfect.

With such small differences making an impact i thought there had to be a better way and thought if there could be a way to mod the design. Figured as I cant use the second extruder if i damaged it in the mean time wouldn't be a big deal to wait till a new one arrived.

What I came up with was to drill out the thread (i know but stay with me smile ) in the hole where one of the extruder's screwed in. This way it could slide up and down to get it exactly the same as the other.
I then drilled a hole in the side and threaded it with a M5 Tap set. As I didn't have a Tap and Die set I was lucky to find a 3 piece Tap set with M5,M6 and M8 for around $10 aus. As the my extruder mechanism is Aluminium, which is very soft. I suggest you do much smaller hole then normal then Tap that.
Once this new hole was drilled and had a thread I then put in a M5 Grub Screw.
The reason I went with a M5 was that if I made a mistake or the thread didn't work I could then go up a size in the Taps I bought. Though seeing as though this was my first experience with threading something I did a few tests on a scrap bit of metal first.

You can see the black grub screw in the pictures, I have circled them in red. The location I did the hole for the grub screw I put in green. Sorry for the bad pictures I didn't think about posting my idea till after it was all back together and working.

So the process to get them the same was to set the un-modified extruder to the correct high that would reach the bed before the mounting hardware. Then slide up and down the other extruder till that was correct.
Basically using the same method posted in this video (https://youtu.be/XGpcueIfUn8) but with the modded extruder being able to be adjusted to perfection.
The nut that you normally have to use to set the extruder high, is still needed to be tightened as this holds the 2 parts of the extruder mount together. But the top part is held in my the grub screw, so just need the bottom one.
I also noticed that that when i tightened the nut it would change the high ever so slightly so found the amount it would change by and added this to the hight so when you tightened it, everything was at correct hight.

Please let me know if you needed something explained better if I haven't made sense. Hope this helps your issue like it has mine.

http://soliforum.com/i/?aO9jKRT.jpg
http://soliforum.com/i/?JvYBTUL.jpg
http://soliforum.com/i/?SOLILac.jpg
http://soliforum.com/i/?lqpmPva.jpg
http://soliforum.com/i/?R6RdSGa.jpg


What you suggest is what the CT'c dual has.. It has a heat break that both hot ends share on the carriage. each hot end can slide up and down as they are not threaded. They are held in place by a grub screw that goes though the heat break and snugs against the pipe of each hot end.. All you have to do is make sure the bed is level and then drop each nozzle to the bed then tighten the grub screw.. All though I have found that I set them so the primary is at .15 above the bed and the secondary is .2 above the bed. I have found that if I get them both at the same height and the secondary is cold it sometime would drag on a high spot in the print and mess it up. so giving that extra .05 makes a difference and has no real impact on a dual print.

Printing since 2009 and still love it!
Anycubic 4MAX best $225 ever invested.
Voxelabs Proxima SLA. 6 inch 2k Mono LCD.
Anycubic Predator, massive Delta machine. 450 x 370 print envelope.

20 (edited by dubbsd 2016-01-25 00:12:29)

Re: How to level dual extruder?

you may be able to come up with something similar
to this. I took this design and machined one from aluminum that one uprite  hinges to get it on the heater block that both nozzles go through.

http://www.thingiverse.com/thing:127297

http://soliforum.com/i/?PdS5L4x.jpg

Ultimaker S3.