1

Topic: Protecting your bed BEFORE it cracks, and alternatives to glue stick

I have several different posts around in different places that address a few peoples questions, so I thought I would just make a new thread here about what I have learned so far, and my ongoing experiments with this printer.  I have separated each section in case you are looking for specific information, but still suggest you read it all.

How this all started.
Well, as some of you know, I cracked my bed:
http://i1182.photobucket.com/albums/x459/ShadowWizard1/crack2_zpsfbac4055.jpg
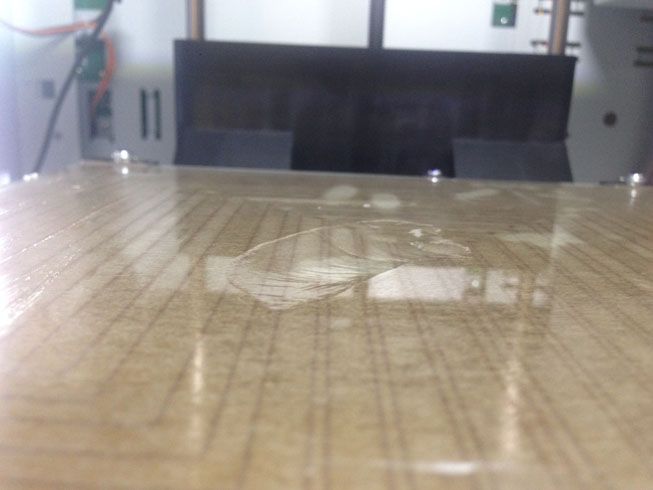
It happened while printing this thing: http://www.thingiverse.com/thing:289497
I placed glue on the bed like normal and went home (My printer is at my store) when i got in, I logged in remotely and sent that to my printer.  Next day when i got to the store the print was not attached to the bed in the slightest; except chip of glass that was no longer part of the rest of the bed.  Yes, that is just a giant chip of glass out of the center of the bed.  I think what was causing it, was the glue was causing it to stick to the bed really well, and the ABS was cooling faster then the glass, causing the ABS to shrink faster then the glass; and because they are stuck together so well.. CRACK!

How I fixed my cracked bed.
So, I contacted XYZ printing.  They want me to send them the old bed, and they will send me a new one when one is available.  Ahh.. no.  I am not waiting forever.  So I decided to try something out.  I had a local glass company cut me a 210mm by 210 mm (Yes, it has to be 210, not 200) square piece of 3 MM glass.  I took off the two strips of metal on either side of the print bed, and laid the glass over top before replacing the two strips of metal.  The screws are long enough they fit just fine.  Then using the thumb screws I lowered the bed down quite a bit then calibrated the bed by eye.

How I calibrated my bed without using the auto useless calibration tool.
To calibrate by eye I basically started a print, and as soon as it actually started extruding turned the printer off.  I then manually positioned the extruder over the glass in each corner and raised the bed.  Because its hard to see exactly where the extruder is, I used the fact the bed has some play in the Z position even when its fixed, and lifted it to see how much space was between the extruder and glass.  Repeated for the other 3 corners, adjusting as needed until I was happy.

Now I am getting error 0010's
I then went back to printing.  I was VERY impressed with the quality of the prints I was receiving from the manual "by eye" calibration I did.  So then i decided to print that same thing AGAIN, but start printing as son as I put the glue down, in case the fact the glue was dry is what caused the bed to crack. (remember, I glued the bed, and went home.)  After a 4:45 print, it took another chunk out of my glass.  The "glass above the glass"  I was very upset, but decided not to dwell on it right then, and started printing other small things.  Error 0010 started popping up often; usually as the bed was raising and heating.  I turn the printer off, and on again, sent the print again, and no problem.  After looking up with 0010 means, it apparently means "Something is wrong with heating someplace." and someone online said it is the error you get when the machine doesn't think the bed is heating up fast enough.  But then I thought "There is an extra piece of glass it needs to heat.. Maybe that's what is causing it.  That would also explain why an off and on would solve the problem without fail, and the error would not come up during prints.  The bed was already partially warm when I did the on and off to clear 0010.  That would explain a lot.  Take longer to heat because of the extra glass, and no errors the second time cause it was already partially heated."

Trying to find an alternative to glue.
So, the next day I decided I was going to switch to using slic3r and the hacked XYZware.  Upped the bed temperature, and the extruder temperature; I decided I was going to play round to find the best heat setting so that I could print stuff, and not have it crack the glass.  I had heard that a higher bed temperature would cause the ABS to adhere to the glass better, so forwent the glue and printed.  I think layer one was set to 115, and each additional was set to 110.  I couldn't get the item off the glass!  I got an exacto knife and tried to pry, and broke the blade.  I got another blade, and started to "saw" it off, to no avail.  At this point I have ANOTHER piece of glass that's useless because it has part of a print attached to it, and the only thing I haven't tried to get it off is fire. (Thank goodness I have many glass bed covers.)  So today I was talking to a friend about the issues I was having.  Turns out he has a friend that does prototypes.  And he recently toured there lab.  They have one of those big monstrous umpteen thousand dollar printers, and a makerbot.  He noticed that on the makerbot bed, they had some kind of felt down or something.  After saying please a few times he emailed his friend.  They use "Build plate tape" http://store.makerbot.com/parts-accesso … tor-2.html  but said it is basically painters tape.

Me experiences with the painters tape solutions (so far)
So of course I ran (Well, drove my motorcycle) as fast as I could to the closest hardware store and got the thickest roll of painters tape they had.  Put some tape down, and started a print.  As soon as the print started it "pulled" at some of the tape.  I then realized, this tape is probably a MM thick, I need to lower the bed a tiny bit more.  So I lowered, re-calibrated, and printed again.  I tried to pull it up with the tape (The print I mean) and the tape just ripped.  Bummer.  So I ripped up all the tape and got my exacto knife and got ready to try and pry this thing off.  I have never had anything come up that easy off that bed.  I was impressed, and quite excited.

Conclusion and summary of suggestions.
So, the moral so far.  As soon as you read this, get a piece of glass (or two) that are 210mm by 210mm cut by your local glass shop, and place that OVER the bed that's already there  That will protect the bed from cracking.  Better to break a $7-$8 piece of glass, then a print bed that will cost you $50+shipping to replace.  I however don't think you will need 3 MM glass, especially if you follow my next recommendation.
Second, and this is still in the testing stage, go and buy a roll of the widest green painters tape you can get.  I spent the money on good tape, and for the $6 for the roll I spent on it, I don't think I will even bother trying cheap "dollar store" tape.  This $6 roll will cover my bed 100X I am sure.  Faster clean up then glue (Any sticky residue I just grab with the tape I already pulled up.) will (hopefully) stop the glass from cracking.  If I am correct about the bed and ABS cooling at different rates, the ABS will simply pull on the tape, that although is stuck to the glass, not stuck so hard it won't just pull off.
Finally, especially when using another piece of glass, error 0010's are (I think) normal.  Just turn off, back on, and resend print.  I have not tried custom firmware yet, but think that will likely solve the problem.
So, I hope this helps some of you out.

2

Re: Protecting your bed BEFORE it cracks, and alternatives to glue stick

I just looked at that crack.  Is it just me, or does it look like an eagle?  Or some kinda bird anyway.

3

Re: Protecting your bed BEFORE it cracks, and alternatives to glue stick

ShadowWizard,

That was a very thorough description of the grief you have encountered with your DaVinci. I think I am going to try the Kapton tape route. I thought I had some at work, but no dice. There are places where you can get a single 12x12" sheet with adhesive for a alright price. I might try that out and see what happens.

Regards,
Joe

4

Re: Protecting your bed BEFORE it cracks, and alternatives to glue stick

I have heard of the Kapton tape, however on my brief research online, and most importantly what I have been told indirectly by someone who owns a company that makes prototypes, the print bed tape is far, far superior.  However I would still like to hear your story about it.  From what I have heard its not quite as good, and far more expensive.

5 (edited by drewsfjord 2014-10-25 06:20:03)

Re: Protecting your bed BEFORE it cracks, and alternatives to glue stick

Hi everyone, I recently picked up a da vinci 1.0 second hand with 9 hours on it. Been non stop printing and learning and about to plunge into the modded hacked world ....

I second Kapton tape and recommend it highly. Mine came with it from a guy who also owns a replicator and i have had no issues using it. So far have logged about 48 hours and use standard glue stick which sticks, and after researching you don't need any glue with kapton tape and abs, not sure about play (can someone chime in?)

I use kapton tape for polishing jewelry and masking etc. it has so far worked great esp when prints were stuck to the printbed.

I recommend wording captain from banggood as its super cheap (pick us warehouse).
50mmx100mm and choose US warehouse for fast shipping. 9.99 vs 29.99

I tape it on slightly overlapping each other ...

on a sidenote,
Anyone recommend buying the hack kit world class tech?

6

Re: Protecting your bed BEFORE it cracks, and alternatives to glue stick

Anyone recommend buying the hack kit world class tech?

What hack kit are you talking about?

7

Re: Protecting your bed BEFORE it cracks, and alternatives to glue stick

I find the best solution is ABS juice, 20cm of filament dissolved into 10ml of acetone seems to be a good mix, just smooth it out over the area to be printed.

Once the print is completed just let it cool down fully and it just pops off by itself...

8

Re: Protecting your bed BEFORE it cracks, and alternatives to glue stick

We've all heard the phrase "ignorance is bliss" - and depending on how you look at it, I'm still hovering on the "ignorant side" as I've not had my printer that long, but what I have found some "bliss" with is the multiple paragraphs on the forum about getting your parts to stick - to something!  I cleaned the glass and started using the wide "painters tape" purchased from Amazon that is 9" wide from the start and believe that I'll "stick with it" as I've had very little issue with its use and with the ability of the tape to keep it's grip on the part.  Before that roll was delivered, I used a 2" wide version as well from the local hardware store (yes, displayed in the painting/masking type section and that worked just as good.

I look at the tape as the sacrificial item and don't get too disturbed if I have to re-apply it often or not - it's super easy to put down (when the glass is cold or at least not up to final temp.  The tape stretches a bit when it warms and you will probably need to "squeegee" it a little bit just to keep the air bumps out but for the price of either one of these rolls, I'm surely not experiencing the frequency of problems that I've read about others having.  What I believe does prevent it from working as well is pretty simple - it's the oils from your hands - everyone has a bit of different chemistry and we all exude something different and when we take our hand and rub over the taped surface, we're most likely working against our best efforts to have something of a neutral surface that the heated resin will stick to.  You can certainly experiment with this theory but I'm a believer in not touching the tape - just use a plastic squeegee and on some occasions have also wiped across the tape with the glue stick but ever so lightly - this isn't a concept where maybe "1 ounce is good so 3 pounds must be great!"  It's also pretty easy to "see the flatness of the bed when you look (or better yet measure as some have suggested) the tracer strip just off position from the main object.  If that prints cleanly, so will the item you're interested in.

If there's a better option I may just not know about it because of the minimal issues I've had with the tape method - and considering everything else that we tend to be "having fun with" - it's pretty darned cheap as well so don't get wrapped up squeezing the smile off of Lincoln's face just to imagine that your end product will show the difference.  I've taken an extreme amount of care sometimes and other times have just stretched out two or three pcs of the 2 inch tape - either works just as well as long as you don't have much of the air bubbles trapped underneath.  Besides that, you'll end up keeping the glass clean, flat and easier to deal with in those calibrating efforts.  Give it a 30 day trial and see what you think.

Thanks.

9

Re: Protecting your bed BEFORE it cracks, and alternatives to glue stick

Does the tape leave residue that is hard to get off of the glass when you are removing it?  Is it easier to remove (the used tape) hot or cold?

Can you post the link for what you are using from Amazon?

10

Re: Protecting your bed BEFORE it cracks, and alternatives to glue stick

Blue painters tape, grabs ABS or PLA
comes off with nothing left behind.

There is alcohol or acetone to clean glass?

There is also Kapton tape
may have to spray it with a bit of hair spray.

Get a bunch of glass plates
Remove print on plate let it cool
put in another plate for next print.

Measure temperature loss by top plate
adjust temp set.

????

11

Re: Protecting your bed BEFORE it cracks, and alternatives to glue stick

I have been using only Kapton with nothing added. No glue, no slurry, no hair spray. I have had no issues. The trick is to manually adjust the bed to about .15 to .2mm using a feeler gauge. It will stick every time unless you have dust or skin oil on it. Clean it if you think you may have touched it.

Printing since 2009 and still love it!
Anycubic 4MAX best $225 ever invested.
Voxelabs Proxima SLA. 6 inch 2k Mono LCD.
Anycubic Predator, massive Delta machine. 450 x 370 print envelope.

12 (edited by ShadowWizard 2014-11-04 02:43:25)

Re: Protecting your bed BEFORE it cracks, and alternatives to glue stick

Well, I thought I would continue my story.  I do say, this printer is a curse and a blessing.  A curse because the piece of crap keeps breaking, and a blessing because this means I am leaning how to fix it.
Lets start with what I am running as of right now (Or where this story begins anyway)

My setup at the start of this story:
After some research, I decided to downgrade the firmware from G to E (I think, must be)  I did this because if the gcode says that it will use 0 meters of filament, it will subtract 0 meters of filament from the cartridge chip.  It worked.
I have bought about 24 lbs of filament from http://www.seacans.com and use it for most of my printing.  I am very pleases with the results.  I still have some filament left from the cartridges I got with the printer, but just white and purple.  I ordered more colors from this place.
I have modified a version of http://www.thingiverse.com/thing:433194 because the single was not long enough, and the dual was too long for the spools I was using.  I will upload the file here when I can.  For some reason I can't seem to access my work computer.
I am still using a piece of glass OVER the broken/chipped glass.  I am very pleased with how its working, and don't get many 0010 errors.
I am using the hacked version of XYZware from http://voltivo.com/forum/davinci-softwa … repository in order to allow me to load gcode files directly to the printer.  Pretty sure its 1.1.29.4 I am using, but will be upgrading in hopes the new version will support larger gcode files.  I slice the filers with Slic3r, using these settings http://www.scribd.com/doc/224483423/Usi … aVinci-1-0


And the story continues:
So, I started some tall prints one day and went home, namely http://www.thingiverse.com/thing:201097  (I am putting all my friends Christmas gifts in one of these this year.  I am wondering how many of them will throw it at me?)  I have a webcam set up so I can watch the inside of my printer from home.  The first 1/2 of the print went fine, but then one part of the print became separated from the painters tape, and then the painters tape became separated from the bed!  I was heating the bed to 115 for first layer and 110 for the second.  I don't know if that in itself was the issue, or the way I laid the tape down or what.  I have since reduced the temperature to 95/90.  The extruder is set to 220 for all layers. 

So, how to solve the shifting prints:
I also decided to use the glue stick on the painters tape.  After doing this, and wrapping the tape around the edge of the bed a bit on larger prints, nothing has come loose.  The parts however come off the bed with painters tape stuck to them quite badly.  See below for that solution.

How I know exactly where to put the painters tape:
I am cheap.  Like, mega cheap.  I am surprised I am not using a lighter to melt all the pieces of filament I have cut off the spools to gets the kinks out in order to reuse them.  But anyway, in my cheapness I have more then once not put enough tape on the bed, where the print has extended a bit to far forward or backwards.  The simple solution would be to use more tape, but that would not be cheap.  Instead I had an idea.  I am using glass on top of the glass that's already there.  What if I made a grid, and placed that between the two pieces of glass?  Then I could tell from either slic3r or XYZware where the print was going to be, so I could conserve expensive painters tape (lol).

The tale of the defective connector:
So, I finished a big print, and then decided I wanted to change filaments, but noticed the nozzle wasn't heating, or at least wasn't registering as heating.  So I pulled the head towards me to see if I could tell if the nozzle was hot (it wasn't this time, but take a word of advice, don't test a nozzles heat with your finger) and it started heating.  If it was the thermal resister it would have just jumped from 21 to whatever it was at (WAY to high cause it has been a very long time since I told it to unload.)  So I pushed it back.  It stopped heating.  Sigh.  This meant a loose wire.  So I started poking and prodding at wires until I had it working.  I should have been more diligent because I started a print and went home.  A couple of hours later I look in on it.  It had printed about 1/4 of the print, the bed was in the position as though it has printed about 3/4 of it, and still moving, and nothing was coming out of the nozzle.  Back to the store I go (sigh) and play a bit.  Finally I give up for the day.  A friend called and needed some help.  The next day I went in, and disconnected things, and started testing wires.  It seemed as though the problem was either the connector on the extruder end, or the wire about 1-2 CM below it.  After about 2 hours of thought and research (this is apparently a common problem), I realized XYZ's solution if I contacted them would be to send the head or wiring back to them, and wait for them to send me a replacement.  Not an option.  So I haven't even contacted them about it.  I decided I would dive in, and cut and repair those wires myself.  So I did.  Cut the connector off, cut the other end off on the extruder side making sure to cut where I think it may be broken inside.  A few wire twists and some tape, voila!

Now, this painters tape on the bottom of all my prints:
I honestly don't know how I thought of it.  Perhaps because it was a simple idea.  I just soak the bottom of the prints in water for a bit.  It takes quite a bit of time, 30-60 min, and then most of the tape comes off.  Another 5 min soak, wipe the bottom with a paper towel, and the glue comes off.

Conclusion:
First off, if you are not technically minded, do NOT, under ANY circumstances buy this printer.
If you do not want to spend time repairing your 2 week old machine, that should work fine, do NOT under any circumstances buy this printer.
If you NEED your printer to work, and it would be very bad if it suddenly broke, do NOT under any circumstances buy this printer.
If you are technically minded, don't mind a bit of repair work, and are not printing critical things, and want to save a bit of cash, this is possibly a good printer to buy.
If I knew I would have all these issues with the printer, would I have still bought it?  Yes, likely I would have.  I am technically minded, and although it pisses me off to no end that I need to do these repairs, the fact I saved the money on the printer, and that it has been a great learning experience is worth it for me.  If i had not found a printer for this low a cost, I would likely not own one now.  I was not prepared to pay $1500+ for a 3d printer, but $500 was something I was willing to spend.

Final notes:
I will add the stl file for the filament holder I made at a later date to this thread.  Its nothing special, I just duplicated it, cut the backside off the copy, and joined the holderthingee (that's a very technical term, hope I didn't loose anyone) back with a slight extension.

13

Re: Protecting your bed BEFORE it cracks, and alternatives to glue stick

I bought mine a month ago on Ebay. A guy buys them from XYZ I assume as returns and sells them with the stated issue. This one was stated as having a clogged head. No such issue, the original buyer just did not know how to or could not read ho to unload it. I unloaded the small piece then put a new cartridge in it and it loaded and printed each of the demo files with surprising results. I was pleased with the quality of the files with very little tweaking. I have been printing on it for about a month now. No Issues with bed or glass. I do use dry Kapton and I set the bed manually to .15mm at all three points. I don't use auto cal except to store an initial pass value. Then I do my own cal.

However now that I am doing my own files I will be flashing the unit and running Repetier on it. I think there where some lemons out there but if you get lucky and find one, it is a solid unit and works very well for 400 bucks. Some people just seem to have had bad luck with theirs

Printing since 2009 and still love it!
Anycubic 4MAX best $225 ever invested.
Voxelabs Proxima SLA. 6 inch 2k Mono LCD.
Anycubic Predator, massive Delta machine. 450 x 370 print envelope.

14

Re: Protecting your bed BEFORE it cracks, and alternatives to glue stick

I;ve noticed due to chillier weather, Kapton and elmo glue or uhh is recommended.

While waiting on a bigger roll of kapton tape, I use Elmo Gluestick,
(PYP,PVA is the stuff Pla and Abs likes) either purple or washable.

Just one good layer while cool, The prints bitterly pop off when cool ... the bed is cleaned with a damp papertowl and scraper while it heats up, another layer is applied either cold or heated, below 80cs seems to work best.

15

Re: Protecting your bed BEFORE it cracks, and alternatives to glue stick

LOL, just noticed my glass bed is chipped as well.

Being lazy, I tried to print on it despite it being chipped, and print came out alright.
I guess I will be looking up a local glass shop to get my 3mm glass soon.

Thanks for the post,

Jay

16

Re: Protecting your bed BEFORE it cracks, and alternatives to glue stick

I have cracked two heated beds getting my things off of the bed. I had used the ABS Slurry in both cases. In the first case my slurry was a little too thick and it worked too well; also, I was in a hurry and didn't wait for the bed to cool. The glass separated just like the one in the pic above. The second heat bed broke the same way but with a thinner slurry. The thing was about 10cm across though I let the bed cool down it still cracked.
DaVinci charges $150 for a new bed...screw that.
I found one bed on eBay and got it for about $50.
For my 2nd bed, I got a "parts" printer on eBay for about $130 and used its bed.
I hope I don't break any more. Maybe the 2nd glass will work. Just have to recalibrate, which might be interesting.

17

Re: Protecting your bed BEFORE it cracks, and alternatives to glue stick

They have the bed for $50 on their website, but they are out of stock right now.

http://us.store.xyzprinting.com/us_en/c … spareParts

18

Re: Protecting your bed BEFORE it cracks, and alternatives to glue stick

Does anyone have expierence with using AirWolf's WolfBite with the Davinci heatbed?

It looks pretty good from the video but is kind of expensive, around $20 for 2 ounces. Is it worth it?

19

Re: Protecting your bed BEFORE it cracks, and alternatives to glue stick

keyblade4321 wrote:

Does anyone have expierence with using AirWolf's WolfBite with the Davinci heatbed?

It looks pretty good from the video but is kind of expensive, around $20 for 2 ounces. Is it worth it?


Just use dry Kapton tape and set your nozzle to bed height at about .1mm using a gap gauge and manual adjustment and your prints will stick as long as it is hot. Once cool they will pop right off and sometimes even pop off on their own. You will actually hear when they pop lose. I have used Kapton in my 5 years of printing and in the last three months of this printer and have had no issues.

Printing since 2009 and still love it!
Anycubic 4MAX best $225 ever invested.
Voxelabs Proxima SLA. 6 inch 2k Mono LCD.
Anycubic Predator, massive Delta machine. 450 x 370 print envelope.

20

Re: Protecting your bed BEFORE it cracks, and alternatives to glue stick

carl_m1968 wrote:
keyblade4321 wrote:

Does anyone have expierence with using AirWolf's WolfBite with the Davinci heatbed?

It looks pretty good from the video but is kind of expensive, around $20 for 2 ounces. Is it worth it?


Just use dry Kapton tape and set your nozzle to bed height at about .1mm using a gap gauge and manual adjustment and your prints will stick as long as it is hot. Once cool they will pop right off and sometimes even pop off on their own. You will actually hear when they pop lose. I have used Kapton in my 5 years of printing and in the last three months of this printer and have had no issues.

I've just started using kapton tape too and it works exactly as you describe. It's excellent stuff !
No messing about cleaning up glue, just peel off the tape when it needs replacing.
You also get a lovely clean glass-like finish to the bottom of your prints.

Davinci 1.0 with repetier firmware & E3D V6 Lite
Anycubic Photon DLP printer, Einscan-S 3D scanner
Simplify3d, 123D Design, Meshmixer
http://www.thingiverse.com/scobo/designs

21

Re: Protecting your bed BEFORE it cracks, and alternatives to glue stick

I am starting to think that having the bed properly calibrated so that first layer is put down wide and super thin does more to help stick than anything else.  I was having a fit cleaning and reapplying glue constantly and still it was hit or miss if the part was going to stick until I printed your bed levelers, recalibrated (using auto) and then turned each knob a quarter turn to the left.  Now I haven't fooled with the glue (there is still old glue on there) or cleaning and every print since has stuck great and then was loose when the bed was cool.  That was a few days ago and I have finished probably a half dozen prints or more and haven't thought about bed adhesion problems since.

22

Re: Protecting your bed BEFORE it cracks, and alternatives to glue stick

scotthay wrote:

I am starting to think that having the bed properly calibrated so that first layer is put down wide and super thin does more to help stick than anything else.  I was having a fit cleaning and reapplying glue constantly and still it was hit or miss if the part was going to stick until I printed your bed levelers, recalibrated (using auto) and then turned each knob a quarter turn to the left.  Now I haven't fooled with the glue (there is still old glue on there) or cleaning and every print since has stuck great and then was loose when the bed was cool.  That was a few days ago and I have finished probably a half dozen prints or more and haven't thought about bed adhesion problems since.

Yeah you're right, it's really just about getting the 1st layer to stick properly but that's probably the most important layer.
If it doesn't stick, the rest of your print will most likely be a mess.
If you print with slic3r you can set it to print a single layer skirt around the print first which gives you a very good indication of whether your print is likely to stick or not.

Davinci 1.0 with repetier firmware & E3D V6 Lite
Anycubic Photon DLP printer, Einscan-S 3D scanner
Simplify3d, 123D Design, Meshmixer
http://www.thingiverse.com/scobo/designs

23

Re: Protecting your bed BEFORE it cracks, and alternatives to glue stick

carl_m1968 wrote:

Just use dry Kapton tape and set your nozzle to bed height at about .1mm using a gap gauge and manual adjustment and your prints will stick as long as it is hot.

I would think twice about using a metal feeler gauge. The metal gauge can scar your brass nozzle pretty easily. An index card/business card/printer paper works fine.

24 (edited by carl_m1968 2014-11-12 23:48:33)

Re: Protecting your bed BEFORE it cracks, and alternatives to glue stick

The cards are too thick for this printer. If you use cards most of the time you will not get a good stick. Paper is close to to the right height. I use special gauges that have rounded edges so I am not worried about them harming the surface. Even if they did it would not affect the function of it.  As long as the outlet on the nozzle is not deformed or plugged in some way there is no danger. A feeler gauge won't do either due to the way it is inserted. But to each their own. I have printed with brass nozzles for 5 years and have had no issues using metal feeler gauges. I was printing when the Cupcake was THE machine to have.

Printing since 2009 and still love it!
Anycubic 4MAX best $225 ever invested.
Voxelabs Proxima SLA. 6 inch 2k Mono LCD.
Anycubic Predator, massive Delta machine. 450 x 370 print envelope.

Re: Protecting your bed BEFORE it cracks, and alternatives to glue stick

Has anyone tried using the repositionable glue sticks?