1

Topic: updating Lawsy Carriages...

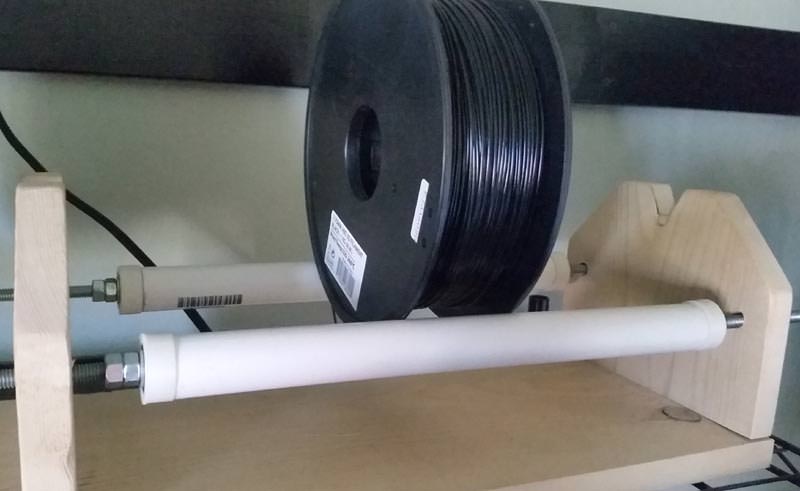
So after doing a regular cleaning and lube of my #1 SD4, was running a couple of prints and noticed that the idler pulley for the X axis was making some squeaking noises... add a couple more drops of oil to it, and it quiets for a few minutes, then starts squeaking again...

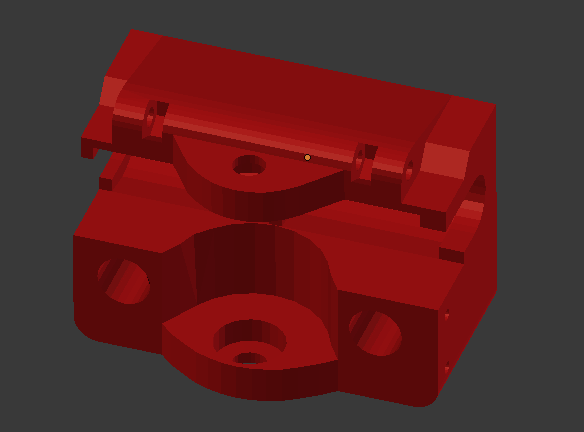
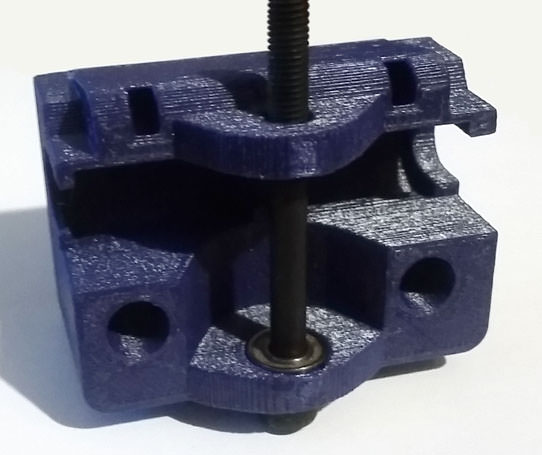
Ok, time to do something more permanent about this.. I had been thinking about this for a while, actually... I want to put bearings in the right carriage for the idler pulley..

poked around in my spare parts bins and came up with some small bearings... 5mm ID x 11mm OD x 4mm thick... common bearing used in RC cars (which we have lots of here)

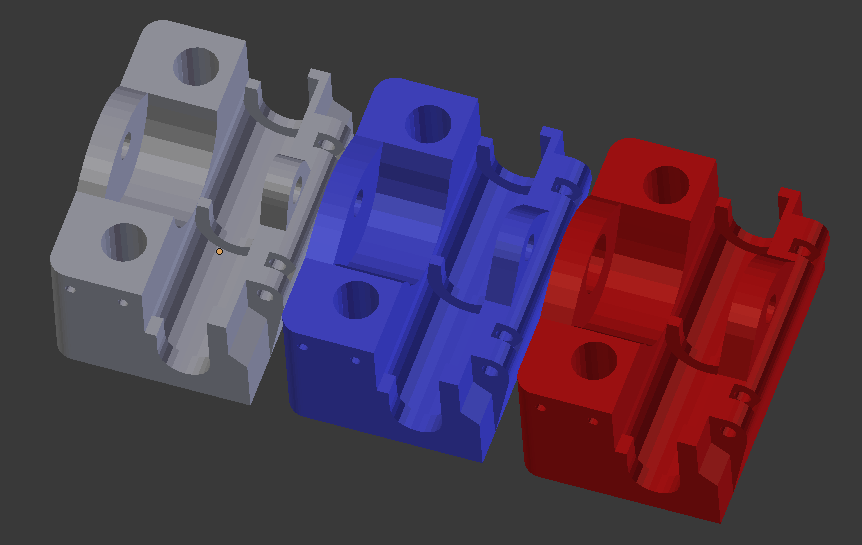
whipped up a quick basic model of it in 123D design, then imported both it and the right carriage into Blender for the actual modifications.
(Blender does not have "real" scaling, so i did this to make sure it was of the correct size)

First order of business was to slightly enlarge the areas the 5mm screw goes through, in order to have enough working room for the bearing to fit. Also had to make them slightly thicker. That part was fairly easy.

Then it was on to actually modeling the pocket for the bearing to fit into...

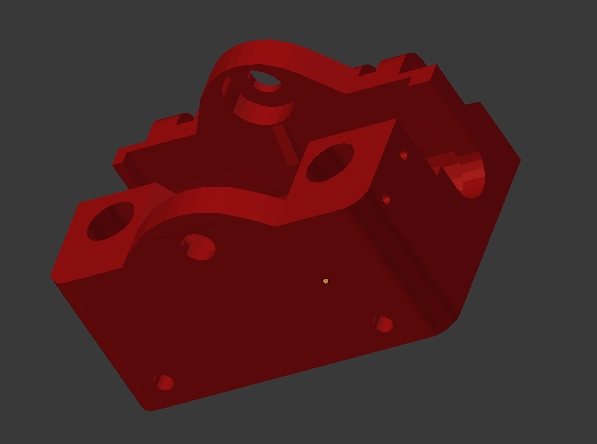
Bottom side went pretty well...

http://soliforum.com/i/?XABHDUr.png

upper side had a small issue, however (looking at it upside down, from the inside)...

http://soliforum.com/i/?malAjgT.png

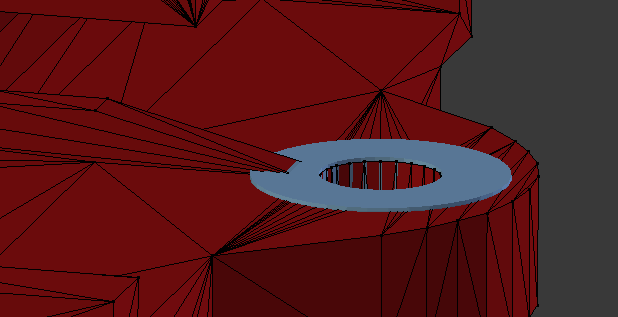
As it turns out that was a pretty easy fix as well. Simply had to move the 2 points of that ridge back a little to clear the bearing pocket.

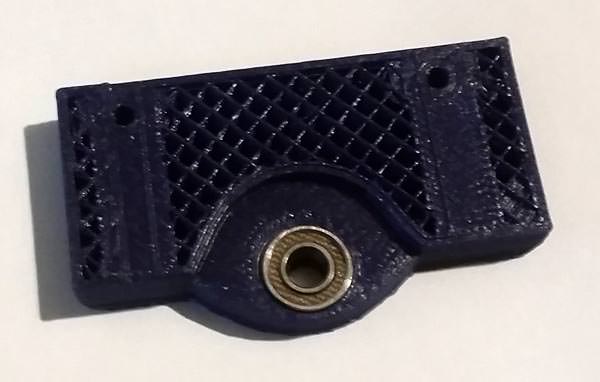
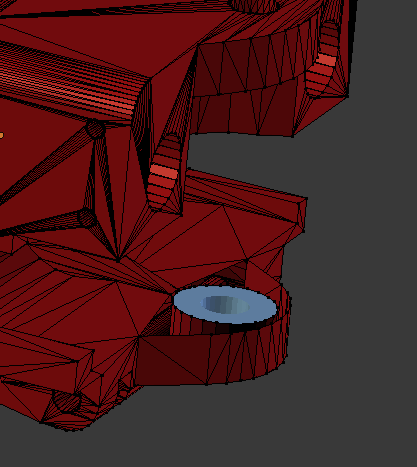
And this is where it currently is... just need to finish rebuilding the faces to fully enclose things again, and it will be ready for a test print...

http://soliforum.com/i/?GZARw1q.png

If this works out well, once it is done, I will be sharing with the SD community. smile

SD4 #1 & #2 - Lawsy carriages, E3D v6, Rumba controller board, mirror bed plate, X motor fan, upgraded PSU & Mica bed heater
SD4 #3 - in the works ~ Folgertech FT-5, rev 1
Printit Industries Beta Tester - Horizon H1

2

Re: updating Lawsy Carriages...

Nice work, I probably could have saved you a bunch of work though wink

Printit Industries Model 8.10 fully enclosed CoreXY, Chamber heat
3-SD3's & a Workbench all fully enclosed, RH-Slic3r Win7pro, E3D V6, Volcano & Cyclops Hot End
SSR/500W AC Heated Glass Bed, Linear bearings on SS rods. Direct Drive Y-axis, BulldogXL
Thanks to all for your contributions

3

Re: updating Lawsy Carriages...

wardjr wrote:

Nice work, I probably could have saved you a bunch of work though wink

Oh sure... NOW you say something... =P

let me guess, this has already been done?

SD4 #1 & #2 - Lawsy carriages, E3D v6, Rumba controller board, mirror bed plate, X motor fan, upgraded PSU & Mica bed heater
SD4 #3 - in the works ~ Folgertech FT-5, rev 1
Printit Industries Beta Tester - Horizon H1

4

Re: updating Lawsy Carriages...

Anyway... finished up the model and did a quick test print for bearing fitment.. fits beautifully!

http://soliforum.com/i/?NiMW96p.png

http://soliforum.com/i/?Y0Gk4E9.png

http://soliforum.com/i/?KLCqoHV.jpg

full print coming tomorrow.

SD4 #1 & #2 - Lawsy carriages, E3D v6, Rumba controller board, mirror bed plate, X motor fan, upgraded PSU & Mica bed heater
SD4 #3 - in the works ~ Folgertech FT-5, rev 1
Printit Industries Beta Tester - Horizon H1

5

Re: updating Lawsy Carriages...

looks good

Sd4 #9080 with a glass bed. E3d chimera duel extruder. Paste extruder , duet wifi.
Lawsy carriages. linear bearings. Y axis direct drive, Kinect scanner
SD4#8188 glass bed, lawsly carriages, E3d v6, octoprint http://www.ustream.tv/channel/hotrod96z28
Filastruder/filawinder, Custom Delta 300mm x 600mm

6

Re: updating Lawsy Carriages...

That does look good, but yeah wink

Printit Industries Model 8.10 fully enclosed CoreXY, Chamber heat
3-SD3's & a Workbench all fully enclosed, RH-Slic3r Win7pro, E3D V6, Volcano & Cyclops Hot End
SSR/500W AC Heated Glass Bed, Linear bearings on SS rods. Direct Drive Y-axis, BulldogXL
Thanks to all for your contributions

7 (edited by heartless 2017-11-02 14:13:00)

Re: updating Lawsy Carriages...

wardjr wrote:

That does look good, but yeah wink

I see how you are.. LOL

Really was not that much work to do this.. maybe 30-45 mins of actual work.

I had made other minor changes previously, like lengthening the belt attachment points to allow more screw length, and widening the back edge of the upper pulley tab...

here is a progression of the original carriage (grey) to the 1st mods I made as noted above (blue), to the current version (red)

http://soliforum.com/i/?wxtrzBe.png

All total, I have maybe 2 hours into the changes I have made... Blender is a bit of a learning process, but works VERY well for modifying existing stl files.

SD4 #1 & #2 - Lawsy carriages, E3D v6, Rumba controller board, mirror bed plate, X motor fan, upgraded PSU & Mica bed heater
SD4 #3 - in the works ~ Folgertech FT-5, rev 1
Printit Industries Beta Tester - Horizon H1

8

Re: updating Lawsy Carriages...

and here it is.. the finished full print.. bearings fit snugly, but did not require a lot of effort to put in. smile
printed in Octave's Galaxy Blue...

http://soliforum.com/i/?XhaBu9k.jpg

Now to reprint the rest of the parts in the same color.. I have some wire loom that should go quite nicely with this.. #1 will be getting a big update soon, lol

SD4 #1 & #2 - Lawsy carriages, E3D v6, Rumba controller board, mirror bed plate, X motor fan, upgraded PSU & Mica bed heater
SD4 #3 - in the works ~ Folgertech FT-5, rev 1
Printit Industries Beta Tester - Horizon H1

9

Re: updating Lawsy Carriages...

Oh yeah.. I did say I would share... so here it is.

Post's attachments

lawsy bearing mod carriage right.stl 100.38 kb, 6 downloads since 2017-11-03 

You don't have the permssions to download the attachments of this post.
SD4 #1 & #2 - Lawsy carriages, E3D v6, Rumba controller board, mirror bed plate, X motor fan, upgraded PSU & Mica bed heater
SD4 #3 - in the works ~ Folgertech FT-5, rev 1
Printit Industries Beta Tester - Horizon H1

10 (edited by blarz 2017-12-02 04:18:43)

Re: updating Lawsy Carriages...

Have you thought about making the top a clamp like the original carriage on the sd4? I recently picked one up on ebay for a deal I couldn't walk away from. I want to replace the gantry system with lawsy's replacement carriage BUT that one requires you to use screws/bolts to fasten the belts, I would like the clamp system that it currently has. I have been looking around everywhere to try and find a set someplace but no one seems to have any recent designs since solidoodle went out of business. Hey btw Heartless, tinkercad allows you to import files to edit, I know tinkercad isn't the greatest but it has helped me create some nice designs..

BTW are you having issues with the head feeding the extruder filament?

SD3/SD4 Mods completed: glass bed, changed zrod to 5mm, slop nut, aluminum arm-originally wood, plexi-glass case, Z Wobble Preventer,  Lawsy Carriages, X\Y motor fans, control board fans, extruder cartridge heater, MK5, Esd Lite
Mods working on:Direct Y Drive
Remember.......All you touch and all you see is all your life will ever be....Pink Floyd...Dark Side of the Moon.

11

Re: updating Lawsy Carriages...

I do not use online/cloud based cad programs - ever. I just don't - for multiple reasons.

Not sure what version of SD you got, but my original carriages had the exact same setup as the Lawsy carriages do for the belts. I still have the old carriages that I can take pictures of for you if you like.

clamping the belts removes the ability to tension them properly - unless you come up with another way to do so. I prefer to be able to tension my belts correctly and at will (they do stretch over time). With the Lawsy carriages it is a simple twist of a 2.5mm allen driver to adjust them

I used to have problems with filament feeding when using the stock spool holder, but I solved that issue by building a better spool mount and putting it above the printer, not behind... also takes up less space on the workbench that way. Spools spin much more freely on this...

http://soliforum.com/i/?EBLX5xi.jpg

made of a couple pieces of PVC pipe, some skateboard bearings and 3d printed bearing mounts, mounted on some cheap threaded rod with nuts to hold things in place. total cost was probably under $10-15 - the wood was scrap left over from another project and the PVC pipe was extra from some plumbing repairs - so I only had to buy the bearings & threaded rod/nuts

SD4 #1 & #2 - Lawsy carriages, E3D v6, Rumba controller board, mirror bed plate, X motor fan, upgraded PSU & Mica bed heater
SD4 #3 - in the works ~ Folgertech FT-5, rev 1
Printit Industries Beta Tester - Horizon H1