Topic: Yodas!!!
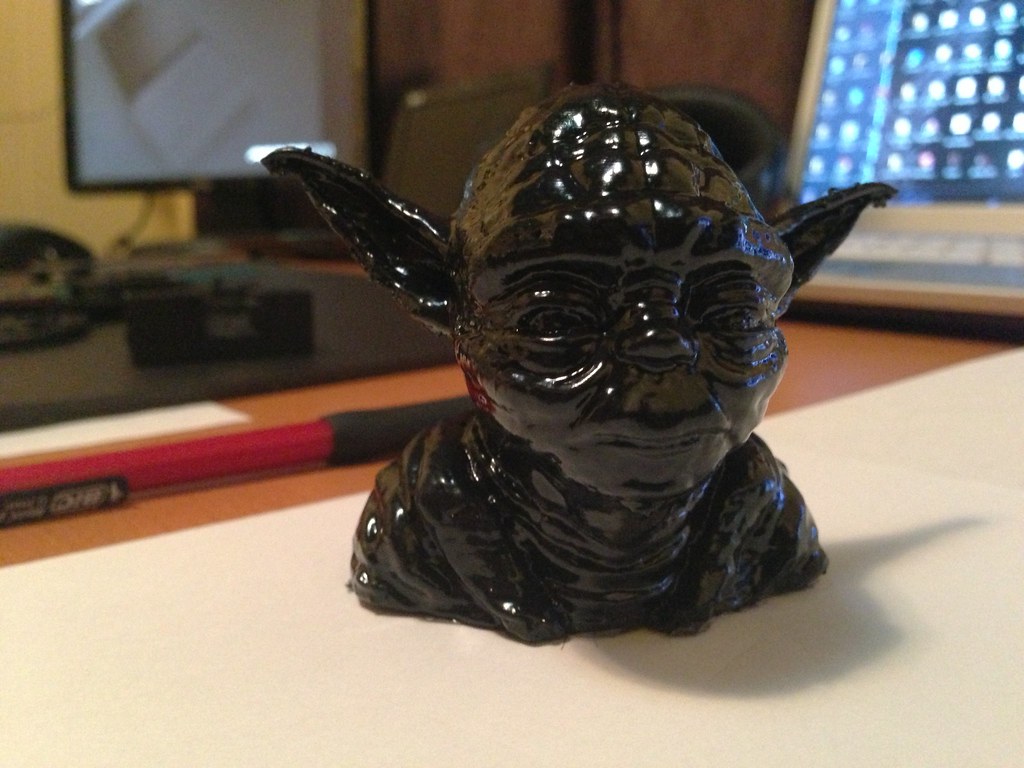
Let's see how everyone's Yodas are coming out... Maybe post your config with it too just to give people jump off points. I also ran this print through my smoothing station. Pretty pleased with the results!
You are not logged in. Please login or register.
Let's see how everyone's Yodas are coming out... Maybe post your config with it too just to give people jump off points. I also ran this print through my smoothing station. Pretty pleased with the results!
Very nice
Head over to makergear.com and check out the yoda printed at 20 microns, impressive.
Josh, you should post about your smoothing station. How long and how many times did you expose the Yoda? And what was its resolution to start?
I will be doing a post tomorrow with pictures for my station when it is light enough out to take them... It started off as a clone of yours and now I just use a multi cooker with a frozen lid. The print was .1 mm layers and it was one quick exposure for about 30 seconds. I literally put the frozen lid on, heat it up on low till I can see acetone condensing on the lid, unplug, wait till acetone quits condensing, and remove the piece. It is 30-60 second process.
I know everyone is terrified of acetone, but I couldn't start a fire outside if I tried. I tried just to see how dangerous it was. I cooked the acetone as hot as I could, poured it on the cord and its connection point, and had a candle going about 10 feet away. No fire, no flash, just evaporated acetone. I used to use this stuff to clean and sterilize labs and never had any problems with it then either. I am still cautious at all times except when trying to prove a point outside and my boy can't see me setting a bad example for him, but willing to use it if it is so quick and effective.
So rather than messing around with a condenser, you just keep the lid of a crockpot in the freezer? The cool thing about the steel stock pot is there seems to be a pattern of condensation followed by instant evaporation on the sides. It shows as a slightly darker shade where the vapor is, and you can practically see it sloshing around the sides of the pot. I can see it drop lower in the pot as it cools, and can tell when it's time to add more hot water to the outer tub to make it deep enough for whatever I'm putting in there.
As for flammanility it might be different for vapor (and maybe not) but the wikipedia entry for acetone notes-
"Acetone has, however very high ignition initiation energy point, so accidental ignition is rare. Even pouring or spraying acetone over red-glowing coal will not ignite it, due to the high concentration of vapour and the cooling effect of evaporation of the liquid.[20] It auto-ignites at 465 °C (869 °F). Autoignition temperature is also dependent upon the exposure time, thus at some tests it is quoted as 525°C. Also, industrial acetone is likely to contain small amount of water which also inhibits ignition."

That looks "simply" awesome. Waiting for your post about this procedures, the results looks awesome.
Is this printet with or without support?
EDIT: Saw the ini-file now ![]() Thanks
Thanks
Josh, you may have already seen this post, but check out a different Yoda, printed and smoothed on the Stratasys machines-
http://blog.erikdebruijn.nl/archives/12 … es....html
A pot of warm acetone may not be safe for an office environment, but you can certainly get the same results in your backyard (or parking lot) for thousands less. All you need is that small sandblaster and cabinet ($150-$200 total) for the complete set. Stratasys has a "burnishing station" which is a sandblaster for creating matte finishes like the sample in the blog post.
First, yes I do just keep a frozen lid in the freezer... In all honestly, I don't think it needs to be frozen. I got impatient to wait for it to freeze so just ran another one without it frozen and got the same exact results... Again, just waiting to see condensing bubbles on lid and unplugged. wait for condensation to stop and remove part. As promised, be sending out a post shortly...
How would you set up a sandblasting station?... I would much prefer the matte finish because I am not a fan of the glossy look for most pieces. I am assuming run it through the acetone bath... let it dry... and then make a cabinet with a spinning pedestal. Make a top that closes and a hole in one side for the nozzle of the sandblaster... Just pull the trigger and let it rotate for a minute or two?
Or as an alternative buy the cabinet and just hold the part while blasting it?

What type of crockpot are you using for this? Hoping to utilize our not often used mini crock pot warmer (read no controls) that came with our full sized one. I pretty much know my wife will object to putting acetone in our main crockpot, though the WAF might be higher against a larger setup such as Ian's.
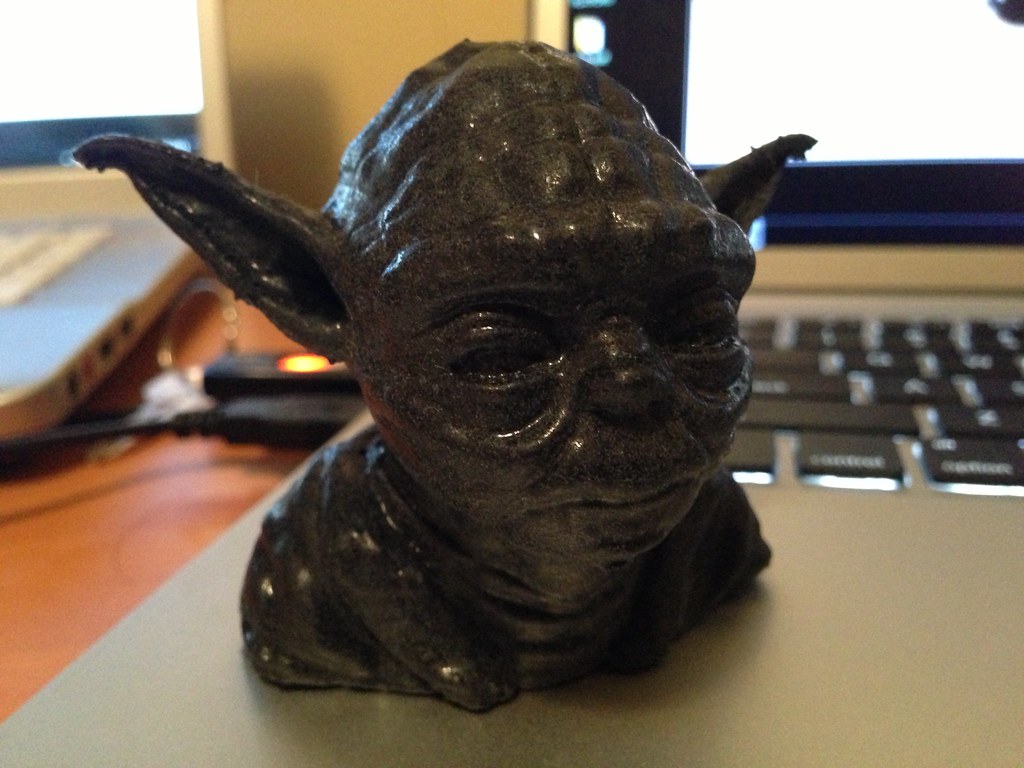
Pronterface/Skeinforge
200C extruder
100C bed
.3mm layer
No raft, no support.
Glow in the dark blue abs
Trimmed some loose threads under ear tips and chin...
I think it would be easier just to buy one of these - http://www.harborfreight.com/abrasive-b … 42202.html than try to build something from scratch.
One of the problems in doing this is how to hold the part. For some things, just setting it on a steamer rack of some kind is good enough. For another I screwed an eyelet into the bottom and dangled it from some wire and hung it up to dry. I was thinking a good solution might be a kind of "bed of nails". Find a base material of something soft, and push some pins up through it. The amount of actual contact with the model would be very small and the vapor would get at all sides equally. I wonder if something like a pad of silicone would be non-reactive to acetone.
Let's see how everyone's Yodas are coming out... Maybe post your config with it too just to give people jump off points. I also ran this print through my smoothing station. Pretty pleased with the results!
May we use these pictures on our website?
jooshs wrote:Let's see how everyone's Yodas are coming out... Maybe post your config with it too just to give people jump off points. I also ran this print through my smoothing station. Pretty pleased with the results!
May we use these pictures on our website?
Yes
I should print, smooth, and tumble one for comparison. The ceramic media is pretty big, I'm not sure it will get into the creases, or if the dust that accumulates contributes some abrasion on its own. Tumbling is more automatic than blasting, but the parts need to be robust enough to survive it.
I had done the tumbling to try and knock out layer lines. If the goal is only to create a matte finish, then a smaller tub with something like walnut shells might be gentle enough.
With the blasting, you could experiment with masking some areas to create a pattern between matte and gloss.
That's a great idea... I will try that on the one I am working on now for the entire process... I should mention I am actually using crushed walnut shells for the blasting... There was no dry sand in town... ![]()
I should print, smooth, and tumble one for comparison. The ceramic media is pretty big, I'm not sure it will get into the creases, or if the dust that accumulates contributes some abrasion on its own. Tumbling is more automatic than blasting, but the parts need to be robust enough to survive it.
I had done the tumbling to try and knock out layer lines. If the goal is only to create a matte finish, then a smaller tub with something like walnut shells might be gentle enough.
With the blasting, you could experiment with masking some areas to create a pattern between matte and gloss.
I am curious to see the difference in finish and time. I haven't printed any parts I can try that are solid, but it seems like if you have enough perimeters you might be able to go straight to matte by blasting. Tough to tell if it will preserve the details though. Another project for another day
Powered by PunBB, supported by Informer Technologies, Inc.