Gentlemen.
I have scoured the interwebs, dealing with my own problem, and this forum has been such a help to me, at least to get me started.
Background info:
Product: Da Vinci 1.0A (newer rev. mainboard, w/ a microSD, etc.).
Running Repetier firmware and printing PETG like a boss for over a year.
Long story short, I became an unaware victim of the whole "dont use a wire brush to clean the hot end while powered on". Strange, must have been from upgrading to a much bigger/fatter wire brush. I was simply prepping for "the next print" and suddently started getting extruder temperature-related errors, being reported via Simplify3D.
Thus, the poking began, and a vital mistake was made. Out of desperation, I started using tweezers to gently push each wire into the harness (adderall has its quirks.. I forgot to turn the power off beforehand..)
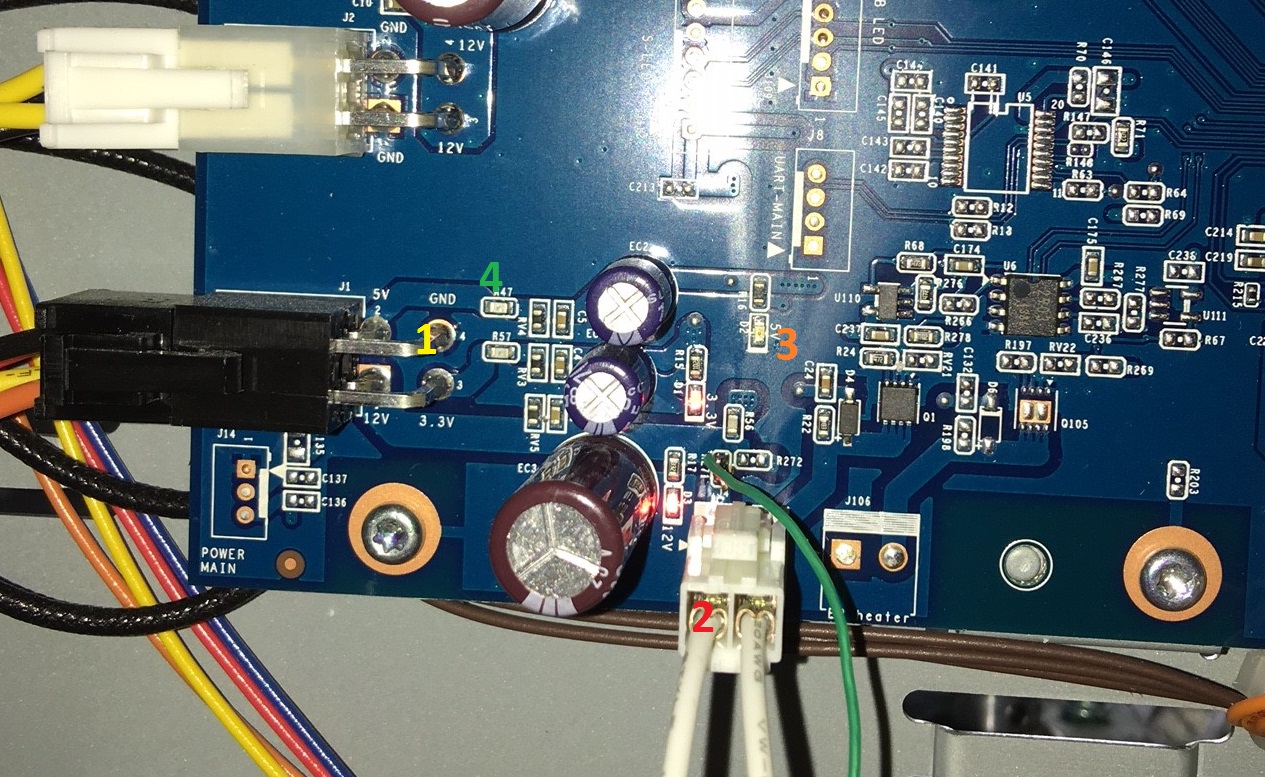
Thus it took quite a bit of research to even determine my own state of affairs (2 damaged components.)
----
Let's talk facts, because I have some interesting information to contribute:
The symptoms:
Grabbed an AstroAI DT132A Multimeter, and started probing..
I discovered 2 damaged components:
There's some chatter, between @dtgamer99 an @carl_m1968, regarding using zero-ohm resistors, or 250mA SMD components, for replacing R47.
The component I ended up ordering for R47:
Mfr. #: 0467.250NR - Surface Mount Fuses .25 AMP 32V VERY FAST ACTING
The component I ended up ordering for RV5:
Mfr. #: 043801.5WR - Surface Mount Fuses Surface Mount Fuses 32V FA 0603 1.5A
For visitors/readers, please don't go rush to buy those just yet.
Let's just say I am lucky I had to repair RV5 as well.
Upon installing both components (hot air reflow station / soldering iron, solder paste, etc.), the printer seemed delighted to be alive. The 5V debug LED on the mainboard resumed functioning, as well as the display. However, I was skeptical due to the 1.5A part, used to replace the damaged RV5, looked identical to the nearby R57, and I was left considering how the original component, labeled R47 seemed identical to this neighboring R57 component.
Needless to say, within maybe 10 mins of starting a print, the printer stopped printing, stopped moving the extruder, lowered the bed by ~1 inch, and the display reverted to no display. Additionally, the 5V debug LED stopped illuminating.
Now, I had gotten to the point where I cud really give a fuq about this already-broken 4-year old printer. Thus, in the name of science, I replaced the R47 component with the same 1.5A component, used to repair RV5.
In closing, I recommend going for something with higher amperage than 250mA, as it clearly wasn't enough for my tense and purposes.
PS: My printer is running as smooth as silk now and just finished a 4h print.
Post's attachments1.jpg
1.jpg 877.38 kb, file has never been downloaded.
2.jpeg 423.98 kb, 4 downloads since 2020-05-02
3.jpeg 317.72 kb, 3 downloads since 2020-05-02
4.jpg 537.85 kb, file has never been downloaded.
You don't have the permssions to download the attachments of this post.