Topic: Slicing a 3D Image File For Photos.
If I wanted to take a .stl file and cut it into slices front to back and take photos of each slice from a fixed camera position and white background how could that be done?
You are not logged in. Please login or register.
SoliForum - 3D Printing Community → 3D Modelling/Scanning/Design → Slicing a 3D Image File For Photos.
If I wanted to take a .stl file and cut it into slices front to back and take photos of each slice from a fixed camera position and white background how could that be done?
slice it. use the g-code viewer and set the layer range where you want it 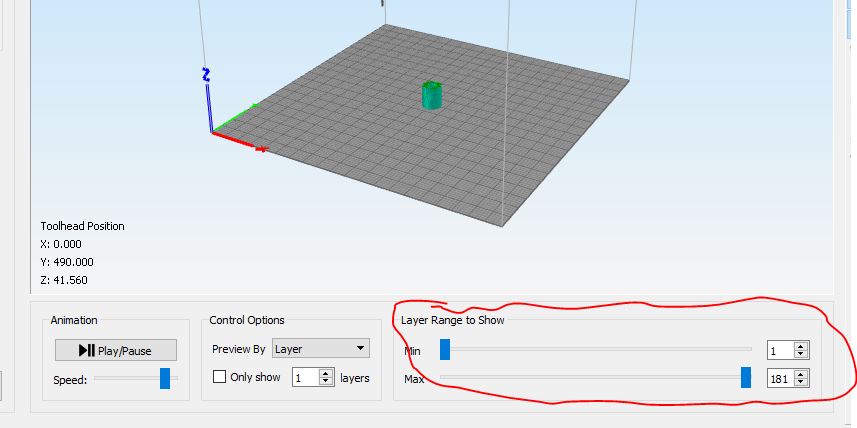
How exactly? I have SD2. This is Repetier Slic3r?
that looks more like S3D, but something similar is available in Repetier Host - but it will not be on a white background.
However.. either will give you top to bottom slices, not front to back - you can re-orient the piece to get front to back, but that would be the only way i know in a slicing program.
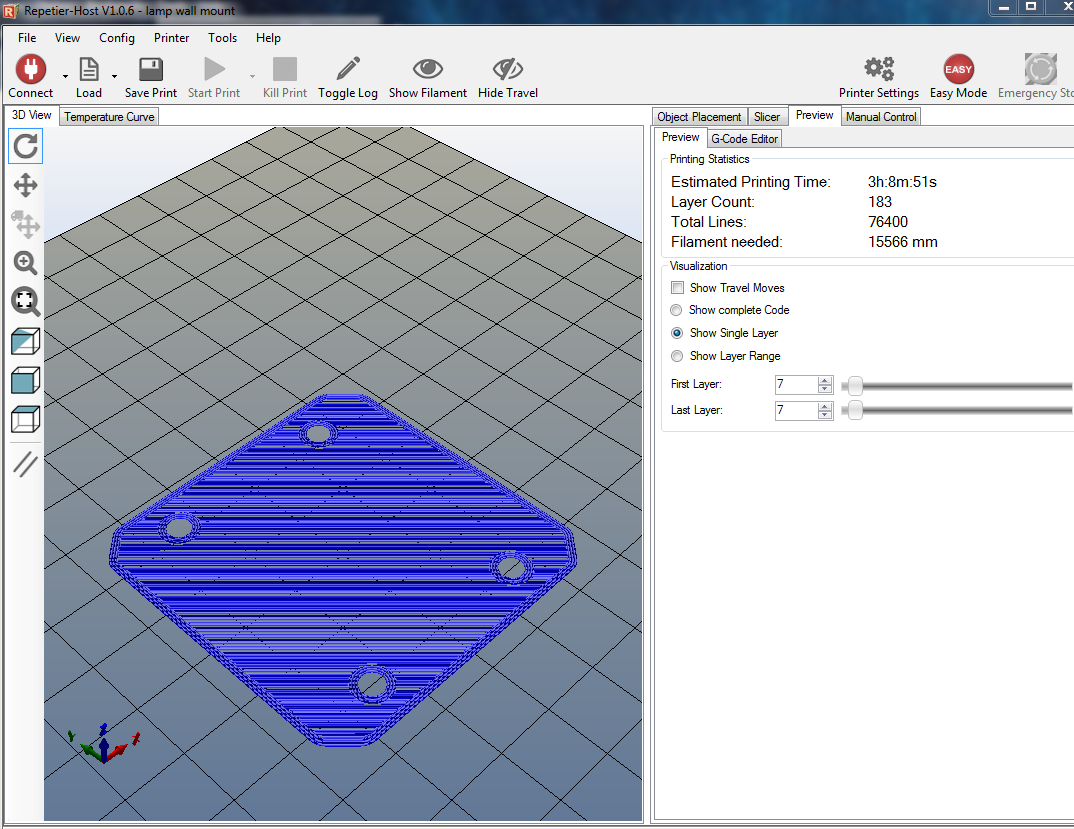
after slicing in RH, in the Preview tab, select "Show Single Layer" then step the slider as needed to view the layer you want - then it is just a simple screen capture for the "picture"
Alternatively, you can select "Show Layer Range" and view specific layers in a given range using the sliders to set the range
Lets say the object is 3 inches from front to back and I want 10 equal slices of it. Is there an easy way to do that? There is a printing on transparent sheets technique MIT came up with to create a 3D effect in 2D space.
not terribly difficult, really..
Slice it.
divide the number of layers by how many slices you want - say 350 / 10 = 35
set the preview to individual layers and then set the slider to layer 1 to start with.. then add 35 to that, so layer 36 would be next, then add 35 again to get the next slice at 71, and so on
if you want to use the layer range thing.. you would set one slider to 1, 2nd slider to 35 - that will show all layers between 1 & 35.
for the next "image" set the 1st slider to 36, and 2nd to 70, and it will show all layers between 36 & 70, and so on
(i may have that backwards... 1st slider may be the upper limit, 2nd the lower - would have to test)
but again, this will not be front to back, unless you orient the piece that way. and it will not be on a white background.
another option would be to open the file in Meshmixer and slice it up there, but not sure how you would get X number of equal slices - have not tried it.
ok, so pic tutorial in RH
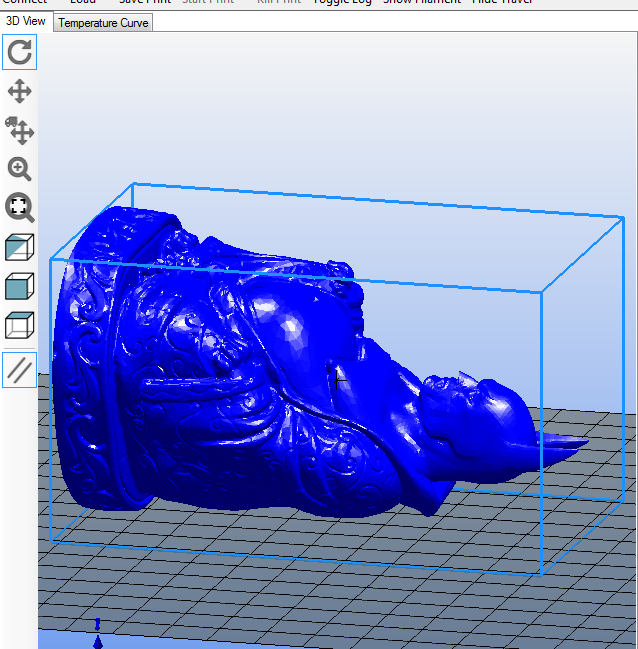
stl oriented to get front to back slices...
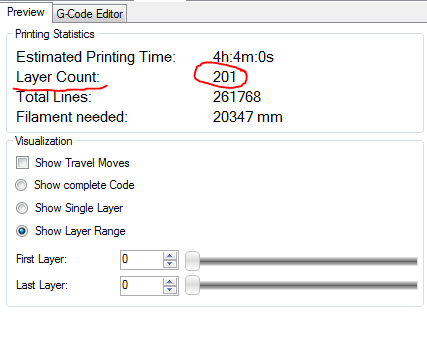
after slicing, find the number of layers and divide by how many slices you want..
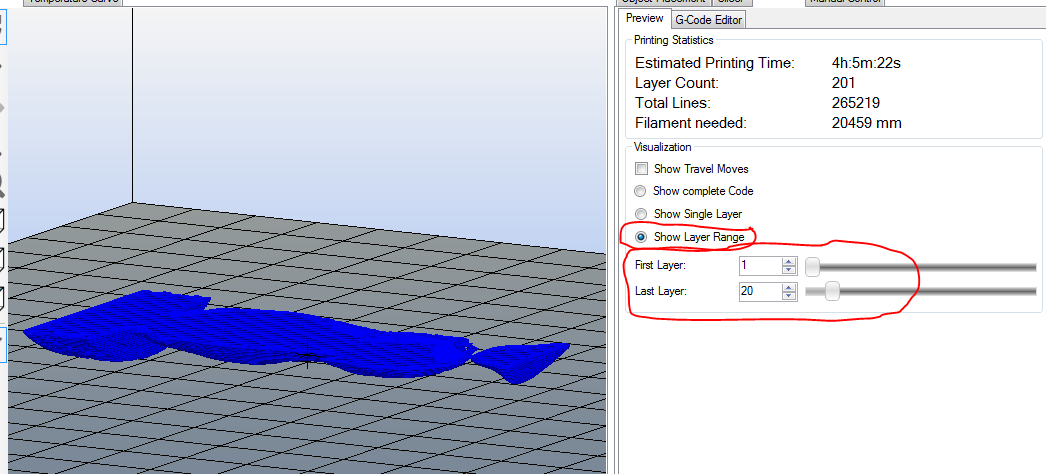
201 / 10 = 20 (rounded off)
first image slices would be from 1 to 20 like this..
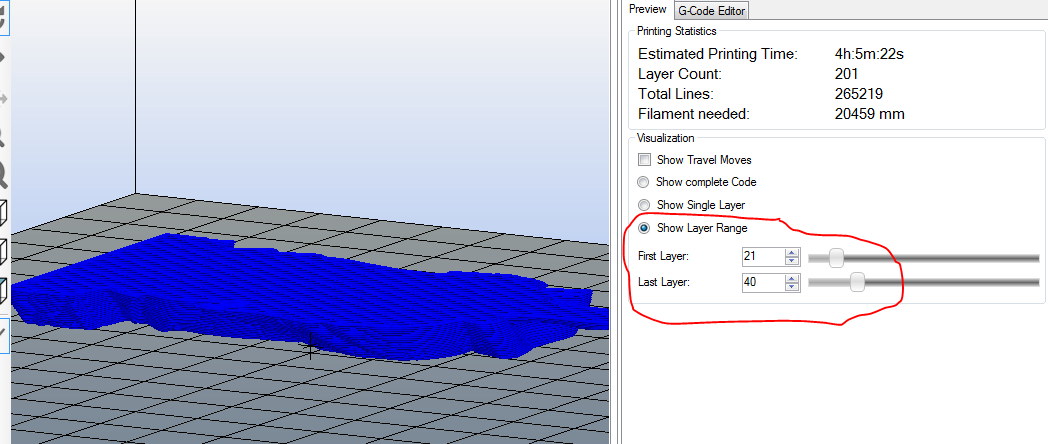
then 21 to 40...
then 41 to 60...
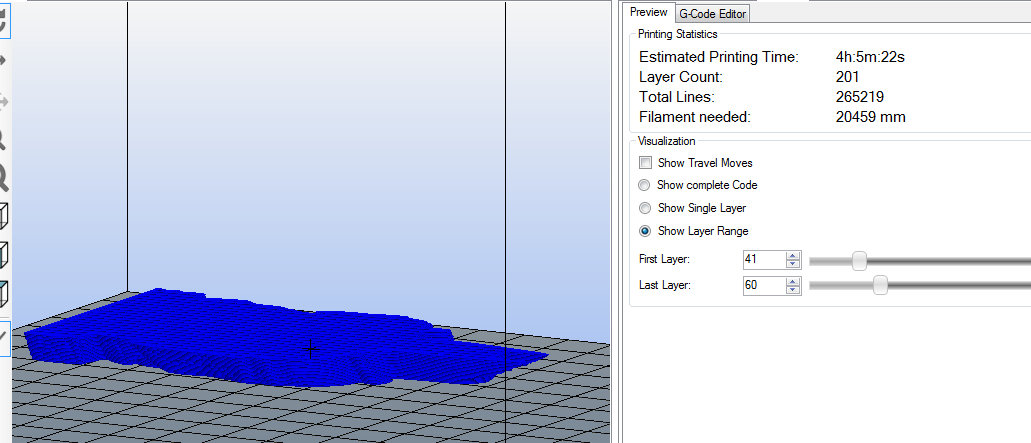
and so on until you get all layers
SoliForum - 3D Printing Community → 3D Modelling/Scanning/Design → Slicing a 3D Image File For Photos.
Powered by PunBB, supported by Informer Technologies, Inc.