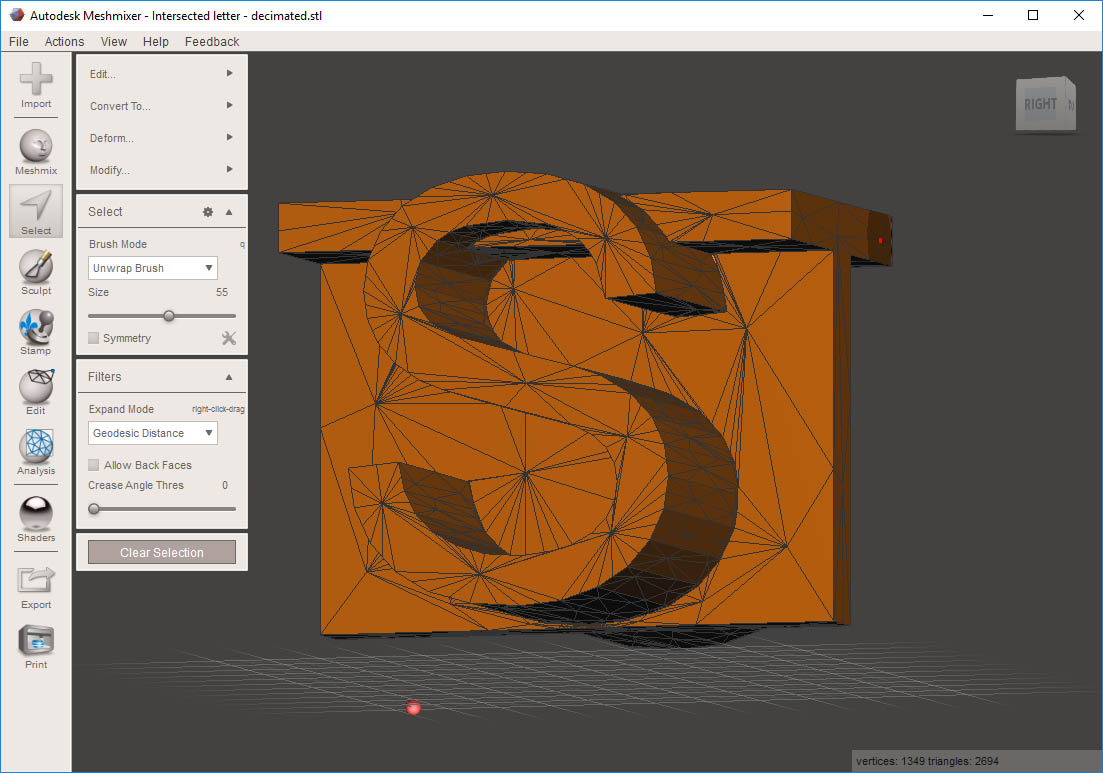
Here is a rather lengthy tutorial on how to Boolean merge 2 objects.
In the case of your model, the 2 letters are actually intersecting, but they are not merged as one single object. To do this we'll use Meshmixer. To better see what we're doing also press the "W" key to turn on the wireframe.
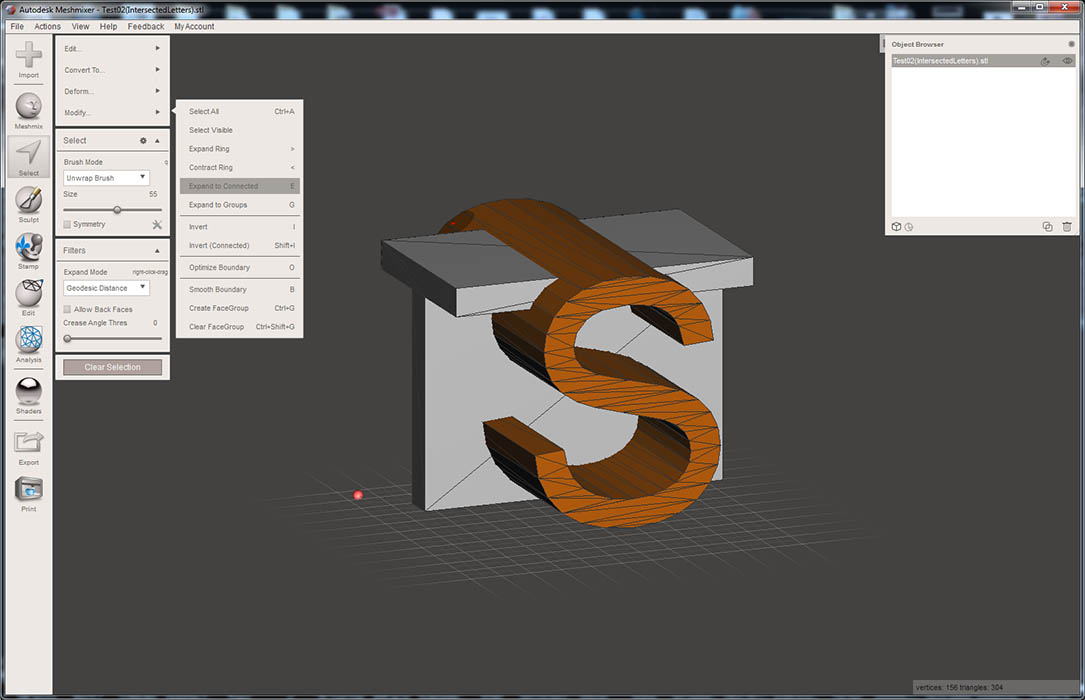
In order to merge the 2 letters, we first need to separate them into separate bodies/objects. from the left pane, click "Select", then click anywhere on the S body surface. This will highlight a few polygons. Press the "E" key to select all connected polys.

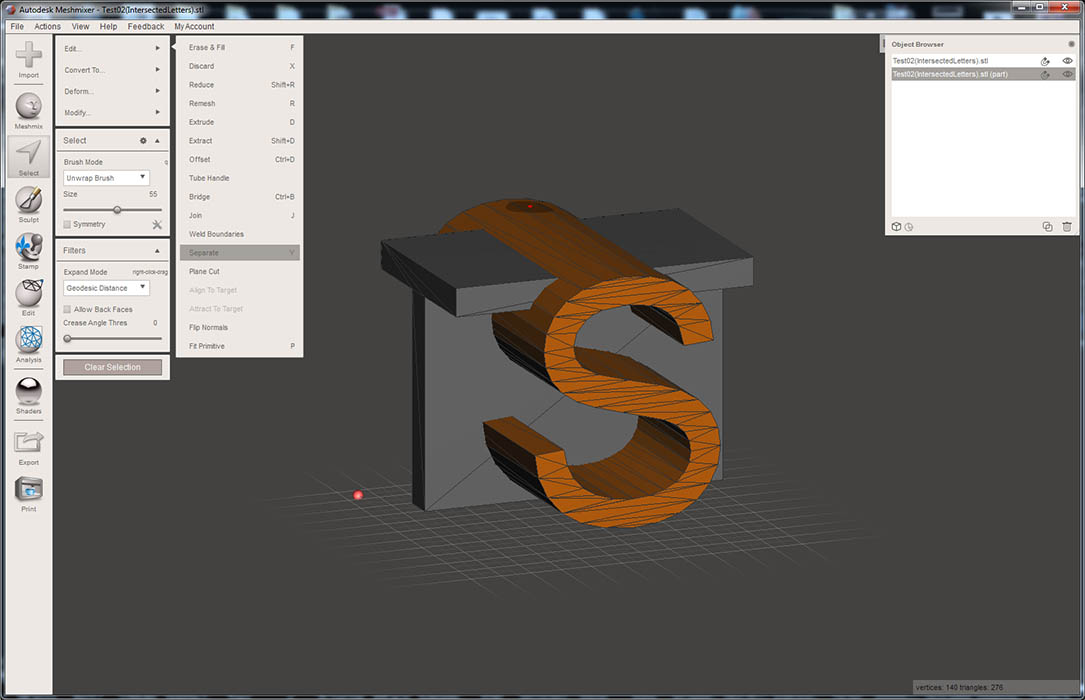
Next, with the S object still highlighted, press the "Y" key. This will separate the S object from the T object, creating 2 separate objects.

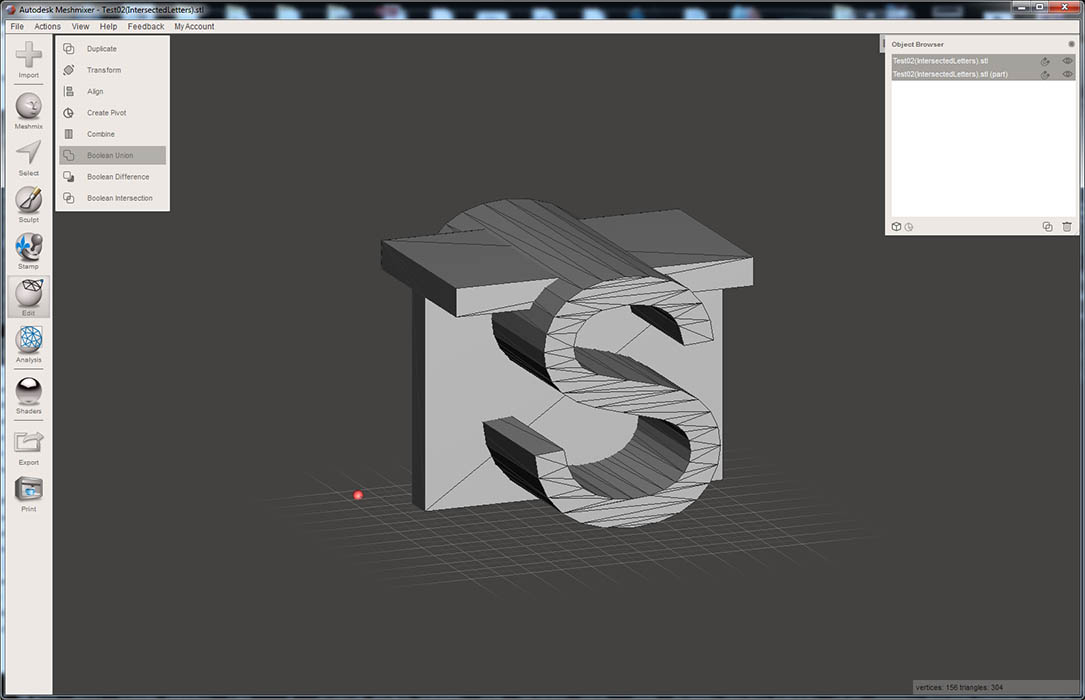
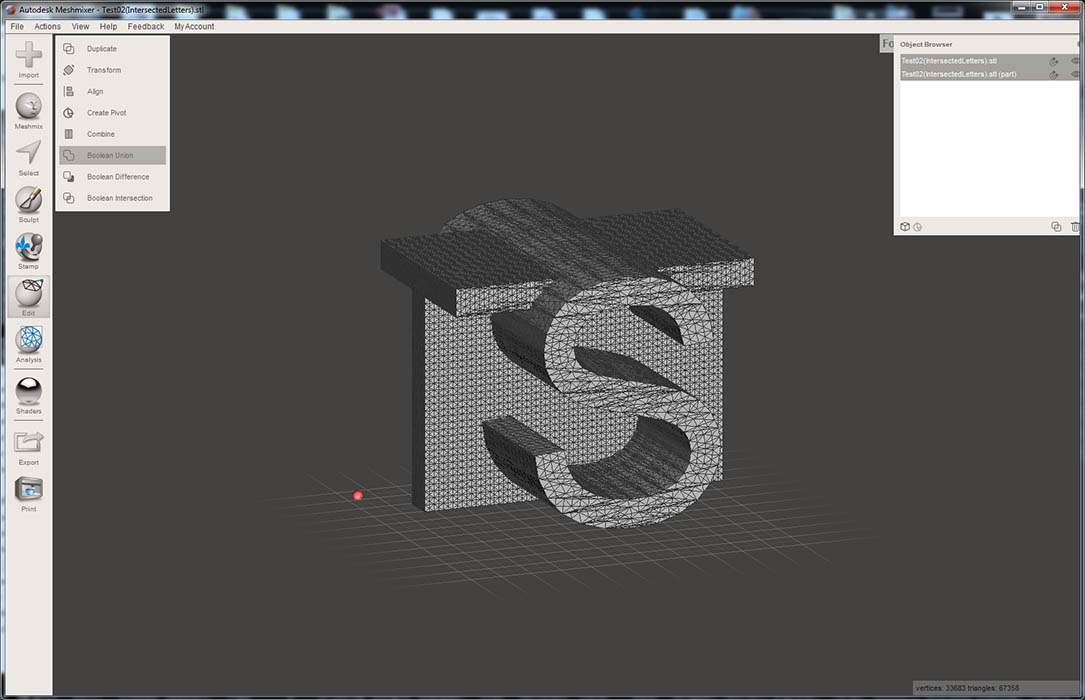
Next up we need to merge the 2 object. to do this, all we need to do is select the 2 objects in the object browser, then click Boolean Union on the left pop-up menu.

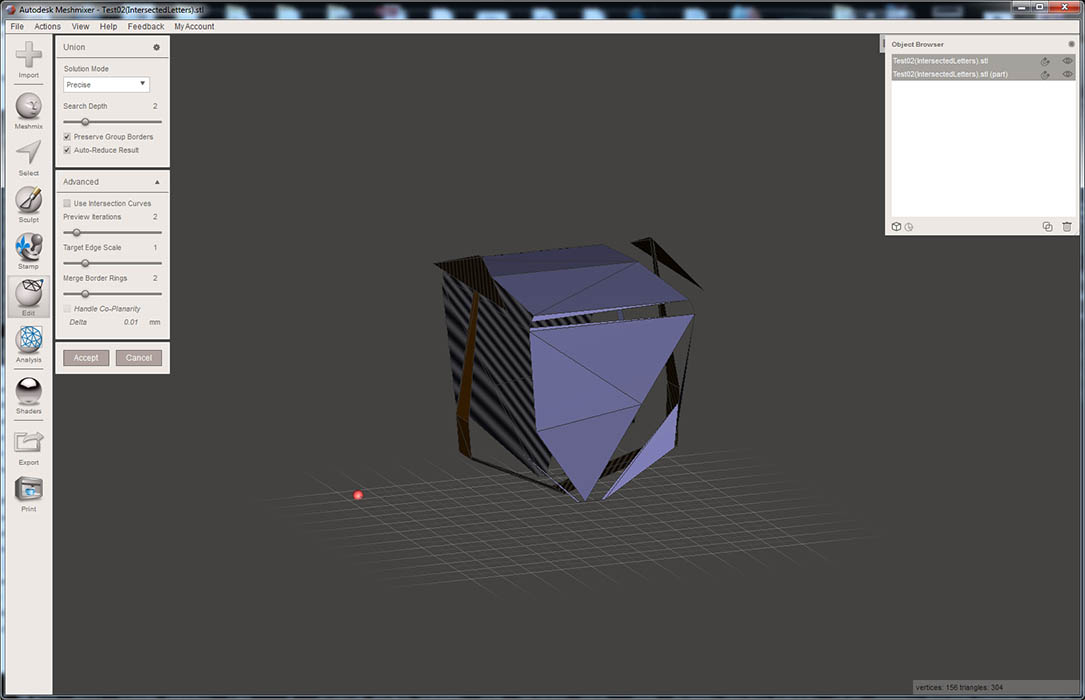
The problem is that this model has far too few polygons to be able to do a successful merge. Here is what happens if you try to merge it at this stage.

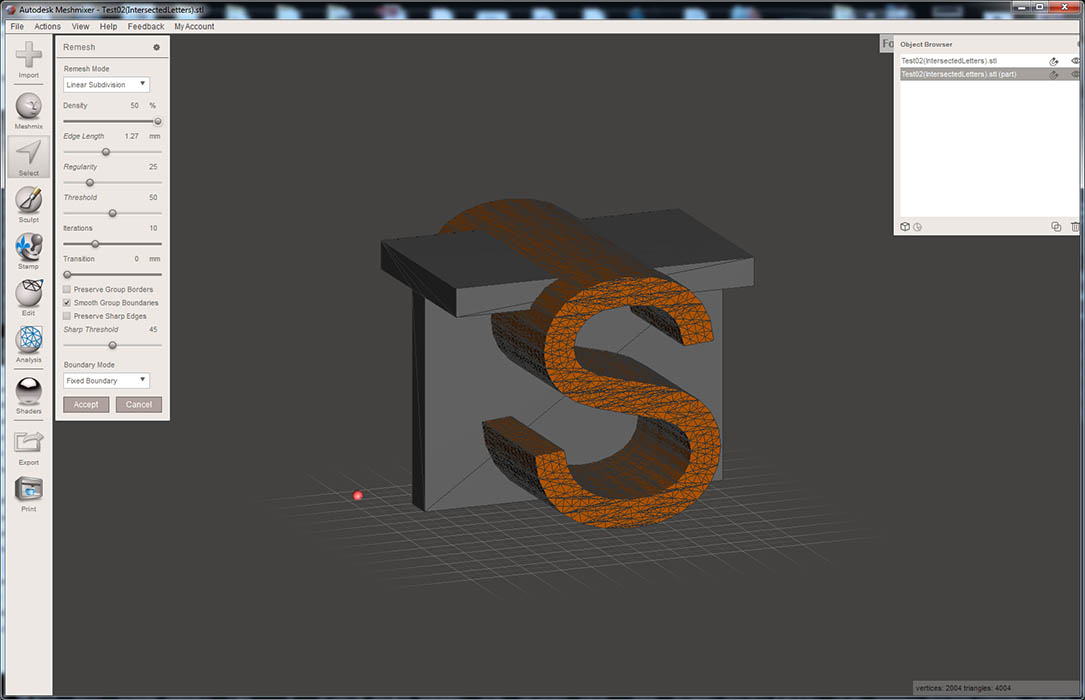
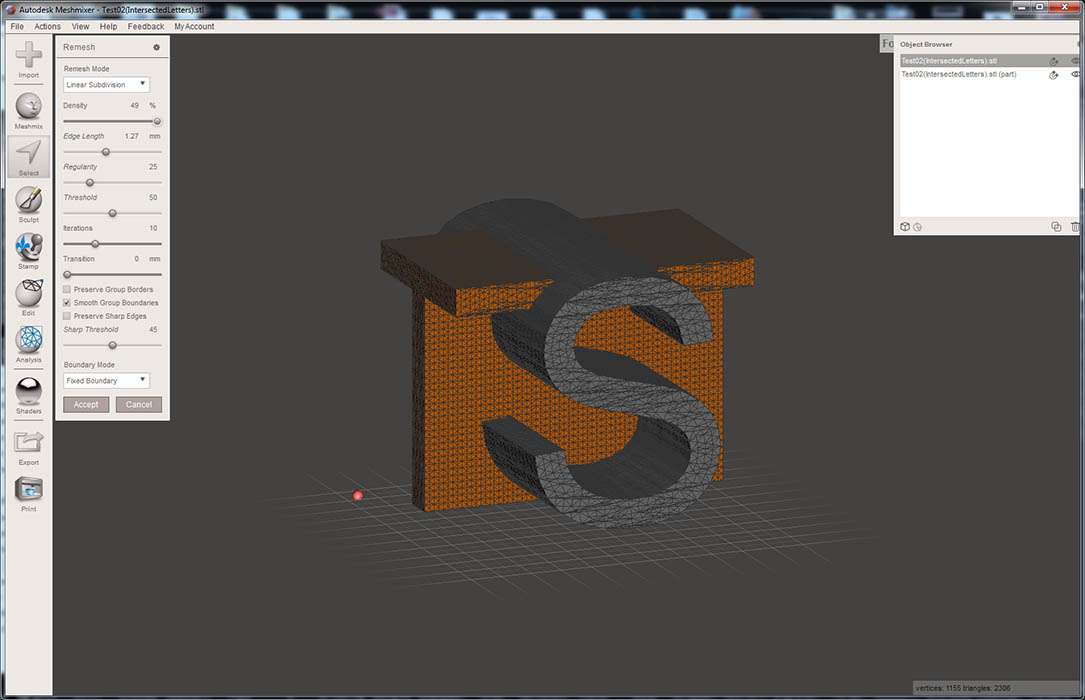
So obviously that doesn't work, so we need to increase the number of polygons for each one of these objects. Select one of the objects (the Letter S in this case), Press "CTRL-A" to select all the polygons, then press "R" to begin the Remesh process. Next use the "density" slider to max. This will divide the existing poly into a few more, then click "accept". this will need to be repeated 3-4 times to achieve a reasonable density.

Do the same for the "T" letter object.

Now we're ready to merge the 2 objects. once again, select both object layers in the "Objects Browser" windows, then click Boolean Union:

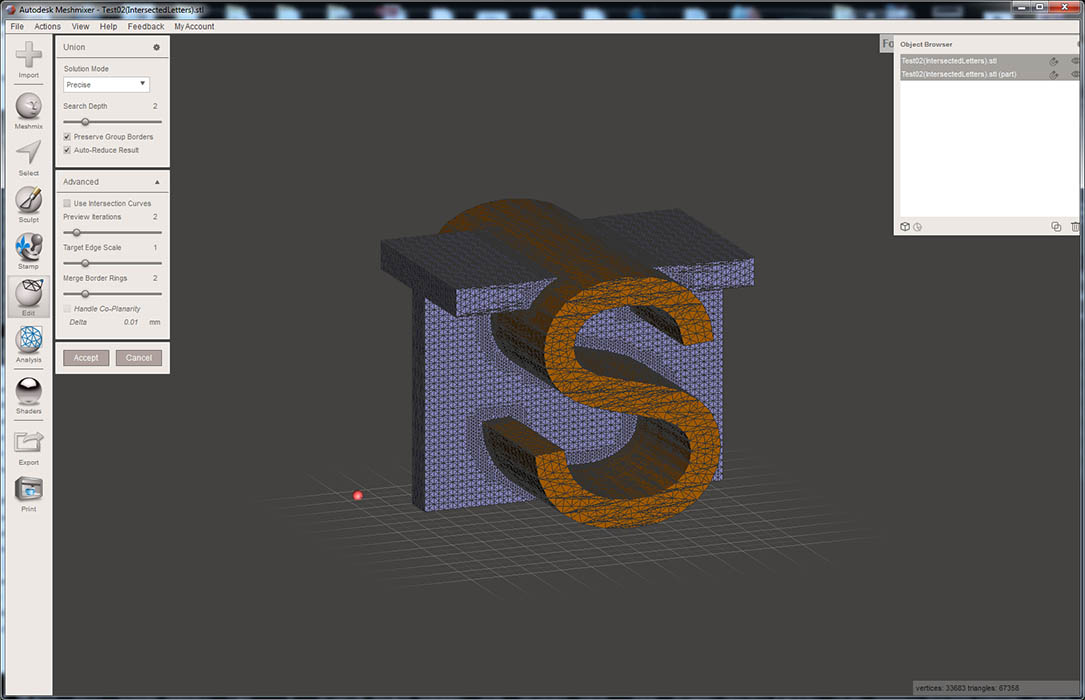
If Meshmixer can find a solution, the objects will turn to Orange and Purple like this:

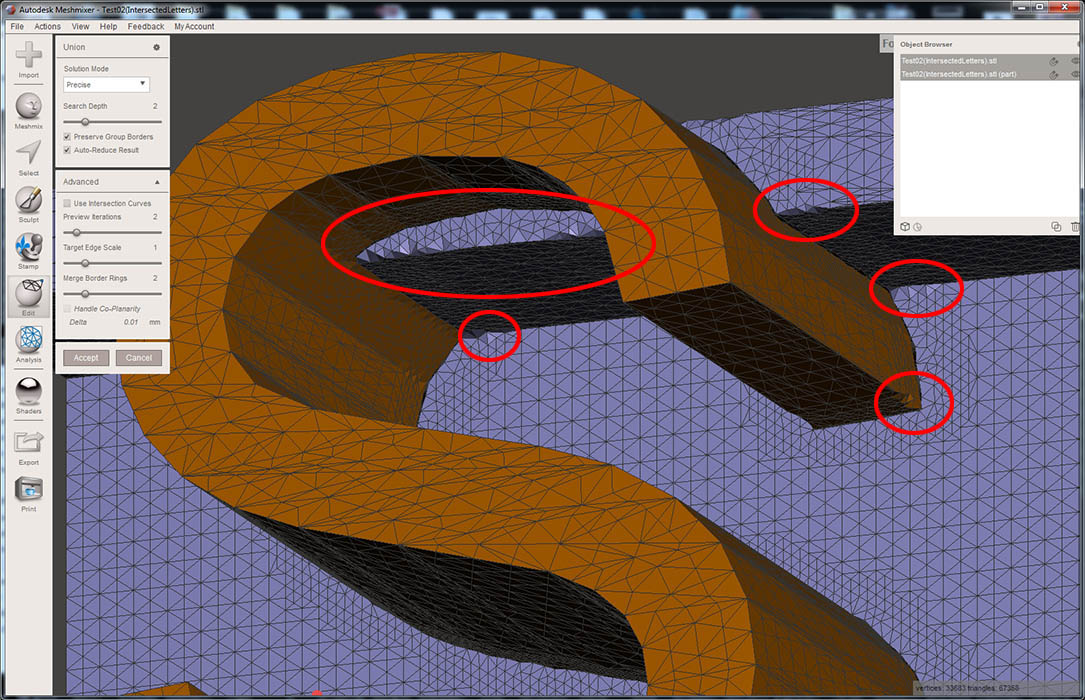
At first glance that looks fine, except there are usually some artifacts that occur, which tend to distort sharp edges. Take a look at the close up below.

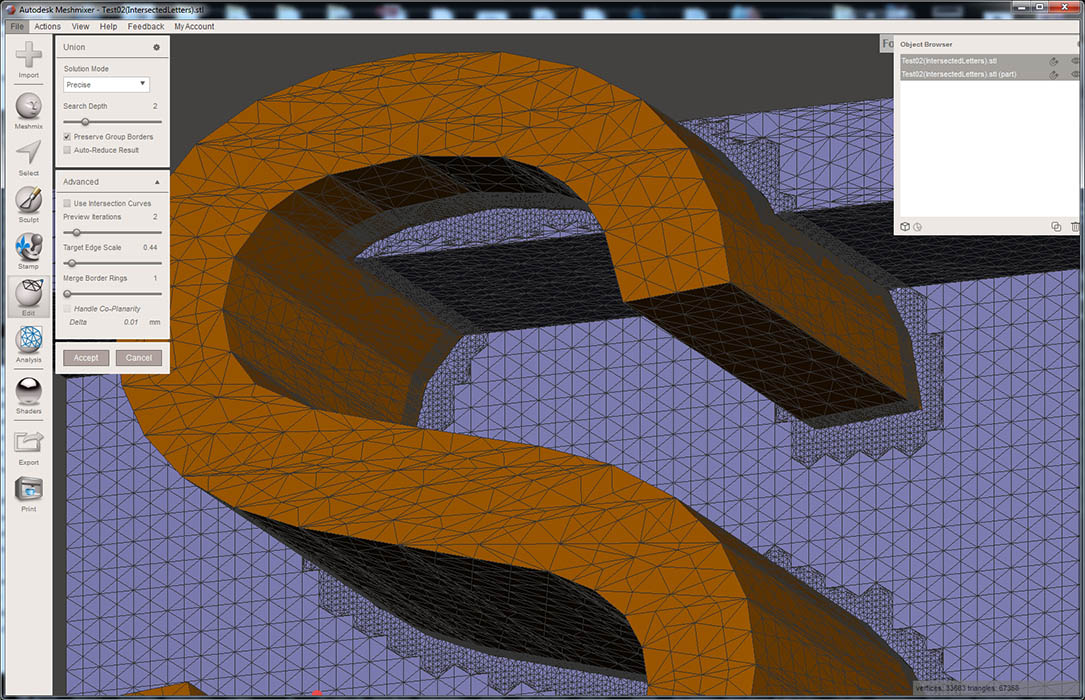
This can be fixed to an extent. To fix it, there are some controls. In the "Boolean Union" dialog box, uncheck the "Auto-Reduce Result", then slide the "Target edge Scale" down to about 0.4-0.5, and you can also slide the "Merge Border Rings" slider all the way to the left. You will immediately notice that the number of polygons around the intersection grows dramatically, but the edges are now cleaner. If satisfied, click "Accept".

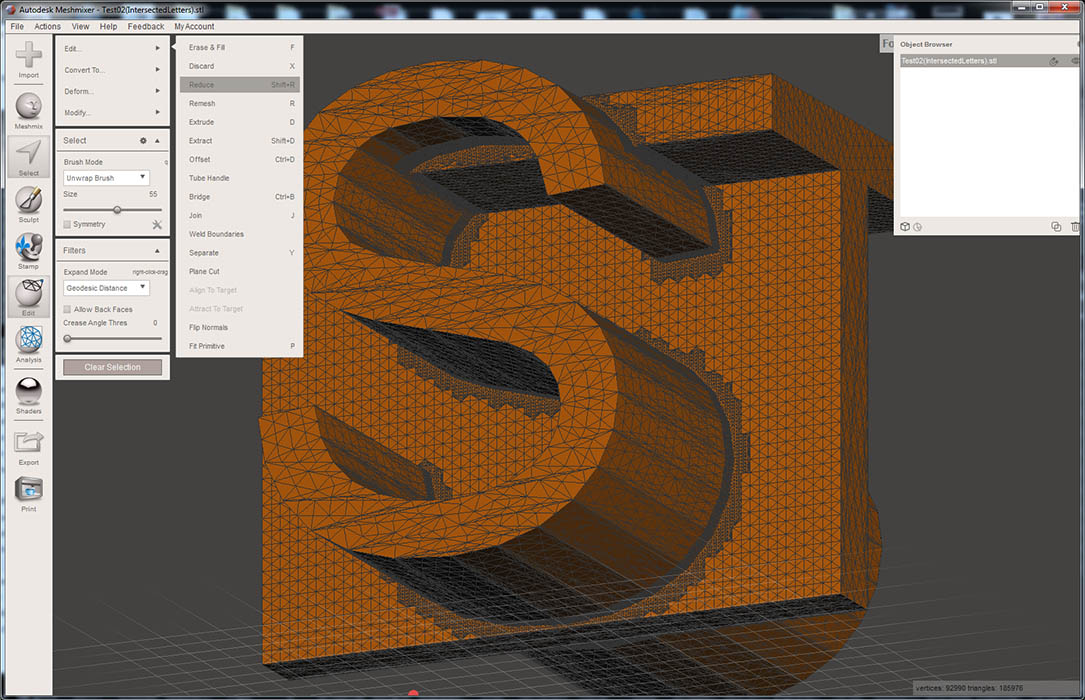
So now we have a Boolean joined object. But there are simply too many polygons, and the model could use a reduction. Press "CTRL-A" to select all, then click Edit/Reduce, as seen in the image below.

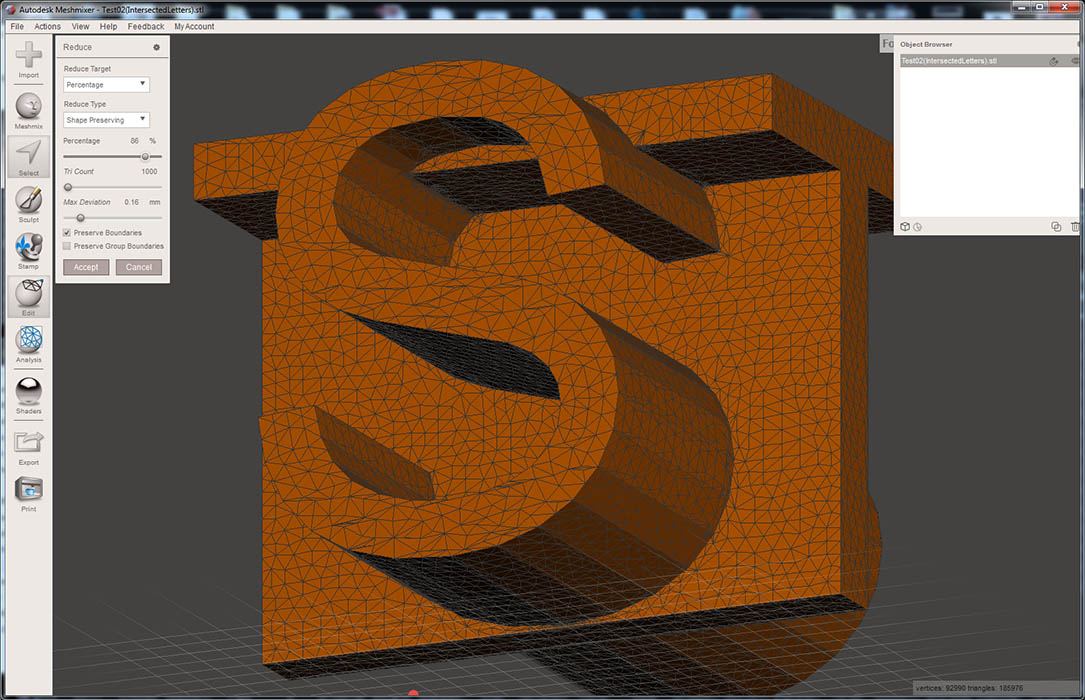
From the Reduce Menu, use the "Percentage" slider to about 75-85%, then click Accept.

Well the only thing left to do is export the object to STL.
And here is the result of this tutorial.
Post's attachmentsIntersected letters.stl 1.29 mb, 3 downloads since 2019-09-20
You don't have the permssions to download the attachments of this post.
To print or, 3D print, that is the question...
SD3 printer w/too many mods, Printrbot Simple Maker Ed., FormLabs Form 1+
AnyCubic Photon, Shining 3D EinScan-S & Atlas 3D scanners...
...and too much time on my hands.

