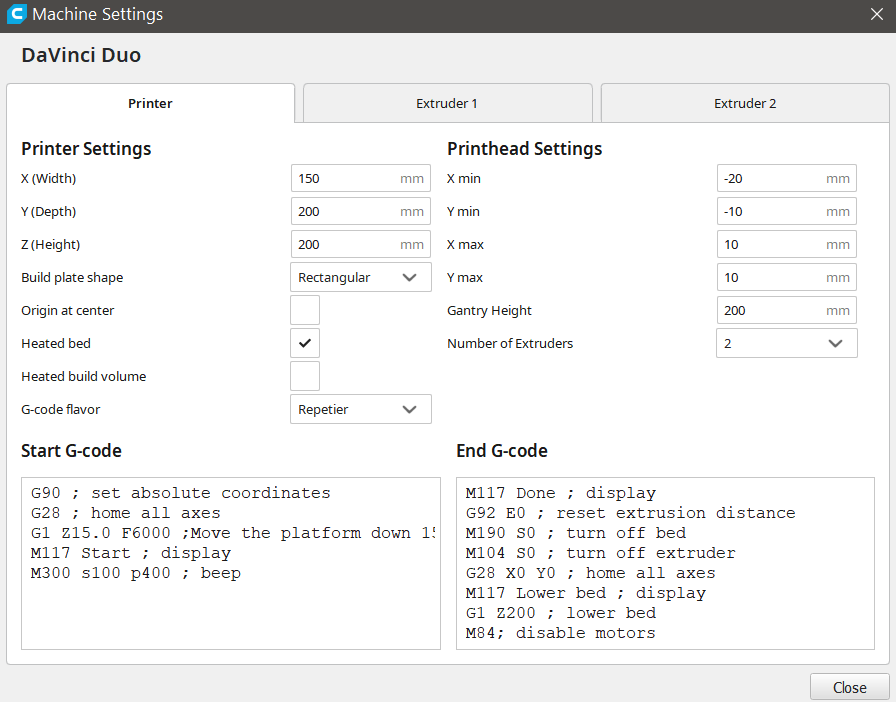
List of all mods on my DaVinci Duo printer (can be applied on DaVinci single extruder, too). Result is a totally different printer, comparable to high end models (PDF file with mods list attached). Here is my modded DaVinci Duo: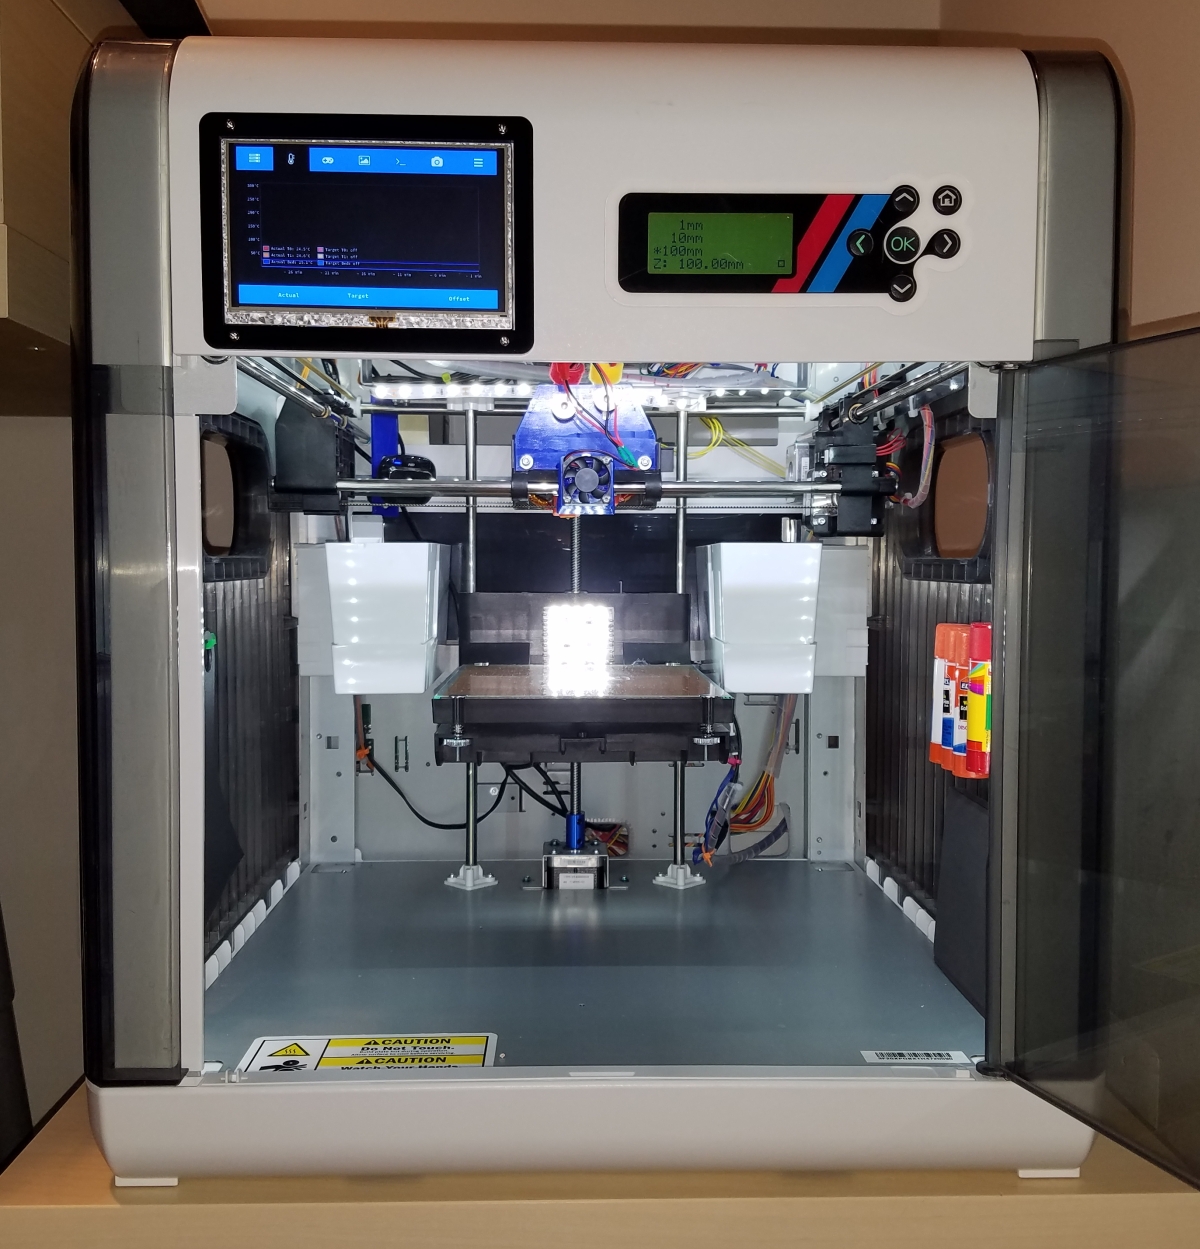
And here is 3DBenchy with the modded DaVinci printer (PLA, 180C, no supports):
IMPORTANT MODS
1- Replace stock firmware with DaVinci Repetier - Free
https://github.com/luc-github/Repetier- … -4-Davinci
2- Remove the metal strips from the bed sides along with the sensor wires and turn the spring loaded screws upside down to gain some bed real estate (see image under LED addition in optional mods) - Free
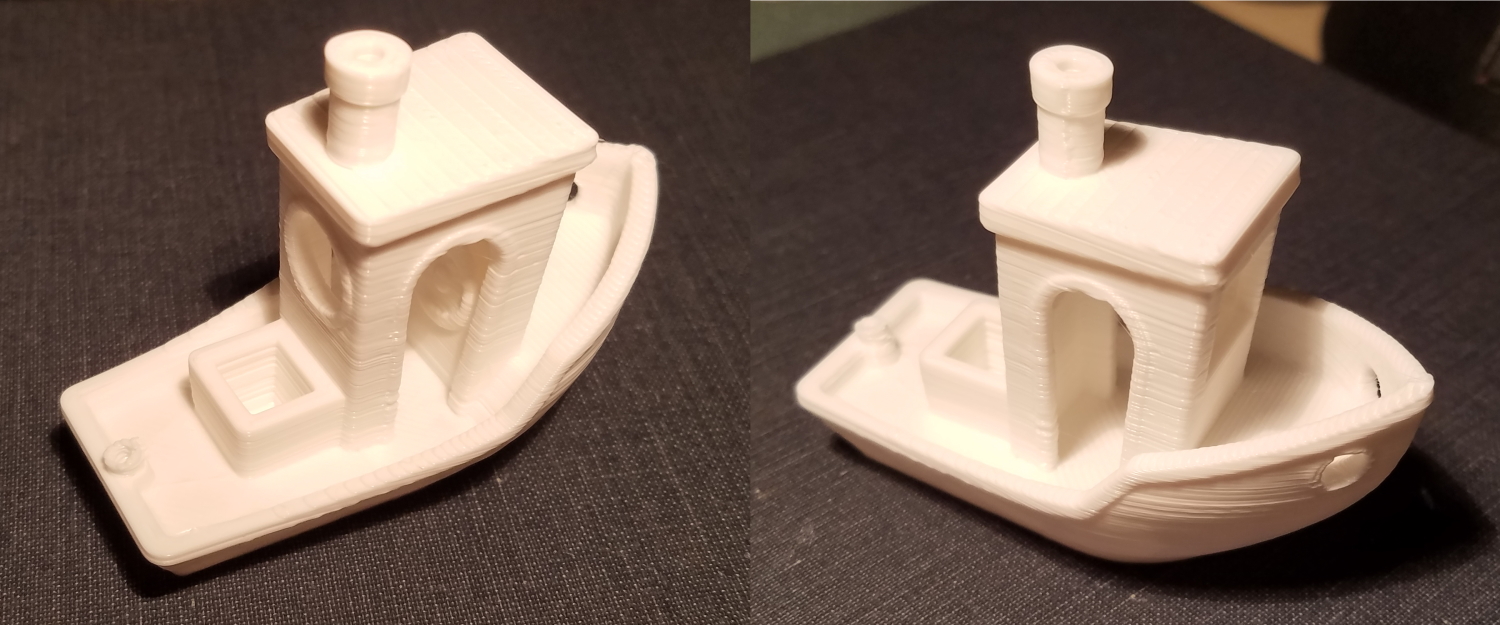
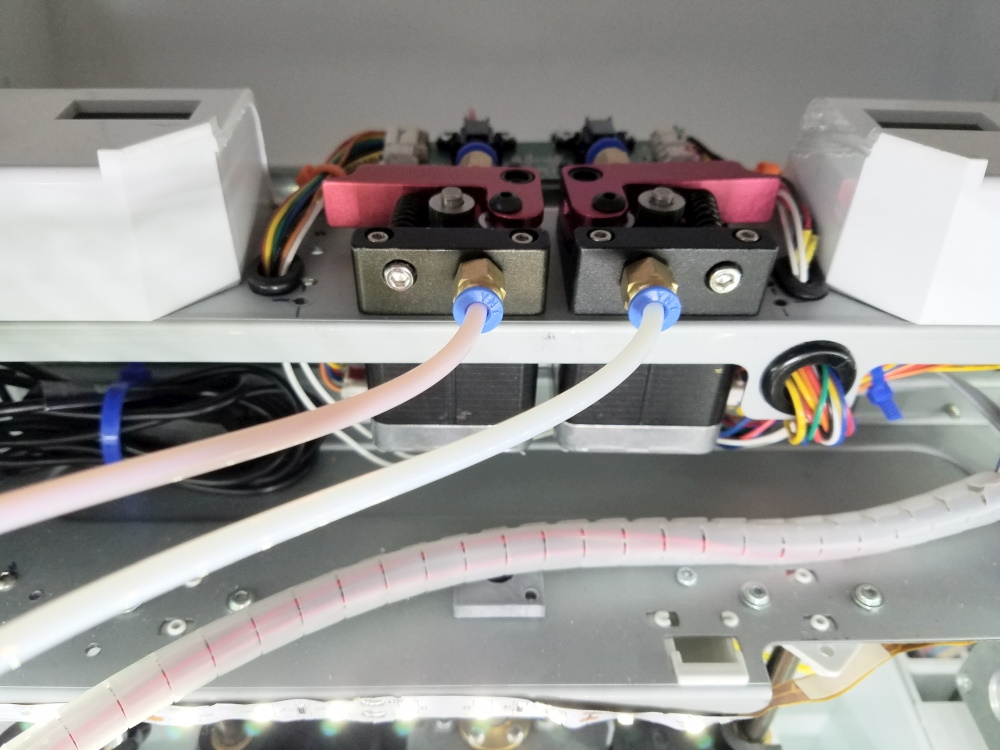
3- Modify extrusion from direct to Bowden: DaVinci Duo already has a “hidden” option for Bowden extrusion. Cut the white plastic frame in the top-rear part of the printer for about 5-6” and place two Bowden extruder feeders in the existing holes on the metal frame (left- and right-hand).
Remove everything from the carriage, cut the extruder bracket in half horizontally to keep only the upper part with the board and place it before the Bowden feeders using an L-shaped aluminum bracket. Remove the extruder steppers from the carriage and place them underneath the metal frame – $18
https://www.amazon.com/Improved-YOTINO- … amp;sr=8-2
https://www.amazon.com/Improved-YOTINO- … mp;sr=8-12
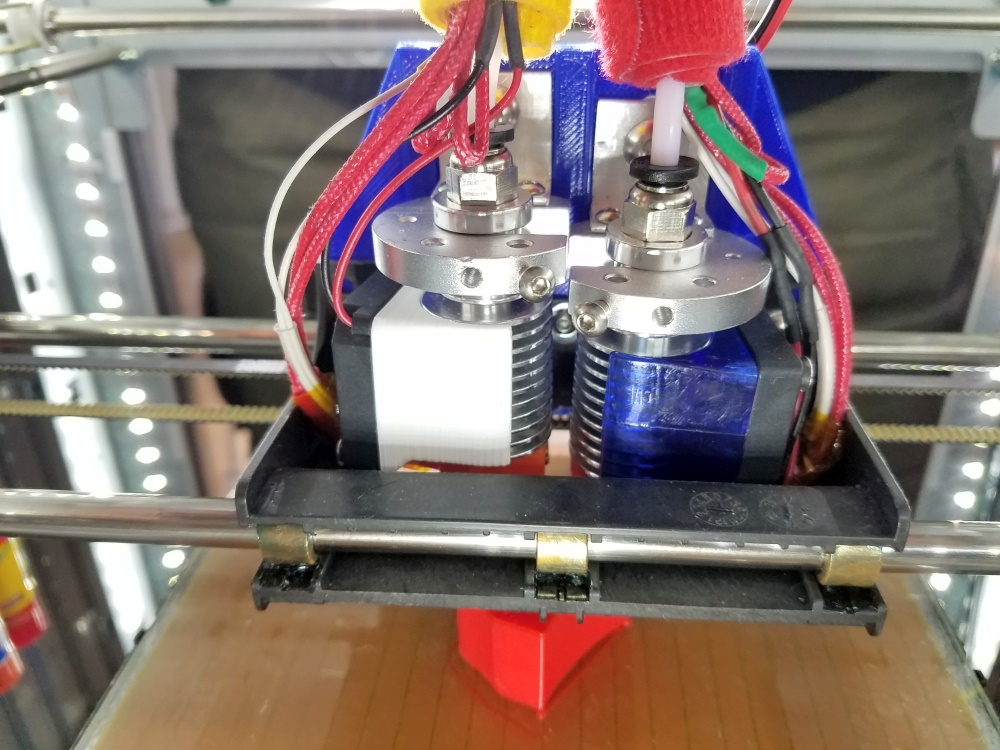
4- Make dual extruder vertical movement independent: Cut horizontally the upper part of the carriage (about 1” above the carriage base) and place a 3D-printed hotend holder plate with two vertical slits with a length of approx. 5/8” length). This allows to adjust the vertical position of the hotend assemblies independently from each other (STL model attached) - Free
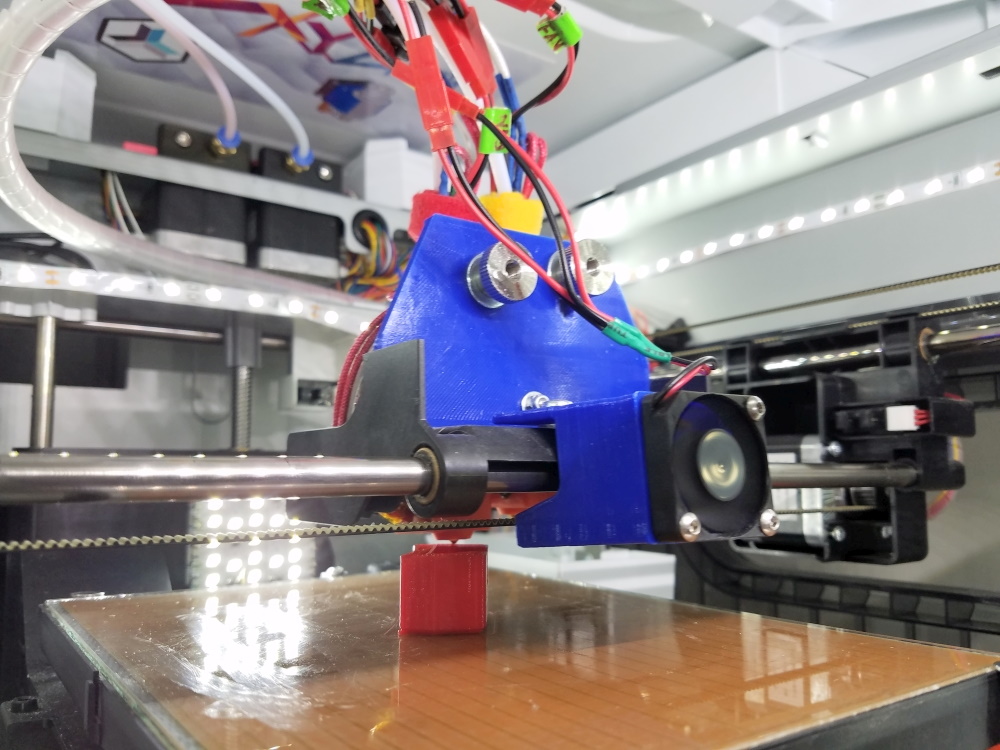
5- Replace hotends: Install two E3D V6 (original or clones) using J-head holder plates. Drill and tap a hole on the side of the J-head plate to tighten the hotends firmly in place. Use two L-shaped aluminum brackets to hold the hotend assemblies and mount them on the hotend holder with screws and knurled thumb nuts allowing them to move vertically independently. Fans will need to be replaced with low profile ones to fit in the carriage. Change 2nd extruder offset in the settings - $54 (if using clones)
https://www.amazon.com/Wangdd22-1-75mm- … amp;sr=8-8
https://www.amazon.com/Aluminum-U-Shape … amp;sr=8-9
https://www.amazon.com/gp/product/B01M6 … &psc=1
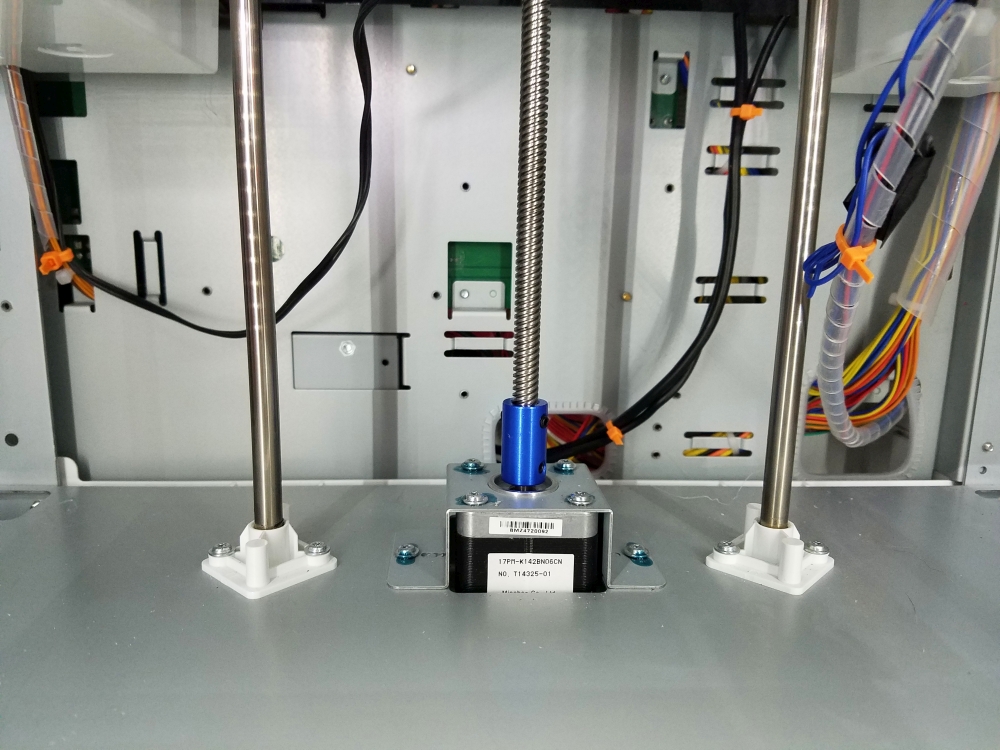
6- Replace original Z-screw with a T8 lead screw. 3D-print the nut holding bracket (see image under LED addition in optional mods, STL model attached). Change Z stepper’s steps per mm in the firmware - $17
https://www.amazon.com/OctagonStar-L300 … amp;sr=1-8
https://www.amazon.com/KINGPRINT-Coupli … amp;sr=1-5
TOTAL COST - $89 (+ $5 for accessories)
OPTIONAL MODS
7- Highly recommended if using V6 clones: replace cheap heatbreaks and nozzles with better quality products – $46
https://www.amazon.com/gp/product/B06WG … &psc=1
https://www.amazon.com/gp/product/B01J3 … &psc=1
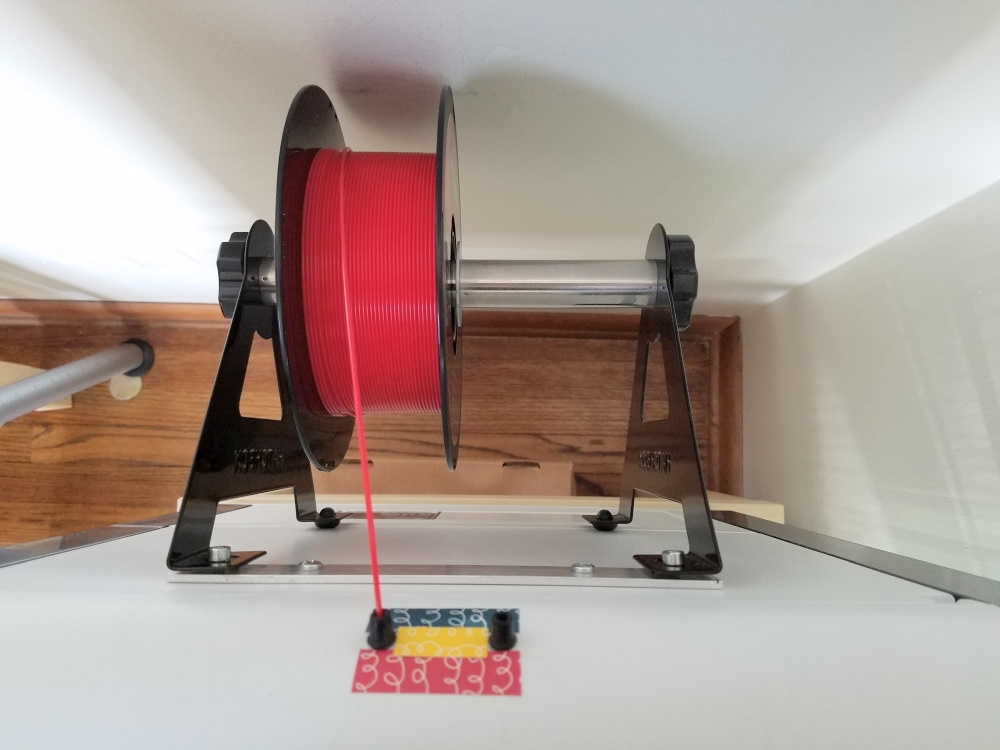
8- Place a wall-mount double spool holder on the back of the printer. Reinforce the plastic rear wall of the printer with a piece of aluminum strip (spool holder is heavy) - $12
https://www.amazon.com/gp/product/B00RC … &psc=1
9- Add part cooling fan (one or two) in the front part of the carriage (same as low profile fans for hotends, fan shroud STL model attached) – $8
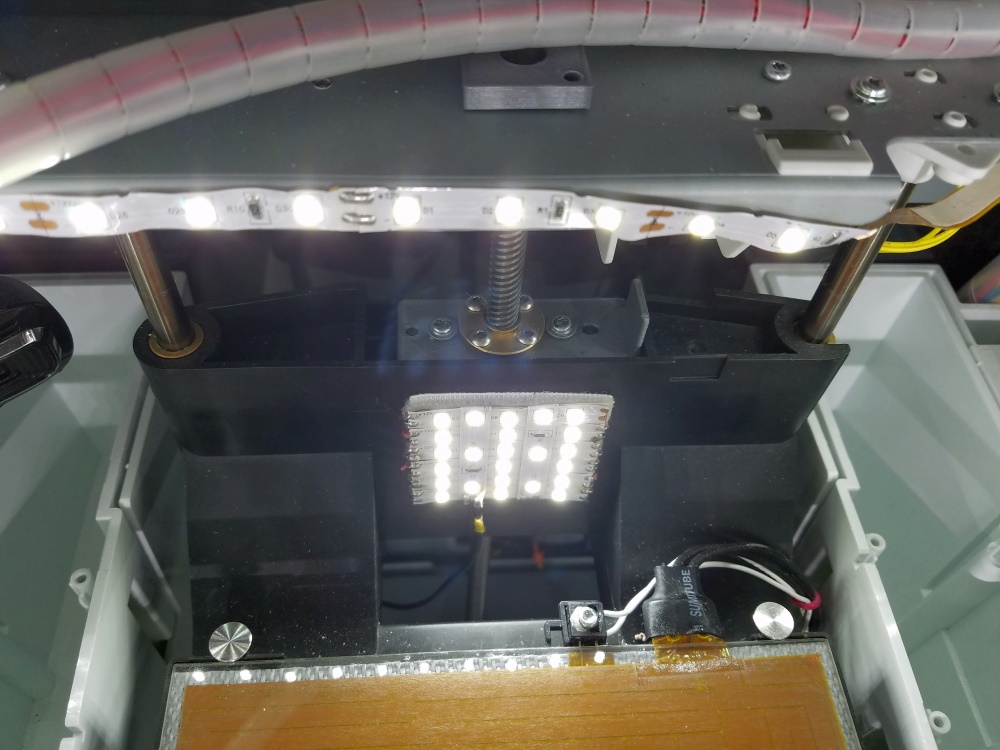
10- Add lighting on the bed and all around the printer with LED strip. It can be connected to the original LED board using a MOSFET driver (needs some soldering) - $17
https://www.amazon.com/gp/product/B00HS … &psc=1
https://www.amazon.com/dp/B07ZGLRFVQ/ref=dp_cerb_1
TOTAL COST - $83 (+ $5 for accessories)
RECOMMENDATIONS
11- If possible, measure the temperature of the hotends from room temp to 270°C with type K wire thermocouple and a digital thermometer and adjust the thermistor curves in the firmware – Free (if TC and thermometer available)
https://github.com/luc-github/Repetier- … issues/140
12- Print server: OctoPrint for printer controller. Raspberry Pi and microSD card needed. Add a webcam. A touch screen can be added (not listed) to allow local OctoPrint control. – $59
https://octoprint.org/download/
https://www.amazon.com/Raspberry-Model- … 3&th=1
https://www.amazon.com/PNY-Elite-microS … mp;sr=8-20
https://www.amazon.com/Aokin-Raspberry- … p;sr=8-165
13- Bed levelling: use the piece of paper technique to manually level the bed. Perform bed levelling using the left extruder only (lift the right extruder when levelling). Once the procedure is completed for the first extruder, lower the right extruder and adjust its height using a piece of paper in one location only (do not touch the bed adjustment screws) – Free
https://all3dp.com/2/3d-printer-bed-lev … -tutorial/
14- Software: DesignSpark Mechanical (direct modelling) or FreeCAD (parametric) for 3D modelling, Netfabb Free for model repairs, Cura for slicing, Notepad++ with G-Code plugin for editing G-Code files – Free
https://www.rs-online.com/designspark/m … stallation
https://www.freecadweb.org/
https://github.com/3DprintFIT/netfabb-basic-download
https://ultimaker.com/software/ultimaker-cura
https://notepad-plus-plus.org/downloads/
https://zero-divide.net/?shell_id=151&a … ghlighting
]]>