Re: Bed Leveling for Beginners
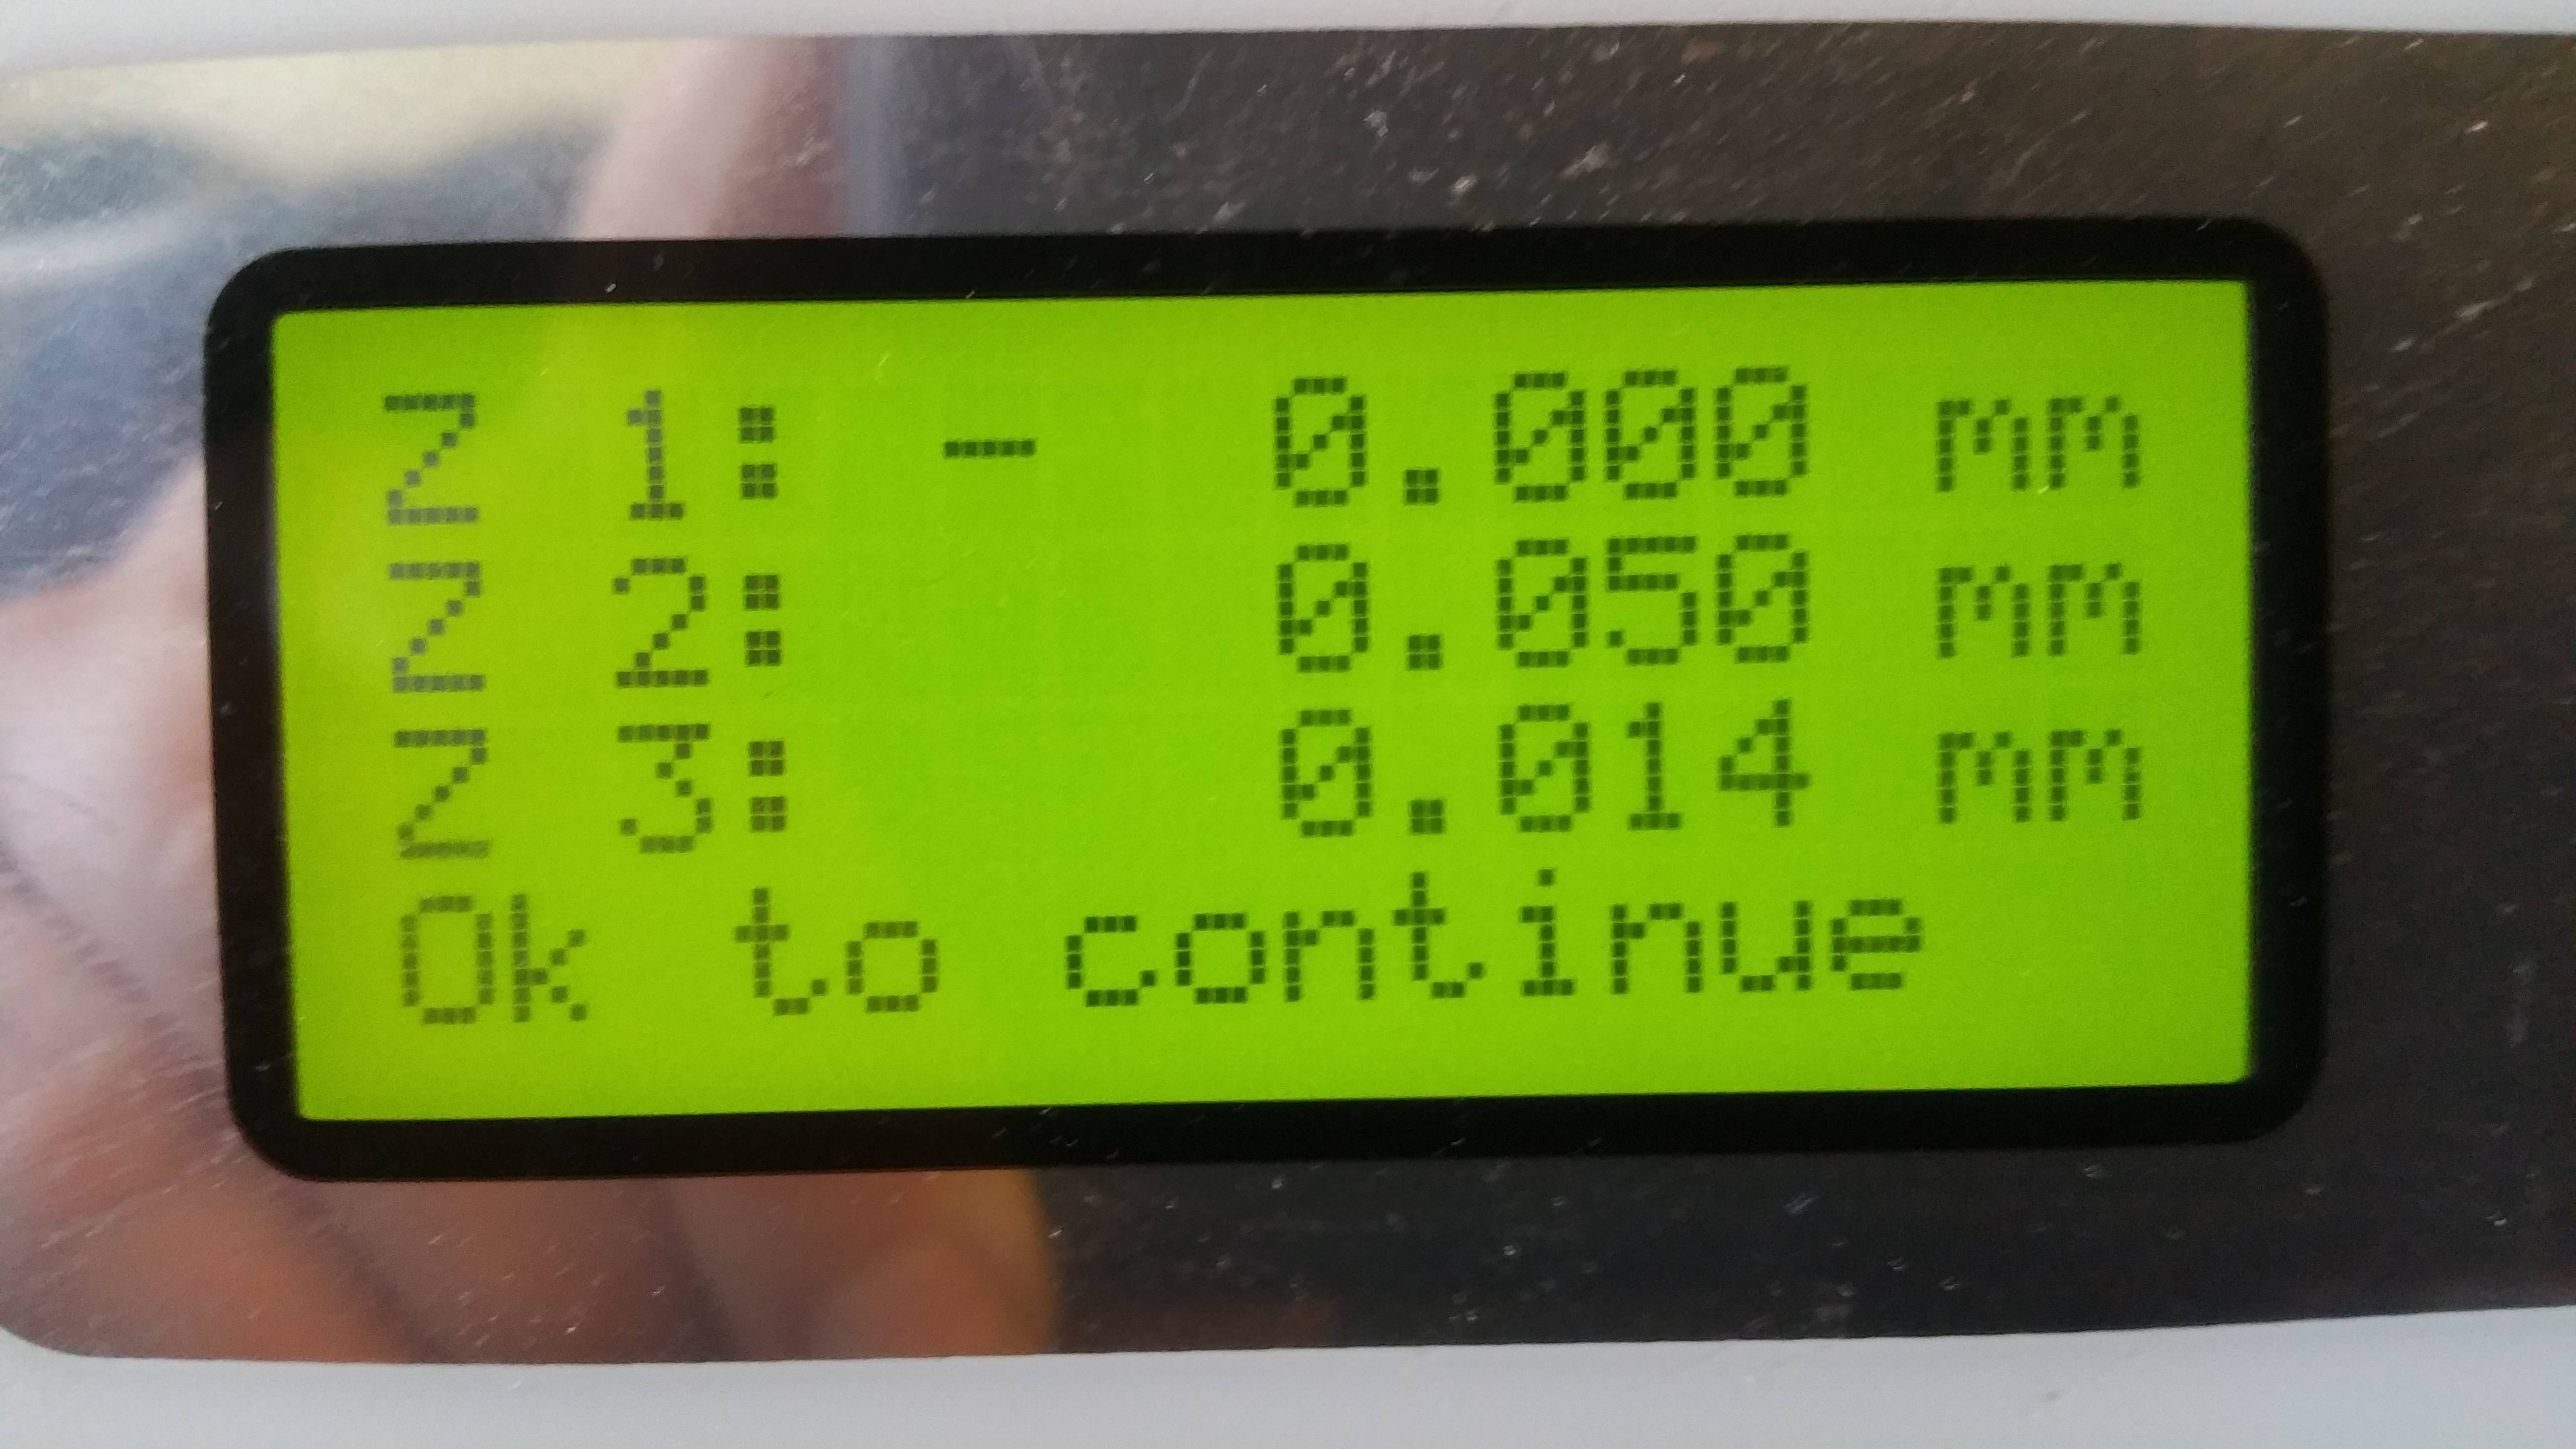
Everything assumes you are looking at the machine facing the door. So the door is the front. The numbers on the display for the calibration are from left to right A, B, C. The adjusters on the bed are A = Back right, B= Middle Front, and C= Left Back. The number relate to the space between the nozzle and the bed and represent millimeters in .000 decimal. So 445 would .445mm and 295 would be .295mm. You want to try to get between 250 and 300 on all three numbers.
Printing since 2009 and still love it!
Anycubic 4MAX best $225 ever invested.
Voxelabs Proxima SLA. 6 inch 2k Mono LCD.
Anycubic Predator, massive Delta machine. 450 x 370 print envelope.
Anycubic 4MAX best $225 ever invested.
Voxelabs Proxima SLA. 6 inch 2k Mono LCD.
Anycubic Predator, massive Delta machine. 450 x 370 print envelope.