Topic: How I assemble 'naked' Hotends
When you receive a new hotend, it quite often will come 'naked' - that is, un-assembled and without the electronics inserted. Something like this, often even broken down further:
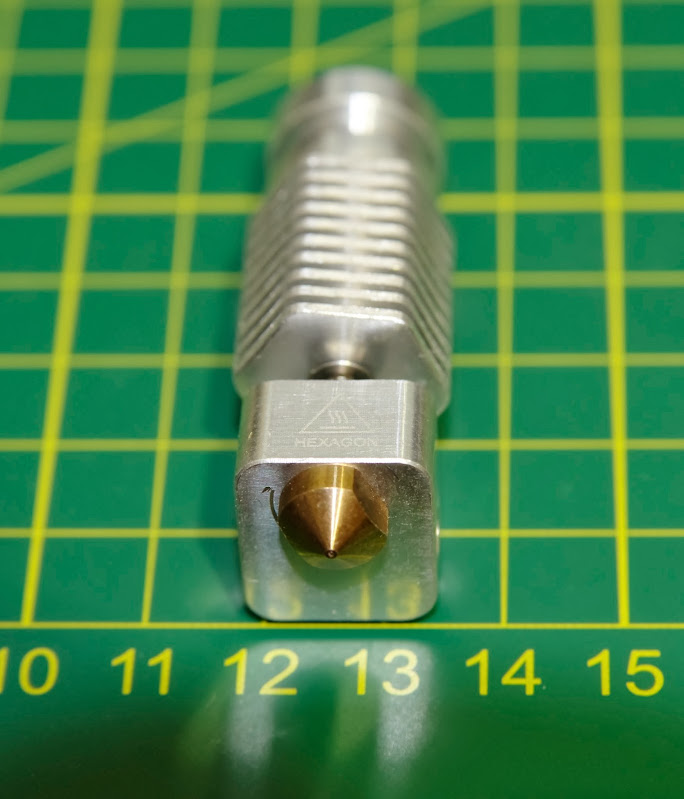
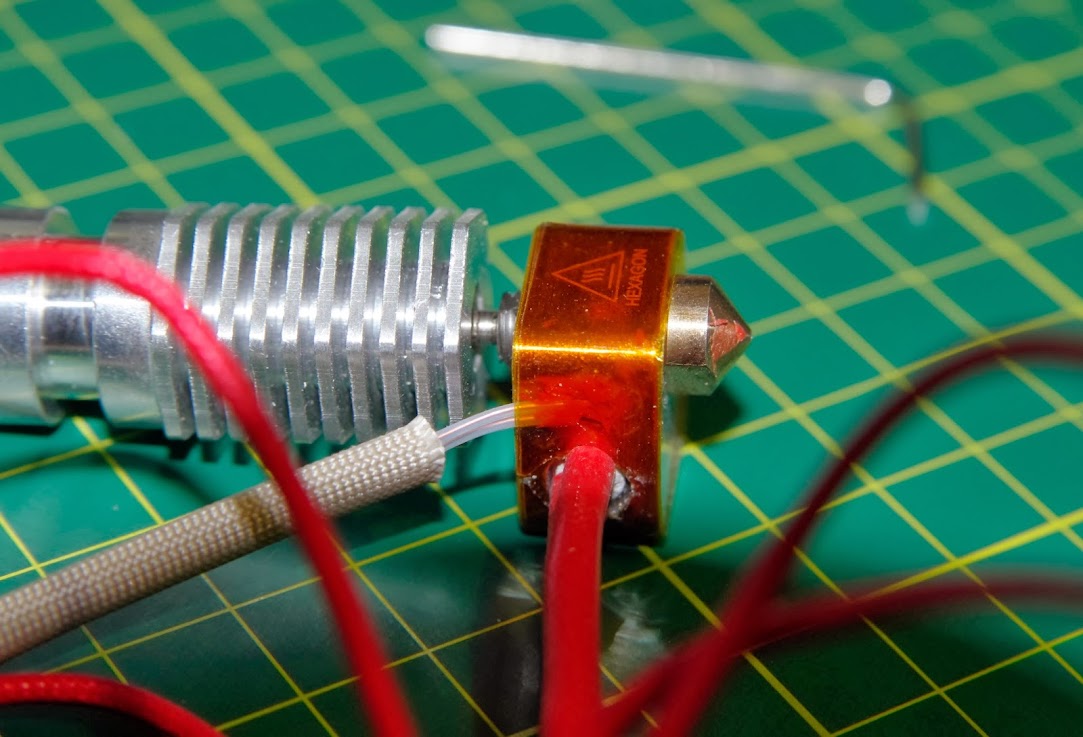
I in fact prefer receiving a hotend this way, as then I know precisely what thermistor I'm putting into it etc and how it is affixed. This post covers how I tend to set them up - clearly the pictures contain a brand new Hexagon hotend from RepRapDiscount.com - but this is the same method I use for every hotend I assemble (like the blocks I'll have to do this week for my Kraken! ![]() )
)
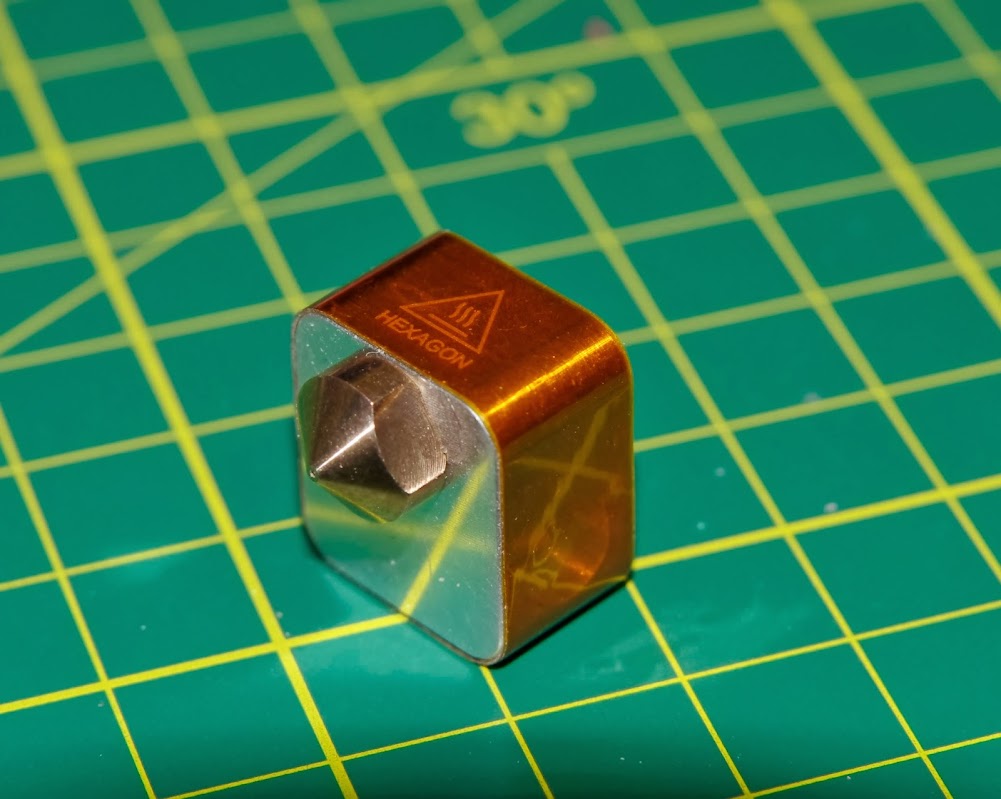
Firstly; for everyone that is reading old and new, here's a quick recap of the terminology certainly I use when dealing with bits of the Hotend. Hotends may all differ in design or function of the different parts ; but they all feature this same anatomy for all intents and purposes (some may use PEEK heat sinks/breaks; some may use water in a water block, etc) - So this method is easily adaptable for all. :

Not pictured is the grub screw that usually accompanies an all-metal hotend these days to retain the cartridge. On this particular Hexagon its located underneath the heater block relative to the above pic; on an E3D it appears just 'behind' the nozzle on the 'base' of the heater block.
So when I first receive a hotend, I will dry assemble all the bits, just to make sure everything fits. This is very true of prototypes or short/hand production runs of a hotend. With it all more or less together, I hand run an appropriate sized Drill bit through the heater cartridge/resistor hole. This just makes sure that its all cleaned up and really is 5/5.5/6mm in size. This is a worthwhile step as it is surprisingly easy to get a cartridge wedged in a hole - at which point its worth mentioning that you should always check the size of your cartridge and that its round - 10's of a millimeter can count here.. Now is when I'd also determine how much I need to pack a resistor by with foil to get a tight fit in the hole (although I just don't use them these days...). Do NOT use a power drill - you will rapidly eat the aluminium blocks.

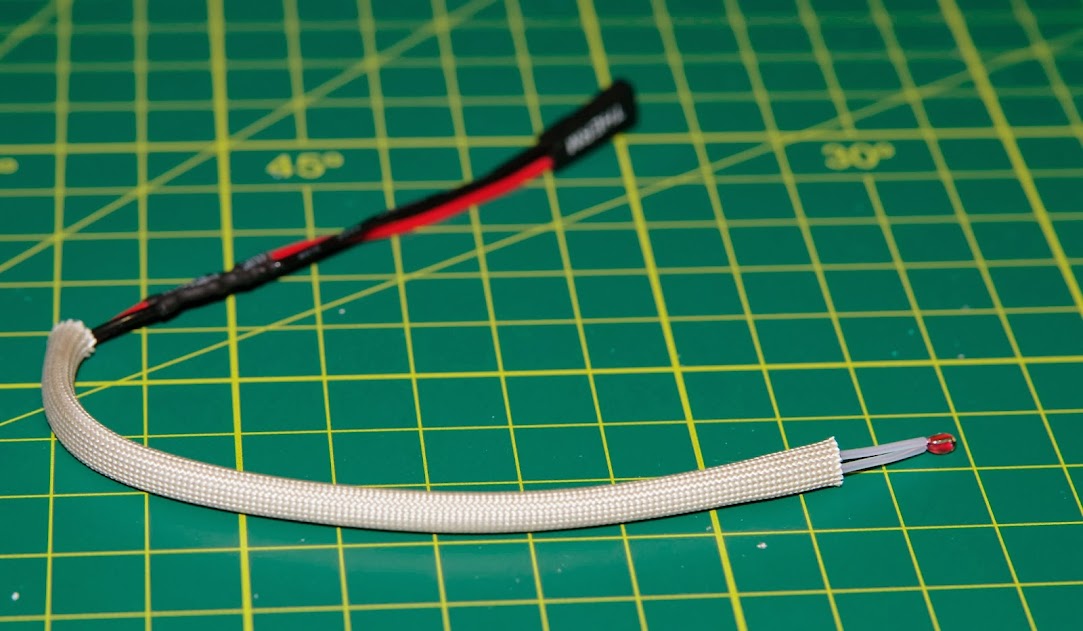
My thermistor setup takes a minute more in prep, but has never failed me in operation yet. I use small .7mm PTFE tube and place about 15mm's of it over each each leg. Using a bootlace ferrule, I then crimp on high gauge wire and heat shrink the whole thing before adding a final layer of "VIDAFLEX" fibreflass sleeving which is a woven 'spaghetti' insulator designed for high temp or abrasive conditions (often seen protecting mains circuits). RepRapDiscount has started shipping their kit thermistors this way (minus the vidaflex) however I still cut it down and heatshrink/vidaflex them as the as shipped ones are long enough to run all the way back to the controller; however I run a small plug block on my x-carriage so dont need anywhere near that length. Use bootlaces at the thermistor side, however solder is acceptable at the top end where I rejoined the 2-pin header socket - just use a 'Western Union Splice' to join them and heatshrink it all to be safe. Use lead free solder for its higher meltpoint if you are so equipped.
Once this is done, I disassemble the heater block and then using the nearest-to-the-vertical-height-of-the-heaterblock width kapton(or off-brand polymide clone ; stock up via DX/Aliexpress/eBay - 10mm, 15mm, 20mm are good all over the printer sizes to have on hand) and then wrap 2-3 layers around it, making sure to start and finish on either undrilled sides (usually the 'front' or 'back' of the block). Do this as tightly as possible.
Eagle eyed viewers will note I've covered the holes. Using a sharp knife such as an xacto/scalpel ; trim out the tape around the holes - I usually punch a hole either side of the circles and then just trim with the tension of the tape. You only need to do the thermistor hole at this stage but I often just do all of them.
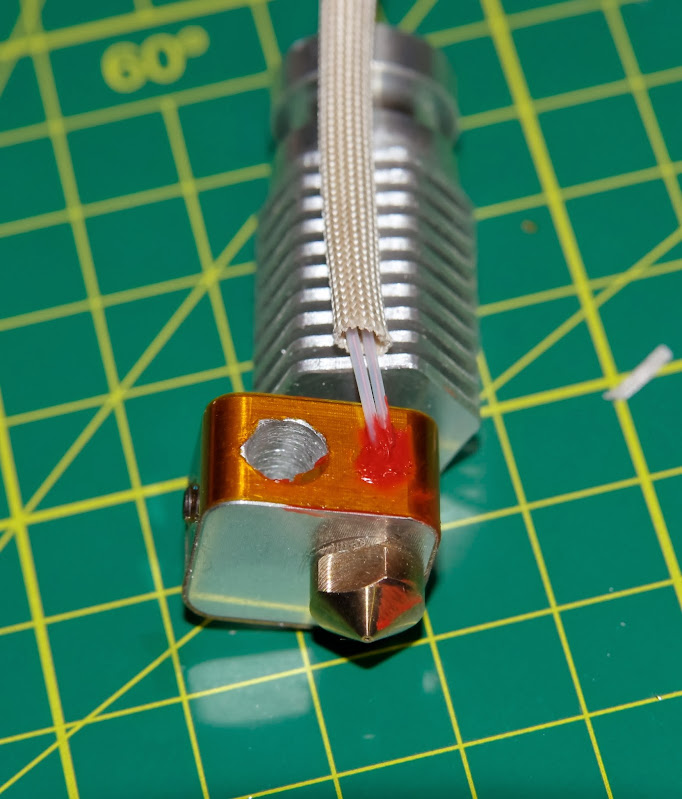
Now insert you thermistor into its hole and fold it over so it runs out the top of the heater block. I usually 'pre shape' the thermistor with a right angle. You want to make sure the thermistor 'exits' the heater block with only PTFE against the block. Make sure in this process that the PTFE stays pushed up against the ends of the thermistor - whilst the aluminium block is now insulated for both heat and electrically only the outside, its still possible to mash the thermistor leads together or short insde the hole.
Once inserted, use a small piece of card or a pallete knife to apply some Sensor Safe High-Temp Silicone Gasket compound. I use Loctite 596 . Whilst it can be argued that this does potentially have a slight hysteresis on the temp readings; in practice it is not an issue and can be ignored - particularly if you make sure the thermistor is right against the back of its recess. The compound is there to hold it all in place and ensure a good seal on the cavity - so make sure the back of the hole and thermistor is properly covered.
Once this is done; Its time for a final kapton wrap to secure the thermistor in place against the top of the block and make sure it can't be pulled out by accident. Trim out the main heater cartridge holes and you can now insert and secure the cartridge or resistor:
And we are done! You can install your new hotend and get printing!
This takes a few minutes more, but the small preparations mean that I can remove my hotends, throw them around in boxes, ignore them for a few weeks, and put them back in and they work. I have yet to have a thermistor in this setup fail , fall out or end up shorting randomly down the road.
Hope this information is helpful to some!
Adrian

