1 (edited by adrian 2013-06-03 14:34:51)

Topic: Removing the pressed in threaded rod (pics + guide)

2n2r5 posted similar pics in the threaded rod upgrade thread, but to make it easier for everyone else, I thought I'd post pics of how I removed the rod. Add your own pics/steps if you find a simpler way!

I used simply

6 x 5/16" Nuts
1 x 5/16" Large Flat Washer
2 x Big Shifters (The bigger, the more leverage and thus easier it is on the bottom nut).

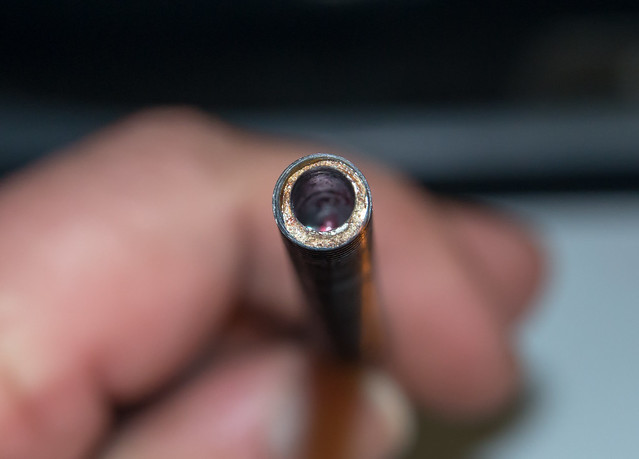
1) Remove the motor from table and printer.
2) Place the Washer onto the rod and slide it down to sit flush on the face of the motor. This is to prevent marking/scoring the motor face
3) Thread 4 of the nuts onto the threaded rod at a good spacing. These will eventually work their way down to the bottom as you tighten each of them. The bottom nut will pass cleanly off the bottom of the rod and fall into the space between the washer and the end of the rod.

4) Screw on the remaining two nuts and tighten them very firmly against each near the top of the rod to lock them off against each other. Using one of the shifters, you will grip these to prevent the rod from turning.
http://farm8.staticflickr.com/7389/8936471968_9f4a28dbbf_z.jpg

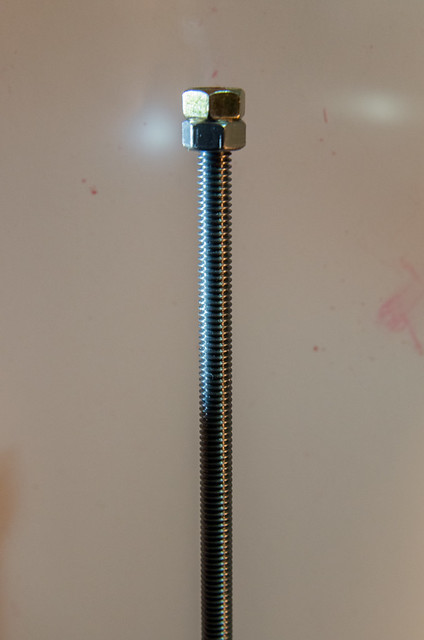
5) Gripping the two lock nuts at the top of the shaft with one shifter, use the other shifter to do up the lower nut and forcing it against the nut that is sitting above the washer. These will slowly ease the rod up as the nut moves off the bottom of the rod and stacks against the first nut. Continue to repeat this process for each nut. Here you'll see I'm just finishing the fourth nut:
http://farm6.staticflickr.com/5347/8935835459_d4fe465393_z.jpg

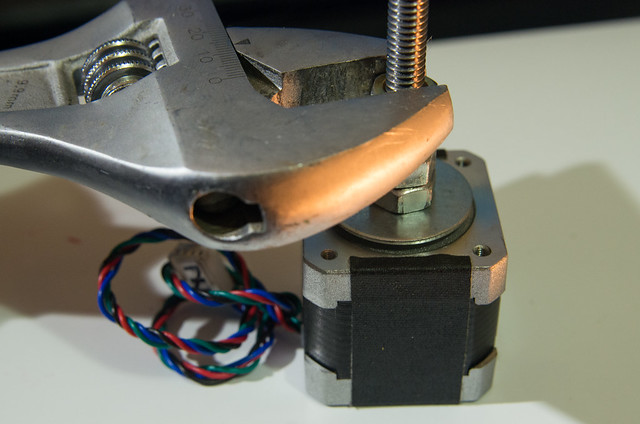
6) Eventually, all the nuts will be at the bottom of the shaft and it should take a slight final twist to remove the rod:
http://farm6.staticflickr.com/5447/8935864389_0724e6d8b2_z.jpg

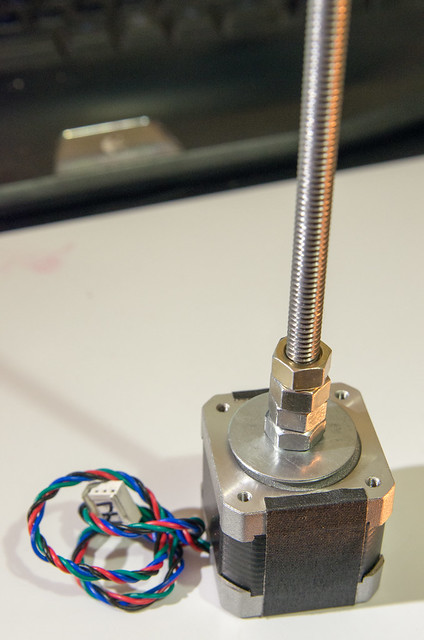
7) And voila! Rod removed:
http://farm8.staticflickr.com/7314/8936445870_da1ec4467d_z.jpg

2

Re: Removing the pressed in threaded rod (pics + guide)

Thanks for that.  If the last picture isn't distorted, I think you can make out the slightly decentered bore that would lead to wobble.

Matt

3 (edited by adrian 2013-06-03 16:03:13)

Re: Removing the pressed in threaded rod (pics + guide)

mconsidine wrote:

Thanks for that.  If the last picture isn't distorted, I think you can make out the slightly decentered bore that would lead to wobble.

Matt

Indeed, it is not distorted. Gritty detail in http://www.soliforum.com/topic/2662/onl … illing-15/ . But as you noted, its not like you need calipers to tell you its off-center!! smile

4

Re: Removing the pressed in threaded rod (pics + guide)

Maybe the folks at the factory could 3D print a hole with a plug in the center where the bore hole should be.  Then the quality inspection of the rod work would be straightforward - if the bored rod fits in the hole, use it.  If not, don't ship it.  Takes measuring out of the equation ...

5

Re: Removing the pressed in threaded rod (pics + guide)

Great write up and wow. I just looked at mine and they got it almost perfect. I can't believe that slipped through by Q.A.

SD3 w/ mods:
Glass bed with QU-BD heat pad upgrade, threadless ballscrew w/ 8mm smooth rod, spectra line belt replacement, lawsy MK5 extruder, Lawsy replacement carriage, E3D hotend, Ramps 1.4 w/ reprap discount controller, DRV8825 drivers, 12v 30A PS, Acrylic case, Overkill Y-idlers, Filament alarm, Extruder fan + more.

6

Re: Removing the pressed in threaded rod (pics + guide)

This is a great tutorial, but for the life of me I cant find the thread talking about the actual M5 threaded rod upgrade.

I've been searching these forums with a bunch of different queries but no luck.

Can someone point me towards the instructions for upgrading to an M5 threaded rod. Thanks.

7

Re: Removing the pressed in threaded rod (pics + guide)

Gomisan wrote:

This is a great tutorial, but for the life of me I cant find the thread talking about the actual M5 threaded rod upgrade.

I've been searching these forums with a bunch of different queries but no luck.

Can someone point me towards the instructions for upgrading to an M5 threaded rod. Thanks.

http://www.soliforum.com/topic/2304/eli … tment-kit/

SD3 w/ mods:
Glass bed with QU-BD heat pad upgrade, threadless ballscrew w/ 8mm smooth rod, spectra line belt replacement, lawsy MK5 extruder, Lawsy replacement carriage, E3D hotend, Ramps 1.4 w/ reprap discount controller, DRV8825 drivers, 12v 30A PS, Acrylic case, Overkill Y-idlers, Filament alarm, Extruder fan + more.

8

Re: Removing the pressed in threaded rod (pics + guide)

Fantastic that is exactly the 'thread' I was looking for.

9

Re: Removing the pressed in threaded rod (pics + guide)

Gomisan, the best way I have found to search the forum is with google and the 'site' operator...

https://www.google.com/#bav=on.2,or.r_c … p;safe=off

10

Re: Removing the pressed in threaded rod (pics + guide)

I was upgrading to a M3 rod this evening on my SD3. I printed out everything I needed from 2n2r5's forum thread, and I disassemble the old rod.
I looked at this page for some pictures of how the rod was mounted on the motor(nice documented!)

When I was finished and I had put everything back together, the Z-stepper motor wouldn't turn so very strong, so I think I might have broken it. It just skipped steps, and I could hold against the motor with my fingers.
You win some, you lose some..

I had another stepper motor laying around, so I took and replaced the original SD-motor with this one. When everything was mounted back together, I fired up RH and was ready to do some testing and configuration with the EEPROM.

When I tried to lift the Z-axis, it went the other direction - downwards.
I  started to think how I was solve this problem. So I fired up the EEPROM, and I just put a minus sign before the numbers on the Z-direction. I saved the configuration, and I tried to lift the bed. Voila! The motor was going the right way! How easy!

My next mission was to home the Z-axis, so I could do some measurements. I clicked the Home Z button, and the bed started to rise. It was quite a bit down, so it would take some time to go all the way up. I started preparing the tools I needed for the measurements while the bed was going home.

Suddenly I hear all this cracking noise and skipping of motor steps, and even more cracking noises, then I see that the motor has reached beyond the Z-stop, and was still going, and now it was stopped by the nozzle that was in the middle of the bed...

I'm really glad I have a red button on the power outlet, so I could quickly kill the power.. Hopefully I didn't do to much damage to my dear SD3.

So, if anyone have an inverted/reversed stepper motor, you have to modify the invert_z_dir in the configuration.h and set it to true....


Thomas

11 (edited by Retroplayer 2014-11-16 02:23:09)

Re: Removing the pressed in threaded rod (pics + guide)

thsorensen wrote:

So, if anyone have an inverted/reversed stepper motor, you have to modify the invert_z_dir in the configuration.h and set it to true....


Thomas

This happens if you wire the stepper in the opposite order. Just swap your pins in the connector

12

Re: Removing the pressed in threaded rod (pics + guide)

Retroplayer wrote:
thsorensen wrote:

So, if anyone have an inverted/reversed stepper motor, you have to modify the invert_z_dir in the configuration.h and set it to true....


Thomas

This happens if you wire the stepper in the opposite order. Just swap your pins in the connector

+1

Printit Industries Model 8.10 fully enclosed CoreXY, Chamber heat
3-SD3's & a Workbench all fully enclosed, RH-Slic3r Win7pro, E3D V6, Volcano & Cyclops Hot End
SSR/500W AC Heated Glass Bed, Linear bearings on SS rods. Direct Drive Y-axis, BulldogXL
Thanks to all for your contributions

13

Re: Removing the pressed in threaded rod (pics + guide)

Retroplayer wrote:
thsorensen wrote:

So, if anyone have an inverted/reversed stepper motor, you have to modify the invert_z_dir in the configuration.h and set it to true....


Thomas

This happens if you wire the stepper in the opposite order. Just swap your pins in the connector

I had that in my mind, but the stepper motor was complete with the right connector and everything, so I was looking for a easy way out, so I wouldn't need to cut the wires and soldier them together.

14

Re: Removing the pressed in threaded rod (pics + guide)

Can't you just turn the connector around and plug it in?

SD2 - Stock - Enclosure - Heated Bed - Glass Plate - Auto Fire Extinguisher
Ord Bot Hadron - RAMPS 1.4 - Bulldog XL - E3D v6 - 10" x 10" PCB Heated Build w/SSR - Glass Plate
Thanks for All of Your Help!

15

Re: Removing the pressed in threaded rod (pics + guide)

IronMan wrote:

Can't you just turn the connector around and plug it in?

Then I would bend the pins on the relay board..
So I'm satisfied with editing the configuration file.

https://www.dropbox.com/s/vkjhg3o7s28bp6b/Photo%2016.11.14%2C%2016.10.22.jpg?dl=1

16

Re: Removing the pressed in threaded rod (pics + guide)

Got it...my plugs work in either direction...

SD2 - Stock - Enclosure - Heated Bed - Glass Plate - Auto Fire Extinguisher
Ord Bot Hadron - RAMPS 1.4 - Bulldog XL - E3D v6 - 10" x 10" PCB Heated Build w/SSR - Glass Plate
Thanks for All of Your Help!