1 (edited by nlancaster 2013-05-08 05:26:19)

Topic: Entirely new Printable Extruder and X-carriage Assembly.

This is still a work in progress.

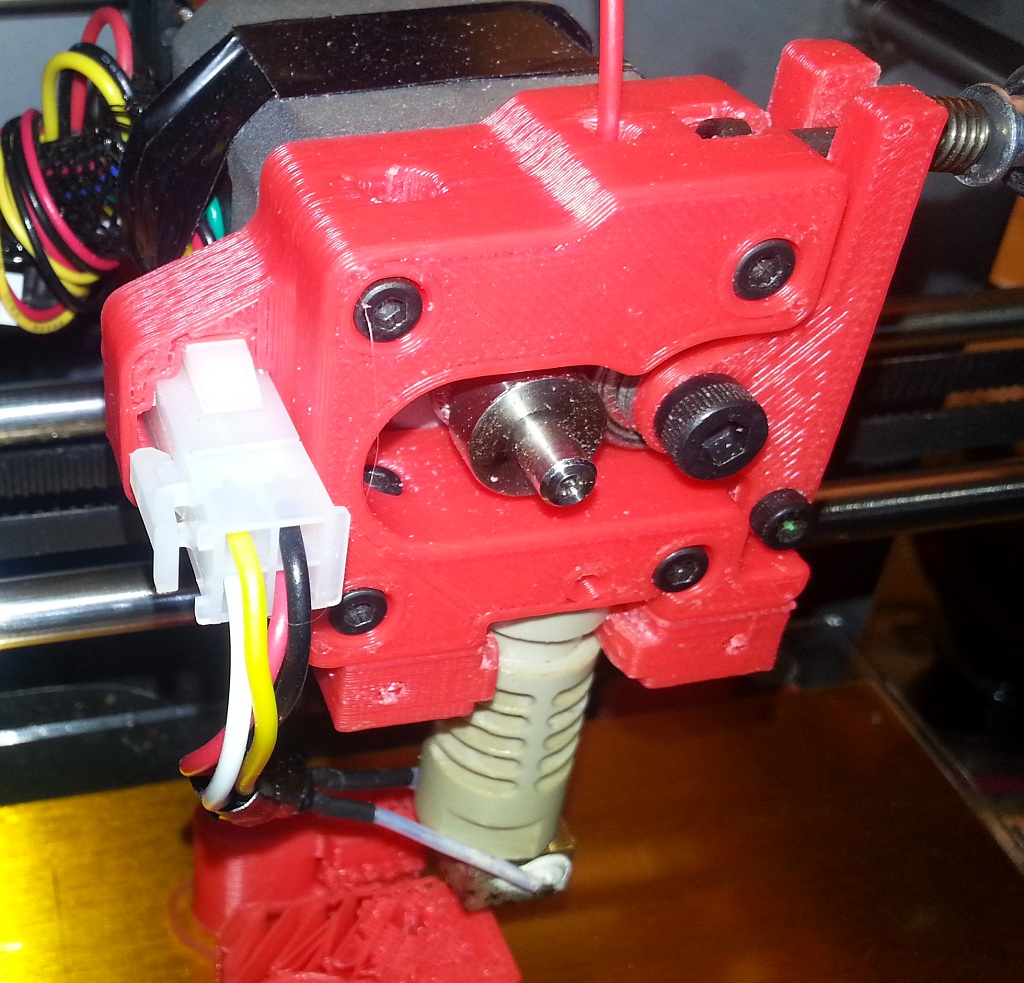
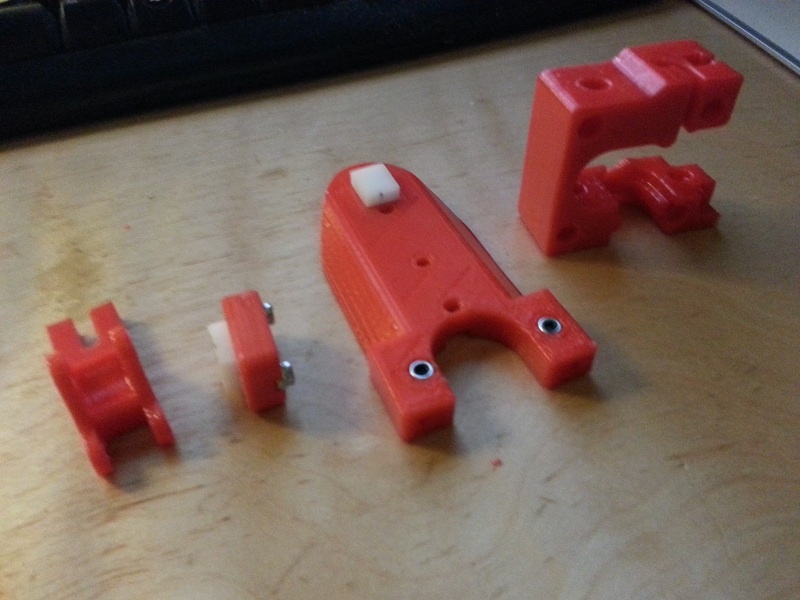
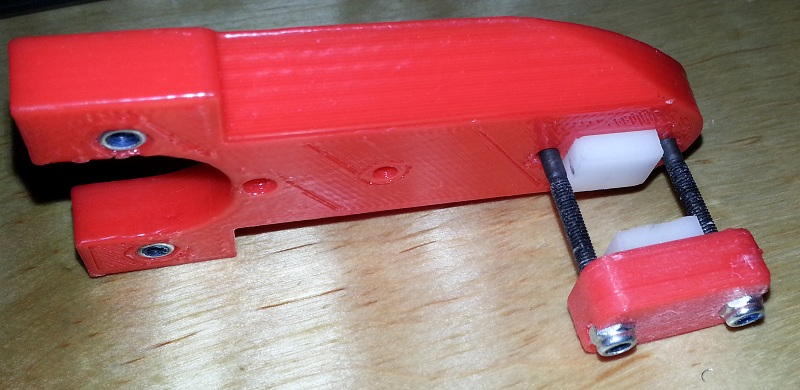
So I have been working on a new extruder and x-carriage assembly. I have thought that the previous version was just to cumbersome to assembly and disassemble.  So I redesigned the extruder using things learned from Lawsy's MK4 and a few things I thought up myself.  I never did like the skeletal look of Lawsy's designs they work great just not to my taste so my design is a bit more like the acrylic parts but 3d printed.  This also gains about 10mm of z-travel, but be sure your z-axis screw is long enough, especially if you have a z-axis anti-backlash nut system installed. I have about 1 thread showing above the nut at start of prints on this.

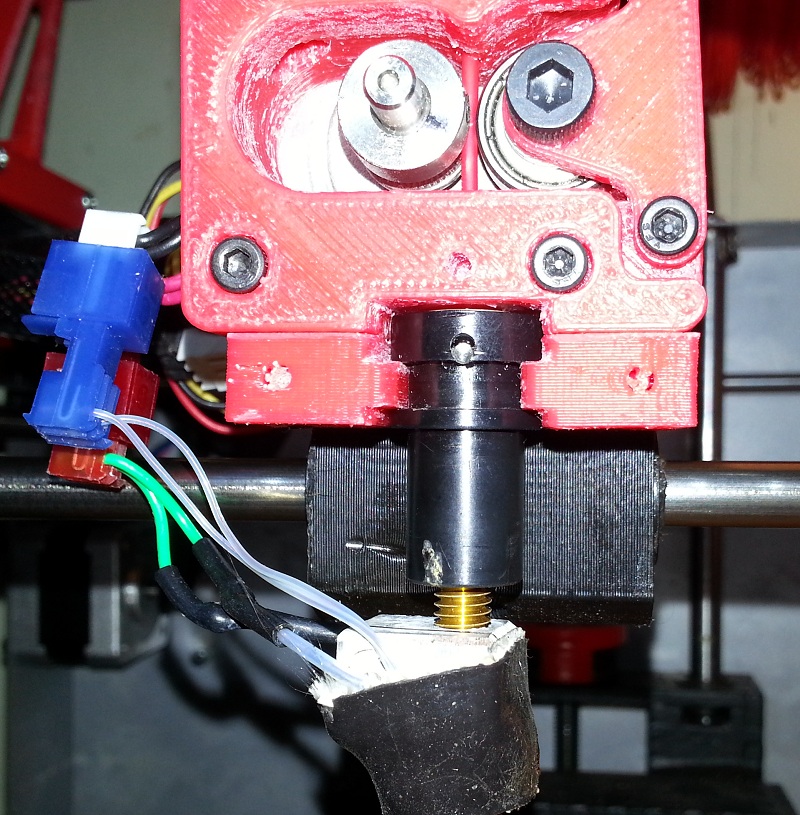
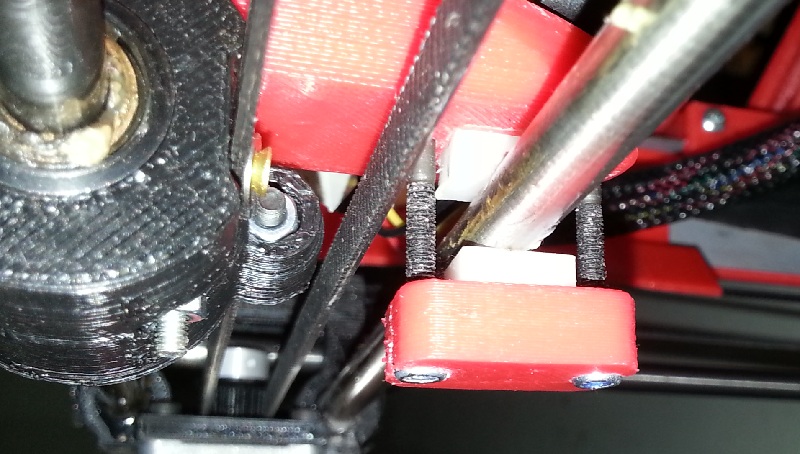
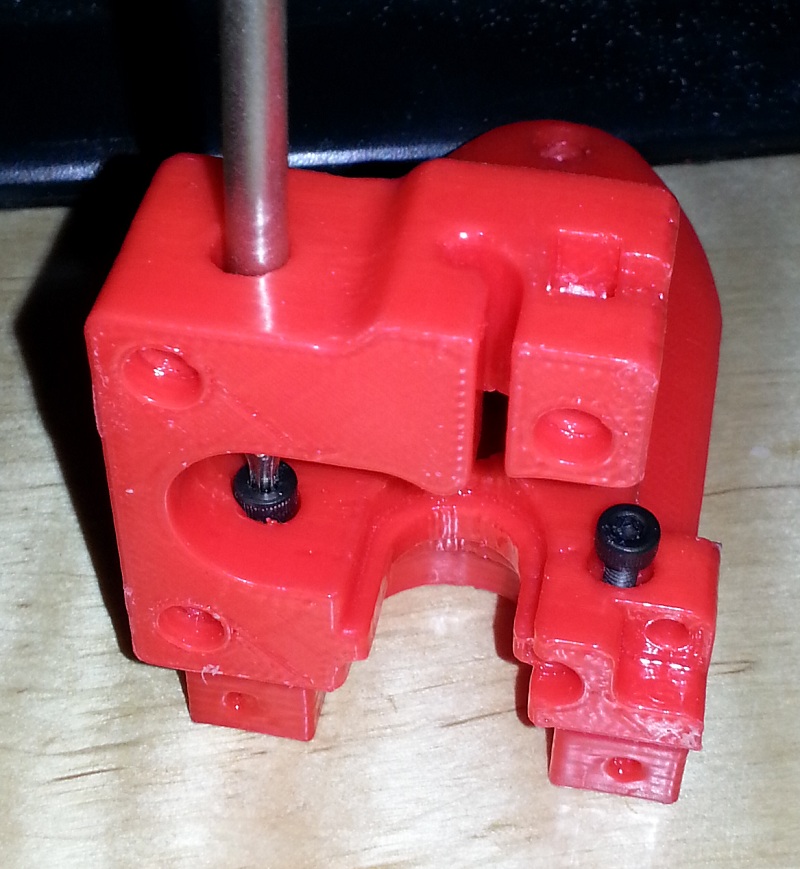
I have made a mistake though and need to correct it.  To make my extruder hot swappable I removed the wood and acrylic blocks, breaking them in the process they were super frigile for some reason.  And on my first print with the latest prototype of this design noticed the hotend was moving, on closer inspection the ABS was melting where it gripped the peek and where it the x-axis carriage wrapped around the peek.  So it would appear the wood acted as a heat shield for the extruder assembly, I will have to figure something out to replace it, and not get in the way of hot swapping the hot end.  One other thing to work on, is the clamping system for the back x-axis rod is not adjustable right now while the motor is installed.  But the way it is build should not need adjustment once properly set. And you can remove the entire extruder assembly and hotend in one piece by removing only 2 screws.

This new assembly does not use any new screws, and in fact only uses 12 of the origonal screws, we shall see how it works out in the long run. All of these parts have been given an acetone vapor bath to help strengthen and smooth the outer layers.

So stay tuned, I will post the STL files soon to thingiverse if you want to experiment with it.

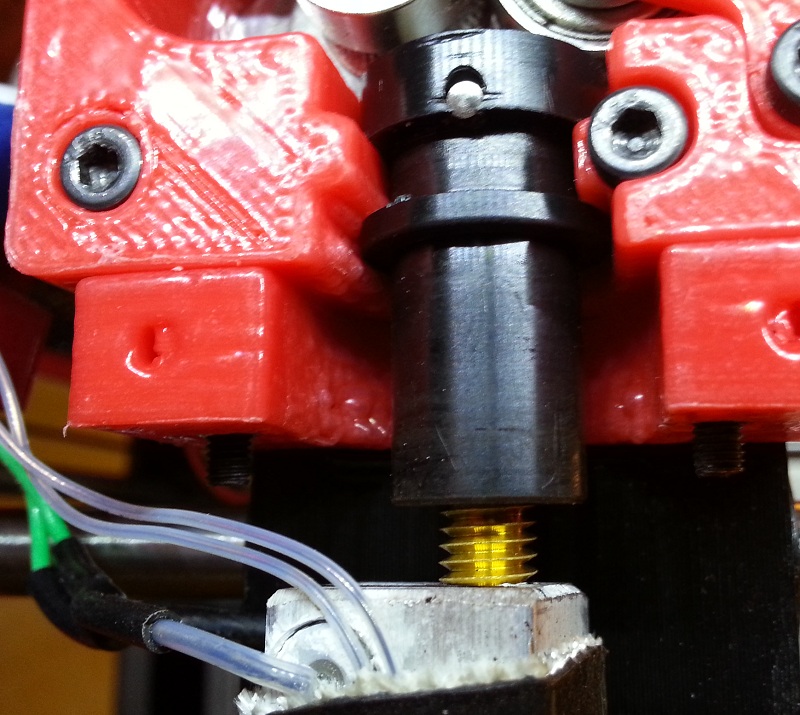
And now a few pictures, sorry for the quality my good camera is dead.

http://www.pdxmc.com/uploads/SD3/20130507_204134.jpg
http://www.pdxmc.com/uploads/SD3/20130507_204226.jpg
http://www.pdxmc.com/uploads/SD3/20130507_204324.jpg
http://www.pdxmc.com/uploads/SD3/20130507_221843.jpg

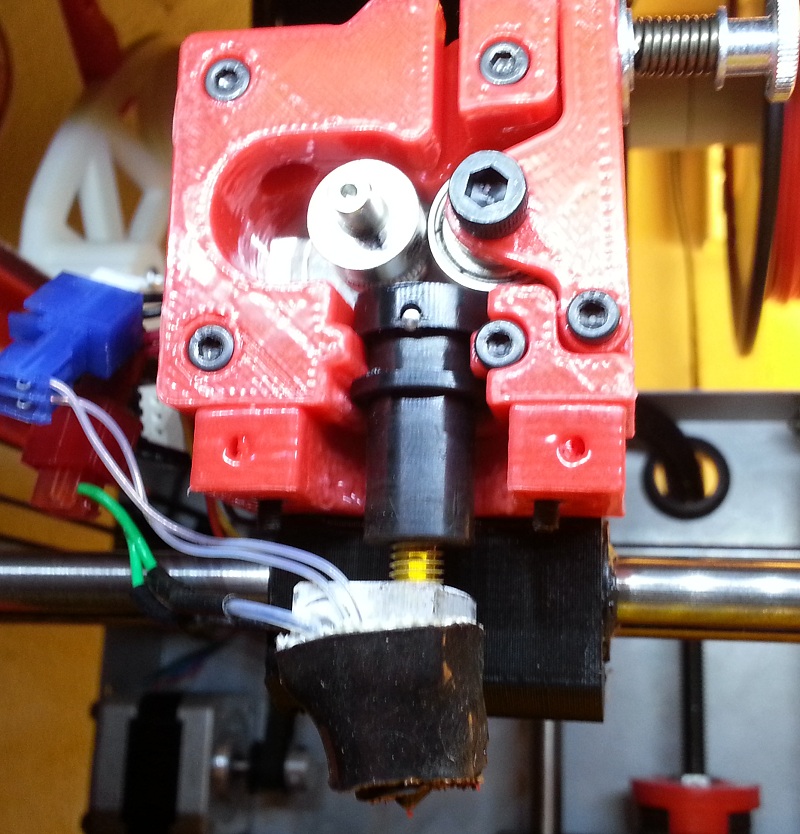
And here I tried to get a shot of the melting ABS... need to work on that.
http://www.pdxmc.com/uploads/SD3/20130507_221836.jpg

2

Re: Entirely new Printable Extruder and X-carriage Assembly.

Interesting design. Looking forward to seeing your new x carriage as I mount the extruder/stepper mount a limitation when doing the mk4.

3

Re: Entirely new Printable Extruder and X-carriage Assembly.

Thanks, I was looking at your mk4 video, and you hot end looks different with a bigger block on the end.  Maybe that is why your is not melting?

4

Re: Entirely new Printable Extruder and X-carriage Assembly.

nlancaster,

Very nice some ideas jumped out at me. Where the hot end is captured you could try

1: printing a threaded thru hole into the face of the body with portion of the rod/screw diameter into the sticking out that forms the knuckle (instead of the ABS) to grab the hot end. Real simple fix then the heat is in the rod not directly on the abs although it will transfer but should help.

2: Similar concept just cut out the knuckle portion in the model so you have a slot into the body (as tall as the hotend gap) and then cut a small notched material (wood,better heat resistant plastic) and slip in in the notch then the material will capture the hot end.

SD2 owner- Surestepr, filament holder,QUBD servo and heaters, glass bed
Print for fun and for parts for my sports cars
current car is 88 IROC

5 (edited by nlancaster 2013-05-09 16:48:22)

Re: Entirely new Printable Extruder and X-carriage Assembly.

So I replaced the melted Extruder mount with a previous non-acetone treated prototype and it does not apear to be melting. I think the acetone lowered the melt point of the ABS parts.

But I Have also thought of a different way togo, I will lose some of the z-axis I gained but eliminate that pocket that can trap hot air.  I will get something posted this weekend.

6

Re: Entirely new Printable Extruder and X-carriage Assembly.

http://www.soliforum.com/topic/2231/hot … rmal-pics/ Might help re getting an understanding of what part heats up where on the extruder on the stock carriage.

7

Re: Entirely new Printable Extruder and X-carriage Assembly.

I think I am narrowing in on a good setup.  This unfortunatly causes slightly less then stock z-axis movment. probably 1-2mm less tops.  But works, and seems to work well.  entire exturder assmebly held on with 2 top access bolts.  The main thing I wanted to accomplish was to replace the hard to keep adjusted pinch at the back of the x-axis carriage. Now the 2 long bolts go thru lock nuts and are easy to adjust form above.  Just remove the 2 screws holding the extruder motor, and adjust them. Should never have to adjust them once properly set.

http://pdxmc.com/uploads/SD3/20130512_175430.jpg
http://pdxmc.com/uploads/SD3/20130512_175717.jpg

8

Re: Entirely new Printable Extruder and X-carriage Assembly.

I've had some trouble with my j-head being a little loose in that kind of mount.  There could be a .25 gap due to slight differences in specs of the hot end or the way the print came out.   Something that might help is if the gap for the top lip of the hot end was a bit short.  Then the vertical screws would pull the extruder tight against the top of the hot end.  There would be a slight gap between the base and the extruder, since if they could meet there is a chance that the hot end isn't gripped hard enough

9 (edited by nlancaster 2013-05-13 04:11:25)

Re: Entirely new Printable Extruder and X-carriage Assembly.

Ian, it is actually printed that way.  I made the gap between the extruder and hot end a pefect fit. And just the tiny over extrusion I have apparently cuased it to be so tight it would not slide in. I filed to make it bigger, but I could leave the part as designed.and it will clamp the hotend in place.

I ordered a Jhead and I will let you know how it fits.

10

Re: Entirely new Printable Extruder and X-carriage Assembly.

Can I get a copy of the design or STL files for this? I am trying to get a hotend mount for my bowden setup. I figured it would be nice if we were all working from the same X-carriage design.

SD3 w/ mods:
Glass bed with QU-BD heat pad upgrade, threadless ballscrew w/ 8mm smooth rod, spectra line belt replacement, lawsy MK5 extruder, Lawsy replacement carriage, E3D hotend, Ramps 1.4 w/ reprap discount controller, DRV8825 drivers, 12v 30A PS, Acrylic case, Overkill Y-idlers, Filament alarm, Extruder fan + more.

11

Re: Entirely new Printable Extruder and X-carriage Assembly.

2n2r5, I am making a couple of changes after using this design for 2 weeks.  I will get it posted to thingiverse before next weekend.

12

Re: Entirely new Printable Extruder and X-carriage Assembly.

Sorry, I didn't update this weekend. Was not feeling well and didn't get much time to work on anything this weekend.  I will get something up in the next day or two.

Nick

13

Re: Entirely new Printable Extruder and X-carriage Assembly.

No need to be sorry. It's your design. I am just going to borrow and adapt it for my purposes. Sorry to hear about you not feeling well. Can't wait to see the finished design.

SD3 w/ mods:
Glass bed with QU-BD heat pad upgrade, threadless ballscrew w/ 8mm smooth rod, spectra line belt replacement, lawsy MK5 extruder, Lawsy replacement carriage, E3D hotend, Ramps 1.4 w/ reprap discount controller, DRV8825 drivers, 12v 30A PS, Acrylic case, Overkill Y-idlers, Filament alarm, Extruder fan + more.

14 (edited by nlancaster 2013-06-05 06:39:08)

Re: Entirely new Printable Extruder and X-carriage Assembly.

So here is a preview of the new model, need to update one more part.  I upgraded to a j-head and it is so much better, faster heat up. faster color switching with less waste of filament to flush the old color.  That is a 4pin ATX extender used to make the connection, I will have versions of this for download with and without the 4pin connector housing.

http://pdxmc.com/uploads/SD3/20130604_233341.jpg

15

Re: Entirely new Printable Extruder and X-carriage Assembly.

Looks really nice. Just got my J-Head in the mail, so looking forward to try it with your extruder carriage smile

16

Re: Entirely new Printable Extruder and X-carriage Assembly.

That 4-pin ATX connector looks amazing.  Such a huge improvement over the crappy stock connectors.

17 (edited by adrian 2013-06-09 01:43:51)

Re: Entirely new Printable Extruder and X-carriage Assembly.

op7ical wrote:

That 4-pin ATX connector looks amazing.  Such a huge improvement over the crappy stock connectors.

Well, not really actually.

Molex connectors are only rated to 105°C ... well below what the temp gets to in that area.. If you look back at the thermal images I supplied, it gets closer to 150 in only a few minutes.

The 'crappy stock connectors' are correctly rated connectors from a very reputable brand. The only reason there is a perception they are 'crappy' is because like most specialty connectors, they aren't available from your corner store an you need to special order them.

The ATX style connector will also require more cable slack to insert/remove than the 'crappy stock connector'.

They may look, to your eye, more attractive, but they are certainly not better functionally.

Context, its an important thing! smile

18

Re: Entirely new Printable Extruder and X-carriage Assembly.

That connector on my printer is not even warm to the touch, and that is after printing for 6 hours straight, on a warm day.

I am not sure how your connector got so hot, But 150c is crazy hot.  I do remember seeing your thermal images and don't recall looking at the connectors.  I will keep an eye on it.

19 (edited by adrian 2013-06-09 03:04:24)

Re: Entirely new Printable Extruder and X-carriage Assembly.

http://www.soliforum.com/topic/2231/hot … rmal-pics/

The wires do, and the connections not far off

Anyway was not saying it's bad, just not better

20

Re: Entirely new Printable Extruder and X-carriage Assembly.

It certainly does look cleaner and neater smile but when I am designing systems I like to keep high current circuits separate from logic level circuits by using multiple plugs that way if/when you have a meltdown it shouldn't affect other systems.

21 (edited by nlancaster 2013-06-09 17:41:18)

Re: Entirely new Printable Extruder and X-carriage Assembly.

Well I did feal the wires during a 5 hour print this evening, and they are "warm" to the touch so yes the connector may be getting hot.  But on inspection no visible warping or melting in the connector housing.

Also the main reason I think those connectors that come stock on the SD3 while they may be rated for 150c they sure dont seem to be working well against the vibration. I had to use a punchdown tool to reset my thermister wires about once a month since I got it. I wonder if any melt downs of hotends could be traced to the connector wires falling out?

22

Re: Entirely new Printable Extruder and X-carriage Assembly.

I'm with you on using IDC connections for heavy movement/vibration areas... wouldn't be my first choice but it is quicker to build on large scale and that is probably one of the deciding factors here... once you get a loose connection I'm sure the ratings are diminished.

23

Re: Entirely new Printable Extruder and X-carriage Assembly.

As promised I have posted my new parts to thingiverse, sorry it took so long.

http://www.thingiverse.com/thing:101875

This is for advanced users only, I will not be providing detailed instructions on assembly at this point, as it is Version 1.0 and requires wider testing then just me. I built this for my Solidoodle 3, and I am fairly sure it will works on a Solidoodle 2 but need confirmation.

This is a printable replacement for the Solidoodle x-axis carriage and extruder assembly. This uses few pieces and offers more precise and permanent adjustment of the rear pinch blocks for the x-axis carriage. With this carriage assembly I am reliably printing at 100mm/s and fast moves are going at 120mm/s I have not tested higher speeds yet. I am looking forward to any constructive critasism that may be given too me.

I have also included a dimensioned drawing of the carriage extruder area, I know the numbers are a little odd, but there are some tight spaces in the extruder assembly.

Instructions

Print a very strong part. there are some bending forces involved in this kind of print.

Use caution on the pinch screws, the holes thru the carriage are a very tight fit on purpose to keep the lower carriage block from chattering at high speeds.

There are 2 versions of the Extruder Base one with a ATX 4-pin panel mount holder if you change your extruder connection wires. One with out the Wire holder.

It is imperative that the carriage itself end up very flat. In a few of my tests I used a warped part on purpose and got some interesting ridge patterns going on.

24

Re: Entirely new Printable Extruder and X-carriage Assembly.

Nice work mate! smile

25 (edited by 2n2r5 2013-06-11 08:40:11)

Re: Entirely new Printable Extruder and X-carriage Assembly.

Thanks for the parts! Fantastic Job!

SD3 w/ mods:
Glass bed with QU-BD heat pad upgrade, threadless ballscrew w/ 8mm smooth rod, spectra line belt replacement, lawsy MK5 extruder, Lawsy replacement carriage, E3D hotend, Ramps 1.4 w/ reprap discount controller, DRV8825 drivers, 12v 30A PS, Acrylic case, Overkill Y-idlers, Filament alarm, Extruder fan + more.