1

Topic: ATLAS 3D Scanner Instructions

You can download the instructions from these links.

Kit Enclosure Instructions - https://s3.amazonaws.com/atlas3d/Instru … losure.pdf
Printed Enclosure Instructions - https://s3.amazonaws.com/atlas3d/Instru … losure.pdf

And view a video tutorial for the Kit Enclosure here:

https://youtu.be/TEsBM5ACriQ

2

Re: ATLAS 3D Scanner Instructions

Is there a set of instructions with pictures for the kit enclosure?  All the screws came in one bag and some of the descriptions assume you know what it looks like put together i.e.

Step 3: be sure that the small LED indicator circle is at the bottom left hand side when facing the camera from the motor.

I'm trying to take pics as I go along so that I can post a guide, but I was wondering if there were pics?  I do poorly with written instructions.  I can glance at a map and get someplace, but if people give me more than three steps, I have to turn the directions into a map in my head.

3 (edited by n2ri 2016-01-11 15:04:38)

Re: ATLAS 3D Scanner Instructions

I been asking for clarification also on this thread http://www.soliforum.com/topic/10469/printing-atlas-3d/ as the hardware is mostly not marked by letter as instructions (in video also) say. and the extra prints for the old PI which I am using dont explain how or where to install them or if the new parts are to be used with them some how. where to find serial number for regisering and future free software updates, etc. was told serial number is on sticker on motor (which would not be seen once assembled).

Solidoodle 2 with Deluxe kit cover & glass bed with heater. and 2nd board SD2 used not 3rd and alum platform not installed yet still wood. also need cooling fan installed to board. use Repetier Host couple vers. Slic3r also have all free ware STL programs

4

Re: ATLAS 3D Scanner Instructions

n2ri,

The serial number is on the bottom of the motor and should still be readable even with an assembled scanner (printed and acrylic versions).  The case for the Pi B is a direct replacement for the B+/2 and attaches in roughly the same way.  I just put one together to show you how.  Please see the image below.  Are you sure that you have the B and not the B+?  The case for the B was made mostly to fulfill a Kickstarter pledge.  ATLAS 3D does not have official support for the Pi B, just the B+ and Pi 2 as listed on the product page for the store.  If you have a Pi B then you will need to supply your own 26-pin ribbon cable.  PM me if this is a problem.

http://soliforum.com/i/?CInF7B9.png

- Uriah

5 (edited by n2ri 2016-01-12 05:53:00)

Re: ATLAS 3D Scanner Instructions

ok my motor has 2 stickers both on center side of motor, one is manufacturer model tag, the other is a white label maker sticker with just a string of numbers and letters

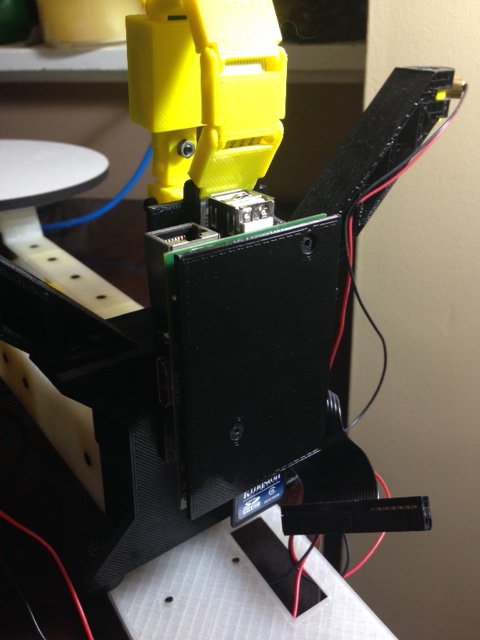
also the Right camera tower part? whats it for its like half the tower.

and the hardware did not come sorted into lettered bags and the video dont say anything about whats in the H bag in its picture of bags. I found 8 different types of hardware some only have 4 each and different sizes screws. nuts and washers. no drawing or means to ID which is for what. not even a list of how many of each should be included.

my pi is same as the number 2 (maybe a B+ its just 1st version with less RAM) but has a full sized SD slot instead of micro SD so hole in case will need to be bigger. on board it says Rapberry Pi (c) 2011.12 has some other ports and the only 2 standard USB are stacked in center on one end not at side like in video.

the video skips the part on attaching the 1st part of frame into the Camera tower then next scene shows it already being installed and sliding the frame over it

one of the instruction PDF (maybe for acrylic case) shows using a long nylon screw to attach camera not included so not sure why its shown.

Solidoodle 2 with Deluxe kit cover & glass bed with heater. and 2nd board SD2 used not 3rd and alum platform not installed yet still wood. also need cooling fan installed to board. use Repetier Host couple vers. Slic3r also have all free ware STL programs

6

Re: ATLAS 3D Scanner Instructions

For the acrylic case's set of fasteners:

"Bag A" as referenced in the instructions is 12x M4x16mm nuts and screws.
"Bag B" is 23x M3x14mm screws
"Bag C" is 4x M2 nylon screws, spacers, nuts, springs
"Bag D" is 6x M3x25mm screws
"Bag E" is 33x M3 nuts
"Bag F" is 4x M3x18 screws, wood screws, 1x M2.5x10mm screw and nut
"Bag G" is 4x M3x10mm button screws
"Bag H" is 3x M2.5 18mm screws and nuts, 6x M2.5 nylon spacers

From now on, all fasteners will be grouped into lettered bags. I've looked at so many fasteners that I can identify them on sight, but I realize that isn't the case for everyone so moving forward, individual bagging it is.

The nylon screw is for the acrylic case.

7

Re: ATLAS 3D Scanner Instructions

elmoret wrote:

For the printable case's set of fasteners:

"Bag A" as referenced in the instructions is 12x M4x16mm nuts and screws.
"Bag B" is 23x M3x14mm screws
"Bag C" is 4x M2 nylon screws, spacers, nuts, springs
"Bag D" is 6x M3x25mm screws
"Bag E" is 33x M3 nuts
"Bag F" is 4x M3x18 screws, wood screws, 1x M2.5x10mm screw and nut
"Bag G" is 4x M3x10mm button screws
"Bag H" is 3x M2.5 18mm screws and nuts, 6x M2.5 nylon spacers

From now on, all fasteners will be grouped into lettered bags. I've looked at so many fasteners that I can identify them on sight, but I realize that isn't the case for everyone so moving forward, individual bagging it is.

The nylon screw is for the acrylic case.

bag C is washers
I have no woodscrews nor button screws. got 4xM2.5 10mm flat allen screws with nuts and washers which look like whats used to attach turn table but not what size nuts it says to use.

then I have 4 M3x20mm flathead screws.

the assembly video says to use 'A' flat screws and B nuts and C washers for frame parts.
then most other parts it says use D caps screws and B nuts and C washers. then E screw and F nut to mount Pi, then G screws for turn table but 1st says tape B nuts in coupler for those to screw into. those must be M3 nuts as the other screws that use them are. plus the quantity of screws you list are not enough for frame and other parts and I have more than 12 of those. that list dont match assembly of printed inclosure. also the camera tower has 4 screw holes built in like to use self tapping screws in to attach Pi case, but instructions never use those.

Solidoodle 2 with Deluxe kit cover & glass bed with heater. and 2nd board SD2 used not 3rd and alum platform not installed yet still wood. also need cooling fan installed to board. use Repetier Host couple vers. Slic3r also have all free ware STL programs

8

Re: ATLAS 3D Scanner Instructions

Sorry - the above is for the acrylic case, not the printable case. I'll get the printable case breakdown tomorrow.

9 (edited by n2ri 2016-01-12 06:41:10)

Re: ATLAS 3D Scanner Instructions

hairu526 wrote:

n2ri,

The serial number is on the bottom of the motor and should still be readable even with an assembled scanner (printed and acrylic versions).  The case for the Pi B is a direct replacement for the B+/2 and attaches in roughly the same way.  I just put one together to show you how.  Please see the image below.  Are you sure that you have the B and not the B+?  The case for the B was made mostly to fulfill a Kickstarter pledge.  ATLAS 3D does not have official support for the Pi B, just the B+ and Pi 2 as listed on the product page for the store.  If you have a Pi B then you will need to supply your own 26-pin ribbon cable.  PM me if this is a problem.

http://soliforum.com/i/?CInF7B9.png

- Uriah

the Pi in pic does look like mine and it has a 26 pin socket and 2 small ribon type 1 next to ethernet jack and another near SD card. so this Pi wont work? I also have a clear plastic case for it but no holes for ribons to run through

Solidoodle 2 with Deluxe kit cover & glass bed with heater. and 2nd board SD2 used not 3rd and alum platform not installed yet still wood. also need cooling fan installed to board. use Repetier Host couple vers. Slic3r also have all free ware STL programs

10

Re: ATLAS 3D Scanner Instructions

Regarding the acrylic instructions, they suck.  You have way to many degrees of freedom, you don't have a packing list of screws and bolts so that we can confirm that everything is there, the bag breakdown wasn't done on my kit, the directions were written from the perspective of some one that knows what it looks like and how things are connected when it is completed.

Five or six pictures would really helped.  I've never seen engineers rely on verbal communication to such an extent for an assembly.  It's like the IRS marketed a scanner.

Fail.

11 (edited by n2ri 2016-01-12 07:00:05)

Re: ATLAS 3D Scanner Instructions

so does the Pi B+/Pi2 have a line of tiny color LEDs like my Pi B? the 40pin to 26pin ribon just dont use the rest of the 40pins its like a 26pin ribbon with spacer. I prefer seeing all LEDs and Black ABS wont allow that on Pi or camera also will LED light glare on scanned object since they face it?

Solidoodle 2 with Deluxe kit cover & glass bed with heater. and 2nd board SD2 used not 3rd and alum platform not installed yet still wood. also need cooling fan installed to board. use Repetier Host couple vers. Slic3r also have all free ware STL programs

12

Re: ATLAS 3D Scanner Instructions

so when are these questions going to be answered correctly?

Solidoodle 2 with Deluxe kit cover & glass bed with heater. and 2nd board SD2 used not 3rd and alum platform not installed yet still wood. also need cooling fan installed to board. use Repetier Host couple vers. Slic3r also have all free ware STL programs

13

Re: ATLAS 3D Scanner Instructions

For the printed case's set of fasteners:

"Bag A" as referenced in the instructions is 43x M3x10mm screws.
"Bag B" is 73x M3 hex nuts
"Bag C" is 34 M3 washers
"Bag D" is 31 M3 socket cap screws
"Bag E" is 4x M2.5x10 screws
"Bag F" is 4x M2.5 jam nuts
"Bag G" is 4x M3x20mm screws
"Bag H" is 4x M2.5 washers

14

Re: ATLAS 3D Scanner Instructions

hairu526 wrote:

n2ri,

The serial number is on the bottom of the motor and should still be readable even with an assembled scanner (printed and acrylic versions).  The case for the Pi B is a direct replacement for the B+/2 and attaches in roughly the same way.  I just put one together to show you how.  Please see the image below.  Are you sure that you have the B and not the B+?  The case for the B was made mostly to fulfill a Kickstarter pledge.  ATLAS 3D does not have official support for the Pi B, just the B+ and Pi 2 as listed on the product page for the store.  If you have a Pi B then you will need to supply your own 26-pin ribbon cable.  PM me if this is a problem.

http://soliforum.com/i/?CInF7B9.png

- Uriah


I tried messaging you  when I 1st got my scanner on your web site contact form, NO reply. I also posted on a couple topics here, then after you posted this (1st reply) I sent you a forum email, then next day a PM as you stated here, still NO reply. I have seen others having similar problems contacting you about issues with the scanner. I guess I dont understand why its so hard to get replies from you on your 'successful' startup project that has been fulfilled completely for months now. this is not pre-order query's but actual customer support for those that paid for and received a 'kit' which by your own words has been done hundreds of times with no issues. this is why I ordered mine through Filastuder as Tim has been a long time proven 3D printer product maker and distributor on this forum and always has our backs in true business man fashion. thats how committed successful businesses live long and prosper in a country with free enterprise. now on the contrary if you ignore, miss inform, delay replies etc to the customer population, then said business withers away in short time and is forgotten. so how you treat your customers (or prospective customers) is how your business ends up.

I dont intend to let this topic fall from the active list until the issues are resolved, so dont bank on it fading away. problems dont go away on their own if ignored in life.

we all have had great admiration of your efforts in this project and supported you. now we would like the same support in return as consumers of your designed product so we dont have to hide it in a closet so family and friends dont see it and ask whats the deal with this? and rub it in our face how we got duped into buying a pipe dream. dont let your project become an embarrassment when its got much better potential than its much costlier competitors.

Solidoodle 2 with Deluxe kit cover & glass bed with heater. and 2nd board SD2 used not 3rd and alum platform not installed yet still wood. also need cooling fan installed to board. use Repetier Host couple vers. Slic3r also have all free ware STL programs

15

Re: ATLAS 3D Scanner Instructions

n2ri,

I received your contact form post and replied to you via the forum, since that is what you referenced in the contact form post.
http://www.soliforum.com/post/113899/#p113899

The RPi B is electronically the same as the B+ but physically different (dimensions), so it still "works" with ATLAS 3D.  The B+ and the Pi 2 are electronically different but physically the same (dimensions).  The reason the B is not officially supported is because  it requires a different ribbon cable and a different design for the acrylic enclosure.  Since the B+ has replaced the B, the time spent supporting the B is better spent on improving the product in other ways.  A printable case was made for the RPi B with mounting holes (earlier versions of B didn't have them) since the Kickstarter BYOP included the 26-pin cable.  Let me know if you want to use the B and I will send you a 26-pin cable.  First, post a picture of your Pi so that I can be assured of what version you have.

Regards,
Uriah

16

Re: ATLAS 3D Scanner Instructions

hairu526 wrote:

n2ri,

I received your contact form post and replied to you via the forum, since that is what you referenced in the contact form post.
http://www.soliforum.com/post/113899/#p113899

The RPi B is electronically the same as the B+ but physically different (dimensions), so it still "works" with ATLAS 3D.  The B+ and the Pi 2 are electronically different but physically the same (dimensions).  The reason the B is not officially supported is because  it requires a different ribbon cable and a different design for the acrylic enclosure.  Since the B+ has replaced the B, the time spent supporting the B is better spent on improving the product in other ways.  A printable case was made for the RPi B with mounting holes (earlier versions of B didn't have them) since the Kickstarter BYOP included the 26-pin cable.  Let me know if you want to use the B and I will send you a 26-pin cable.  First, post a picture of your Pi so that I can be assured of what version you have.

Regards,
Uriah

yes my Pi B has the 2 mounting holes and is supposed to be the newrer version by what I found on the RPI forums telling the differences in versions. so can I still use it on my scanner? and will software still work and update? as for inclosures most of the scanner is open anyway so that dont matter as its all low voltage and no contacts cant be touched/shorted unless bugs got in like any other electronic items.

I am also noticing as I print parts. the parts that slide into other parts and lids that do are about 1mm too wide to do so. is it normal to have to sand/file them all that much to assemble? my parts are printing very clean so they are not over extruding causing this.

Solidoodle 2 with Deluxe kit cover & glass bed with heater. and 2nd board SD2 used not 3rd and alum platform not installed yet still wood. also need cooling fan installed to board. use Repetier Host couple vers. Slic3r also have all free ware STL programs

17

Re: ATLAS 3D Scanner Instructions

What is the settings for your first layer it sounds like you have it to low and creating a flange
On the first layer
As for the software I downloaded and put it on a full size sd on an old rpi and it worked but I'm not sure about the mountings

D4S + S3d 18 months and still learning
Filastruder

18

Re: ATLAS 3D Scanner Instructions

no flange.

Solidoodle 2 with Deluxe kit cover & glass bed with heater. and 2nd board SD2 used not 3rd and alum platform not installed yet still wood. also need cooling fan installed to board. use Repetier Host couple vers. Slic3r also have all free ware STL programs

19

Re: ATLAS 3D Scanner Instructions

n2ri wrote:

I am also noticing as I print parts. the parts that slide into other parts and lids that do are about 1mm too wide to do so. is it normal to have to sand/file them all that much to assemble? my parts are printing very clean so they are not over extruding causing this.

Sounds more like you need to do some calibrating. When I assembled my Atlas, I didn't have to sand/file a thing. Some parts were very snug, but fit fine with gentle force.

Print a couple calibration parts and compare dimensions. I saw you *may* have some corrupt files, so download some new calibration parts to start with a clean slate.

Printit Mason and Printit Horizon printers
Multiple SD2s- Bulldog XL, E3D v5/v6/Lite6, Volcano, Hobb Goblin, Titan, .9 motor, Lawsy carriages, direct Y drive, fishing line...the list goes on
Filawinder and Filastruder #1870.....worth every penny!

20

Re: ATLAS 3D Scanner Instructions

n2ri,

Your Pi B will work (including auto-update) but you need a 26-pin ribbon cable.  Let me know if you don't have one and we will send one to you.  Also, you shouldn't have to sand/file any of the parts.  I suggest checking the calibration of your 3D printer.

- Uriah

21 (edited by n2ri 2016-01-15 06:45:19)

Re: ATLAS 3D Scanner Instructions

AZERATE wrote:
n2ri wrote:

I am also noticing as I print parts. the parts that slide into other parts and lids that do are about 1mm too wide to do so. is it normal to have to sand/file them all that much to assemble? my parts are printing very clean so they are not over extruding causing this.

Sounds more like you need to do some calibrating. When I assembled my Atlas, I didn't have to sand/file a thing. Some parts were very snug, but fit fine with gentle force.

Print a couple calibration parts and compare dimensions. I saw you *may* have some corrupt files, so download some new calibration parts to start with a clean slate.


thanks, thats what I was wondering since I am trying to use my very poorly manufactured quality ABS roll of Octave filament and done as much calibration possible but instead of it being true 1.75mm dia it varies from 1.79mm-2.01mm with some worse spots I have had to back out, cut off and reload mid print about a half inch deep into spool on like 4th print while adjusting calibration best I could. I have to babysit the thing full print time and help it feed at times to finish prints. they are turning out nice all things considered just need cleanup finishing b4 assembly and maybe a few patch/glued spots also but I also intend to paint over the Black ABS with flat black also to stop any reflections from effecting scans and hide patching. once I use what I can of that wasted $35 roll I will print the remaining parts with a dif black roll which can be better calibrated but hoping to do all main outer frame parts with the current roll so outside finish is even.

I re-calibrated several times while slicing files and reprinting test parts and reslicing til parts looked good enough to use.

Solidoodle 2 with Deluxe kit cover & glass bed with heater. and 2nd board SD2 used not 3rd and alum platform not installed yet still wood. also need cooling fan installed to board. use Repetier Host couple vers. Slic3r also have all free ware STL programs

22

Re: ATLAS 3D Scanner Instructions

hairu526 wrote:

n2ri,

Your Pi B will work (including auto-update) but you need a 26-pin ribbon cable.  Let me know if you don't have one and we will send one to you.  Also, you shouldn't have to sand/file any of the parts.  I suggest checking the calibration of your 3D printer.

- Uriah

thanks, I replied to Azerates similar post on printing issue I am having. just wanted to know if it was normal or still my bad roll of Octave. least I know when its gone I can do better with other roll.

yes I PMd you about the ribbon cable. thanks for helping me with this.

Solidoodle 2 with Deluxe kit cover & glass bed with heater. and 2nd board SD2 used not 3rd and alum platform not installed yet still wood. also need cooling fan installed to board. use Repetier Host couple vers. Slic3r also have all free ware STL programs

23

Re: ATLAS 3D Scanner Instructions

could not stand another second of that crappy Octave roll. swapped in some Inland stuff from Microcenter. anybody want to grind up some octave and re-extrude it correctly?

Solidoodle 2 with Deluxe kit cover & glass bed with heater. and 2nd board SD2 used not 3rd and alum platform not installed yet still wood. also need cooling fan installed to board. use Repetier Host couple vers. Slic3r also have all free ware STL programs

24

Re: ATLAS 3D Scanner Instructions

Nearly done the assembly of the acrylic case.  No directions in the package.  Found them online and the youtube video.  Would have been nice to have the bags sorted for all the screws. 

Having challenges getting the turntable level.  The 2.5 mm screw is tedious to lock the table down.  Any suggestions?

25 (edited by n2ri 2016-01-17 08:26:21)

Re: ATLAS 3D Scanner Instructions

hairu526 wrote:

n2ri,

The serial number is on the bottom of the motor and should still be readable even with an assembled scanner (printed and acrylic versions).  The case for the Pi B is a direct replacement for the B+/2 and attaches in roughly the same way.  I just put one together to show you how.  Please see the image below.  Are you sure that you have the B and not the B+?  The case for the B was made mostly to fulfill a Kickstarter pledge.  ATLAS 3D does not have official support for the Pi B, just the B+ and Pi 2 as listed on the product page for the store.  If you have a Pi B then you will need to supply your own 26-pin ribbon cable.  PM me if this is a problem.

http://soliforum.com/i/?CInF7B9.png

- Uriah

what does this statement mean? ATLAS 3D does not have official support for the Pi B
also which ribbon socket does camera connect to on it? there are 2

Solidoodle 2 with Deluxe kit cover & glass bed with heater. and 2nd board SD2 used not 3rd and alum platform not installed yet still wood. also need cooling fan installed to board. use Repetier Host couple vers. Slic3r also have all free ware STL programs