FreeLSS 1.14 is available via the ATLAS 3D auto-update system. This releases adds camera exposure control while also introducing a new and easy way to configure the network connection and connect to the scanner via a USB flash drive.
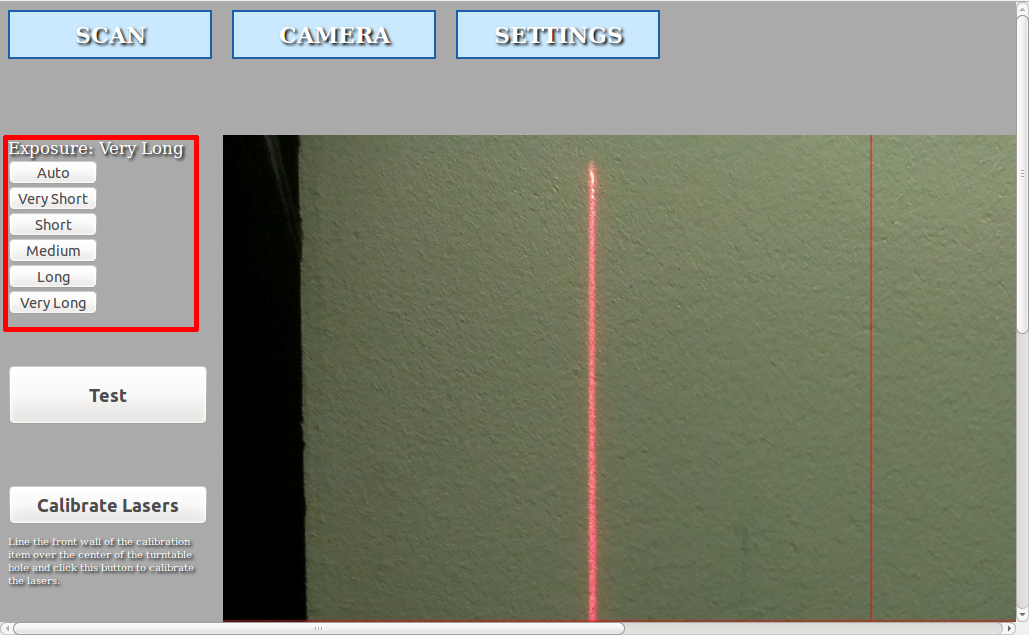
Camera Exposure Time
The exposure time for the camera can now be set as part of a Preset. Previously ATLAS 3D would rely upon the auto-exposure settings of the Raspberry Pi firmware which would sometimes result in over saturation of the laser line (especially in low light situations). The exposure can now be explicitly set. Furthermore, it can be changed dynamically from the CAMERA page.
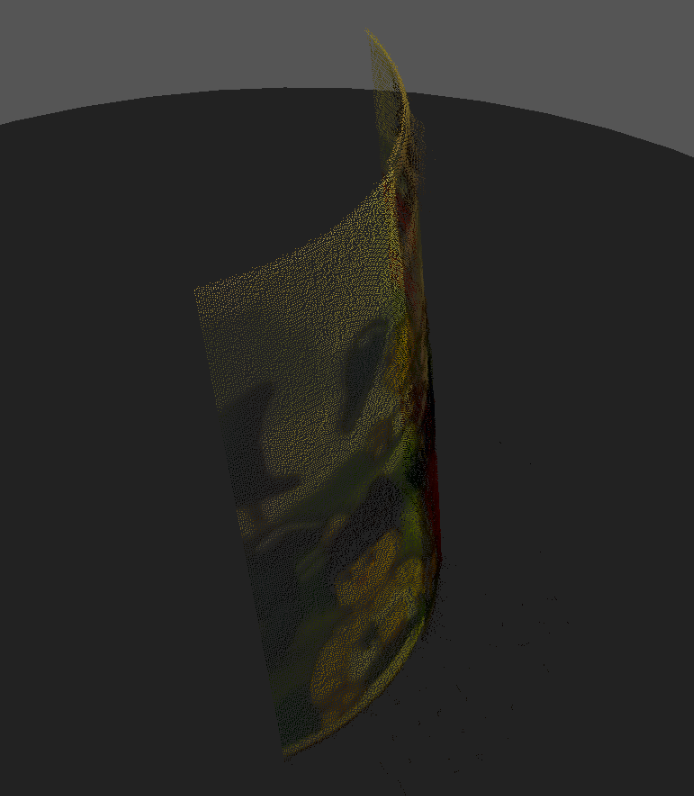
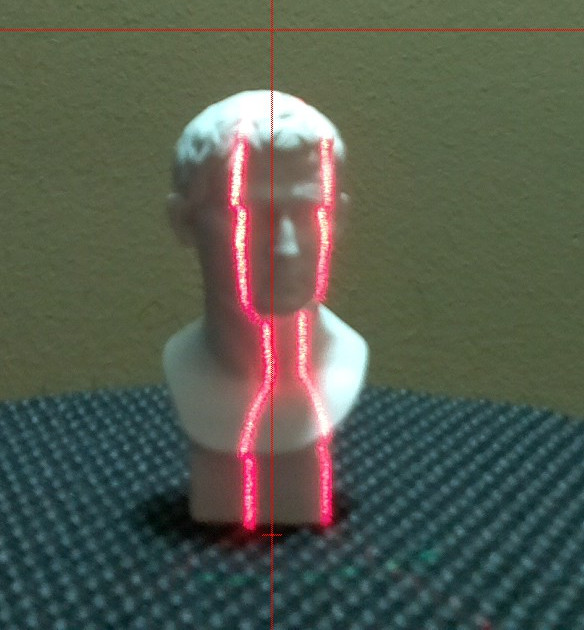
Auto Exposure Time - Notice the over saturation.
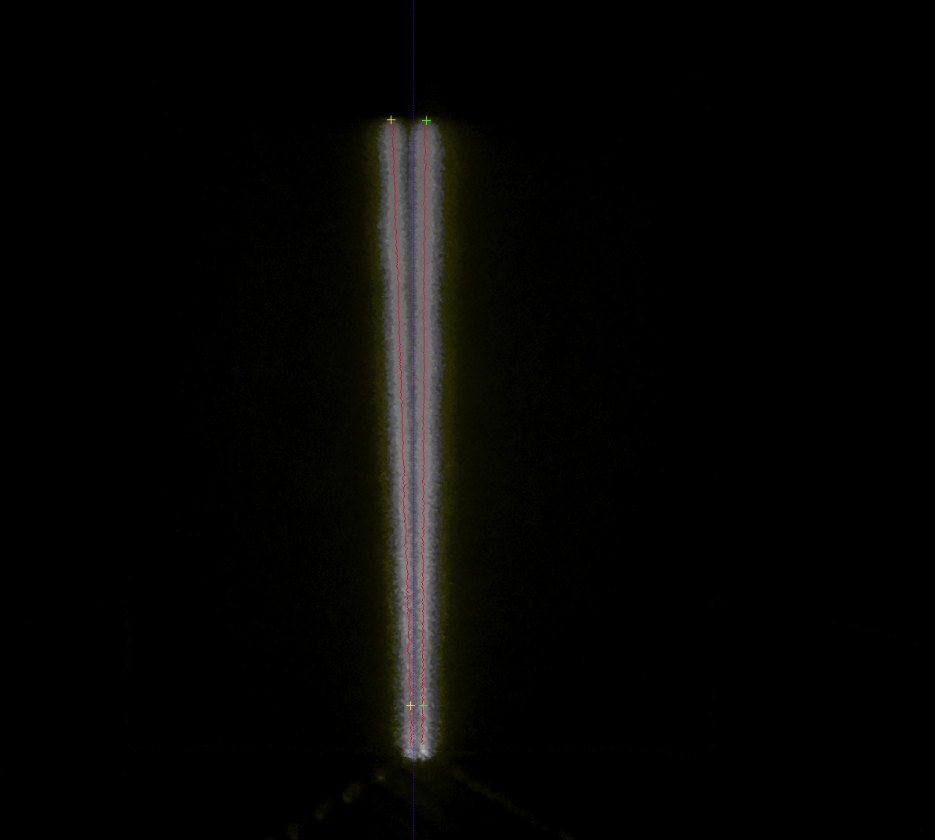
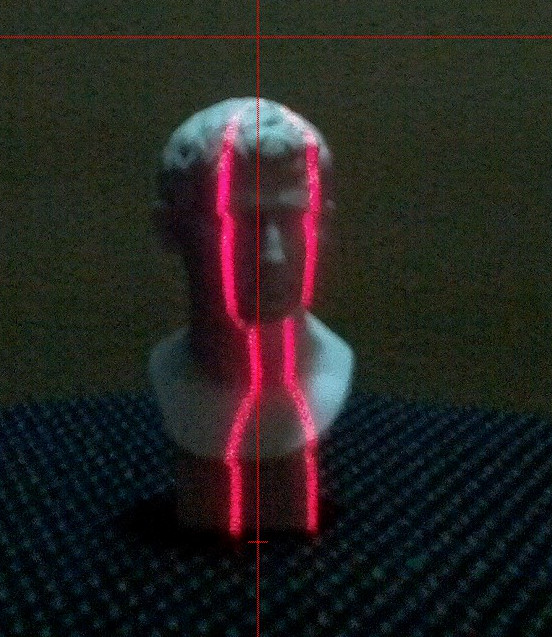
Short Exposure Time - More ideal conditions can be obtained by manually setting the exposure.
USB Network Configuration
The USB Network Configuration feature allows a USB flash drive to be used to communicate with the scanner. The following operations can be performed via USB Network Configuration.
Retrieve the list of WiFi networks in range.
Retrieve diagnostic information from the scanner.
Have the scanner join a WiFi network.
Retrieve the scanners current IP address.
Access the scanning software (FreeLSS) with the up to date IP.
When a USB flash drive is inserted into the ATLAS 3D scanner, it will write several files to the root of the drive. Both lasers will turn on when the USB drive is detected and turn back off once it is safe to remove the USB drive.
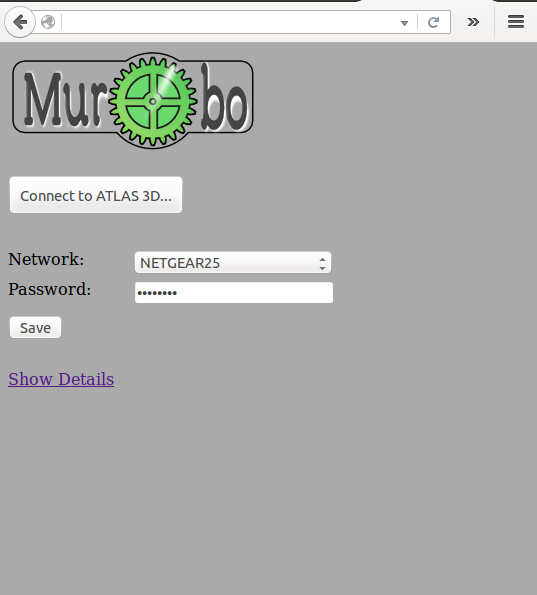
ATLAS3D_Windows.hta
This Windows HTA application can be used to setup the scanners network and to connect to the scanner. Once the WiFi information is saved, insert the USB drive back into ATLAS 3D to connect it to the WiFi network.
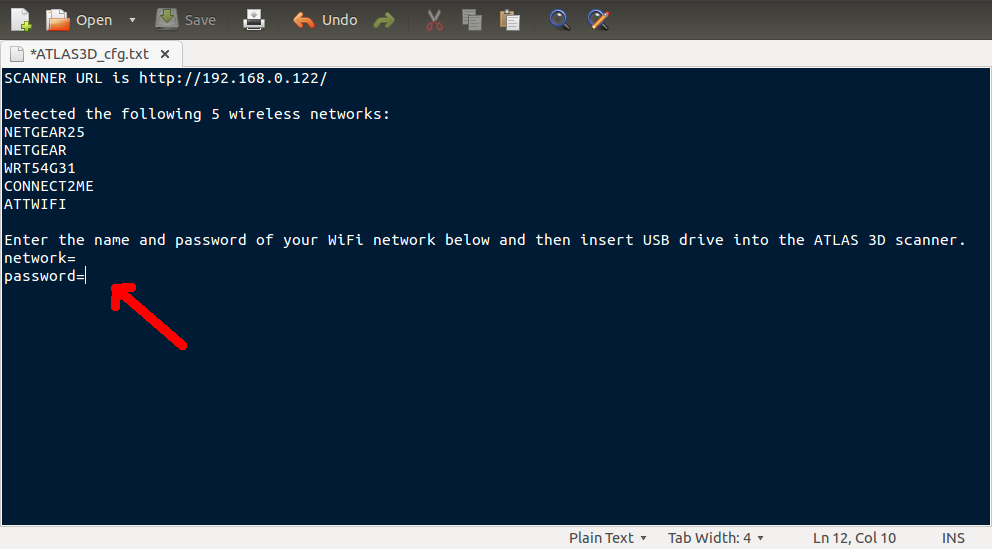
ATLAS3D_cfg.txt
Mac and Linux users can manually modify this text file to enter the WiFi network and password. Once the USB drive is inserted back into the ATLAS 3D it will connect to the WiFi network.
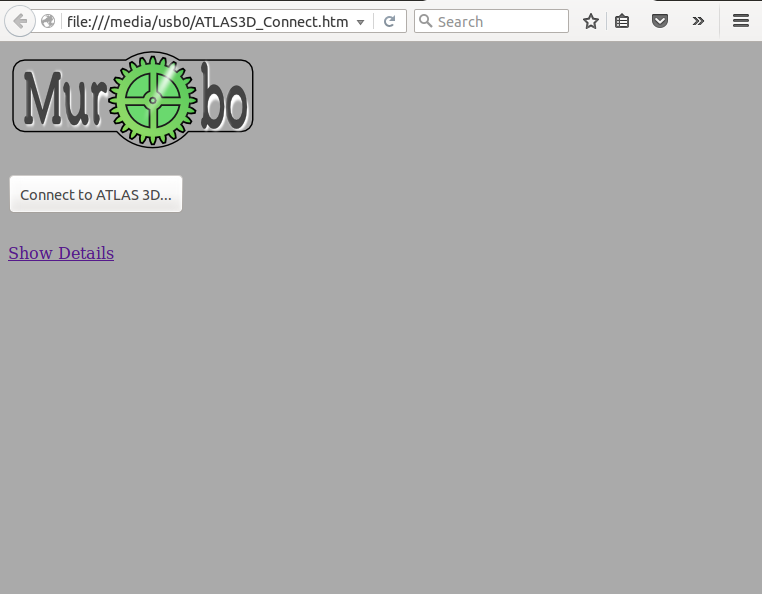
ATLAS3D_Connect.html
This file is created once the ATLAS 3D is connected to a network. It allows for a very easy way to get the scanners current IP address and to easily connect to the scanner.
Note: This update takes a little longer to install because it must install the usbmount package if it is not already installed on the system.