Topic: DIY Smoothing Station II
After a lot of debating, reading around, and helpful guidance, I feel like I have a smoothing station I am finally pleased with...
First, thanks to Ian for many helpful suggestions and inspirations in creating the station...
Second, acetone is dangerous... We all know it is dangerous... Please be careful, cautious, and smart... I did everything I could to make this setup catch on fire, blow up, damage my brain, etc... just to test how dangerous this would really be. I've used acetone in labs for cleaning, on girls nails to clean off nail polish, to make glue, and so on... It is useful, just don't be stupid and we should make a separate thread for a debate if people want to argue the safety implications. By the way, do everything with the acetone smoothing outside away from your grill, candles, and kids.
I began by attempting to make a hot pot, separate acetone pot, condenser coils with pumps and throttling, and a tub of ice water... The setup felt like it took up my entire porch, it had a lot of random parts, and was just clunky. Therefore, I decided if I could get over the fear of cooking acetone, I could do it much more simply. After countless hours wandering around bed bath and beyond, pier 1, some fancy cooking place I can't remember, and more... I went to Wal-Mart and found exactly what I was looking for... A Presto Multicooker
http://www.walmart.com/ip/14321003?adid … mp;veh=sem
A little steep at $25 after spending a $100 on my first setup, but I'll survive. This had everything I was looking for. A pot that was self heating, a tempered glass lid, and a 6 inch flat bottomed basket. This is why it is perfect...

Notice I laid down a layer of kapton tape at the bottom of the steamer basket so that the holes didn't poke through onto my pieces.
The first step was to bring my cooker outside and plug it in without turning it on. I put in the basket of pieces I want to smooth and quickly, I pour just enough acetone into the cooker to cover the bottom of the pot.
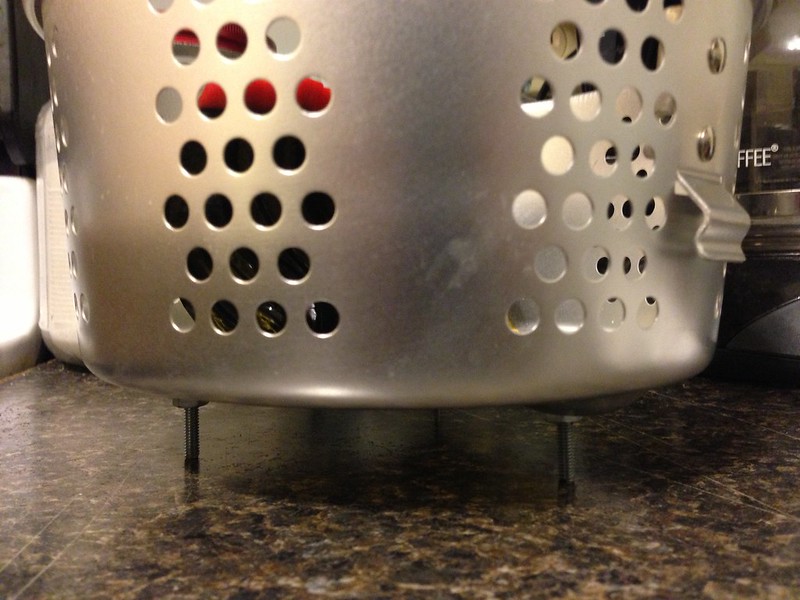
Here, I put a couple of bolts through the holes in the bottom to make sure the pot stood a few cm's off the bottom.
I Acetone has a boiling point at around 130 F. What I wanted was a 2 phase mixture with the quality not climbing much above 25%. At this point, you will have basically completely filled your cooker with a acetone vapor both. Just turning the heating dial far enough to get the light on right before the warm setting brings the pot up to about 130 F. To get the acetone to condense and sink back down towards the pieces, I freeze my tempered glass lid. The cool region at the top will help to condense the acetone. As I understand it, tempered glass should be ok going from frozen to hot in a hurry, but not the other way around.

If it looks like this, it is frozen enough.
The lid will heat up pretty quickly and within a minute, you will see the drops of acetone start to condense on the lid. As soon as the acetone is condensing on the lid, the 2 phase mixture is hitting and maybe even exceeding the 25% quality region. Notice here that I stuffed a little paper towel in the opening where the removed handle is. This absorbs some of the acetone vapor and keeps the pressure from building up without letting too much of the vapor to escape into the air and sink down around the plug connection. I immediately unplug the cooker at this point. After another 20 seconds the condensed acetone begins to run down the sides of the lid. As it finishes condensing on the lid and stops running down the sides of the lid, I take out the basket and quickly replace lid.
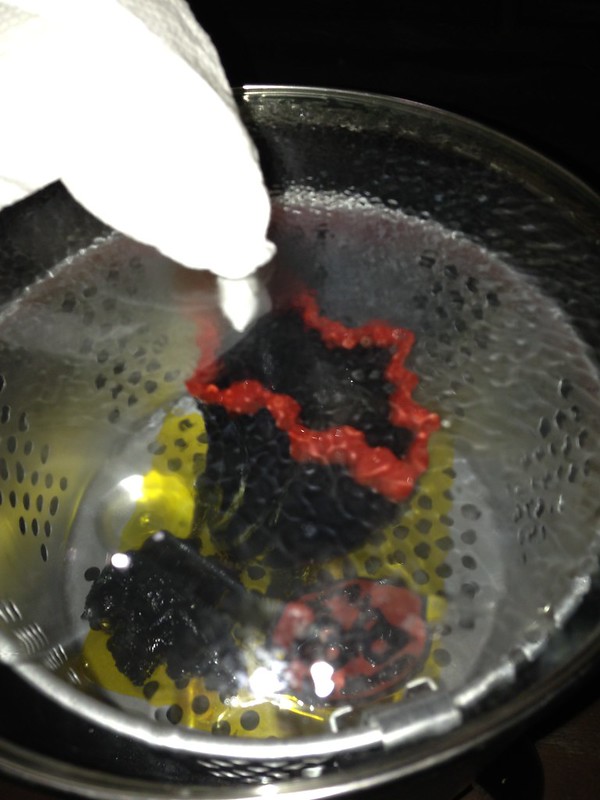
This is the acetone beginning to condense on the lid
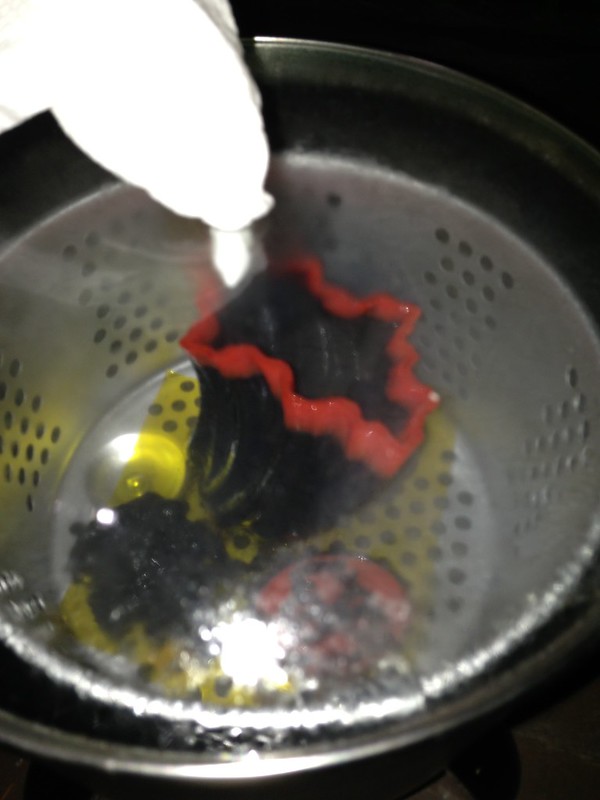
The condensed acetone finishing its run off.
I now let the basket just sit for about 20 minutes while still outside to allow the remaining vapor escaping the pieces to evaporate. I then carefully remove the pieces from the basket and place them in between 2 fans to encourage a little faster drying of the pieces. I haven't determined the exact amount of time the acetone takes to finish doing its job, but it seems like waiting an hour or two will have them ready for blasting. The longer you wait, the better, but I get impatient and don't like to wait.
Next phase is the blasting portion of the smoothing... I really am not a fan of the glossy look in most cases and definitely prefer a matte look with a dryer texture. I will continue to experiment with different mediums, grits, and pressures, but this set up seems to have the best combination of being fast, controllable, and producing an attractive finish.
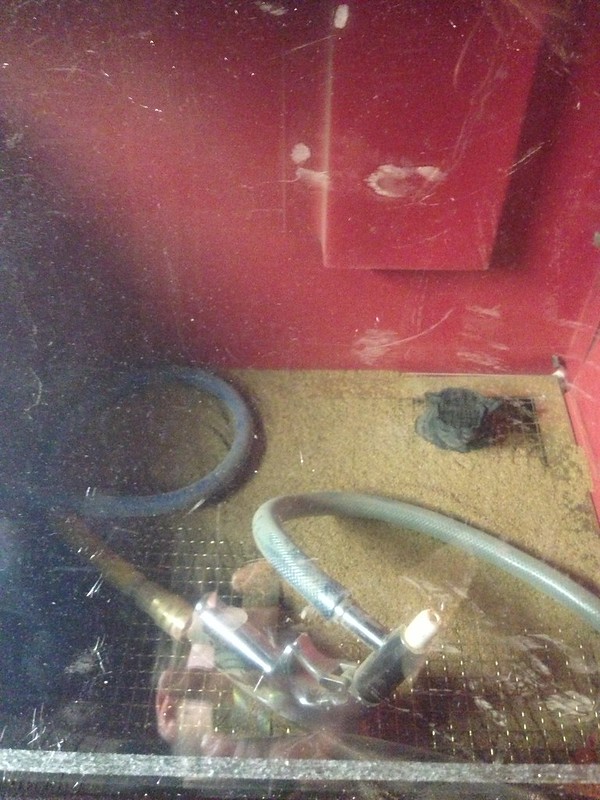
I am using crushed walnut shells because they are less aggressive and supposedly less dusty; they are also always dry in the bag and ready to use...
http://www.petsmart.com/product/index.j … Id=2752164
I got my blast cabinet from Harbor Freight and I am so glad I didn't try to build one after using this since it is perfect for the job and relatively inexpensive...
http://www.harborfreight.com/garage-sho … 42202.html
It says to make sure you use at least a 1 HP compressor running at 100 psi. I chose this one since it has an 8 gallon tank and recovers quick enough I don't have to stop while blasting a piece. It seems like most compressors should work though since I found 40 psi to be the best pressure.
http://www.harborfreight.com/air-tools/ … 68740.html
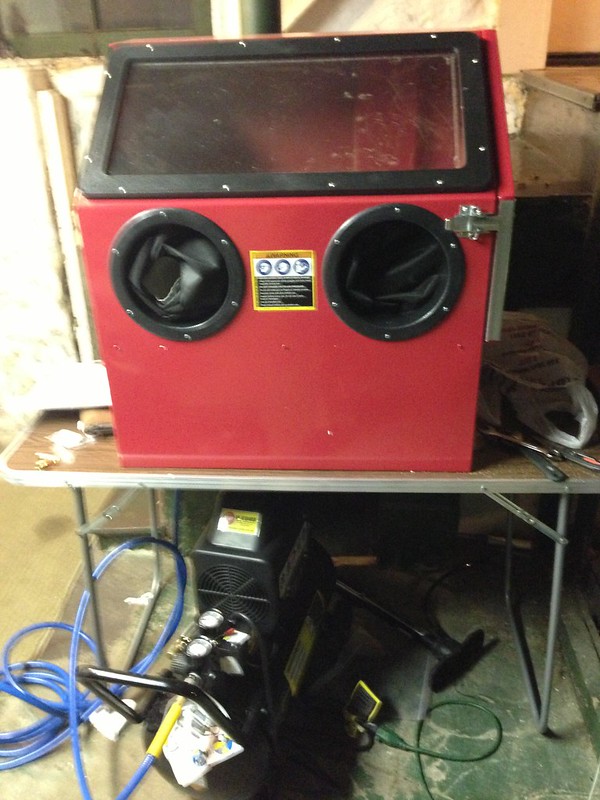
Entire Setup

Compressor Settings
To use the blaster, mostly follow the instructions that came with it. The quick and dirty is to bring the hose in through the back...
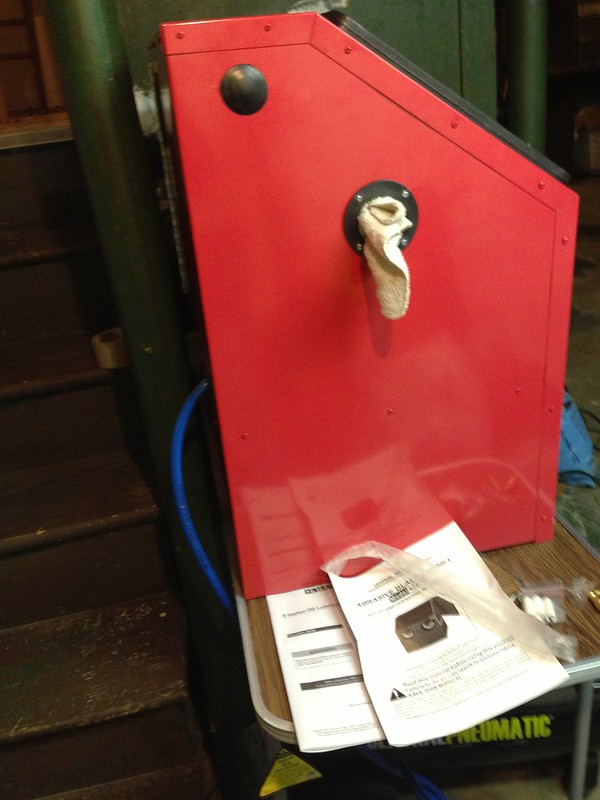
Connect the hose to the gun and fill the hopper with the media, in this case, the crushed walnut...
The process of actually blasting the media is more of a subjective thing than most of this stuff... My rule of thumb is to never stay still, and try to make about two passes around the entire piece. I like to spray from about 3-4" away, continually waving the gun and moving on from every area after a few seconds. The best way to explain is to just watch the video... I don't claim to be an expert on this, but it seems to be working so far... Turn down your volume since I didn't detach it and it is loud!
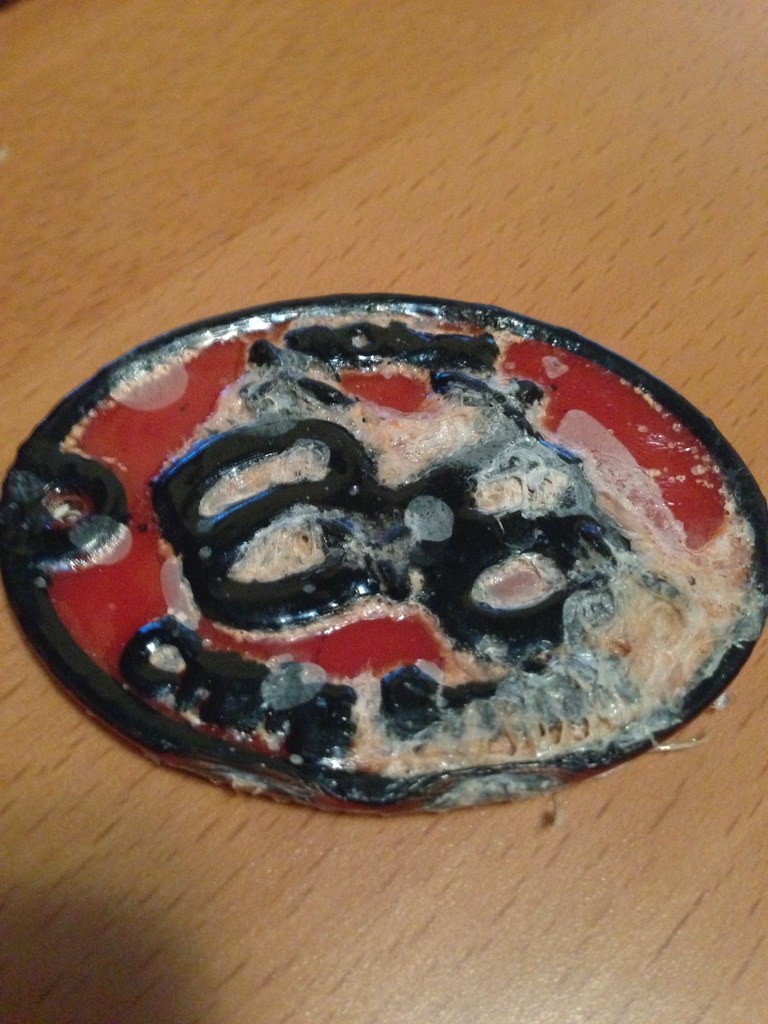
When finished with this, the part will look pretty dirty and not resemble its final appearance at all... I use a clean hose to spray as much excess dust off as I can and then go to rinse the piece off. Rinsing the piece off with water makes it look instantly like it is back to being glossy, but as it drys it will magically turn matte in front of your eyes. It will generally take about an hour from this point to reach its final appearance and texture. Please feel free to comment or make suggestions on any improvements that can be made... The entire process for these pieces was about an hour total with 45 minutes of it being waiting time... Here are pictures of the before, glossy, and matte of a few pieces to show a comparison... All of these pieces were printed at .1 mm resolution with the black and red vase being the exception. It was a failed print a .3 mm, turned successful.
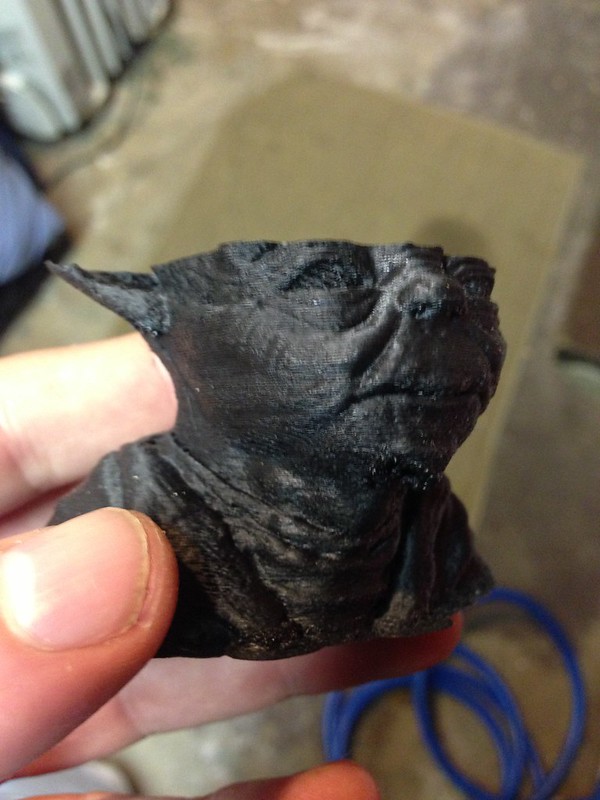
yoda from thingiverse...
http://www.thingiverse.com/thing:10650
similar to original print, can't find pre pic
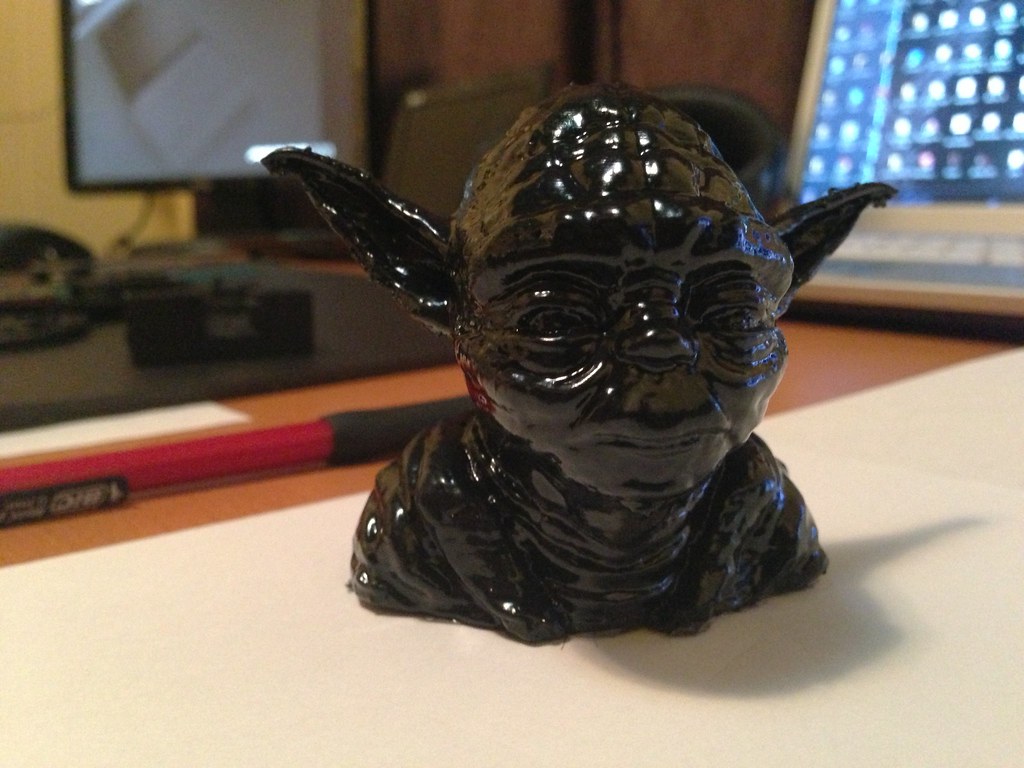
glossy yoda
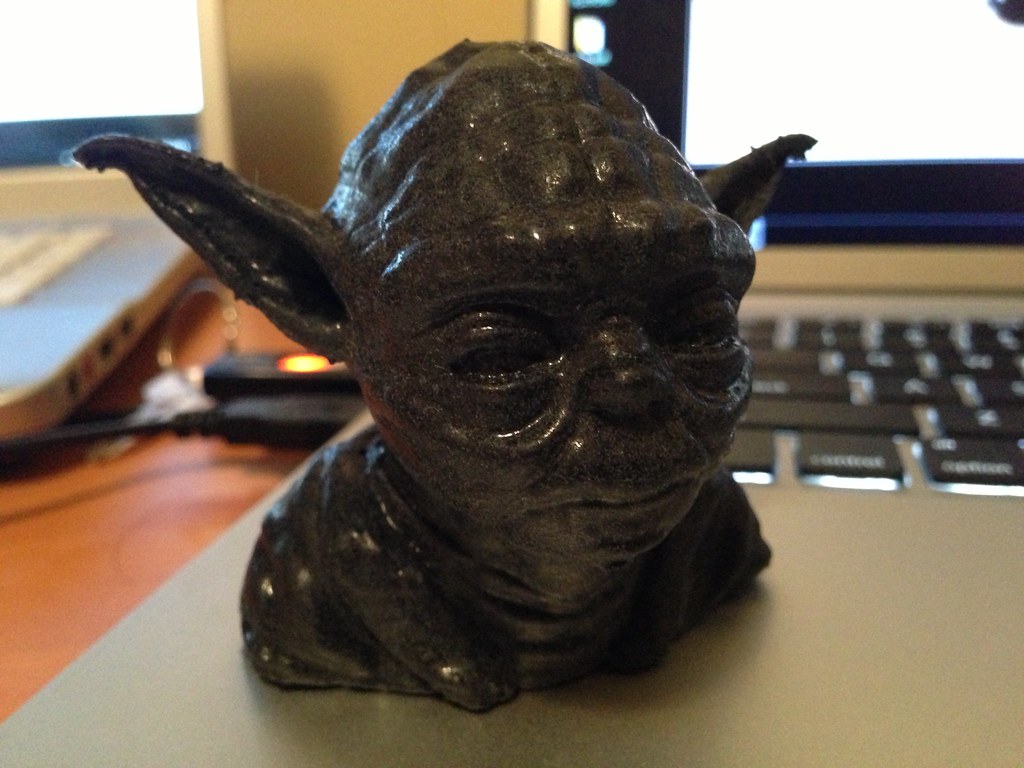
matte yoda
... Here is a vase from thingiverse
http://www.thingiverse.com/thing:28050

original print
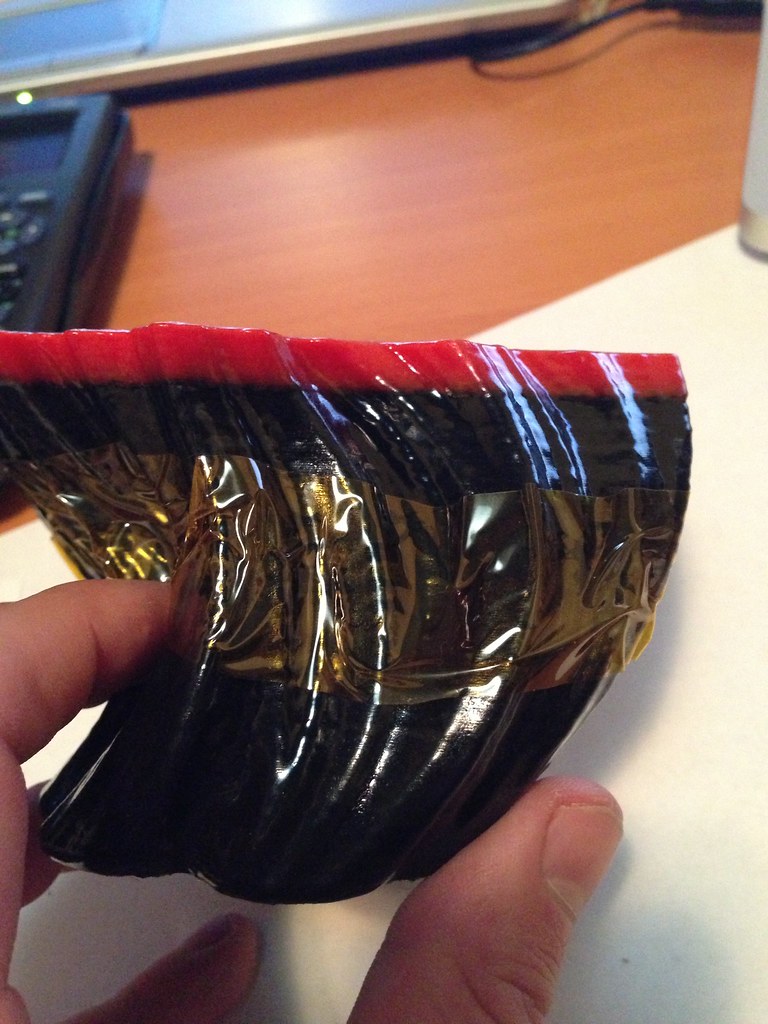
per Ian's suggestion, I tried to tape off a section to do layered textures...
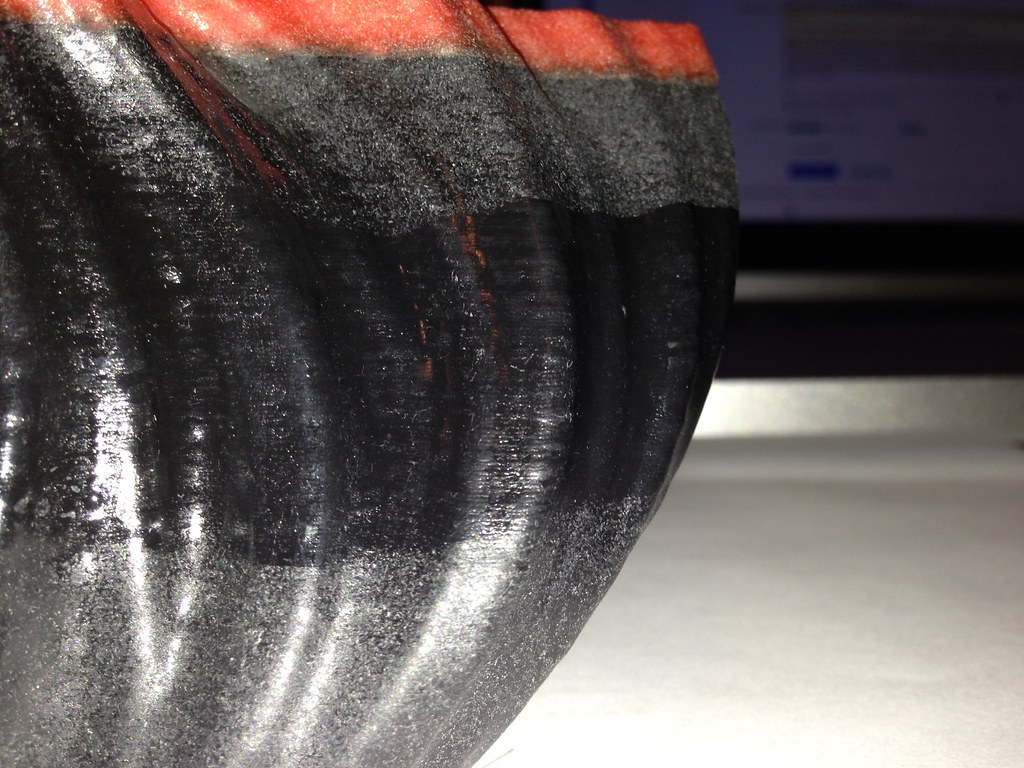
I think it came out as a pretty cool and unique look...
Ganesha from thingiverse...
http://www.thingiverse.com/thing:31301
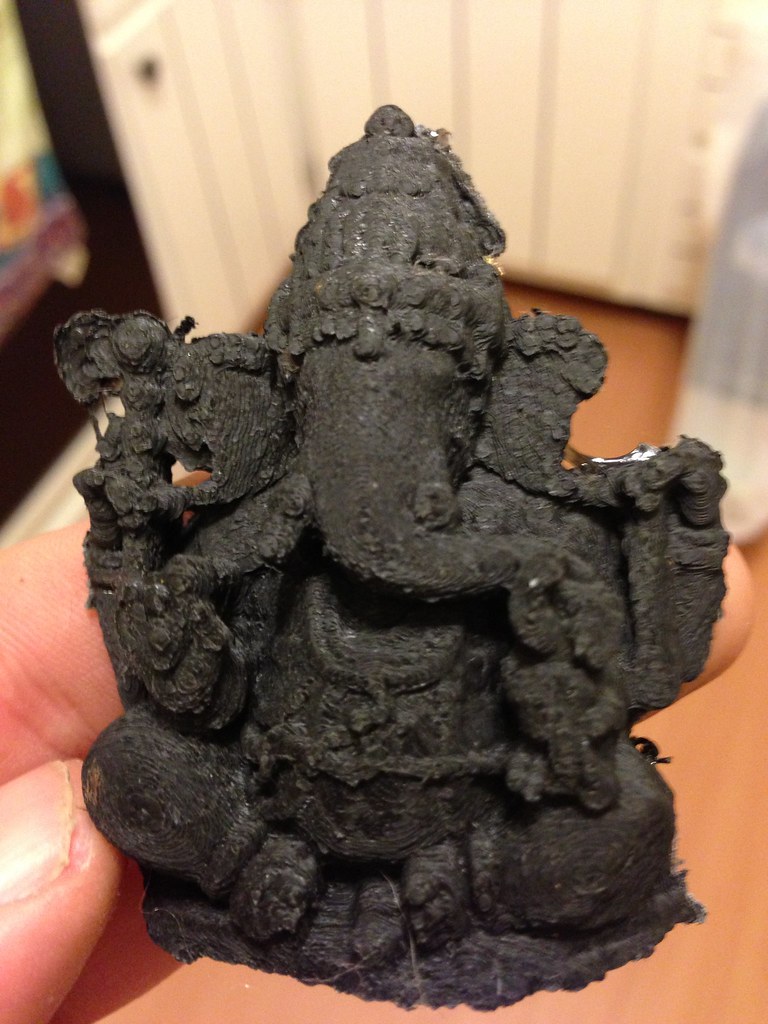
original

gloss
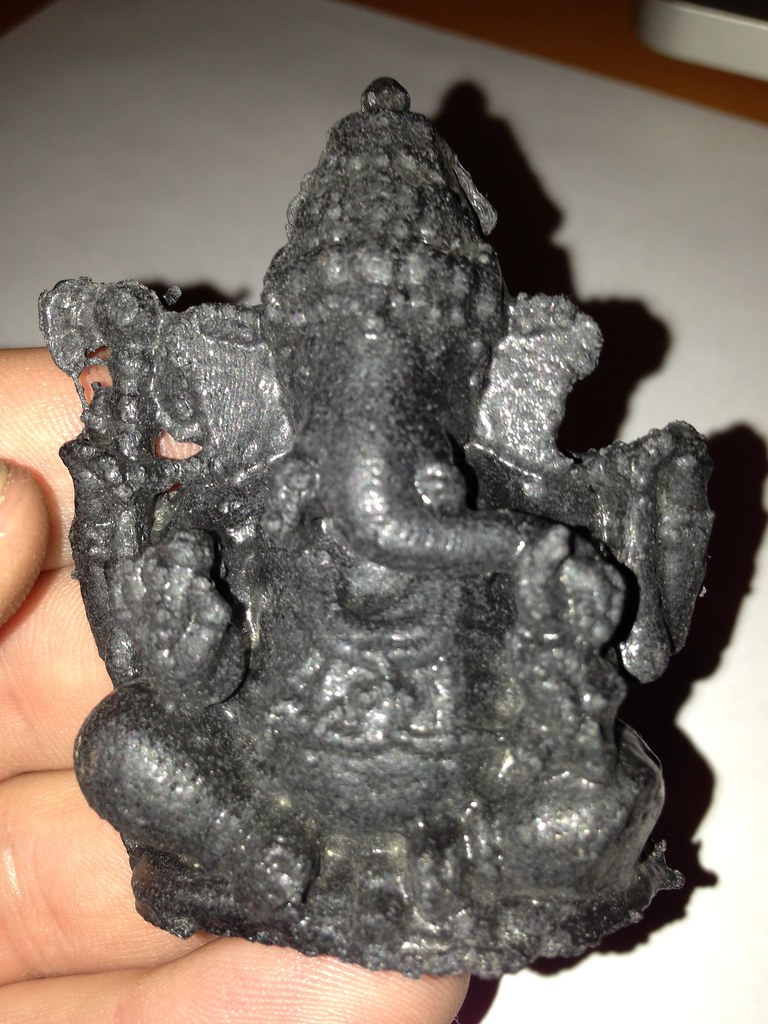
matte
And finally the dragon from thingiverse!
http://www.thingiverse.com/thing:17303
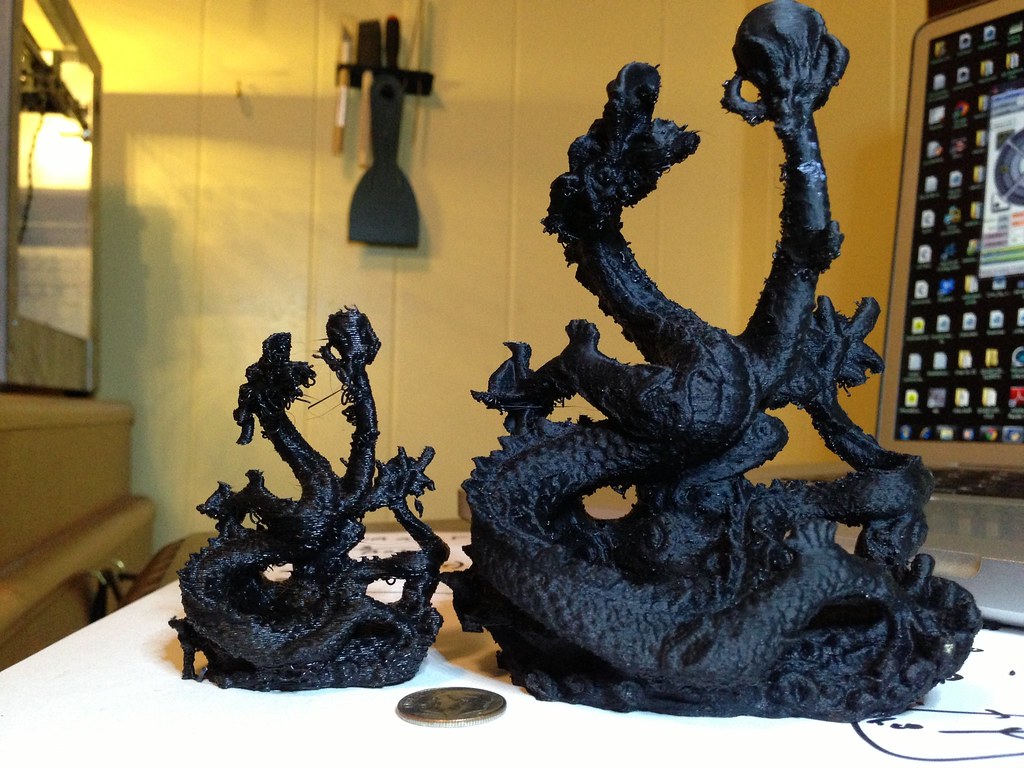
original at 2 heights
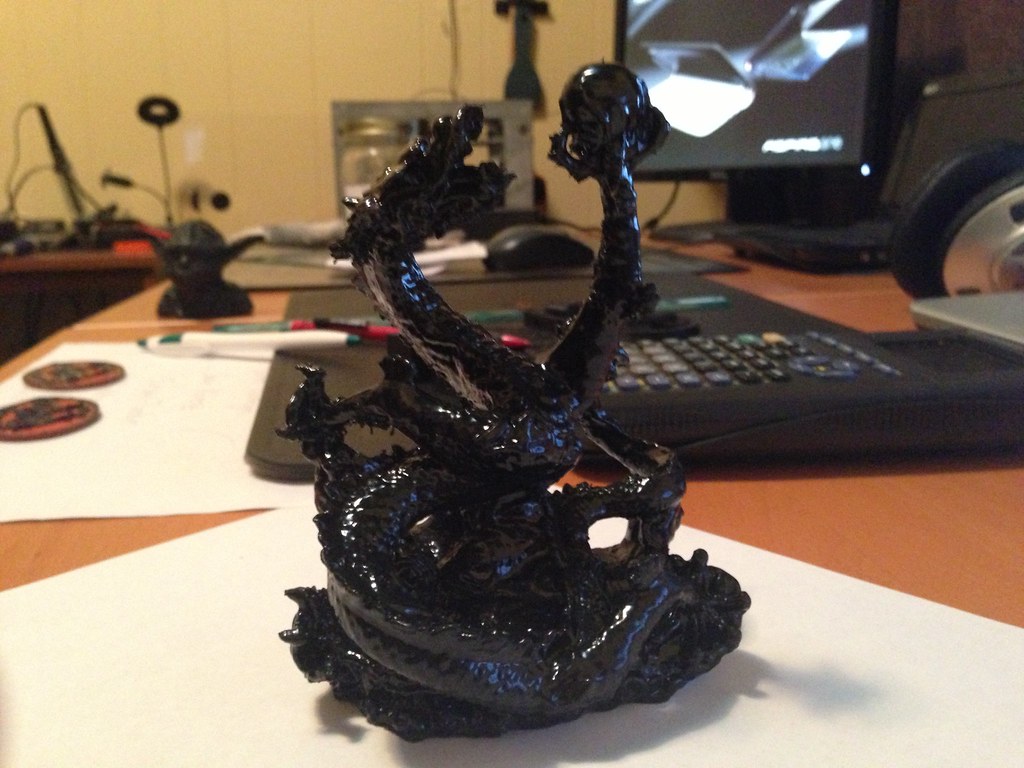
gloss and now a few mattes