26

Re: ATLAS 3D Scanner Instructions

hdhouse3rd wrote:

Nearly done the assembly of the acrylic case.  No directions in the package.  Found them online and the youtube video.  Would have been nice to have the bags sorted for all the screws. 
Having challenges getting the turntable level.  The 2.5 mm screw is tedious to lock the table down.  Any suggestions?

Turn the table and look for wobble.  Adjust the side that wobbles until it rotates straight and then tighten the 2.5mm screw.

27

Re: ATLAS 3D Scanner Instructions

n2ri wrote:
hairu526 wrote:

n2ri,
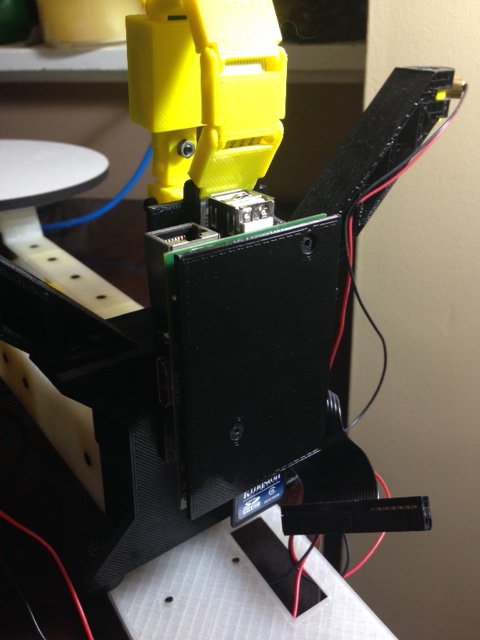
The serial number is on the bottom of the motor and should still be readable even with an assembled scanner (printed and acrylic versions).  The case for the Pi B is a direct replacement for the B+/2 and attaches in roughly the same way.  I just put one together to show you how.  Please see the image below.  Are you sure that you have the B and not the B+?  The case for the B was made mostly to fulfill a Kickstarter pledge.  ATLAS 3D does not have official support for the Pi B, just the B+ and Pi 2 as listed on the product page for the store.  If you have a Pi B then you will need to supply your own 26-pin ribbon cable.  PM me if this is a problem.
http://soliforum.com/i/?CInF7B9.png
- Uriah

what does this statement mean? ATLAS 3D does not have official support for the Pi B
also which ribbon socket does camera connect to on it? there are 2

n2ri,

The statement means that ATLAS 3D does not come with the 26-pin cable that would be required for the Pi 1 B and that the Pi 1 B will not fit in the acrylic case.  We are sending you a 26-pin ribbon cable as a sign of good faith since you did not notice that the Pi 1 B was not supported.  The camera connects to the CSI slot which is closest to the USB and Ethernet ports.  This can be seen in the assembly videos and in the image below.

http://www.kitware.com/blog/files/6_1326725183.jpg

- Uriah

28

Re: ATLAS 3D Scanner Instructions

ok, thanks!

Solidoodle 2 with Deluxe kit cover & glass bed with heater. and 2nd board SD2 used not 3rd and alum platform not installed yet still wood. also need cooling fan installed to board. use Repetier Host couple vers. Slic3r also have all free ware STL programs

29 (edited by calt 2016-01-22 19:07:52)

Re: ATLAS 3D Scanner Instructions

Hi-

I just received the kit from Murobo, with the acrylic enclosure.

[[original]]
I went ahead and picked up the Pi 2 B with it, but it does not seem to fit the enclosure.  Near as I can tell from looking at the pieces, there are holes to align with the various ports for power, usb, video.  But the alignment of the pi, when (loosely) bolted into the holes does not allow the enclosure to fit together, as the usb ports do not line up with the available space.
[[/original]]
--------------
I had FD backwards.  I had the "LED hole" on the wrong side due to a misunderstanding entirely on my part.
---------------


I would appreciate any feedback.  I have other Pis I could grab to use, but they are at home.

edit:  the button hole is also mis-aligned?

30

Re: ATLAS 3D Scanner Instructions

hairu526 who is sending me the 26pin ribbon cable from where?

Solidoodle 2 with Deluxe kit cover & glass bed with heater. and 2nd board SD2 used not 3rd and alum platform not installed yet still wood. also need cooling fan installed to board. use Repetier Host couple vers. Slic3r also have all free ware STL programs

31 (edited by n2ri 2016-01-25 02:46:17)

Re: ATLAS 3D Scanner Instructions

n2ri wrote:

hairu526 who is sending me the 26pin ribbon cable from where?


thanks, got it

Solidoodle 2 with Deluxe kit cover & glass bed with heater. and 2nd board SD2 used not 3rd and alum platform not installed yet still wood. also need cooling fan installed to board. use Repetier Host couple vers. Slic3r also have all free ware STL programs

32

Re: ATLAS 3D Scanner Instructions

Calt, I'm not sure what your question is since you provided the answer that the FD part was reversed.  None of the holes are misaligned.   Please see the video slides from the first post of this thread as well.  https://youtu.be/TEsBM5ACriQ

- Uriah

33 (edited by n2ri 2016-02-02 00:50:05)

Re: ATLAS 3D Scanner Instructions

I dont think this has been addressed yet. the rubber turnrable mat used is the same material sold to line kitchen drawer bottoms but has been found years ago when introduced that it attacks plastic much the same way that plastic/rubber fishing worms and other lures and is why Plano tackle boxes are made with what they call 'worm proof' plastic. I collect N scale trains and this was discovered long ago when some other train modelers ruined many of there plastic trains (even if painted) when this material ate into them melting the grid into them when used to pad containers for storing their trains. so it will likely do same to turn table and any plastic objects left on them very long. it also does it to plastic drawers.

Solidoodle 2 with Deluxe kit cover & glass bed with heater. and 2nd board SD2 used not 3rd and alum platform not installed yet still wood. also need cooling fan installed to board. use Repetier Host couple vers. Slic3r also have all free ware STL programs

34

Re: ATLAS 3D Scanner Instructions

also got a couple questions about the lasers. why do the laser arms only have 2 mounting holes each but tower has 3 each?
what is the large hole in tower for under I guess its the Left laser if looking at Pi towards turntable? which I guess is how instructions are implying right/left laser? the smaller power jack hole is on rear under Pi.
and where do we route wires to lasers from inside tower? no exit holes for them?
then assembly never says where to place washers when used. under srew head, under nut?

Solidoodle 2 with Deluxe kit cover & glass bed with heater. and 2nd board SD2 used not 3rd and alum platform not installed yet still wood. also need cooling fan installed to board. use Repetier Host couple vers. Slic3r also have all free ware STL programs

35 (edited by n2ri 2016-02-02 05:09:08)

Re: ATLAS 3D Scanner Instructions

also instruction video shows laser towers having all 3 mounting holes used, and the laser mounts secured with screws passing through a closed end on arms. the laser arms have an open screw hole/slot for this open at turntable side/front of scanner like a C. is this normal or has something been modified? when viewing STL in netfab it says theres errors and it shows the 3 mount holes and closed laser mount hole end also closed back on arm. but gcode dont show these. its open back like a bridge beam kinda.

Solidoodle 2 with Deluxe kit cover & glass bed with heater. and 2nd board SD2 used not 3rd and alum platform not installed yet still wood. also need cooling fan installed to board. use Repetier Host couple vers. Slic3r also have all free ware STL programs

36

Re: ATLAS 3D Scanner Instructions

n2ri wrote:

also instruction video shows laser towers having all 3 mounting holes used, and the laser mounts secured with screws passing through a closed end on arms. the laser arms have an open screw hole/slot for this open at turntable side/front of scanner like a C. is this normal or has something been modified? when viewing STL in netfab it says theres errors and it shows the 3 mount holes and closed laser mount hole end also closed back on arm. but gcode dont show these. its open back like a bridge beam kinda.

You know, I've been following this just out of curiosity, but I have to say, that I've never seen anyone have some many problems, that just about no one else has.

At this stage I doubt you will ever be able to actually build one of these scanners much less use it, as long as you insist the problem is elsewhere other than with you and your computer.  Many of us, including myself have tried to help, but you seem to have one problem after another, and you're always complaining that the files are defective.  I don't think there's a single person here that hasn't been able to at least print these parts.   

If you're having this many problems printing the frame, I'm afraid to think of what will happen once you start putting the rest of it together.

Once more, there are no problems with the parts, there are no errors with the parts, there are no closed holes that should be open, nor are there any open areas that should be closed.  If you're seeing this, the problem is at your end, nowhere else.  Perhaps you should consider buying the frame rather than trying to print your own.

Here are a couple of snap shots of NetFabb showing that the issues you encountered (closed screw holes, open back where it should be closed, etc) are really NOT  THERE.

http://www.soliforum.com/misc.php?action=pun_attachment&item=9646
http://www.soliforum.com/misc.php?action=pun_attachment&item=9647

Post's attachments

Atlas_Laser_arm_001.jpg
Atlas_Laser_arm_001.jpg 136.21 kb, file has never been downloaded. 

Atlas_Laser_arm_002.jpg
Atlas_Laser_arm_002.jpg 154.64 kb, file has never been downloaded. 

You don't have the permssions to download the attachments of this post.
To print or, 3D print, that is the question...
SD3 printer w/too many mods,  Printrbot Simple Maker Ed.,  FormLabs Form 1+
AnyCubic Photon, Shining 3D EinScan-S & Atlas 3D scanners...
...and too much time on my hands.

37

Re: ATLAS 3D Scanner Instructions

Netfab says there are errors and has the triangle but when repaired I see no highlighted errors. and it looks fine as an STL but seems my old ver of Slic3r has developed a bug as when slicing many of these parts the Gcode states errors that it "tried to fix" and spits out Gcode that is wrong like the wide areas for screw heads/nuts often get made all the way through model either to the side or from top to bottom, and things like the closed back of the laser ASrms are open instead of the solid bottom as you poit out. so I have had Azerate make 5 of the parts for me rather than waste more time/material reslicing on one laptop with the new version and printing through my other one printer is connected to.

I just cant understand why all this never occured till trying to print these files. also it seems something may be getting hot on my printers MB causing things like layer shift on prints over an hour now which did not happen since I bought it 3 years ago. but until this scanner project only printed maybe 5 long duration prints of 2-5 hours biggest toll on my printer was that horrible roll of FAT Octave filament that nearly wouldnt feed being as big as 2mm thick most the way. I have abandon it now. other than 5 parts of the 37 (counting the calibration part) I have managed to get the others printed cleaned up and assembled with a few scrap parts. seems hour and less prints still do great. the Tower which is also a very long print turned out fine 1st print as did most the frame parts. I thought the 1st laser arm did till closer inspection I saw the missing features when test assembling.

the same laptop having slicer issues is the one not wanting to load the web page for the scanner nor 2-3 other web pages and I have gone through 2 very good antivirus/firewalls and found nothing. oh yes and I had a couple emails sent out from my Yahoo accounts contact list sent from a spoofed email saying it was mine. a couple random associated emails so I change email PW but dont think it was hacked only my list was somehow phished. very odd things that seem to be unconnected but all happening within the last month or so.

just hoped maybe all this would sound familiar to somebody else or at least let them see in the future its happened b4.

at this point any issues like others had operating scanner are easy in comparison LOL since there is no ideas what is the causes of all this nonsense. for now I am going to install the 3rd antivirus number 1 rated on this laptop and maybe update some apps while moving towards using the other laptop more soon. maybe some other troubled STLs can be printed on it that wouldnt on here.

Solidoodle 2 with Deluxe kit cover & glass bed with heater. and 2nd board SD2 used not 3rd and alum platform not installed yet still wood. also need cooling fan installed to board. use Repetier Host couple vers. Slic3r also have all free ware STL programs

38

Re: ATLAS 3D Scanner Instructions

I a neubie t 3d scanners & printers. I am trying set up an Atls 3D Scanner  I. am stuck.  There is power ate power supply board with drv8834 drivers.  The green and red ledsvon the Pi 2 B doesn't communicate to inter net. WiFi or Ethernet.. No lasers light no motor turning.

Any help would be deeply appreciated,


Sincerely,

Tom Megna
[email protected]

39

Re: ATLAS 3D Scanner Instructions

I a neubie t 3d scanners & printers. I am trying set up an Atls 3D Scanner  I. am stuck.  There is power ate power supply board with drv8834 drivers.  The green and red ledsvon the Pi 2 B doesn't communicate to inter net. WiFi or Ethernet.. No lasers light no motor turning.

Any help would be deeply appreciated,


Sincerely,

Tom Megna
[email protected]

40

Re: ATLAS 3D Scanner Instructions

Hi Tom -

We're here to help, but its tough to understand your post. Could you revise it? For example, I don't know if you're trying to say the green and red LEDs are on or aren't on.

Some photos of how you've wired things would be helpful as well. For example, it is possible to install the ribbon cable backwards, which would cause problems like you describe.

41

Re: ATLAS 3D Scanner Instructions

hairu526 wrote:
hdhouse3rd wrote:

Nearly done the assembly of the acrylic case.  No directions in the package.  Found them online and the youtube video.  Would have been nice to have the bags sorted for all the screws. 
Having challenges getting the turntable level.  The 2.5 mm screw is tedious to lock the table down.  Any suggestions?

Turn the table and look for wobble.  Adjust the side that wobbles until it rotates straight and then tighten the 2.5mm screw.

Having a little trouble with the turntable levelling myself.  Not sure if the alignment of the discs below the turntable that sit on the spindle have anything to do with it, or the smallest plastic 3d printed piece (had to file it down a bit to create smooth circular holes), but I find it hard to make fine adjustments in the level, it is like it resists the adjustment.

Does anyone have any tips or feedback on how that process goes please?

Do I need to work off some more of the loose plastic perhaps (I didn't want to file too great a hole in the middle, I want to scan but have no printer to create new or replacement parts)?  I'm cautious as I had to file it down some just to get it on the spindle to begin with and didn't want to overdo something I couldn't reverse.

I guess if the turntable slips too loosely onto the spindle I won't really be able to adjust it anymore or keep it held in place that well - or have I got that understanding wrong?

42

Re: ATLAS 3D Scanner Instructions

Oh - it didn't make any real difference for me, but I tried to lift the lower side of the wobbly turntable to see the effectiveness of adjustments in case just pushing down the higher side would have been futile to attempt.  I thought at first maybe I was adjusting in the wrong direction (down on the high side) and so tried the other (up from the lower side).

I wasn't sure what else I could try at that point.

43

Re: ATLAS 3D Scanner Instructions

Does anyone know the dimensions of the FT spacers that are used to mount the Pi?  I seem to have misplaced mine, and need to locally obtain or fabricate some.

Thanks.

44

Re: ATLAS 3D Scanner Instructions

They are 0.25"x0.25"x0.25" with a hole large enough to fit a M3 screw.

45

Re: ATLAS 3D Scanner Instructions

hairu526 wrote:

They are 0.25"x0.25"x0.25" with a hole large enough to fit a M3 screw.

Ok, I found them.  I had it in my head I was looking for round white plastic standoffs.

Thanks.

46

Re: ATLAS 3D Scanner Instructions

Hi, I want to build a freelss scanner with a raspberry pi 2 , what diagram do you recommend?

thanks smile

47

Re: ATLAS 3D Scanner Instructions

I'm trying to get a disk copy of the Atlas3d software program and I try to use the one on Amazonaws and it won't disk copy. The Win32imagewriter keeps saying it CORRUPT.  I can't run the Scanner without it. Thanks in Advance  .

48

Re: ATLAS 3D Scanner Instructions

Make sure you remembered to unzip the file.  Then make sure you are following the Win32DiskImager instructions https://www.raspberrypi.org/documentati … windows.md  If it still doesn't work, the download is likely corrupt.  Try downloading it again.

- Uriah

49 (edited by jrr 2017-05-22 23:40:05)

Re: ATLAS 3D Scanner Instructions

A few comments part way through assembly on the instruction manual and web site:

1) Photos on the /start.html#assembly are very hard to discern on my laptop (MacBook Pro retina display) as the photos are very hard to figure out when everything is black. May I suggest they are retaken using the plastic that is still covered with the removable paper for much better contrast? Note clearly at the top of each page that the paper should be removed prior to assembly.

2) Page 1 - #4 - this is where you tell us to use the longer ribbon cable, not at step 29 on page 2!

3) Page 1 - #6 - typo - change "and then connect FC to FB using 3 of the M4 screws" to "and then connect FC to FB using 4 of the M4 screws"

4) Page 1 - exchange the order of 8 & 9

5) Page 1 - (new #9) - typo - change "and sit the Raspberry Pi onto the three screws followed by" with "and sit the Raspberry Pi onto the 4 screws followed by"

6) The diagram on page 4 should show the FT and any other F(x) parts that are not listed there. I had to go to this forum to find the FT which wasted my time.

(I'm sure there are others, but I have to run...)


Setting the turntable up correctly is not simple!

I would suggest that the center holes (for motor shaft) for the discs be a closer tolerance (they can always be enlarged if needed) to get the preset closer, then a countersunk hole in the underside of the turntable to guide the center of the shaft and help ensure alignment.
I would also suggest using the extra round disc (same diameter as FO, but not printed) instead of the printed plastic with the countersunk holes - and longer flat bottom machine screws. One needs to be able to slide the plastic discs around slightly to get the turntable true, and with the countersunk holes and printed disc that combination tends to force it to a setting - which on my unit is not centered.

A great kit none the less, just the instructions and the turntable need a bit of attention to make assembly easier. At my shop I will be making a truing jig for the turntable with a rod the same diameter as the motor shaft and using a drill press to hold it upside down align it that way then bond the plastic discs with methelyne chloride (plastic cement) so it can never shift again!

50

Re: ATLAS 3D Scanner Instructions

Thank you for this well thought out feedback.  It is very helpful.

- Uriah