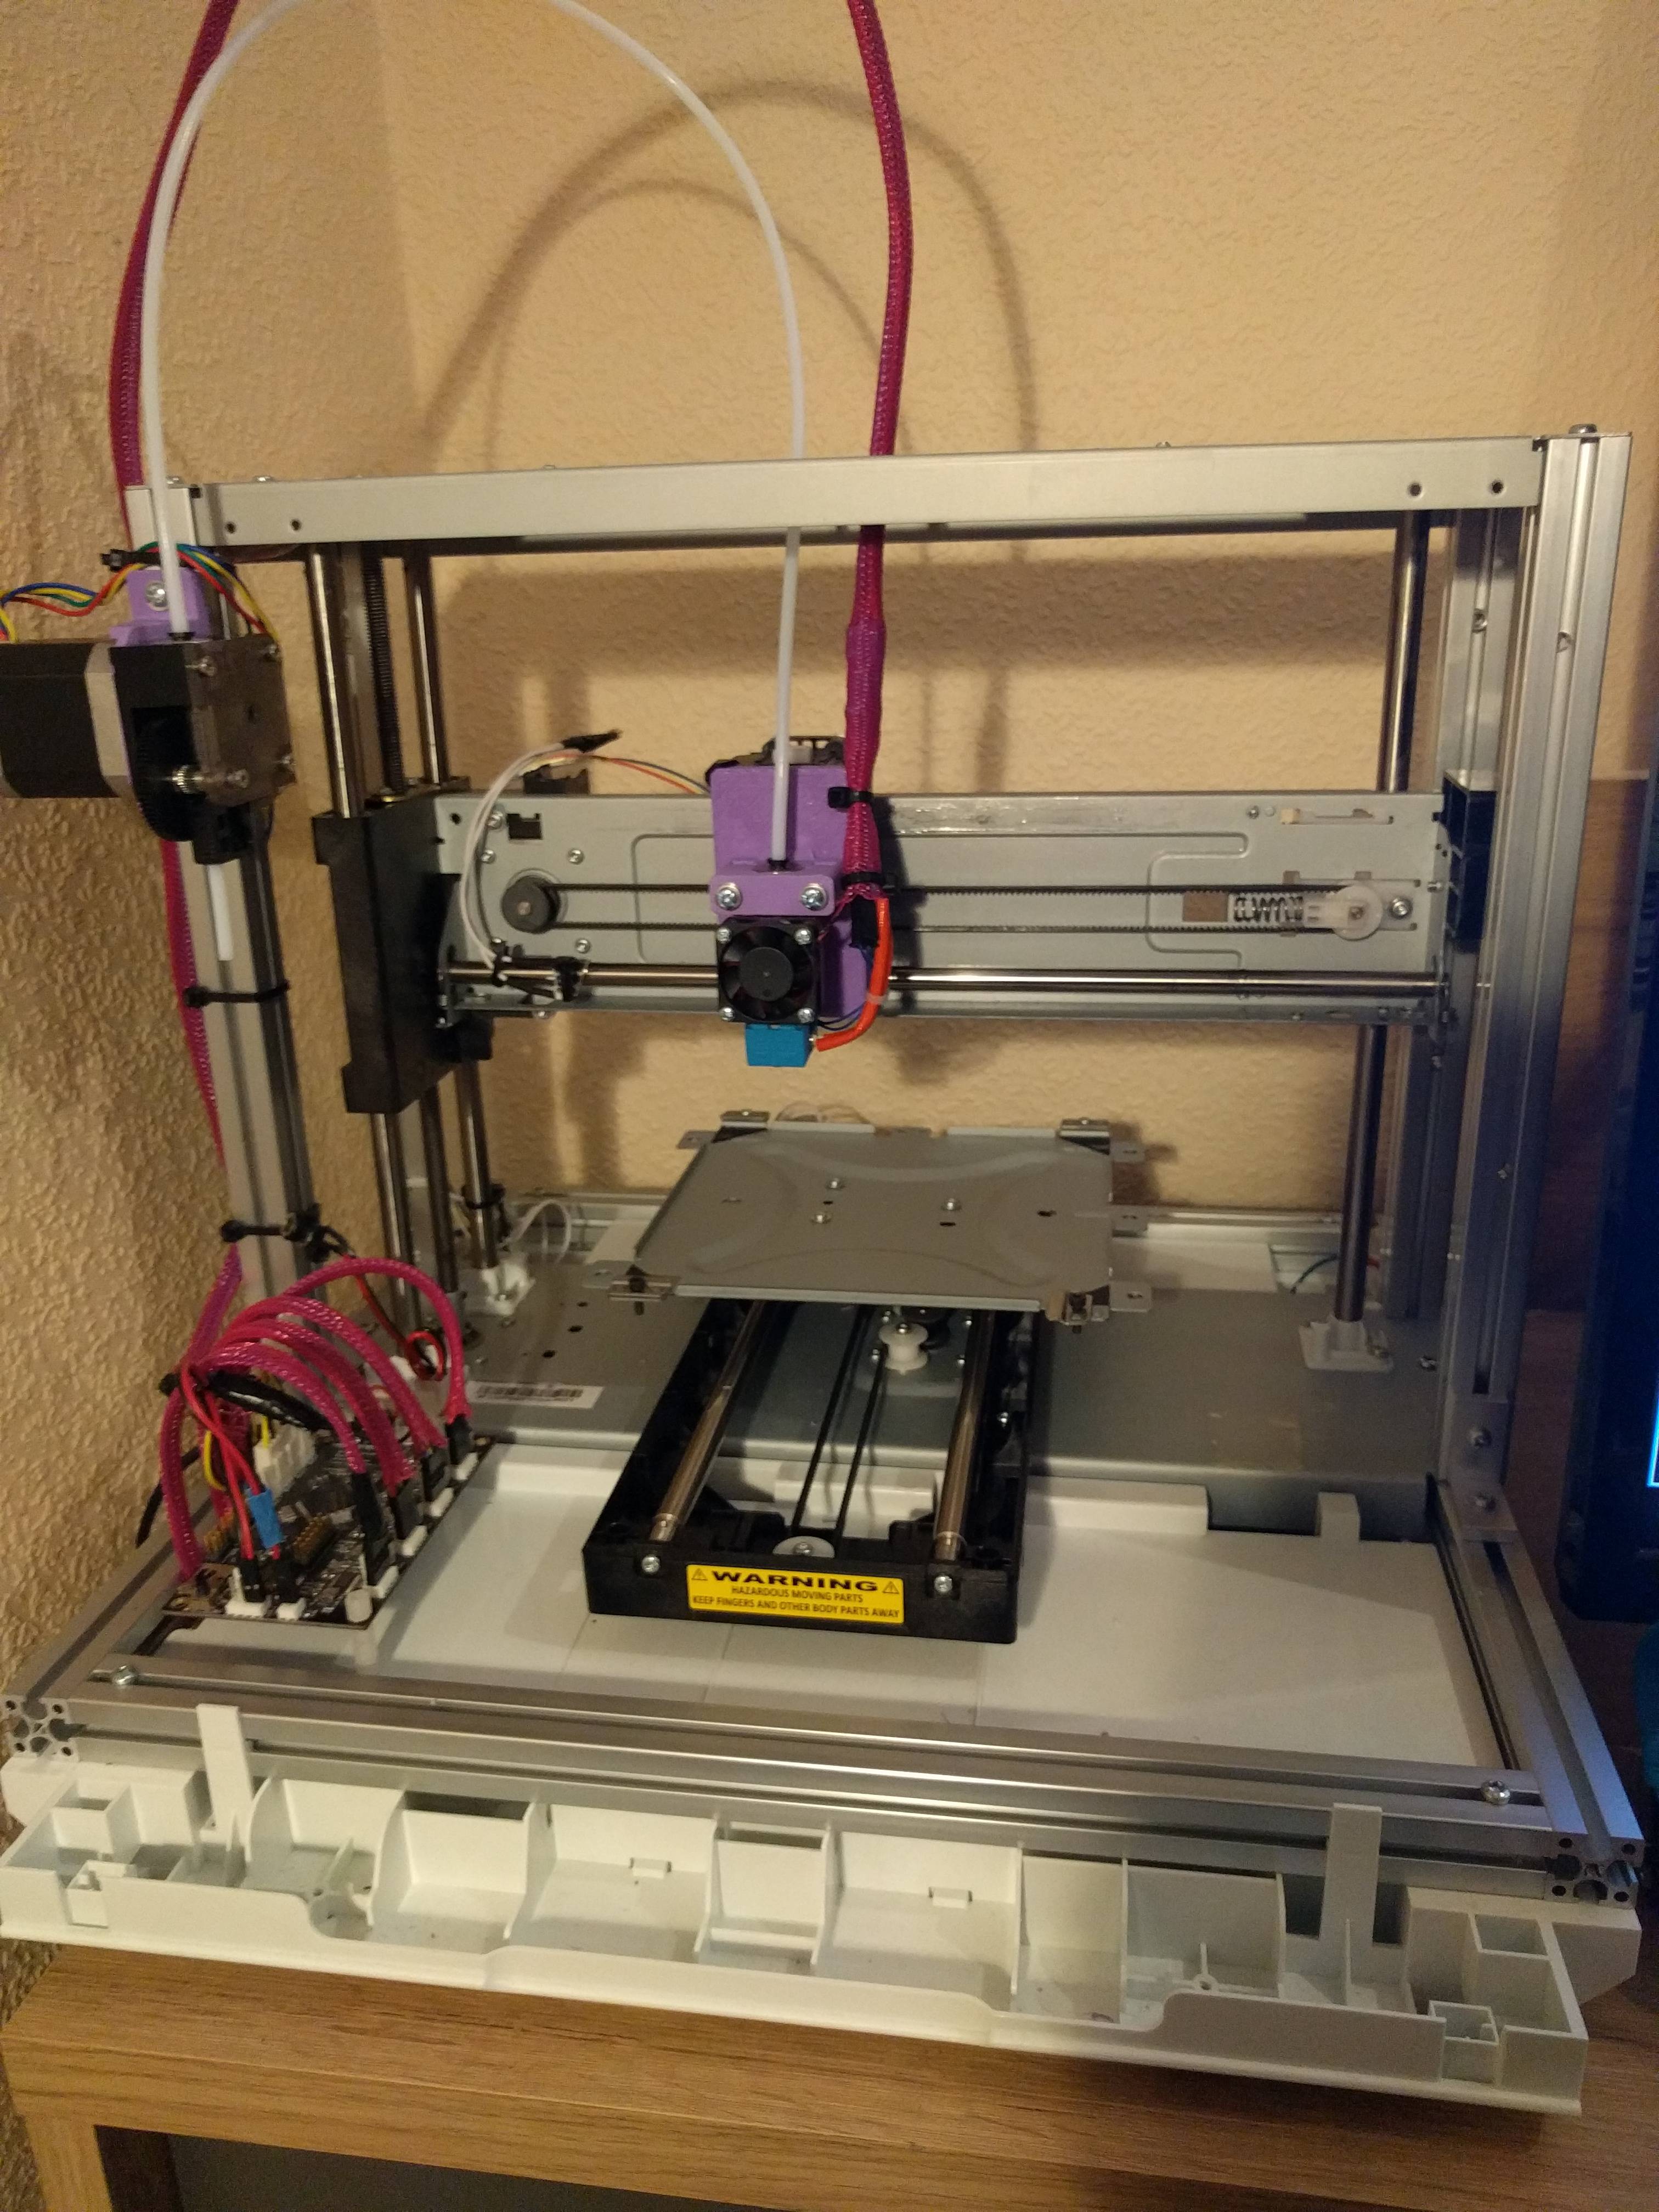
26

Re: [HOWTO] Convert Da Vinci Jr to RAMPS 1.4

Sounds good. I'm probably going to look for some acrylic locally today, and hopefully can find some time to level my new axis.

My curent setup uses a 2020 frame (combination of printed and aluminum 2020) to hold 8mm rails (which I might switch out for 10mm if sagging is a problem there), and a small printed 2020 frame for the bed mount, with bolt-on belt tensioner.

I'm considering designing and printing a custom base for the bed to reduce its profile. 2020 makes things easy but it's not small. The new axis is about 7mm higher than the hold one, which isn't bad but makes homing awkward without modding the Z endstop.

27

Re: [HOWTO] Convert Da Vinci Jr to RAMPS 1.4

Sounds cool. Look forward to pics.
Part of the reason I went with mechanical end stops was i couldn't be bothered trying to find ways of adjusting the optical ones, I had thought of cutting strips of plasticard strips and glueing them on to extend the existing parts that block the optical points. If your still using a start code similar to the original jr code this could work OK I guess as you just need to change offset to fine tune.

28

Re: [HOWTO] Convert Da Vinci Jr to RAMPS 1.4

OK guys. I've tested hotend and fan. All good. The driver positions. Are they Extruder top, just to the right of the D8, D9 and D10 input and X Y Z below from left to right? Just don't wanna make any mistakes after getting this far. :-)

29

Re: [HOWTO] Convert Da Vinci Jr to RAMPS 1.4

Yep gravy, that's right. You'll want a driver in all positions except the top right of the 2-driver row (nearest the endstop pins). The row with one driver is E0, then XYZ across the bottom.

30

Re: [HOWTO] Convert Da Vinci Jr to RAMPS 1.4

@Anthem. Thanks. Just thought I should check to be sure. I have the Junior all wired up now. Past 2 days I've been driving myself crazy with the Z axis. X, Y and Extruder seem fine but, the Z axis isn't. I'm using Octoprint to control Z. (Ive also used the lcd controller with same results). When the gantry moves it pushes into the top of the frame. At the bottom it pushes onto the bed. When its moving up then back down, at least twice it stops moving but the motor continues turning and that creates a grinding noise. If, at this point I turn the pot on the stepper driver it can sometimes cause the gantry to start moving again. Down or up! The motor is a Servo kv4239-2tb... 1.8 degree/step. If thats any help. I'm using all 3 jumpers per stepper driver. I should also point out that I'm using the original Jr power supply. Don't know if that makes a difference? I hope I've made sense with this and maybe you or someone else might be able to help.

31

Re: [HOWTO] Convert Da Vinci Jr to RAMPS 1.4

gravy wrote:

@Anthem. Thanks. Just thought I should check to be sure. I have the Junior all wired up now. Past 2 days I've been driving myself crazy with the Z axis. X, Y and Extruder seem fine but, the Z axis isn't. I'm using Octoprint to control Z. (Ive also used the lcd controller with same results). When the gantry moves it pushes into the top of the frame.

You mean it hits the top when it goes all the way up, right? Sounds like a Z_MAX_POS problem. The Jr is only advertised to have a 150mm Z-axis build size, so check that you're not exceeding that. Also account for your MANUAL_Z_HOME_POS if that's set (if you used my fork, it is). That negative value adds to the total travel length of the axis, so if you have a MANUAL_Z_HOME_POS of -1.8 and a Z_MAX_POS of 160, then Marlin thinks there's a total of 161.8 mm of travel, which may or may not be true for your particular machine. (I was able to get an extra 5mm of Z on my machine, but yours may differ slightly).
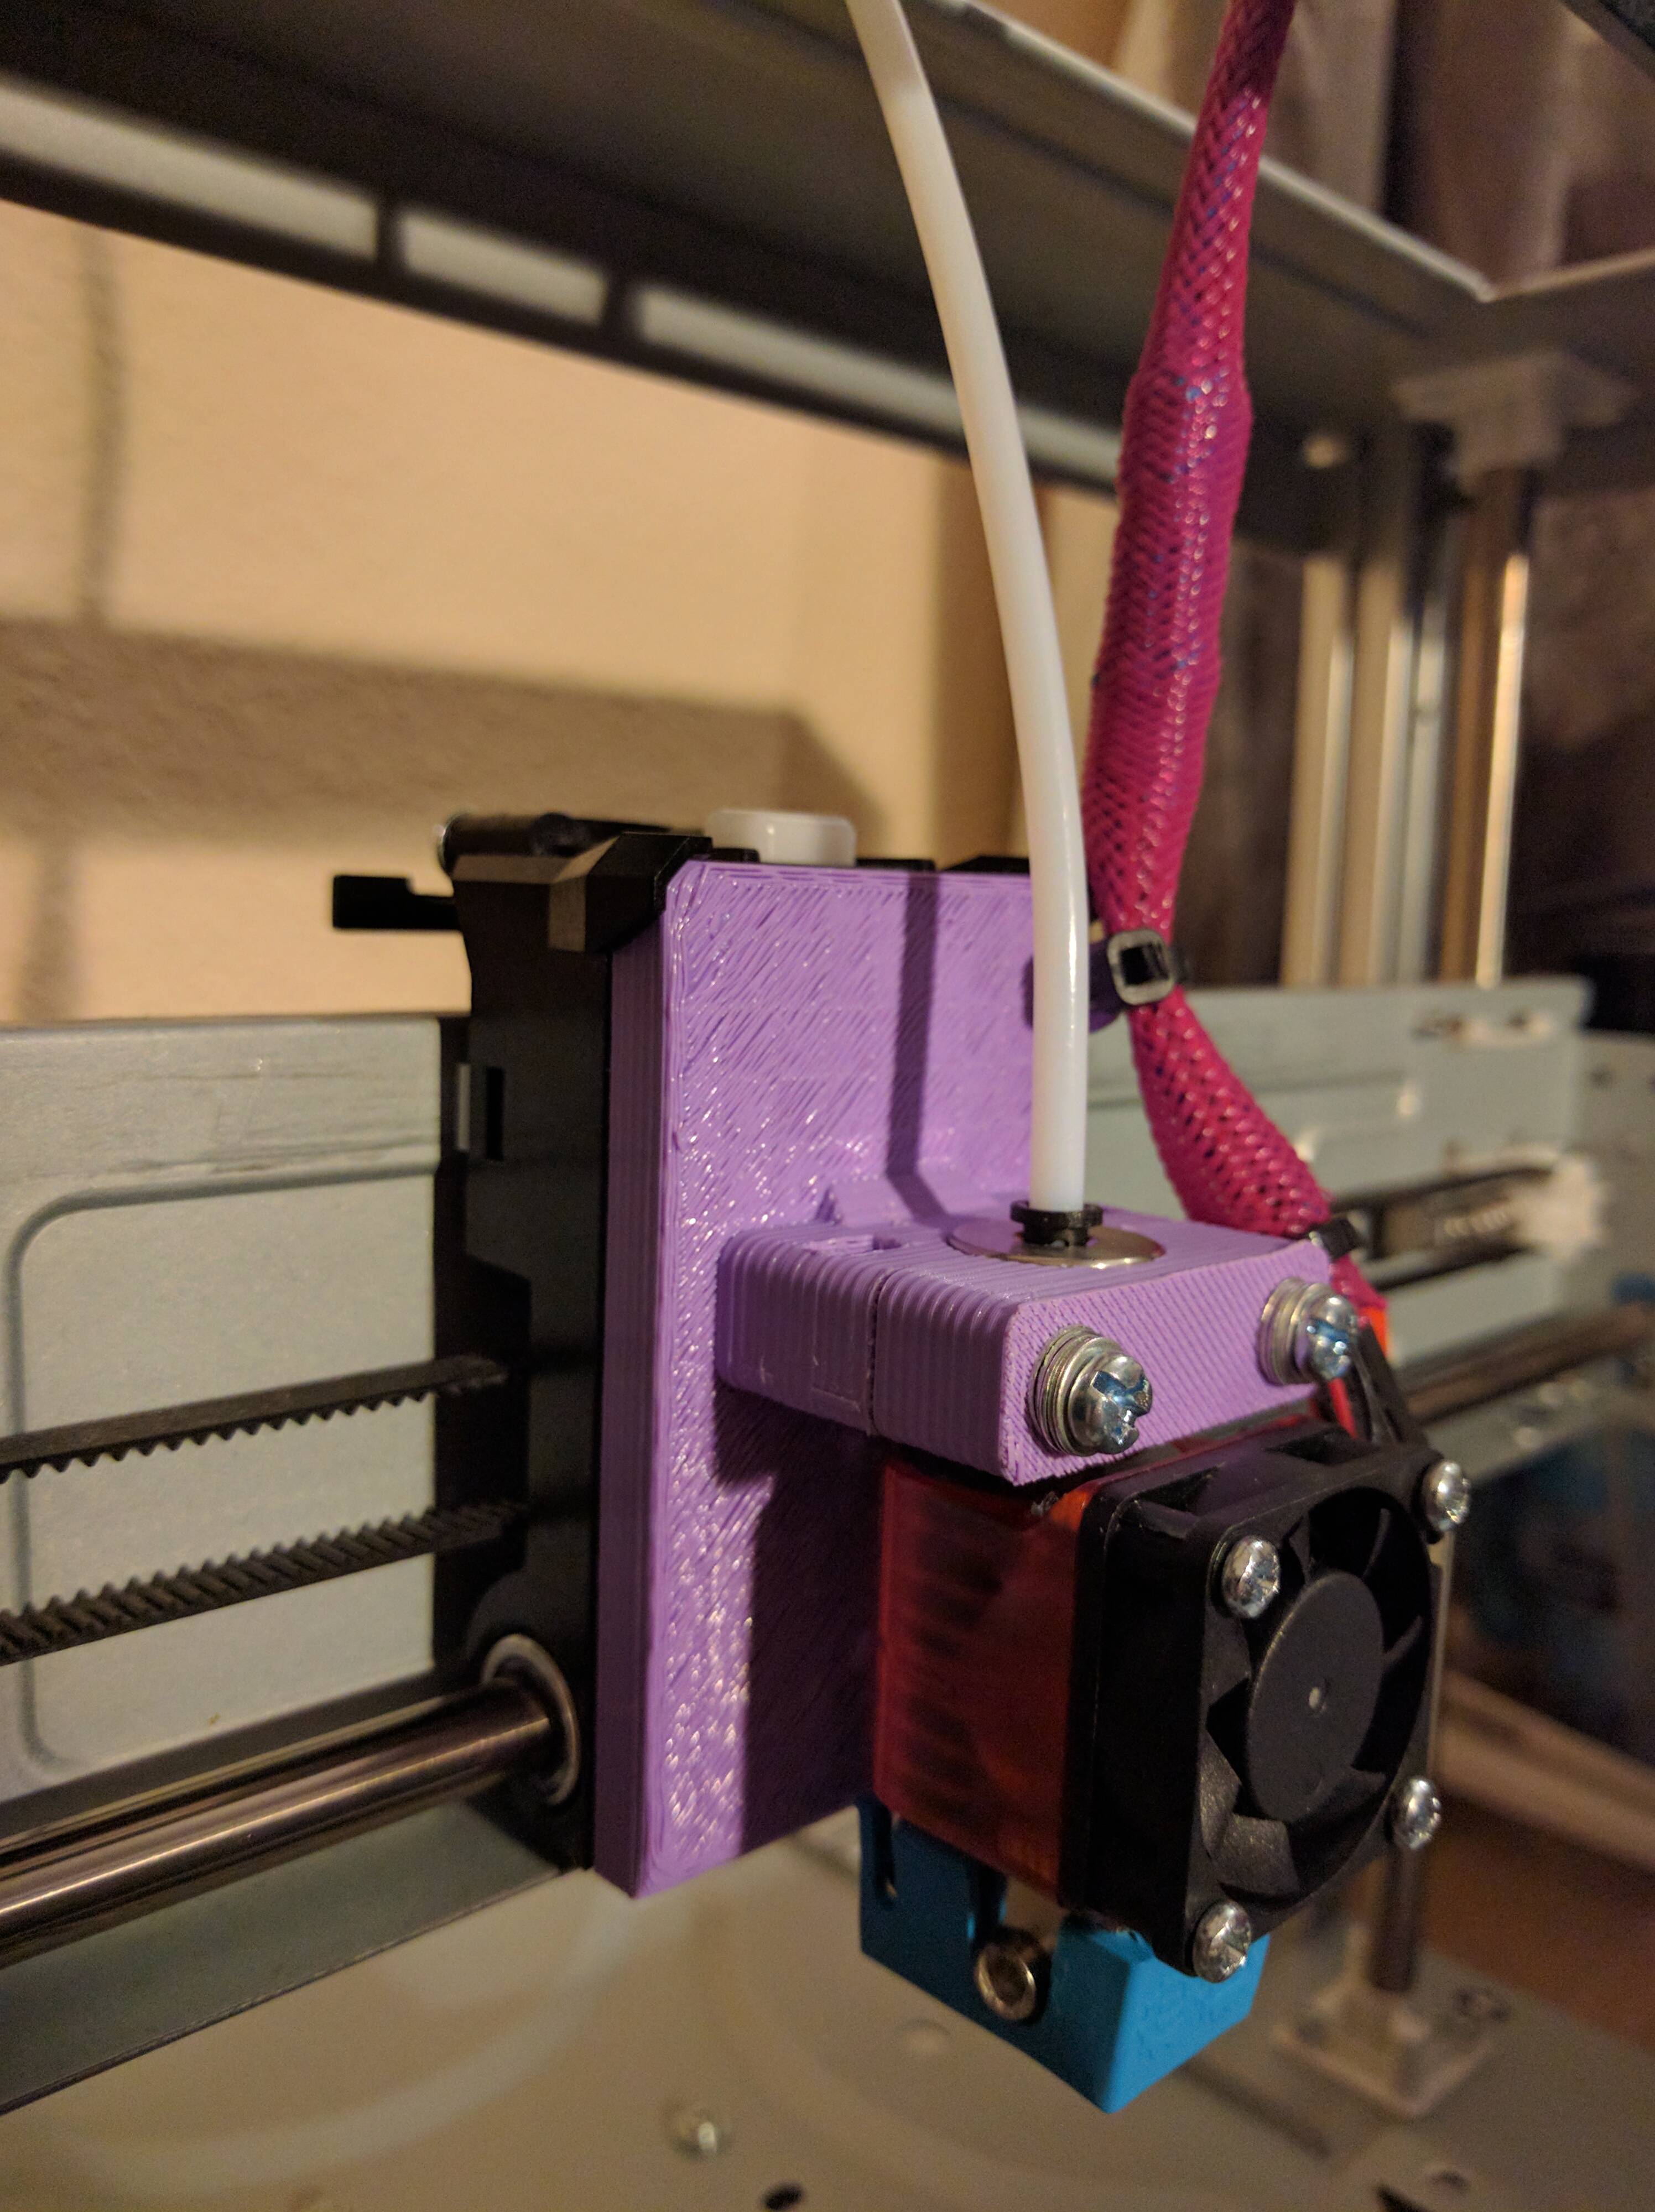

gravy wrote:

At the bottom it pushes onto the bed. When its moving up then back down, at least twice it stops moving but the motor continues turning and that creates a grinding noise.

That sounds bad. Is the threaded rod turning along with the motor? If not it could be a loose rod coupling. If the threaded rod is turning but the gantry is not, you probably have something binding in the Z axis linear rods, and I fear for the health of the threaded brass bearing (if the rod is turning but this isn't going up or down, its threads may be stripped out which would require replacement). A video of this happening might tell more.

gravy wrote:

If, at this point I turn the pot on the stepper driver it can sometimes cause the gantry to start moving again. Down or up! The motor is a Servo kv4239-2tb... 1.8 degree/step. If thats any help. I'm using all 3 jumpers per stepper driver. I should also point out that I'm using the original Jr power supply. Don't know if that makes a difference? I hope I've made sense with this and maybe you or someone else might be able to help.

The Jr power supply (12v 60 watt) was enough to power my RAMPS plus all the stock hardware no problem, and you shouldn't be having a problem there.

If your motor is actually missing steps, that could sound like a grinding sort of noise and it might seem like the motor is turning, but it's actually skipping back and forth quickly. Usually that'll be a problem with the level of the pot on the stepper driver, or a problem with the driver itself.

To check that, first thing to do is to remove power from the board and try switching the Z stepper driver with some other one (like your extruder, something that's working fine). If the different driver works fine (you may have to adjust the power pot) then it must be that stepper.

I'm using A4988 drivers, and I've had problems sometimes with the trimpot not stopping at max, and turning freely back down to minimum power (with a small arc in between that opens the circuit). If you're turning your pot up and suddenly the motor stops working, that may be what's happening to you. Turn the pot back down 1/8-1/4 turn, reset the board and test the axis again.

One more note: I've noticed that using the knob on the RAMPS display to move axes often results in very unpredictable movement. I'm not sure how it's doing the move internally, but using the knob often moves the axis quite a bit more or less than what the display is reading. I would stick to using OctoPrint's control interface and/or its terminal for testing the axes.

Back to positioning in Marlin -- there's an important difference between the MANUAL_Z_HOME_POS  and Z_MAX/MIN_POS variables.

MANUAL_Z_HOME_POS is the (negative) distance between your Z-axis "0" position and where the nozzle ends up after homing.

Z_MIN_POS is the minimum "allowed" position that the axis will travel to after homing. During homing the Z axis could go as low as necessary to trigger the endstop, but after it's been homed, Marlin will move the axis back to Z_MIN_POS before performing any additional travels. This means that if your MANUAL_Z_HOME_POS is different from Z_MIN_POS, that you will be unable to move your axis lower than Z_MIN_POS and it might seem to stop prematurely.

Also, if you have EEPROM settings enabled, there's an additional M206 gcode that can adjust the MANUAL_Z_HOME_POS position. You can see this in the terminal with the M501 gcode that prints your settings. If M206 lists Z with any parameter other than 0, this could be throwing you off.

Here's what I like to do to dial in my homing positions and travel distances (I'm going from memory here, so apologies if this doesn't work 100%, but it should give you some ideas):

  • Make sure X/Y/Z_MIN_POS positions equal MANUAL_X/Y/Z_HOME_POS in Marlin. If they're not this'll confuse you later on.

  • Reset M206 with gcode: M206 X0 Y0 Z0, and save the settings with M500

  • G28 to home all axes. Use M114 to get the firmware position of your axes and take note of the values it reports.

  • M18 to turn off steppers

  • G91 to set relative positioning (this is especially important if your MIN_POS, MAX_POS and HOME_POS may be wrong; trying to use absolute positioning could damage your machine)

  • Use G1 commands to incrementally inch your axes close to your (0,0,0) point, that is, get the nozzle very close to the front left corner of your bed. Usually I'll raise Z a significant amount first (G1 Z10) to get it out of the way, then move X and Y until the nozzle is near the front corner, then finally lower Z very slowly until it's almost touching the bed. Remember that you're in relative positioning mode here, so keep all numbers in the G1 command pretty small.

  • Use M114 to report the current position of your axes in this "close to 0" position. Now subtract these numbers from the previous MANUAL_X/Y/Z_HOME_POS values to arrive at the new values, and put them into your Marlin firmware. Alternatively you can use M206 to set these values by entering the negative of your current position (do not subtract the current position from MANUAL_*_HOME_POS)

  • If you used M206, now run "M500" to save the EEPROM settings. Otherwise re-upload your firmware and reset the board.

Now that you have MANUAL_*_HOME_POS nearly set, you can reset your X/Y/Z_MIN_POS to match these values. Optionally you can set Z_MIN_POS to "0" to make sure that the Z axis always gets out of the way of the bed.

Then to find your X/Y/Z_MAX_POS, I'd do this:

  • G28 (home all axes)

  • G91 (relative positioning)

  • Move axes with G1 and inch up to the maximum of your axis. Once you have a position you're confortable with as your max, use M114 to get the positioning. This value can be entered directly into Marlin as your *_MAX_POS. If at any time you go too far and you crash an axis, the best idea is to re-home that axis (e.g., G28 Z) and repeat the procedure without going too far.

32

Re: [HOWTO] Convert Da Vinci Jr to RAMPS 1.4

@Anthem. Wow. Thank you for taking the time to write that. Very detailed and informative. The stepper motor did turn out to be a faulty driver. Replaced with a new one and its all good. As for power supply. I'm pleased I can use the stock Jr one. Obviously it keeps the cost down. As for the homing positions, I've got them pretty much sorted now. Just one thing I don't understand. You said "The Jr is only advertised to have a 150mm Z-axis build size". I thought that was limited only by the stock f/w. I see all that extra height on the printer but don't understand why, with Ramps I'm still limited to 150mm. ????

33

Re: [HOWTO] Convert Da Vinci Jr to RAMPS 1.4

@gravy yeah dude you can change the parameters within the firmware to whatever you want, so if you've got more than 150mm of space on the z axis set it to whatever you want. When you upload your firmware click on the configuration.h tab and change the Z 150 to Z *whatever space you have*
I've never run mine to the top but I just bought a e3d lite6 and Titan extruder so before I mess around with the firmware for that I'll see how high my jr can comfortably go then adjust to that.

@anthem how are your other modifications going?

34

Re: [HOWTO] Convert Da Vinci Jr to RAMPS 1.4

@gravy - in Marlin config you define your build volume and if Z is set to 150 then you can't go beyond that. I'd presume that @Anthem's config has Z height set to 150.
If you want to squeeze a bit more out of your Z it its quite easy.
Just edit configuration.h file to set Z height to 160 or so.
Then simply move Z axis up to 150 and after that go up by 1mm increments to the height you desire.
When happy - amend config file, reupload it and you're good to go.

Btw, you said that there's plenty of extra space on Z. Have you printed out calibration cube to ensure you have right steps per mm set?!

35

Re: [HOWTO] Convert Da Vinci Jr to RAMPS 1.4

Thanks guys. I've sussed it. Got 153mm z max. Gotta say this is one steep learning curve but I know its worth it. So glad I made the switch to Ramps and Marlin. Of course om still not ready to print yet. Still got a lot to take in but I'm buzzing at that feeling of control I have/will have over this printer. Appreciate the input from you all.

36

Re: [HOWTO] Convert Da Vinci Jr to RAMPS 1.4

Here are my new updates
E3d lite6 on a new carriage I modeled using m5 nuts and bolts with captive slots for the nuts. It also moves the hot end away from the carriage for better airflow through heatsink
E3d Titan extruder
Pink (I ordered red but whatever pink is punk) cable braiding to neaten the whole thing up.
http://soliforum.com/i/?H7Al8tt.jpg
http://soliforum.com/i/?CggvsA9.jpg
http://soliforum.com/i/?u2exDIC.jpg
http://soliforum.com/i/?Pk1oYEl.jpg

37

Re: [HOWTO] Convert Da Vinci Jr to RAMPS 1.4

I have another question. Homing (g28). It appears my Z end stop is dead. When I G28 the z axis continues down past the height of the bed. Taking the bed with it. Is it possible to manually home all axis, simulating G28, so that Z axis stops just short of the bed?

38

Re: [HOWTO] Convert Da Vinci Jr to RAMPS 1.4

Is it plugged into Z max or Z min and what is its status when pressed and not pressed.  You can see this by sending an M119 command and see what it reports back in the terminal window.

Printing since 2009 and still love it!
Anycubic 4MAX best $225 ever invested.
Voxelabs Proxima SLA. 6 inch 2k Mono LCD.
Anycubic Predator, massive Delta machine. 450 x 370 print envelope.

39 (edited by gravy 2016-10-27 19:21:34)

Re: [HOWTO] Convert Da Vinci Jr to RAMPS 1.4

Editing post. @carl_m1968. All Z min. Heres what's happening. My X axis works visually/physically. I am in no doubt about that. However, m119 reports X as "open". Whether I home X. Move X away from end stop. Or cover end stop with a card. It always reports as "open". Now the Y axis works perfectly. Open is "open" and triggered is "triggered". Homes just like it should. Here's the pita, the Z axis sensor is not working so Z crashes into bed. It always reports as "open". I disconnected the sensor from the Z plug and connected that Z sensor onto the X plug. The Z sensor was still not working. I also tried swapping around X, Y and Z connectors on the Ramps board. X to Y. Z to X etc. Result concludes that the Z sensor does not work. Its at this point I start to struggle to keep up with myself. I think its safe to say that the Ramps end is fine. The Y cabling and sensor are fine. The X cabling and sensor seem fine but I don't know why it constantly reports being " open". I'm pretty certain the Z sensor is dead. As for the Z cabling. No idea. As a noob I think its fair to assume that a fault in the Z cabling caused the sensor to die. I hope this all makes sense. I have since considered just replacing all of the end stops with these http://ooznest.co.uk/Endstops/Optical-Endstop or something similar. I'm guessing that would remove the need for the resistors in the cabling in Anthems tutorial.

40 (edited by mysticmixles 2016-11-30 08:28:56)

Re: [HOWTO] Convert Da Vinci Jr to RAMPS 1.4

If you wire in another resistor for the existing mechanical endstops, could you use them, or do you need to wire in new optical ones?

Additionally, what kind of resistors do we need? 1/4W, 1/8W, etc?

41

Re: [HOWTO] Convert Da Vinci Jr to RAMPS 1.4

I didn't the ramps too. Any idea if it's possible to add auto level to the Jr?

42

Re: [HOWTO] Convert Da Vinci Jr to RAMPS 1.4

Quick question. My nozzle catches on the corner of the bed at the beginning of a print. What do I put into G code to prevent this?

43

Re: [HOWTO] Convert Da Vinci Jr to RAMPS 1.4

G28 ; home all axes
G1 Z5 F5000 ; lift nozzle

the above I just copied out of my slicer start g code.
G1 is a movement the Z5 lifts the nozzle 5mm and the F5000 is a feed rate

Soliddoodle 4 stock w glass bed------Folger Tech Prusa 2020 upgraded to and titan /aero extruder mirror bed
FT5 with titan/ E3D Aero------MP mini select w glass bed
MP Utimate maker pro-W bondtech extruder
Marlin/Repetier Host/ Slic3r and Cura

44

Re: [HOWTO] Convert Da Vinci Jr to RAMPS 1.4

Tin Falcon wrote:

G28 ; home all axes
G1 Z5 F5000 ; lift nozzle

the above I just copied out of my slicer start g code.
G1 is a movement the Z5 lifts the nozzle 5mm and the F5000 is a feed rate

Cheers for that. Worked at treat.

45

Re: [HOWTO] Convert Da Vinci Jr to RAMPS 1.4

Glad to help !!

Soliddoodle 4 stock w glass bed------Folger Tech Prusa 2020 upgraded to and titan /aero extruder mirror bed
FT5 with titan/ E3D Aero------MP mini select w glass bed
MP Utimate maker pro-W bondtech extruder
Marlin/Repetier Host/ Slic3r and Cura

46

Re: [HOWTO] Convert Da Vinci Jr to RAMPS 1.4

gravy wrote:

Editing post. @carl_m1968. All Z min. Heres what's happening. My X axis works visually/physically. I am in no doubt about that. However, m119 reports X as "open". Whether I home X. Move X away from end stop. Or cover end stop with a card. It always reports as "open". Now the Y axis works perfectly. Open is "open" and triggered is "triggered". Homes just like it should. Here's the pita, the Z axis sensor is not working so Z crashes into bed. It always reports as "open". I disconnected the sensor from the Z plug and connected that Z sensor onto the X plug. The Z sensor was still not working. I also tried swapping around X, Y and Z connectors on the Ramps board. X to Y. Z to X etc. Result concludes that the Z sensor does not work. Its at this point I start to struggle to keep up with myself. I think its safe to say that the Ramps end is fine. The Y cabling and sensor are fine. The X cabling and sensor seem fine but I don't know why it constantly reports being " open". I'm pretty certain the Z sensor is dead. As for the Z cabling. No idea. As a noob I think its fair to assume that a fault in the Z cabling caused the sensor to die. I hope this all makes sense. I have since considered just replacing all of the end stops with these http://ooznest.co.uk/Endstops/Optical-Endstop or something similar. I'm guessing that would remove the need for the resistors in the cabling in Anthems tutorial.


I'm also curious about replacing the endstops with optical units compatible with the RAMPS 1.4 board and the Da Vinci Jr mountings.

47

Re: [HOWTO] Convert Da Vinci Jr to RAMPS 1.4

mysticmixles wrote:

If you wire in another resistor for the existing mechanical endstops, could you use them, or do you need to wire in new optical ones?

Additionally, what kind of resistors do we need? 1/4W, 1/8W, etc?

I think this is a great idea. I think 1/8W or at most 1/4W units would work. Do you have a schematic for doing this?

48 (edited by mysticmixles 2016-12-28 10:19:05)

Re: [HOWTO] Convert Da Vinci Jr to RAMPS 1.4

Another post. I've started the conversion, and I'm just straight soldering everything, rather than using a connector kit and crimping.

I've got my boards hooked up, and the screen attached. Issue is, I can't give input. Spinning the dial doesn't do anything. Does anyone have any ideas?

EDIT Found that if the thermistor isnt connected, it might not work. Problem is, I can't figure out how to connect it, as the board is poorly labeled. Researching now.

EDIT Got it hooked up and reading. Can't find the fan control option in the menu, however. Also, I get a heating failed error when I try to set the temp.

49

Re: [HOWTO] Convert Da Vinci Jr to RAMPS 1.4

Sounds like you may not have your hot end hooked to the right port. Fan control wont be there since you turned on Auto Fan Control on D9 (if you followed the full setup). Fans will only come up when thermistor gets to > 50 degrees C.

Heating failed i think only happens when there is no load from the hotend (which should be plugged into D10).

Is your thermistor reading properly? at ambient should be reading about 28 degrees or so.

50

Re: [HOWTO] Convert Da Vinci Jr to RAMPS 1.4

willthiswork89 wrote:

Sounds like you may not have your hot end hooked to the right port. Fan control wont be there since you turned on Auto Fan Control on D9 (if you followed the full setup). Fans will only come up when thermistor gets to > 50 degrees C.

Heating failed i think only happens when there is no load from the hotend (which should be plugged into D10).

Is your thermistor reading properly? at ambient should be reading about 28 degrees or so.

Ambient temp is reading at 28 C on the dot.

And I never would have guessed that auto fan disabled manual controls, thanks. The hotels is plugged in to D10. Guess I'll recheck my connections now, but I'm pretty sure they're solid. I'll post a picture shortly.