Hey, I'd be happy to help you getting it up and running.. So firstly, the things you're gonna need -
1. Your power supply unit
2. Some 14 to 16 gauge insulated cabling
3. If you're willing to cut the cords off your solidoodle power supply unit, then you'll just need that. Otherwise, you'll need a barrel connector that plugs into the printer, and a power cable off something else (or an extension cord)
Let's get started!
So, first things first.. Turn your power supply around so that it is facing you like this - 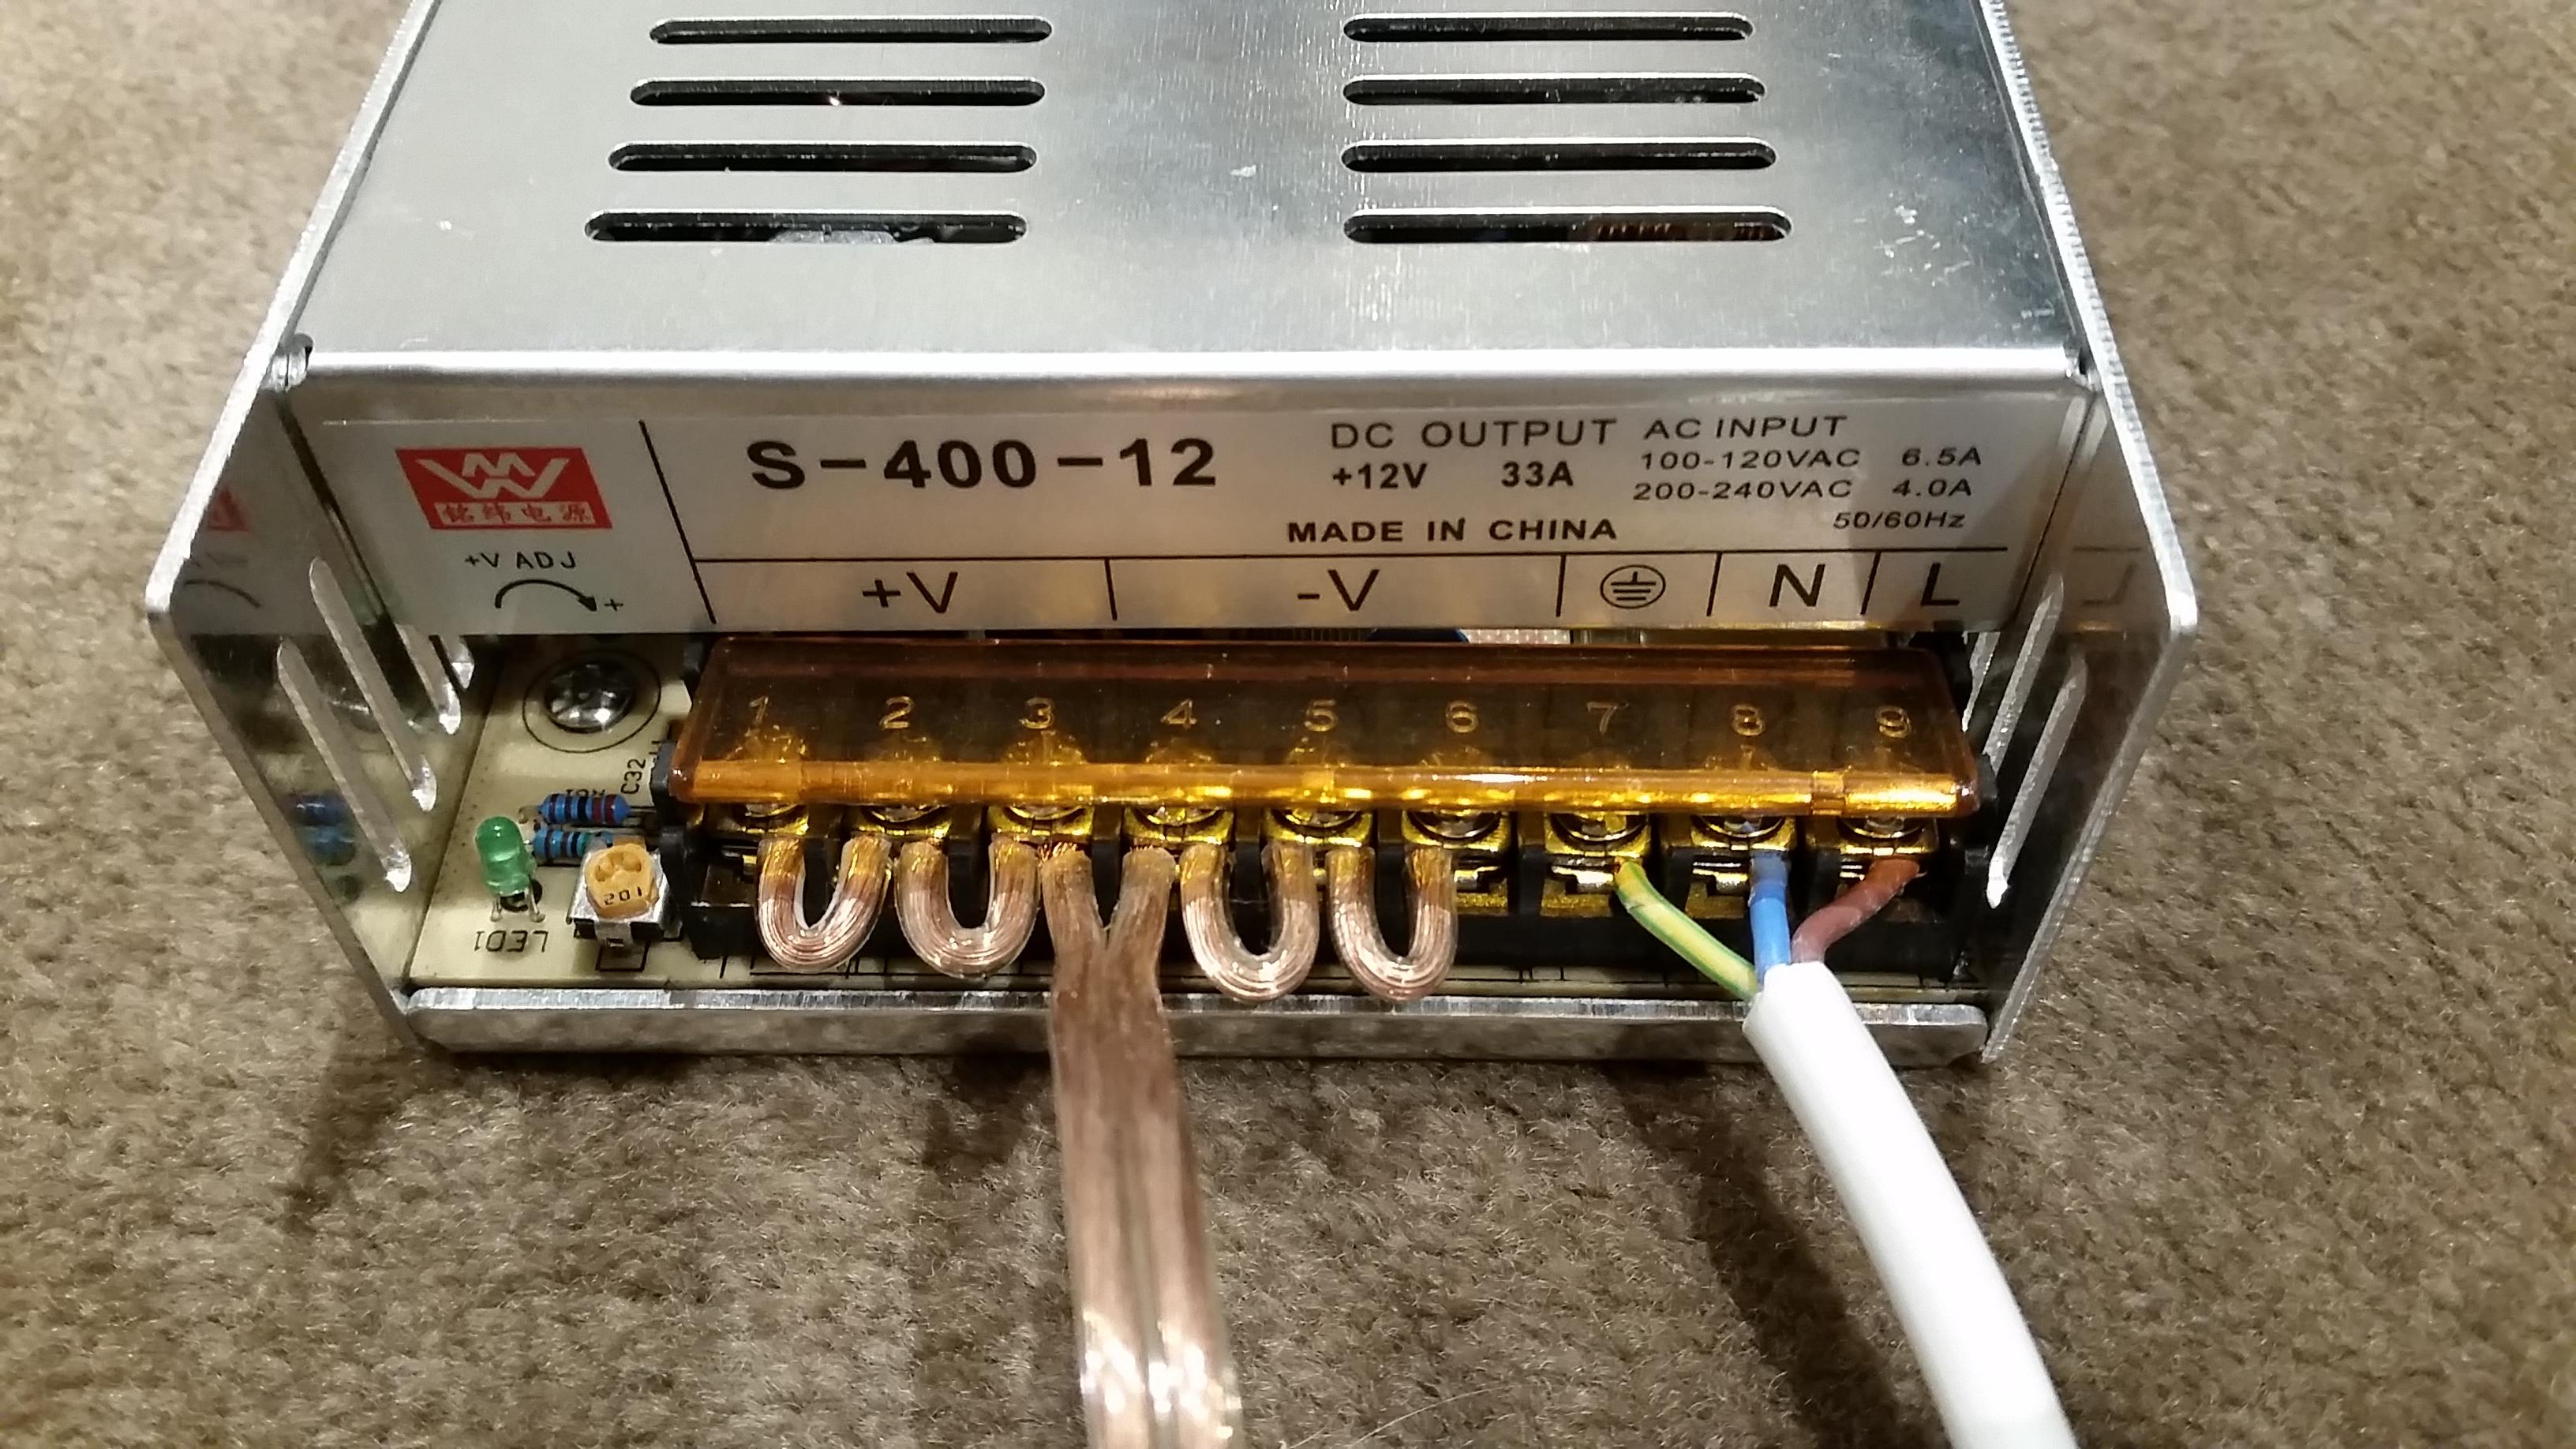
Ignore the cables screwed in there for now. If you look on the right hand side, you'll see the terminals for the Line (L), Neutral (N), and Earth (earth symbol) cables for the cord that you'll plug into the wall outlet.
Take an extension cord and cut it in half, or the power cable for something that you don't use any more. At the end that you cut, cut back some of the very outer insulation about 3cm. You can see this here in the white -

Inside you should see 3 separate cables, the colours of the insulation of these will vary, depending on your country and the standard to which the cable was made. It should be either Red, Black, Green for Line, Neutral, Earth respectively.. Or Brown, Blue, Green (or green and yellow stripes) again for Line, Neutral and Earth Respectively.
Using some wire strippers, carefully cut off about 1cm of insulation on each of these cables, and screw them into their respective terminals as seen in my picture above. If you've made it to here, congrats! Thats almost half done. This part was a bit of a pain in the ass for me to strip it all carefully and neatly. Also, make sure you screw them fairly tight, you don't want it falling out and shocking you. But you also don't want to screw it in so tight that the copper strands snap right off.
The next part
Now onto the other half, there should be 6 terminals left. Half of them will be labelled "+V" and the other half "-V". Here is where you'll need your 14 or 16 gauge cable. 16 will be easier to work with (thinner) but won't be able to handle as much current as 14. If you're wondering, I used 16.
You'll want to cut it up firstly into 4 short pieces, at a guess I'd say about 3-4cm long. Strip 1cm of insulation off each end and start screwing! This part gets a little fiddly.. The whole purpose of doing all of this is so that you can get the maximum power output from the power supply unit.
First, screw one end into the far left terminal, and then bend it around into the terminal to its right. Before you screw that in, you'll want to put in another one of your pieces and screw them in together. Then, take the loose end from this piece and insert it into the terminal to its right again, we should be at the terminal 3rd from the left now. Here, you'll want to screw in a length of your cable too (however long you want it to be) this will be the positive 12V lead to the printer. Repeat the same process, but starting from the right side of the negative terminals and working your way to the left. The picture will make it a whole lot easier to understand.. Pretty much, screw in your cables like this - 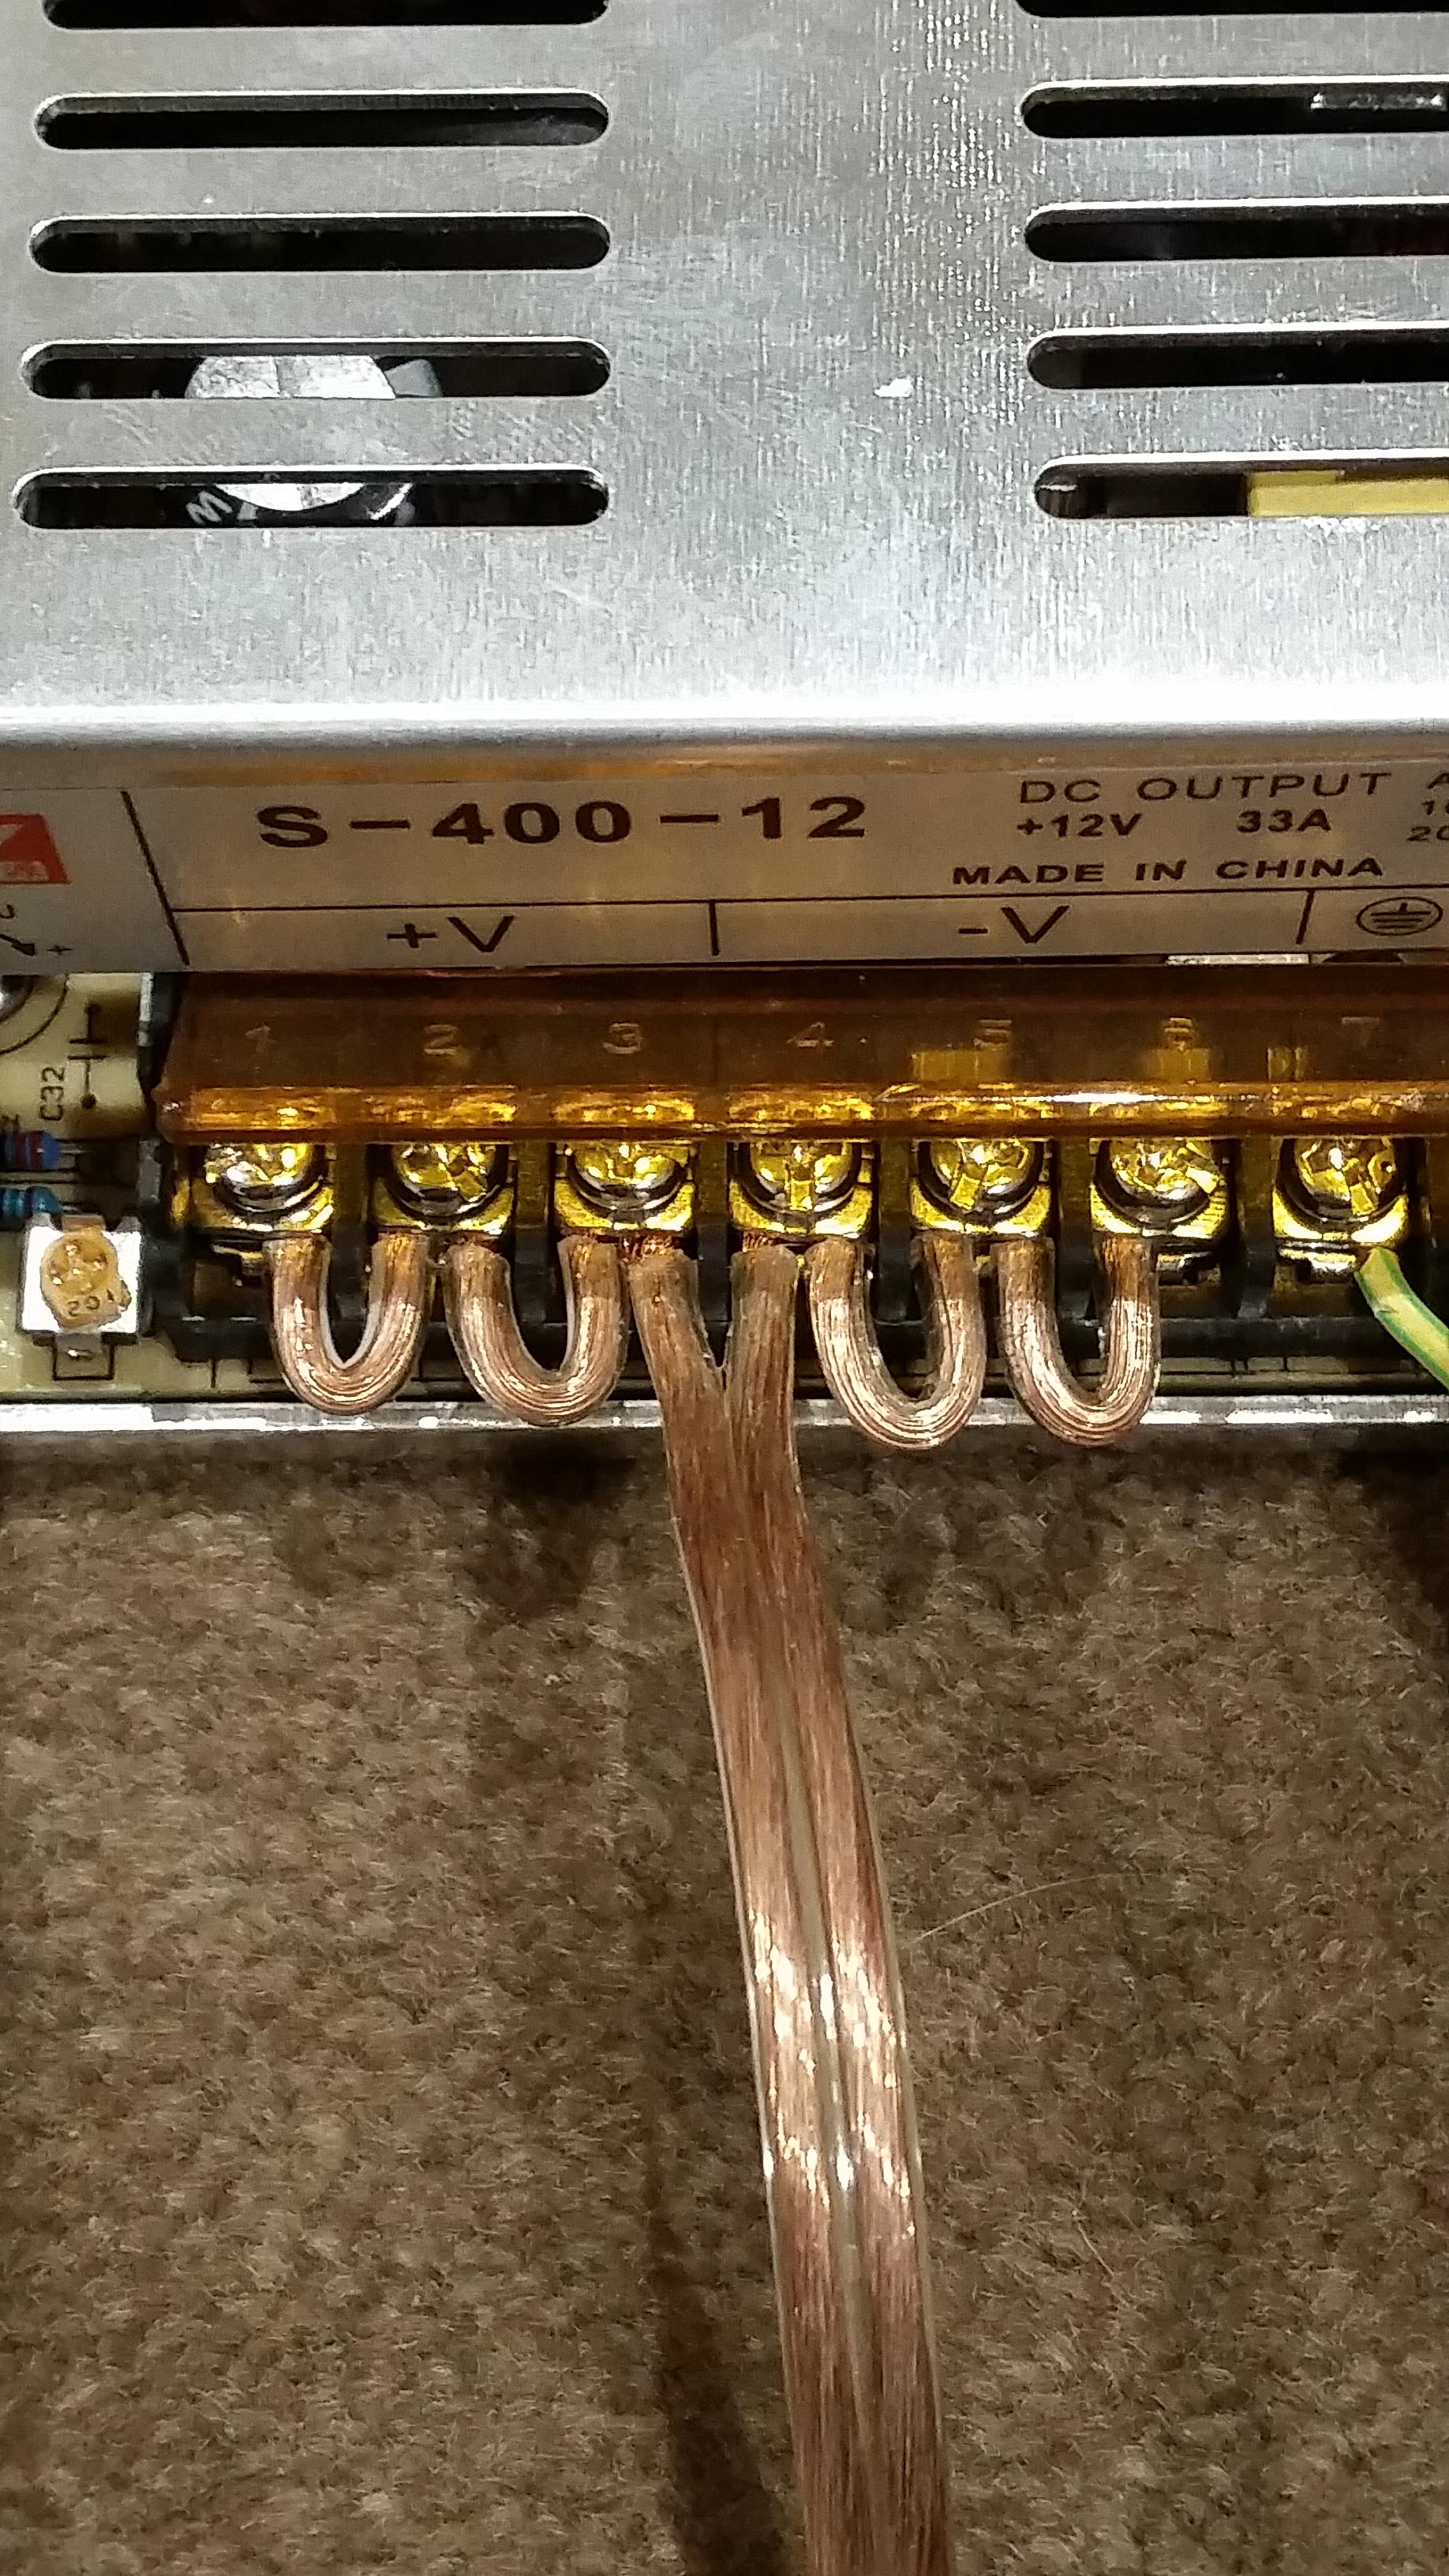
Then, with the ends of the long cords that you screwed in, you'll want to strip off about 1cm of insulation again. And go grab either your barrel plug or just the part that you cut off the original power supply. Mine looks like this - 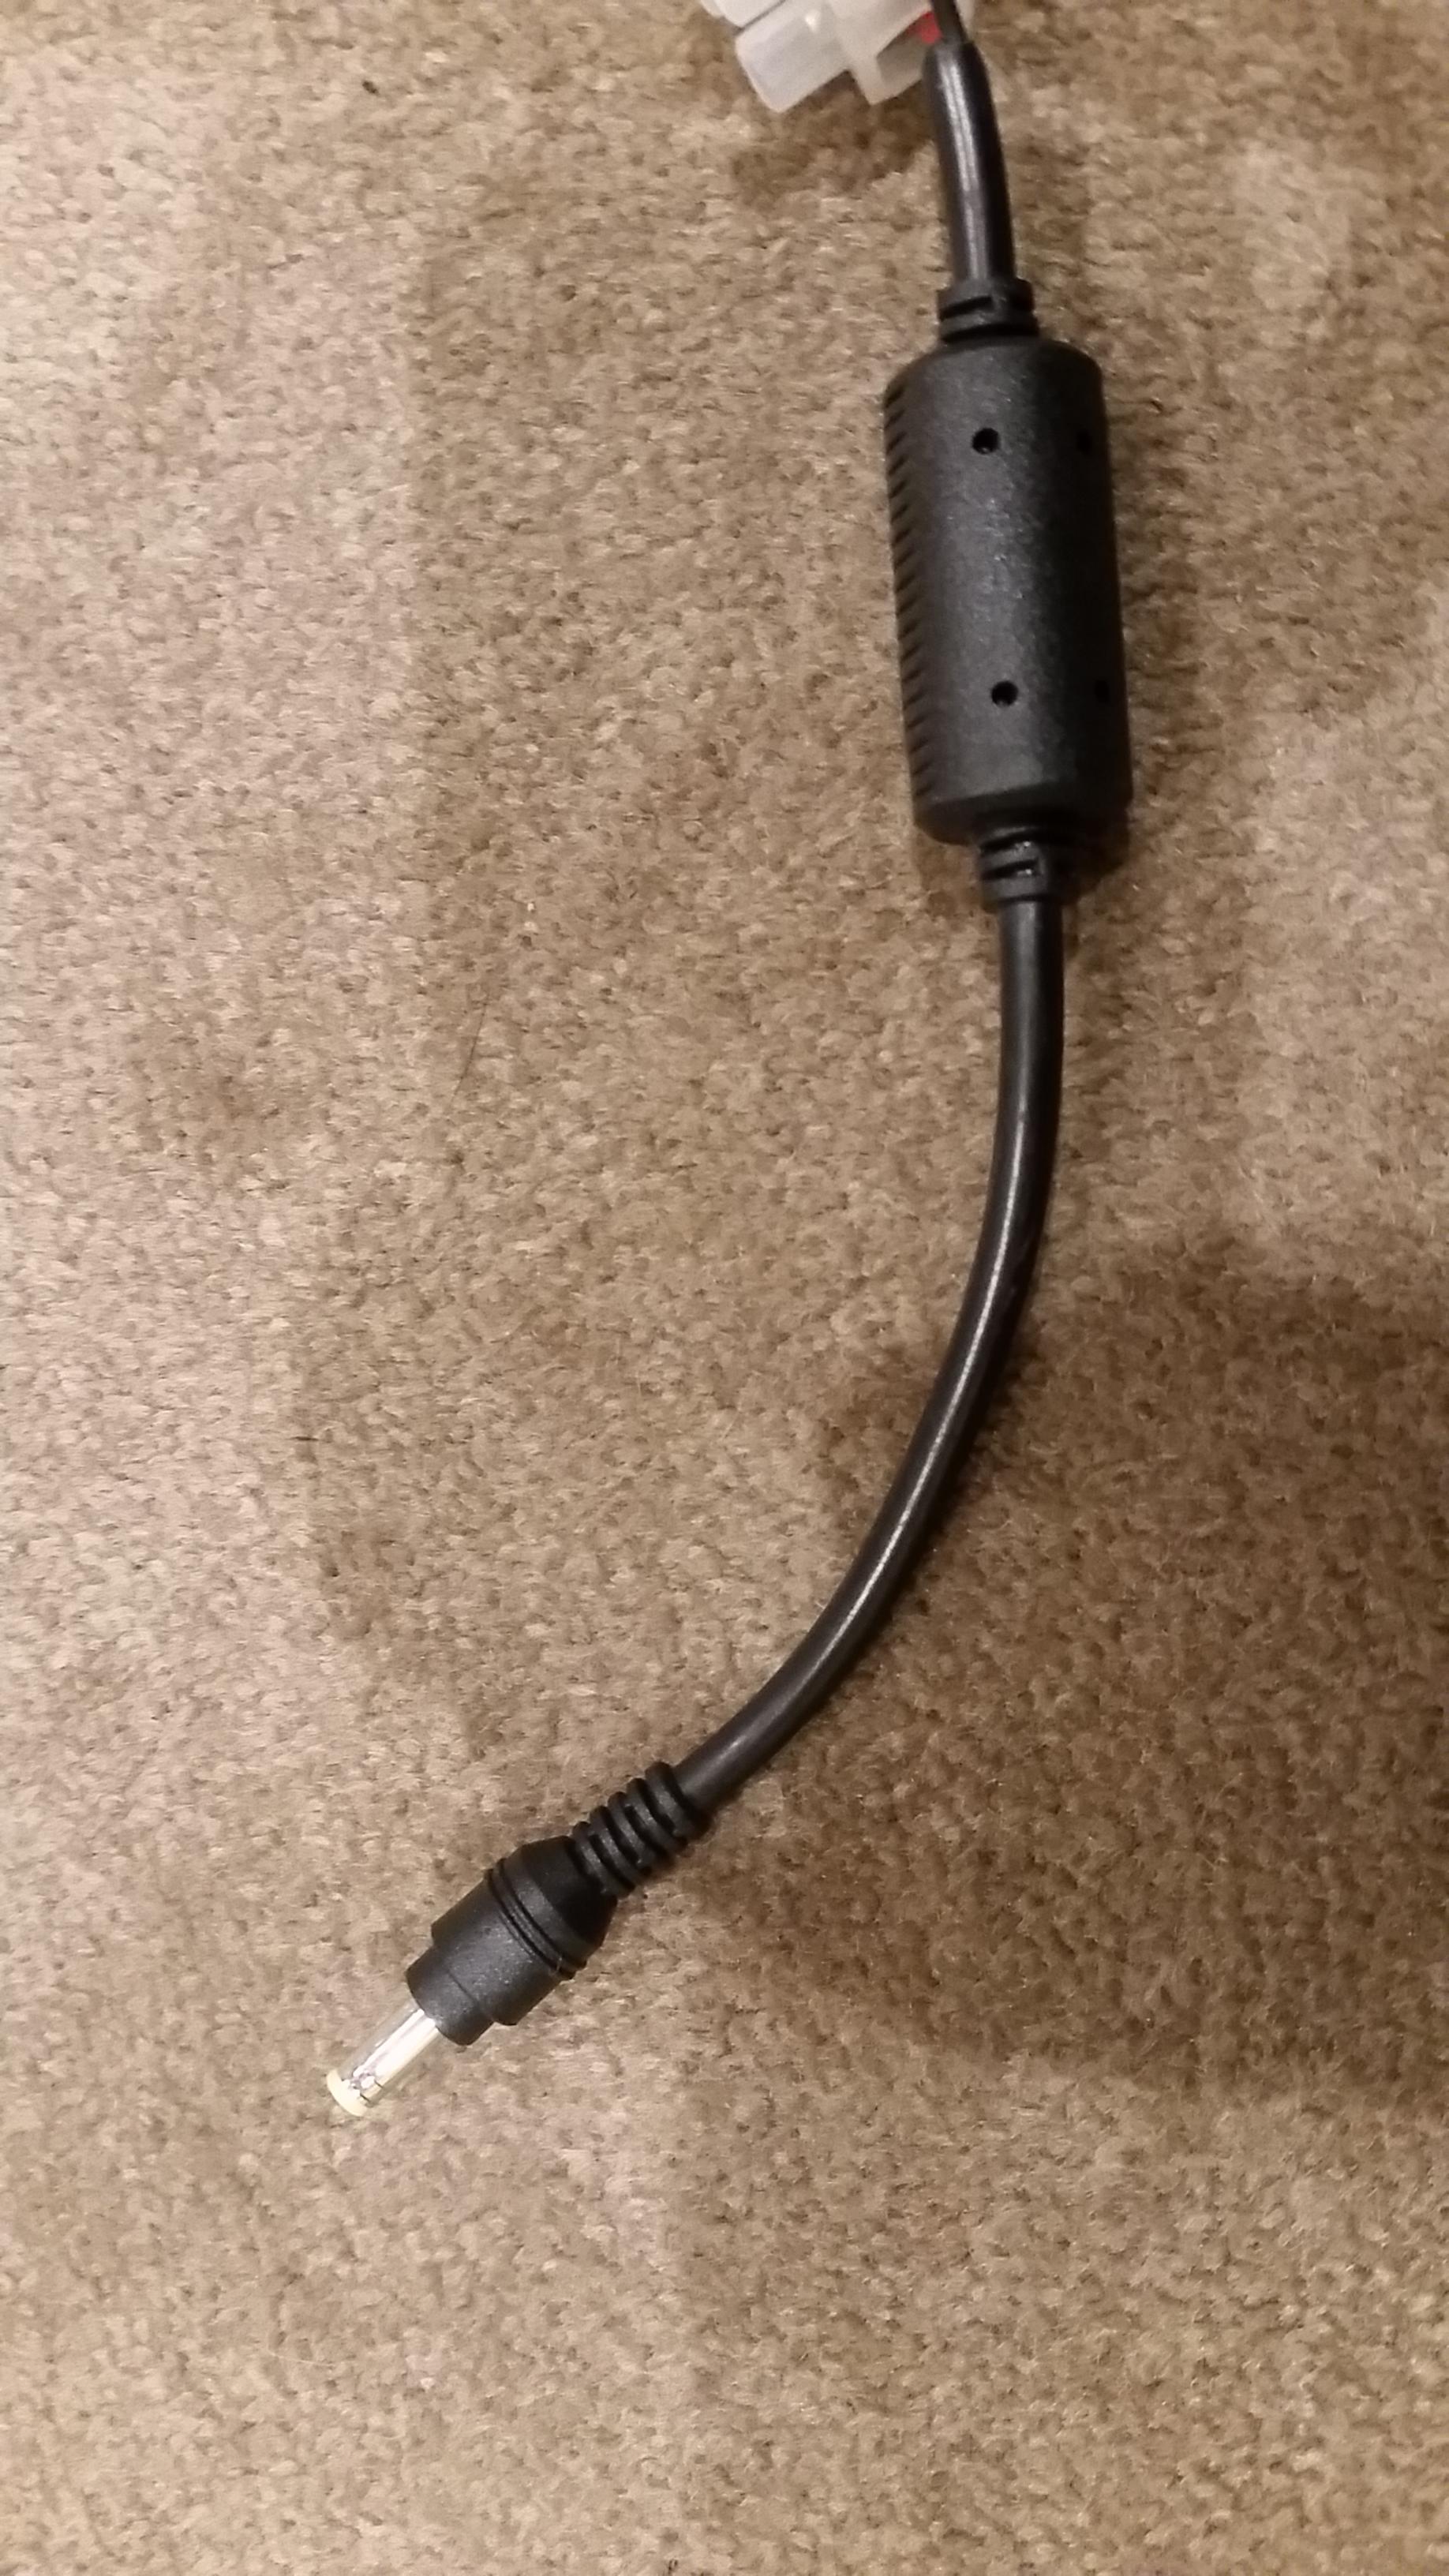
Strip away the insulation from this too, and you should find a red and a black cable inside. Solder the cord coming from the +V side of your power supply unit to the red cable on your barrel plug, and the cord from the -V side of your power supply to the black cable on your barrel plug. An alternative to soldering is to go out and buy an easy screw in connector like I have, but it does the same thing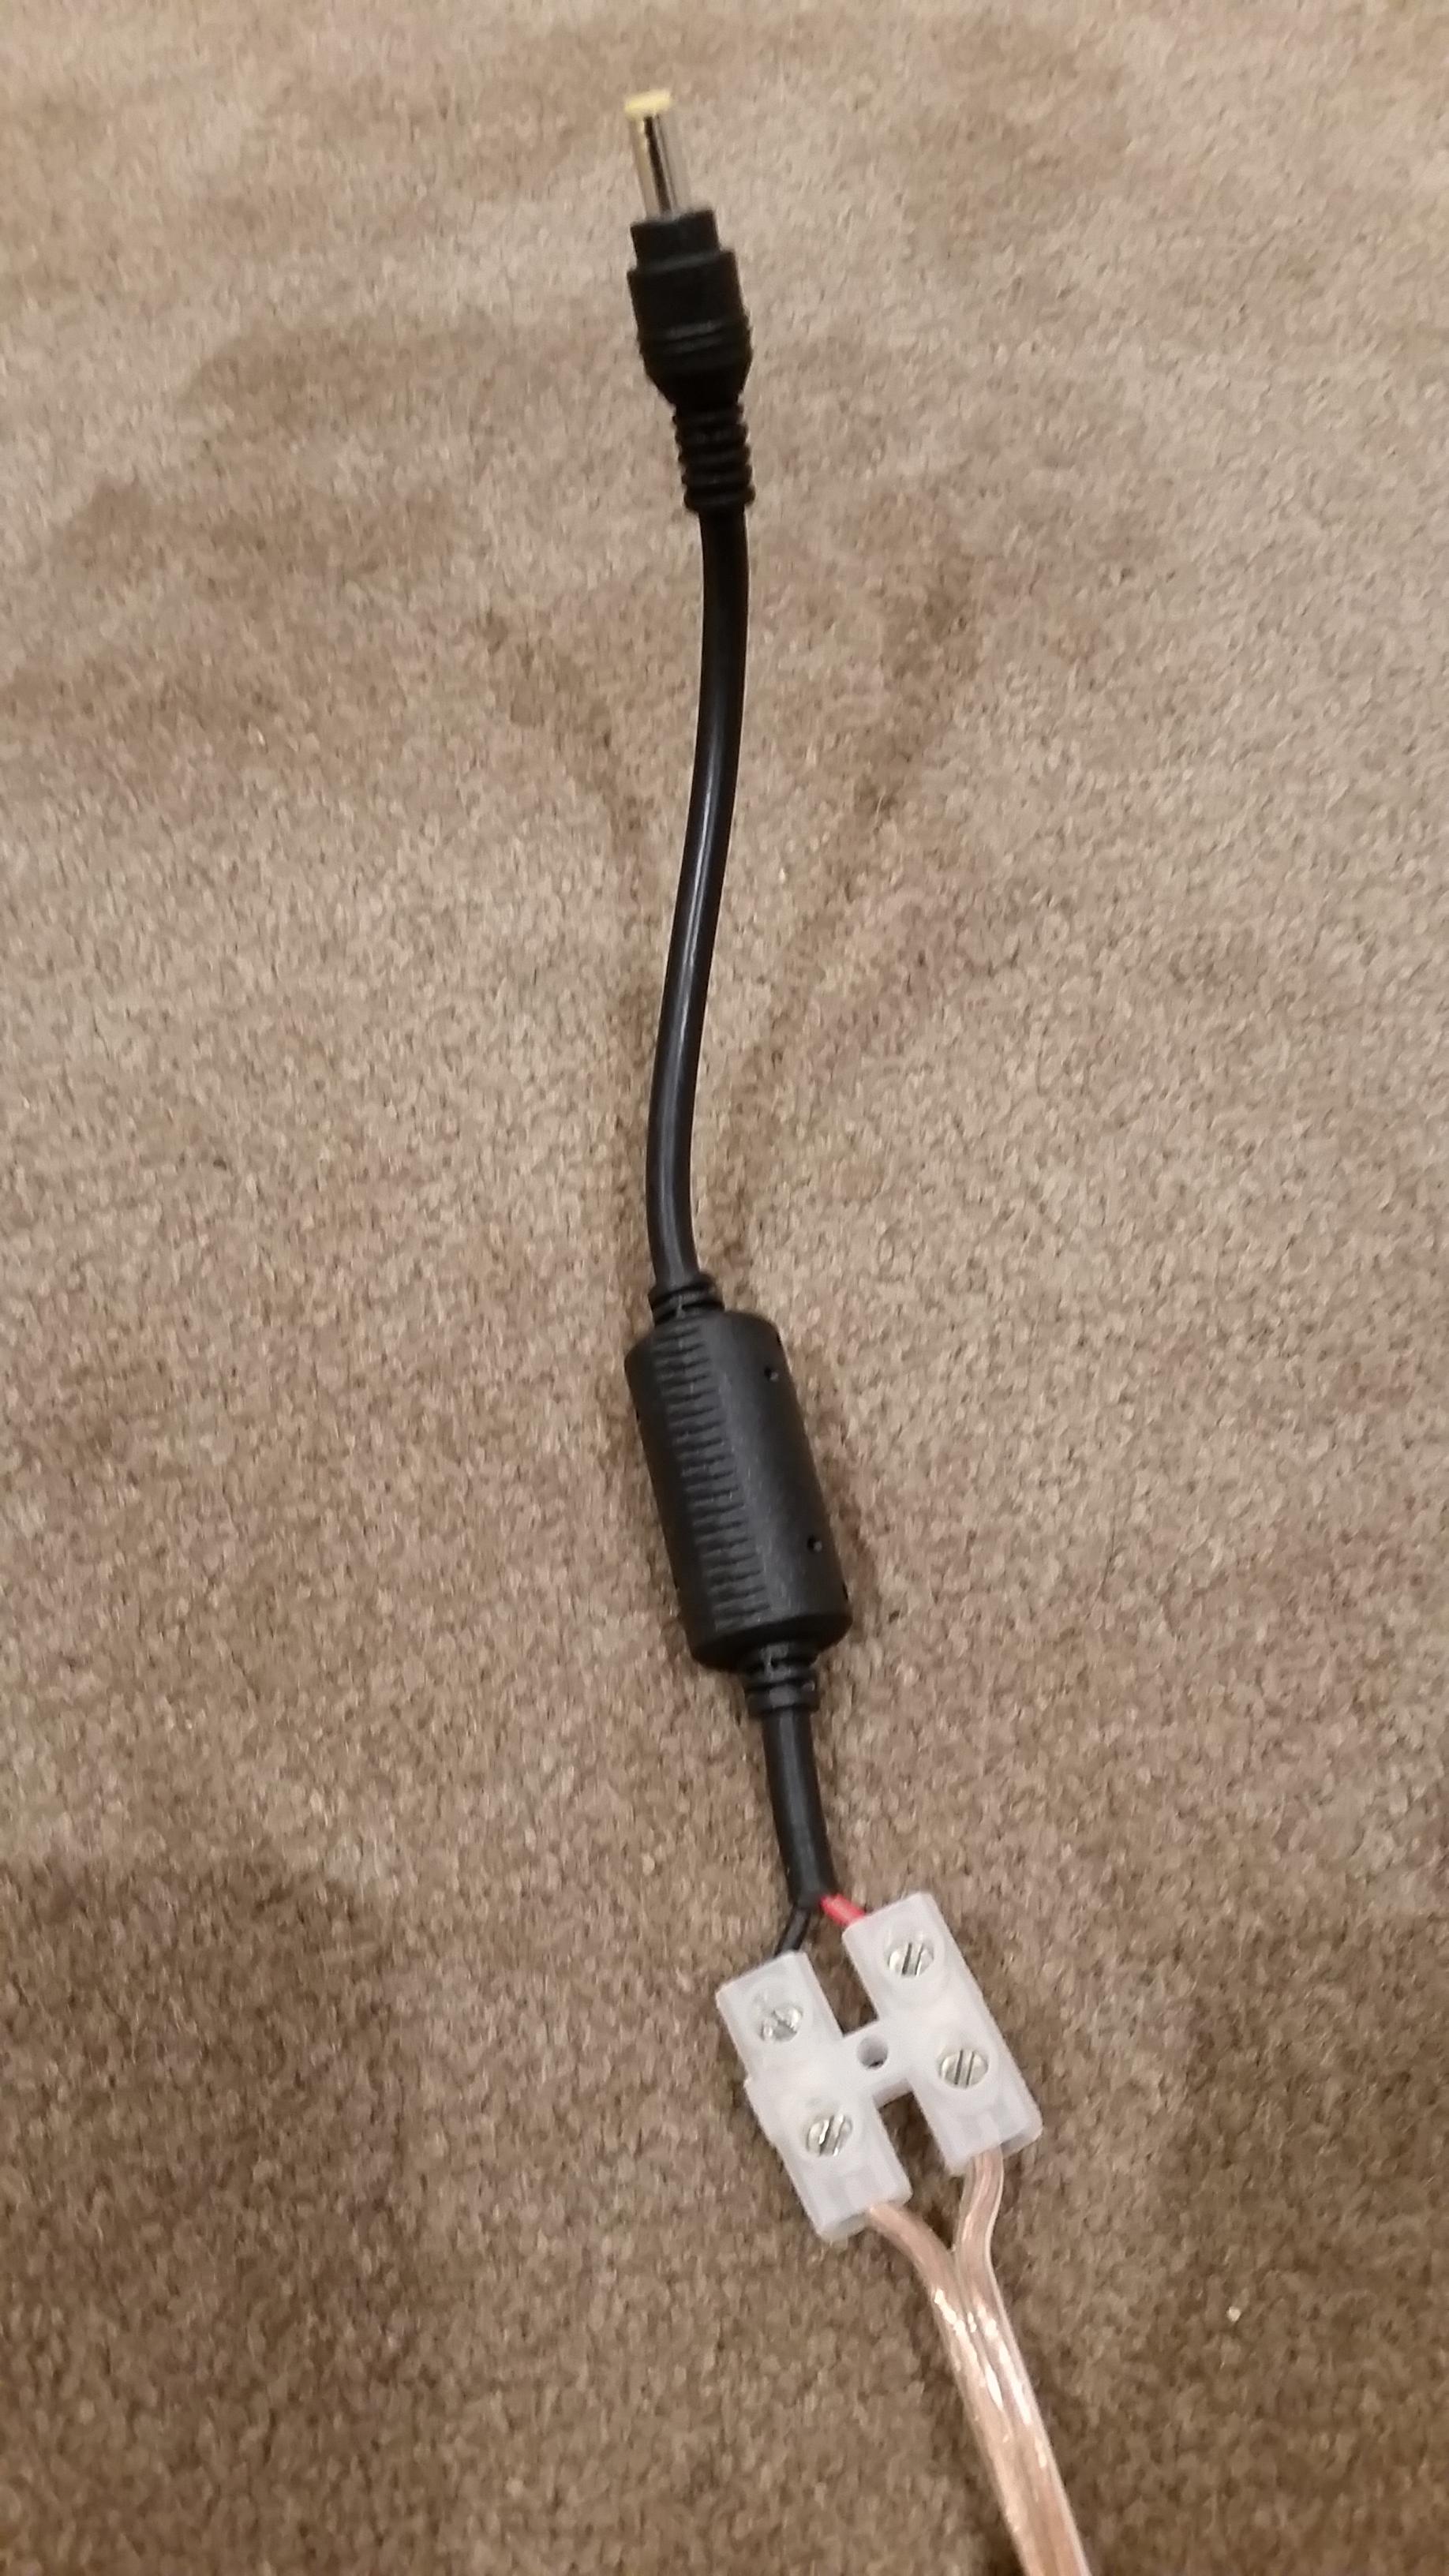
Your power supply unit should now be looking something like this - 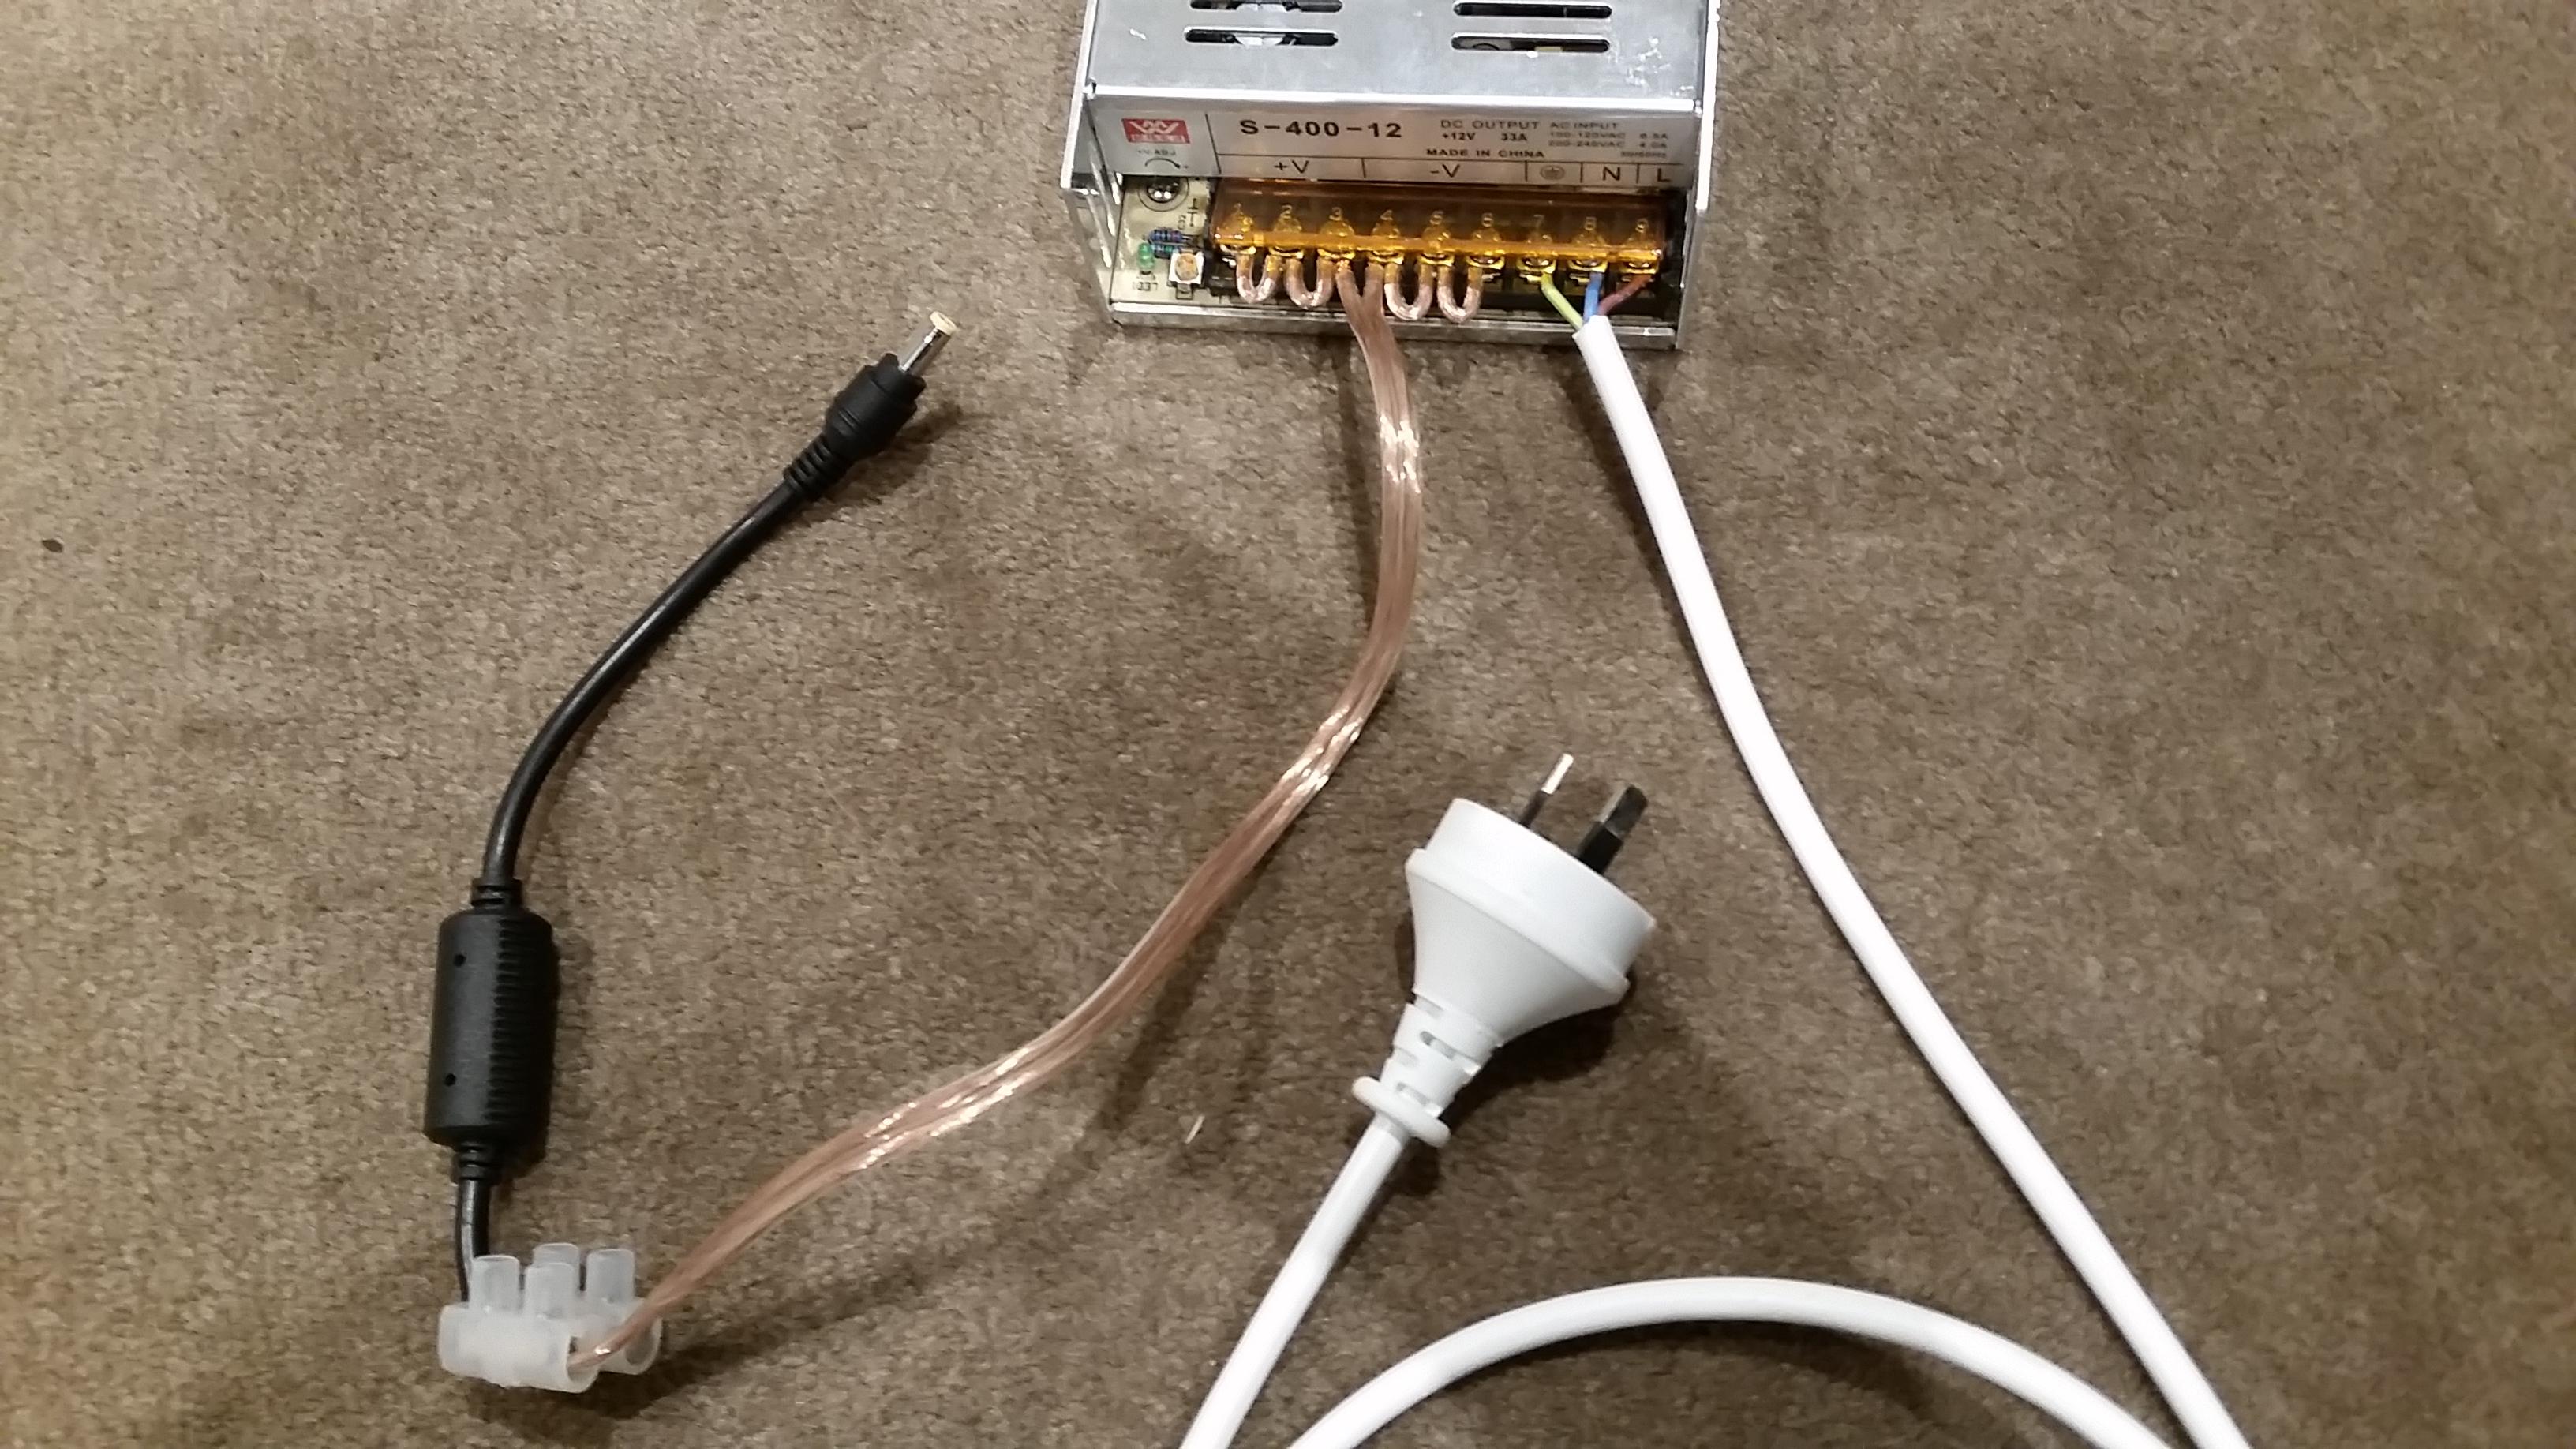
Almost there now...
Now for the moment of truth.. Plug it in and turn it on. I can't say this enough.. Keep your hands well away from the terminals while it is powered on.. If you touch it you'd be greeted by a very very very nasty shock.
For some fine tuning, take a volt meter or multimeter and attach the probes to the outer casing of the barrel connector, and inside the hole at the end. With the power supply on, take a screw driver and slowly turn this little adjustment potentiometer here (with the yellow cap) to get the output voltage as close to 12V as possible 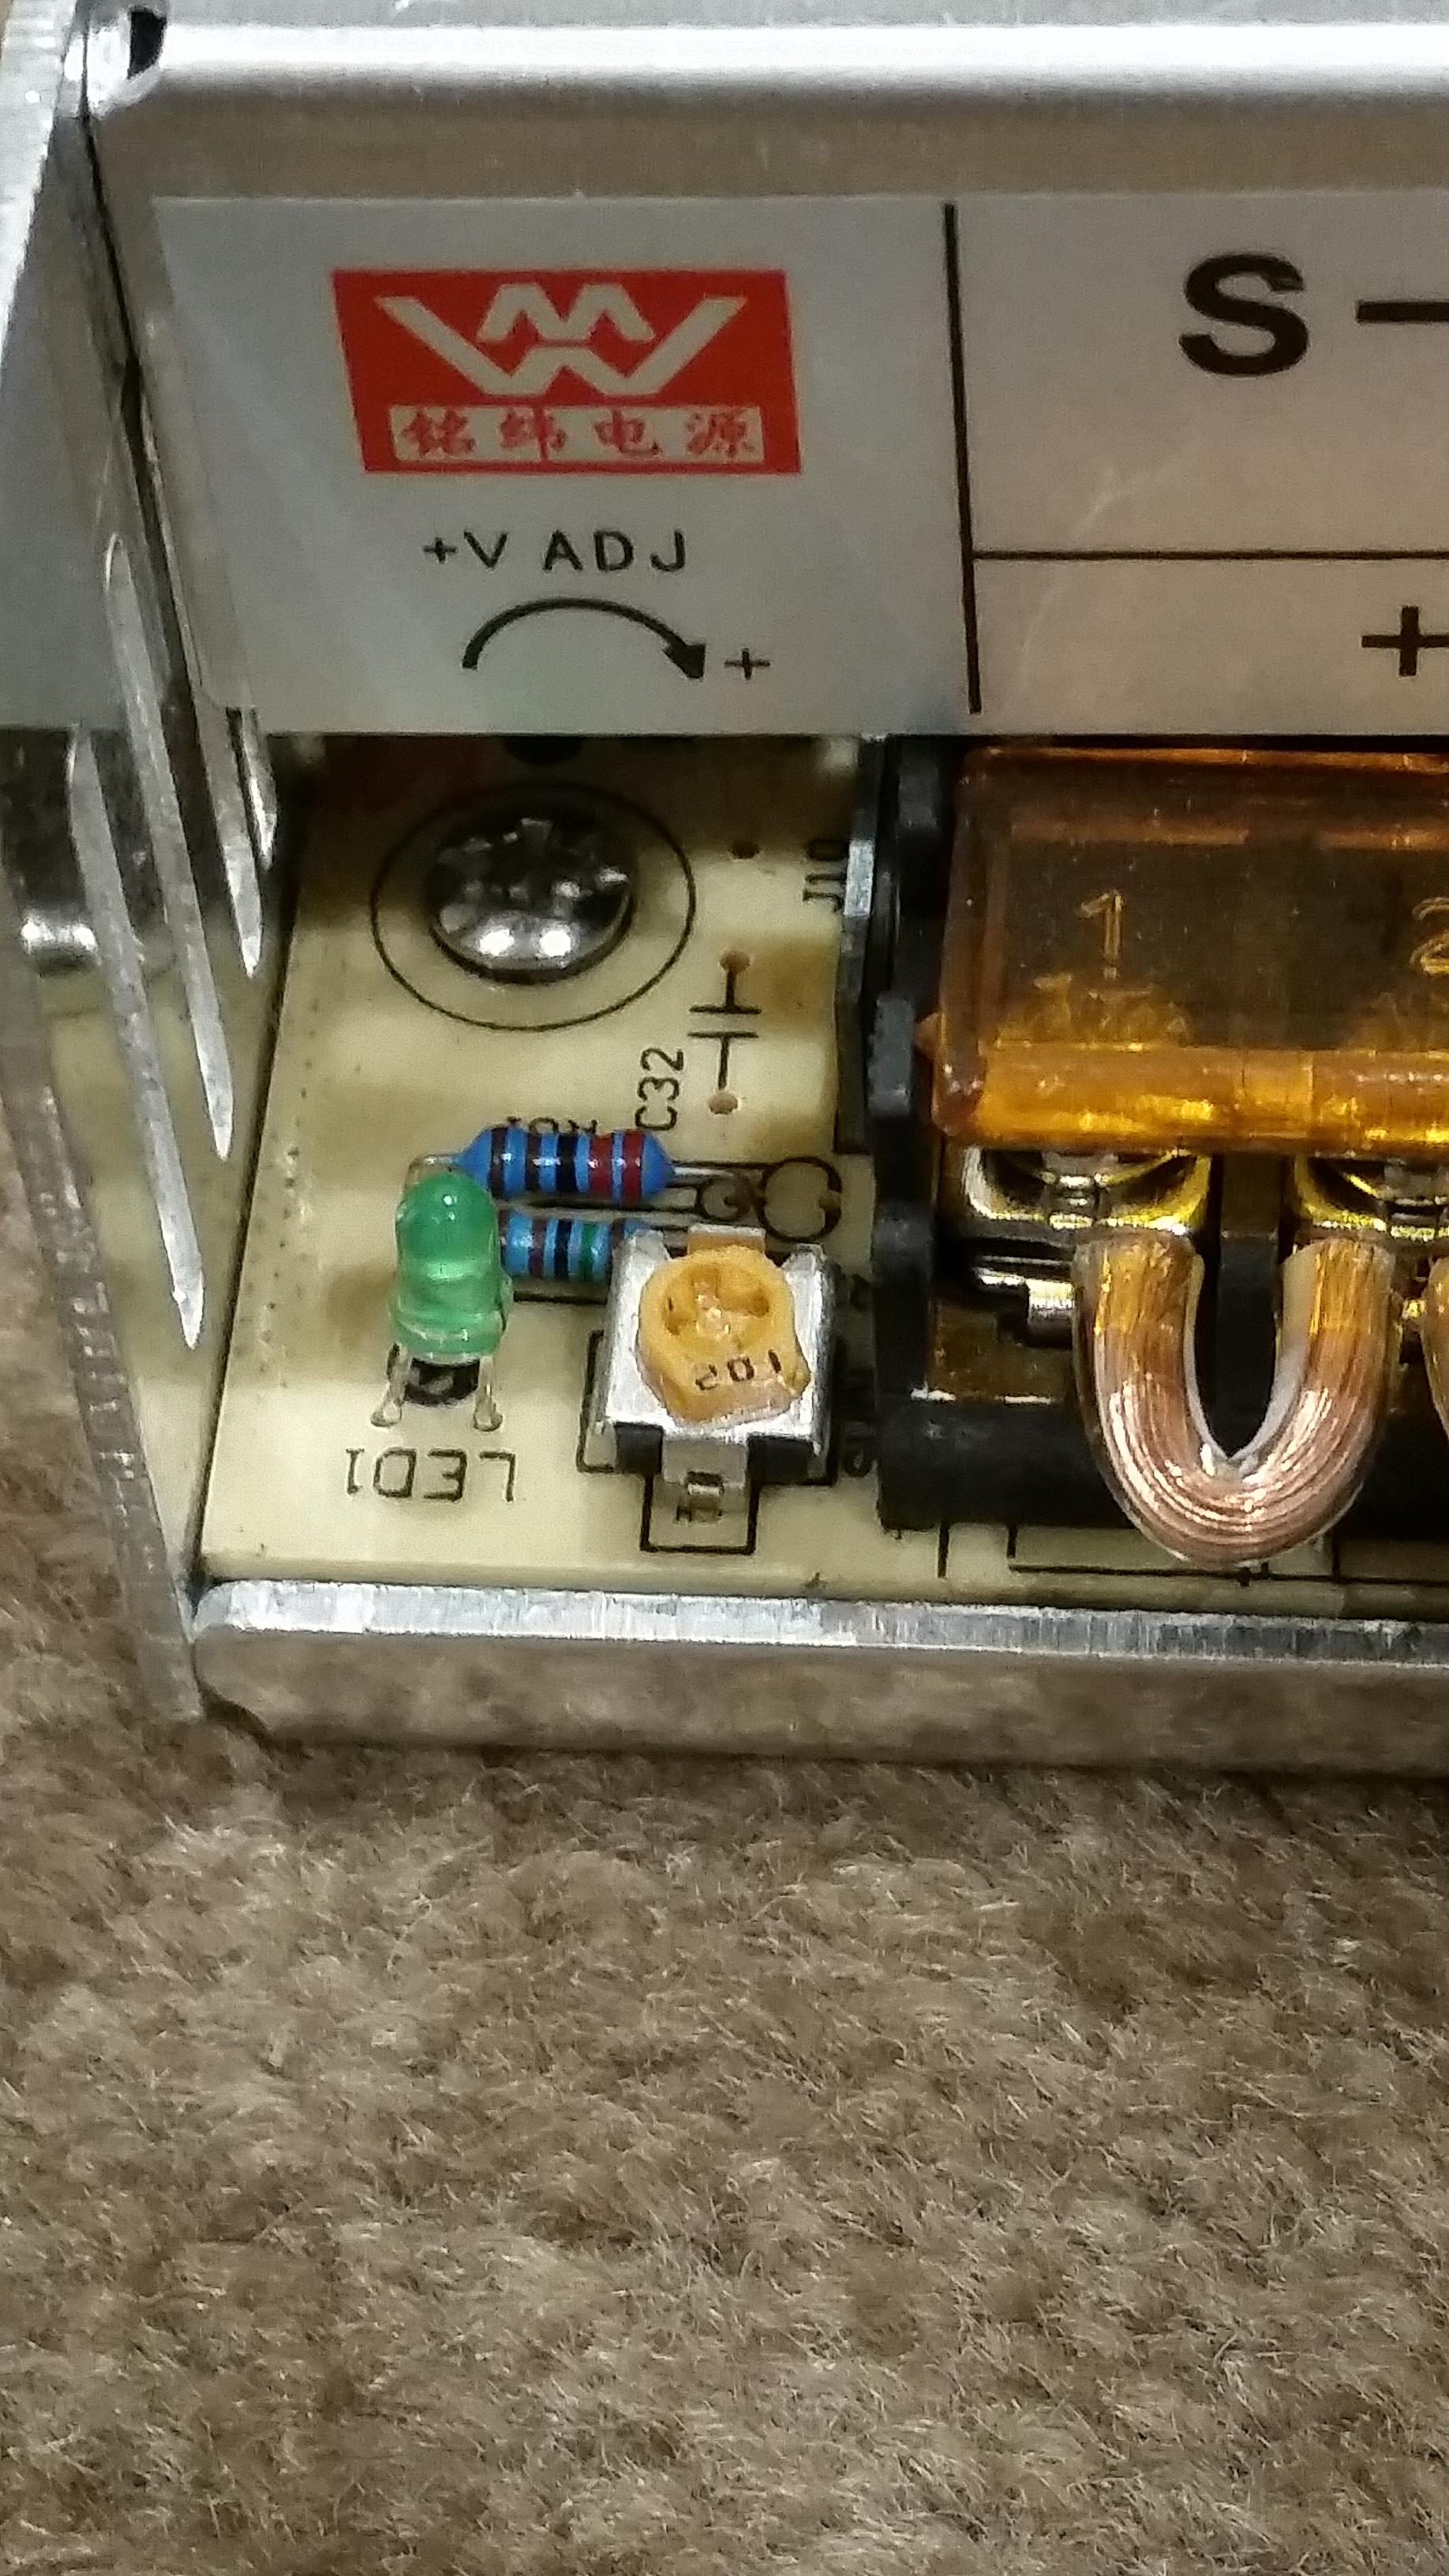
Again, make sure your screw driver doesn't go astray and touch one of the terminals while you're doing this.
Once you've got the voltage set to the correct level, plug it all in and power her up! Let me know if you've got any questions 
-Matt
