1 (edited by Landin81 2015-08-10 22:40:44)

Topic: Acetone smoothing

How does your acetone smoothing-gadget looks like?
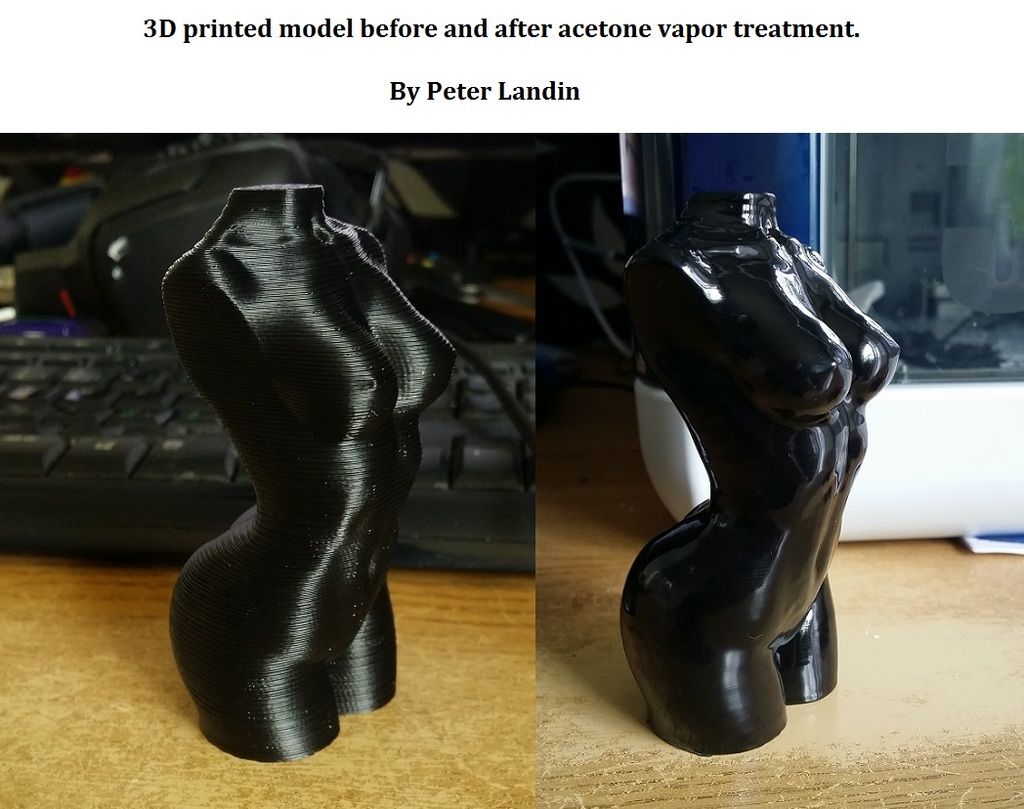
Post pics, explain how it works, how long time you run it and please share before and after-pictures of a model.

I want to have some inspiration for my acetone smoothing-project.

2

Re: Acetone smoothing

Guess no one on this forum is using this method?

Well, here is my first try. Went out pretty nice. I have order a round heated bed for a printer with a controller for temp adjustments. Im going to build a round can and place the bed under it to make the acetone boil. one fan is going to be on at all time when im cooking.

http://i228.photobucket.com/albums/ee5/Loka81/acentonetreatment2_zpshsq9ic0k.jpg

3

Re: Acetone smoothing

The heated method is dangerous and outdated. You should use the cool method it works just as well. Get a paint can with lid that is large enough for your model. Line the sides of the can with paper towels held in place by magnets. Wet the towels with Acetone but not to the point of dripping. Place the lid for the can on a table upside down. Place your model on the lid. Now s turn the can upside down and place it over your model so it sits on the lide but is not actually sealed. Let it sit for 15 minut7oe so. Time may be adjusted for desired finish level. Once done, remove the can but dont touch the model for about 30 minutes as the surface will be soft.

Printing since 2009 and still love it!
Anycubic 4MAX best $225 ever invested.
Voxelabs Proxima SLA. 6 inch 2k Mono LCD.
Anycubic Predator, massive Delta machine. 450 x 370 print envelope.

4

Re: Acetone smoothing

The safest "heated" method I have used is running hot water out of the tap. As it is warming, fill a paint can with acetone. And aluminum riser of some kind is crucial so the part does not sit in the acetone, but gets a vapored drip. As the water gets to max temp, place bucket into sink (with the faucet pitched to the side), lower part onto the riser. If you let the can warm enough before inserting the part, you will feel the vapor on your skin. At this point, toss the lid on as well as a heavy object. A glass milk quart will work to keep the can from floating.
The trick here is to keep the water heat/level as high as possible, but limiting the flotation of the bucket. Thus, then lid weight and water height. Depending on the part, I will do this for 20 minutes. Much longer than an electrically enclosed chamber, but much faster than an ambient temp vapor. Having a flat platform on which the part can sit over the riser will allow quick swapping for smoothing for multiple parts.

I had smoothed dozens of parts successfully like this. It removed a direct heater and does not cause a vacuum, thus limiting the flash risk of the acetone.

Printit Mason and Printit Horizon printers
Multiple SD2s- Bulldog XL, E3D v5/v6/Lite6, Volcano, Hobb Goblin, Titan, .9 motor, Lawsy carriages, direct Y drive, fishing line...the list goes on
Filawinder and Filastruder #1870.....worth every penny!

5

Re: Acetone smoothing

Well, I know alot of people thing that acetone will cause a big fire if it turns in to flames, but it wont. Its gonna get a little blue flame but not alot more. easy to blow out smile

6

Re: Acetone smoothing

I did try the cool treatment, I didnt like it, it took hours to get a nice result.

This is what I came up with insted.
I did it for 6 models, and all turned out really good!

Sorry for my bad english!

7

Re: Acetone smoothing

i'm still using the 'outdated' method without any problems for more than 2 years.. (heating aceton in a slow cooker, then put the cold model from the fridge in the vapor for a max effect of the mistiness.. took max 30s ...)

IMO, the 'cold method' is too long and not as efficient..

8

Re: Acetone smoothing

There is also a pretty good tutorial on the "Knowledgebase" section of our site on Acetone Vapor Smoothing, written by one of our Service Providers. Come take a look if you're interested.

www.american3ders.com

Go to the knowledgebase section and you'll see it there.

9

Re: Acetone smoothing

I use the heating method myself. Only takes a 30 seconds from an electric stove to warm the bottom of the pan to get the vapor to start rising. Since it is heavier than air, I can see the height through the glass lid and decide when to "slide" the lid off and lower my part in.

I put the scissors on top of the pan in question so you can see how large it actually is. The tinfoil thing next to it is what I lower the object into the pan with. What you can't see is a circular wire arrangement at the bottom of the pan that prevents any possibility of the item that I'm lowering in becoming immersed in the acetone. I normally only put at most an ounce acetone in the pan, since I really don't wish to generate enough vapor to have it leave the pan.

I went with the external heat source since I think that is far more controllable than for instance a rice cooker. As soon as the vapor get's close to the height I want I can move it to a cold burner, which prevents me from having to breath the acetone vapors. http://i.imgur.com/hhE12UX.jpg

10

Re: Acetone smoothing

And how large is your scissors? smile
Look great! So all of you pre-heat your aceteone and than lower the model in to it?

11

Re: Acetone smoothing

Scissors are not surprisingly standard cooking shears wink

Yes, it really is that simple, heat the acetone to vapor and then lower a part in for 30 seconds or so. I only have to put up with the "smell" of the acetone that comes off the part once I pull it back out of the vapor. Then I replace the lid and take the pot outside to "dump" any vapor out of it that I didn't use and put the whole mess back into storage.

My printer can do 200X200X200 as it's max size. This seemed to be the cheapest effective method of vapor smoothing a max sized print from my printer.

Unlike the masterpieces created by ysb, my smoothing is limited to items that are printed for purely practical uses. But even there vapor smoothing has a use in making the end product stronger, water tight, and just plain better looking.

This is the latest "finished" item I've printed.
http://i.imgur.com/vBAWGxt.jpg

The transmitter mount won't ever compete looks wise with any of the creations done by the level of artists you'll find on this forum, but I want it to at least look like it is "well made" in case anyone who ever see's me flying the thing asks questions about it. A rework of designs found on thingiverse with 123 Design (freebie BTW), a small amount of sanding with some #180 grit, and a bit of acetone smoothing turns out a product that easily meets my expectations for end results.

(I do apologize for the poor camera on my phone. The far better camera is on the drone, but it's a pain to disconnect and reconnect if I'm just taking one picture)

12

Re: Acetone smoothing

Looks good! Hope it wont do a "flyaway" with that nice mount!

13

Re: Acetone smoothing

Im not sure I like heating up Acetone but I have seen XTC-3D and I posted a question in the general forum to see what people think of it. Seems so much safer.

14

Re: Acetone smoothing

Safety is relative.

The reason I heat mine on an electric stove and only use a few table spoons or so of acetone is on the remote chance that I would manage to light it on fire. I already know that it would burn about like a sterno at that point and even if I was unwilling to just slide the lid back on it, it would burn out in under a minute when it's "fuel" was expended.

Just like the remote chance of starting any oil related cooking fire on a stove (something even a bad cook like myself has yet to manage) the stove is the one area where I live that I'm assured is capable of handing some heat without catching anything else on fire.

With all that said, a brush on filler that self levels would no doubt be excellent for some uses.